Migrate Bing Maps Enterprise applications to Azure Maps with GitHub Copilot
GitHub Copilot is an AI-powered code assistant that helps you write better code faster. GitHub Copilot can generate code snippets from your prompts and suggest completions for your existing code. GitHub Copilot can also learn from your code and preferences and adapt to your style and needs. While GitHub Copilot can't directly convert your code from Bing Maps Web SDK to Azure Maps Web SDK or from Bing Maps APIs to Azure Maps APIs, this how-to article shows you how to use GitHub Copilot to generate code for your Azure Maps applications. This can be especially helpful if you're migrating from Bing Maps for Enterprise to Azure Maps.
Prerequisites
- An Azure Account
- An Azure Maps account
- A subscription key or other form of Authentication with Azure Maps
- A basic understanding of Azure Maps Web SDK
- A basic understanding of Azure Maps APIs
- A GitHub account and subscription for GitHub Copilot
- A basic understanding of the differences between Bing Maps for Enterprise and Azure Maps, see the following articles:
Tip 1: Write your prompts in clear sentences
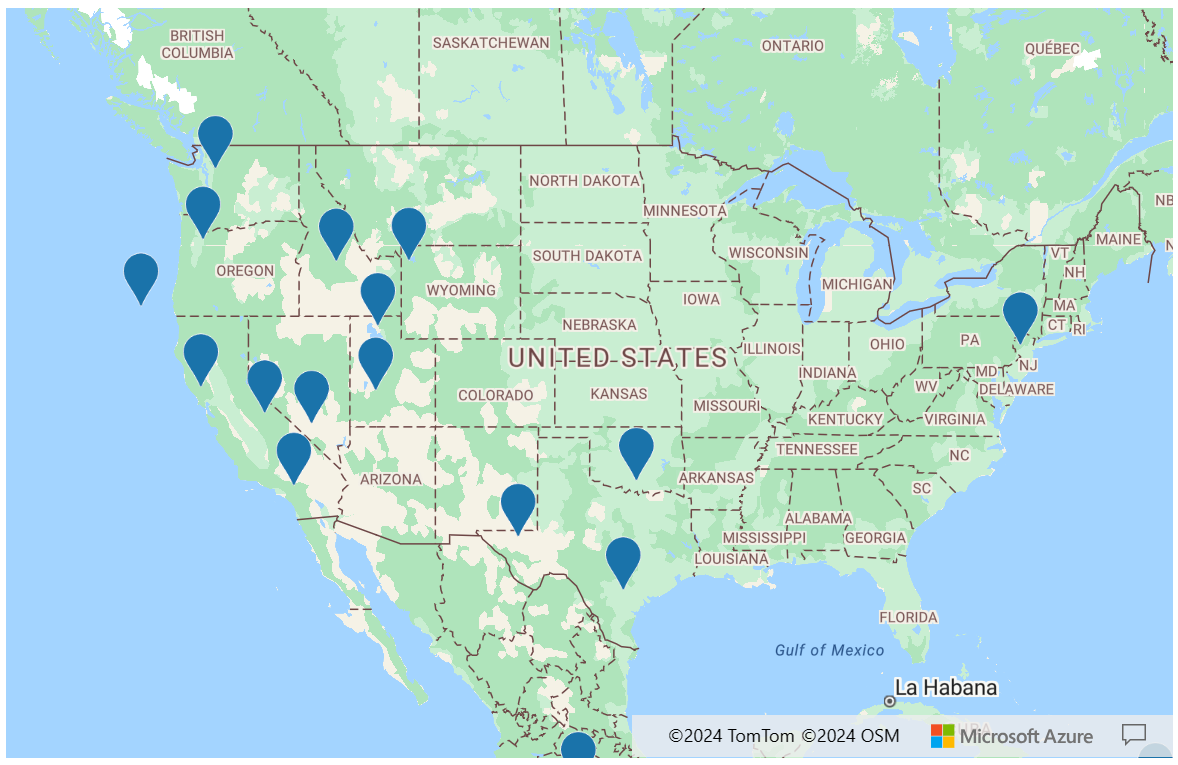
The first step to use GitHub Copilot is to write your prompts in simple sentences. A prompt is a short description of what you want to do or achieve with your code. For example, if you want to display a GeoJSON file with Azure Maps Web SDK, you might write a prompt like this:
Write an HTML program using Azure Maps WebSDK v3 to display GeoJSON features in a SymbolLayer from the following URL: https://earthquake.usgs.gov/earthquakes/feed/v1.0/summary/all_day.geojson
GitHub Copilot then generates a code snippet that matches your prompt, using the language and framework of your choice. For example, if you're using HTML and JavaScript, GitHub Copilot might generate a code snippet like this:
<!DOCTYPE html>
<html>
<head>
    <title>Earthquake Data</title>
    <script src='https://atlas.microsoft.com/sdk/javascript/mapcontrol/3/atlas.min.js'></script>
    <link rel="stylesheet" href="https://atlas.microsoft.com/sdk/javascript/mapcontrol/3/atlas.min.css" type="text/css" />
    <style>
        #myMap { width: 100%; height: 500px; }
    </style>
</head>
<body>
    <div id="myMap"></div>
    <script>
        var map = new atlas.Map("myMap", {
            center: [-100, 39],
            zoom: 3,
            authOptions: {
                authType: 'subscriptionKey',
                subscriptionKey: 'Your Azure Maps Key'
            }
        });

        map.events.add('ready', function() {
            fetch('https://earthquake.usgs.gov/earthquakes/feed/v1.0/summary/all_day.geojson')
            .then(response => response.json())
            .then(data => {
                var dataSource = new atlas.source.DataSource();
                map.sources.add(dataSource);
                dataSource.add(data);

                map.layers.add(new atlas.layer.SymbolLayer(dataSource));
            });
        });
    </script>
</body>
</html>

As you can see, GitHub Copilot can generate a complete and functional code snippet from a simple and clear prompt. You can then copy and paste the code snippet into your code editor or modify it as you wish. You can also ask GitHub Copilot to generate alternative code snippets, or to complete or suggest changes to your existing code.
The advantage of writing your prompts in clear sentences, rather than relying on code snippets from your Bing Maps for Enterprise application, is that you can focus on the logic and functionality of your application, making it more precise for GitHub Copilot to understand your goal. You can also avoid copying and pasting code snippets that might be ambiguous and could potentially confuse GitHub Copilot.
Note
You might get different results each time you run the same prompt, and occasionally you might encounter inaccuracies, like a method that doesn't exist. Make sure to check the browser console for any errors and adjust the code if needed.
Tip 2: Provide detailed, step-by-step instructions
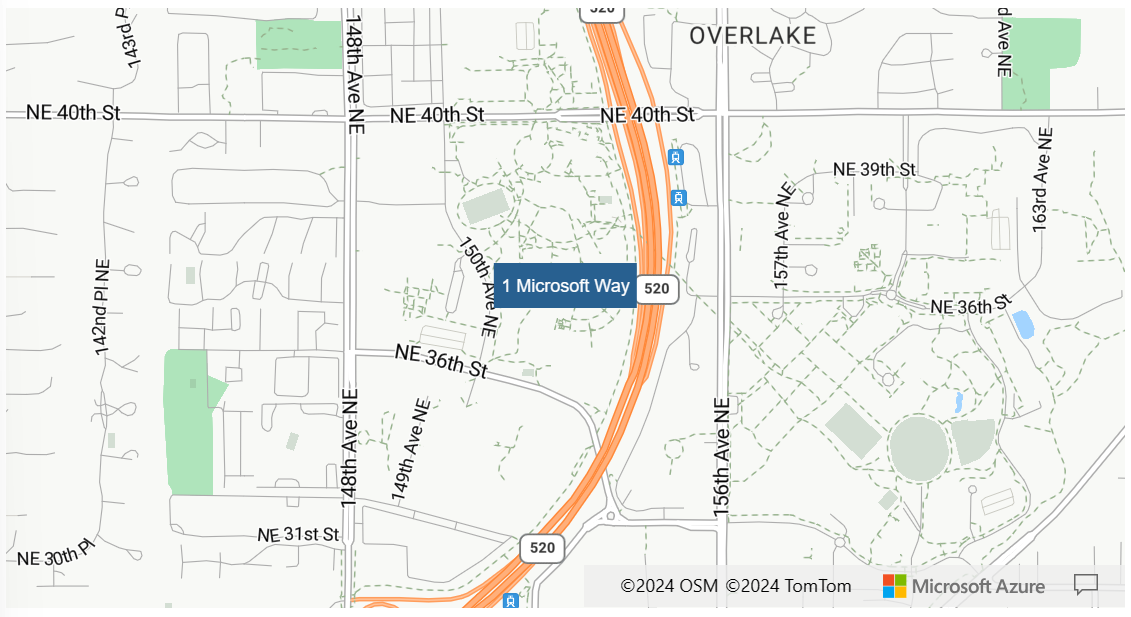
The second tip for using GitHub Copilot is to provide detailed, step-by-step instructions. Imagine that you are a product manager writing functional specifications for your product. For instance, if you want to geocode the address, ‘1 Microsoft Way, Redmond, WA’ and add a marker on the map, you can write a prompt like the following:
Write an HTML program using Azure Maps Web SDK v3 to make a geocode request for the coordinates of '1 Microsoft Way, Redmond, WA' and then place a marker at that location.Step 1. Utilize the Geocode API endpoint: https://atlas.microsoft.com/geocode?api-version=2023-06-01&subscription-key=${subscriptionKey}&query=${query}. An example response is provided for reference.
{"type":"FeatureCollection","features":[{"type":"Feature","properties":{"address":{"countryRegion":{"name":"United States"},"adminDistricts":[{"shortName":"WA"},{"shortName":"King County"}],"formattedAddress":"15127 NE 24th St, Redmond, WA 98052","locality":"Redmond","postalCode":"98052","addressLine":"15127 NE 24th St"},"type":"Address","confidence":"High","matchCodes":["Good"],"geocodePoints":[{"geometry":{"type":"Point","coordinates":[-122.138681,47.630358]},"calculationMethod":"Rooftop","usageTypes":["Display"]},{"geometry":{"type":"Point","coordinates":[-122.1386787,47.6302179]},"calculationMethod":"Rooftop","usageTypes":["Route"]}]},"geometry":{"type":"Point","coordinates":[-122.138681,47.630358]},"bbox":[-122.14632282407,47.626495282429325,-122.13103917593001,47.63422071757068]}]}
Step 2. Make a Geocode API request for the coordinates of '1 Microsoft Way, Redmond, WA'.
Step 3. Use Azure Maps WebSDK to display a map, centering it on the coordinates obtained from the Geocode API response.
Step 4. Wait until the map resources are ready.
Step 5. Place a marker on the map at the coordinates obtained from the API response.
GitHub Copilot generates a code snippet that matches your instructions, using Azure Maps Geocode API and Azure Maps Web SDK.
<!DOCTYPE html>
<html lang="en">
<head>
    <meta charset="UTF-8">
    <meta name="viewport" content="width=device-width, initial-scale=1.0">
    <title>Azure Maps Geocode and Pushpin Example</title>
    <link href="https://atlas.microsoft.com/sdk/javascript/mapcontrol/3/atlas.min.css" rel="stylesheet" />
    <script src="https://atlas.microsoft.com/sdk/javascript/mapcontrol/3/atlas.min.js"></script>
    <style>
        #map {
            width: 100%;
            height: 400px;
        }
    </style>
</head>
<body>
    <div id="map"></div>
    <script>
        var subscriptionKey = 'YOUR_SUBSCRIPTION_KEY'; // Replace with your Azure Maps subscription key
        var query = '1 Microsoft Way, Redmond';

        // Make Geocode API request
        fetch(`https://atlas.microsoft.com/geocode?api-version=2023-06-01&subscription-key=${subscriptionKey}&query=${query}`)
            .then(response => response.json())
            .then(data => {
                // Extract coordinates from the API response
                var coordinates = data.features[0].geometry.coordinates;

                // Initialize map
                var map = new atlas.Map('map', {
                    center: coordinates,
                    zoom: 14,
                    view: 'Auto',
                    authOptions: {
                        authType: 'subscriptionKey',
                        subscriptionKey: subscriptionKey
                    }
                });

                // Wait until map resources are ready
                map.events.add('ready', function () {
                    // Add pushpin to the map
                    var pushpin = new atlas.HtmlMarker({
                        position: coordinates,
                        htmlContent: '<div style="background-color: #286090; color: #fff; padding: 5px;">1 Microsoft Way</div>'
                    });
                    map.markers.add(pushpin);
                });
            })
            .catch(error => console.error('Error:', error));
    </script>
</body>
</html>

Breaking down a complex prompt into individual steps makes it easier for GitHub Copilot to understand and follow, giving you better control over the code flow.
Note
To create effective prompts, you need to customize them for different scenarios. Refining the prompt iteratively allows you to achieve the best possible outcome.
Tip 3: Include examples for API request inputs and response outputs
The third tip for using GitHub Copilot is to include examples for API inputs and outputs. Providing examples can improve Copilot's ability to generate accurate and relevant code snippets by allowing it to learn how to handle the data.
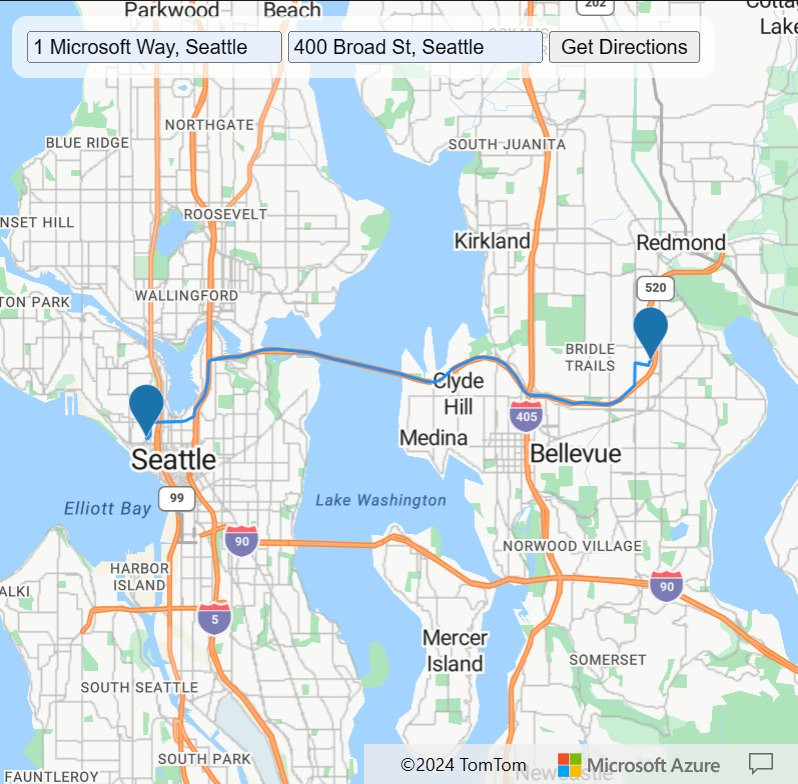
To get examples of inputs and outputs for Azure Maps APIs, you may refer to the Azure Maps REST API documentation. For example, you can see a sample request body and response for the Azure Maps Geocoding Batch API and the Azure Maps Directions API. If you want to create an application for routing between two locations using Azure Maps, you can write a prompt like this:
Implement an HTML program using Azure Maps Web SDK v3 to show route directions for user-specified locations.Step 1. Create two input boxes for users to enter the starting and ending street addresses. Add a submit button to proceed to the next step.
Step 2. Utilize the Geocode Batch POST API: https://atlas.microsoft.com/geocode:batch?api-version=2023-06-01&subscription-key=${subscriptionKey} to find the coordinates of the start and end points.
Example request body:
{ "batchItems": [ { "addressLine": "1 Microsoft Way, Redmond, WA" }, { "addressLine": "400 Broad St, Seattle, WA" } ] }
Example response:
{"batchItems":[{"type":"FeatureCollection","features":[{"type":"Feature","geometry":{"type":"Point","coordinates":[-122.128265,47.639385]},"bbox":[-122.13590814413995,47.63552228242932,-122.12062185586005,47.643247717570674],"properties":{"type":"Address","confidence":"Medium","matchCodes":["Good"],"geocodePoints":[{"calculationMethod":"Rooftop","usageTypes":["Display"],"geometry":{"type":"Point","coordinates":[-122.128265,47.639385]}},{"calculationMethod":"Rooftop","usageTypes":["Route"],"geometry":{"type":"Point","coordinates":[-122.1271239,47.6385519]}}],"address":{"addressLine":"1 Microsoft Way","postalCode":"98052","locality":"Redmond","formattedAddress":"1 Microsoft Way, Redmond, WA 98052","countryRegion":{"name":"United States","ISO":"US"},"adminDistricts":[{"shortName":"WA"},{"shortName":"King County"}]}}}]},{"type":"FeatureCollection","features":[{"type":"Feature","geometry":{"type":"Point","coordinates":[-122.349309,47.620498]},"bbox":[-122.35694938292329,47.61663528242932,-122.34166861707672,47.624360717570674],"properties":{"type":"Address","confidence":"High","matchCodes":["Good"],"geocodePoints":[{"calculationMethod":"Rooftop","usageTypes":["Display"],"geometry":{"type":"Point","coordinates":[-122.349309,47.620498]}},{"calculationMethod":"Rooftop","usageTypes":["Route"],"geometry":{"type":"Point","coordinates":[-122.3485587,47.6200534]}}],"address":{"addressLine":"400 Broad St","postalCode":"98109","neighborhood":"Queen Anne","locality":"Seattle","formattedAddress":"400 Broad St, Seattle, WA 98109","countryRegion":{"name":"United States","ISO":"US"},"adminDistricts":[{"shortName":"WA"},{"shortName":"King County"}]}}}]}],"summary":{"successfulRequests":2,"totalRequests":2}}
Step 3. Use Azure Maps WebSDK to display a map.
Step 4. Wait until the map resources are ready.
Step 5. Create and add a DataSource to the map.
Step 6. Create and add a SymbolLayer to the map.
Step 7. Create and add a LineLayer to the map.
Step 8. Utilize the Route POST API: https://atlas.microsoft.com/route/directions?api-version=2023-10-01-preview&subscription-key=${subscriptionKey} to find the route between the start and end points. Add the GeoJSON response to the DataSource and adjust the map's camera based on the bounding box of the response.
Example request body:
{ "type": "FeatureCollection", "features": [ { "type": "Feature", "geometry": { "coordinates": [ -122.1271239, 47.6385519 ], "type": "Point" }, "properties": { "pointIndex": 0, "pointType": "waypoint" } }, { "type": "Feature", "geometry": { "coordinates": [ -122.3485587, 47.6200534 ], "type": "Point" }, "properties": { "pointIndex": 1, "pointType": "waypoint" } } ], "routeOutputOptions": [ "routePath" ],
"travelMode": "driving" }
Example response:
{"type":"FeatureCollection","features":[{"type":"Feature","geometry":{"type":"Point","coordinates":[-122.127124,47.638552]},"properties":{"routePathPoint":{"legIndex":0,"pointIndex":0},"order":{"inputIndex":0},"type":"Waypoint"}},{"type":"Feature","geometry":{"type":"Point","coordinates":[-122.348533,47.620073]},"properties":{"routePathPoint":{"legIndex":0,"pointIndex":113},"order":{"inputIndex":1},"type":"Waypoint"}},{"type":"Feature","geometry":{"type":"MultiLineString","coordinates":[[[-122.127123,47.638551],[-122.127236,47.638786],[-122.127778,47.639321],[-122.127588,47.639453],[-122.126935,47.639906],[-122.128569,47.64092],[-122.128269,47.641159],[-122.128004,47.641435],[-122.128064,47.641947],[-122.127464,47.642446],[-122.127433,47.642452],[-122.127358,47.642589],[-122.127333,47.642706],[-122.127044,47.643317],[-122.127,47.646063],[-122.12707,47.646064],[-122.1355,47.646072],[-122.135465,47.645943],[-122.134932,47.644569],[-122.134655,47.643384],[-122.134688,47.64219],[-122.134994,47.640816],[-122.135396,47.640114],[-122.135694,47.639576],[-122.136586,47.638589],[-122.138502,47.637193],[-122.14906,47.631126],[-122.150578,47.630481],[-122.152672,47.629904],[-122.15453,47.629628],[-122.156691,47.629525],[-122.163925,47.630213],[-122.168574,47.629931],[-122.170237,47.629981],[-122.171667,47.630214],[-122.179348,47.631954],[-122.181849,47.632144],[-122.185924,47.632041],[-122.186778,47.632117],[-122.187833,47.632345],[-122.188876,47.632739],[-122.190017,47.633476],[-122.190692,47.634194],[-122.191623,47.635672],[-122.192652,47.636933],[-122.195835,47.639784],[-122.197456,47.640891],[-122.199124,47.641725],[-122.20114,47.642394],[-122.202483,47.642648],[-122.206548,47.643149],[-122.208346,47.643164],[-122.210355,47.642861],[-122.218068,47.640503],[-122.219353,47.64005],[-122.220547,47.639476],[-122.223398,47.637523],[-122.224491,47.636915],[-122.22566,47.636477],[-122.226843,47.636165],[-122.228471,47.635972],[-122.229575,47.636001],[-122.231286,47.636192],[-122.238445,47.637468],[-122.241606,47.638218],[-122.243095,47.638484],[-122.269838,47.642514],[-122.275227,47.643424],[-122.279804,47.644349],[-122.282342,47.644655],[-122.289531,47.645049],[-122.29387,47.645413],[-122.296978,47.645393],[-122.300182,47.645129],[-122.304222,47.64444],[-122.308205,47.64353],[-122.30968,47.64328],[-122.31467,47.643113],[-122.318608,47.64274],[-122.318874,47.642714],[-122.321852,47.642389],[-122.322434,47.642195],[-122.322857,47.641863],[-122.323024,47.641566],[-122.323072,47.641284],[-122.323134,47.638686],[-122.323246,47.637911],[-122.323243,47.637778],[-122.323332,47.636353],[-122.323548,47.635195],[-122.323781,47.634413],[-122.324407,47.632851],[-122.324663,47.632356],[-122.3252,47.631657],[-122.326806,47.630159],[-122.327268,47.629875],[-122.327954,47.629266],[-122.328755,47.628281],[-122.328928,47.627756],[-122.328967,47.626499],[-122.329233,47.626199],[-122.330614,47.625588],[-122.332592,47.625034],[-122.334379,47.624774],[-122.334564,47.624765],[-122.336411,47.624697],[-122.340045,47.624729],[-122.342033,47.624546],[-122.343379,47.624517],[-122.347561,47.624571],[-122.347564,47.624483],[-122.347606,47.62079],[-122.347687,47.620726],[-122.348533,47.620073]]],"bbox":[-122.348533,47.620073,-122.126935,47.646072]},"properties":{"resourceId":"v70,h-1356265451,i0,a0,cen-US,dAAAAAAAAAAA1,y0,s1,m1,o1,t0,wO6aTEbzRR0CPQkjMIohewA2
v12,k1,qatt:1","trafficCongestion":"None","trafficDataUsed":"None","distanceInMeters":21606,"durationInSeconds":1455,"departureTime":"2024-03-04T03:05:01+00:00","arrivalTime":"2024-03-04T03:29:16+00:00","type":"RoutePath","legs":[{"distanceInMeters":21606,"durationInSeconds":1455,"departureTime":"2024-03-04T03:05:01+00:00","arrivalTime":"2024-03-04T03:29:16+00:00","routePathRange":{"legIndex":0,"range":[0,113]},"description":"WA-520 W"}]}}]}v12,wBmPp6F3PR0AfTybJTpZewA2
GitHub Copilot can create the following code snippet to provide an interface for users to enter start and end addresses and show the route on the map using Azure Maps APIs based on the sample inputs and outputs.
<!DOCTYPE html>
<html>
  <head>
    <title>Azure Maps Route Directions</title>
    <meta charset="utf-8" />
    <link
      href="https://atlas.microsoft.com/sdk/javascript/mapcontrol/3/atlas.min.css"
      rel="stylesheet"
    />
    <script src="https://atlas.microsoft.com/sdk/javascript/mapcontrol/3/atlas.min.js"></script>
    <style>
      html,
      body,
      #myMap {
        width: 100%;
        height: 100%;
        padding: 0;
        margin: 0;
      }
      #inputPanel {
        position: absolute;
        top: 10px;
        left: 10px;
        z-index: 1;
        background-color: rgba(255, 255, 255, 0.7);
        padding: 10px;
        border-radius: 10px;
      }
    </style>
  </head>
  <body>
    <div id="inputPanel">
      <input id="startInput" placeholder="Enter starting address" />
      <input id="endInput" placeholder="Enter ending address" />
      <button id="submitBtn">Get Directions</button>
    </div>
    <div id="myMap"></div>
    <script>
      var subscriptionKey = "YOUR_SUBSCRIPTION_KEY";
      var map, dataSource;

      function getCoordinates() {
        var startAddress = document.getElementById("startInput").value;
        var endAddress = document.getElementById("endInput").value;

        fetch(
          `https://atlas.microsoft.com/geocode:batch?api-version=2023-06-01&subscription-key=${subscriptionKey}`,
          {
            method: "POST",
            headers: {
              "Content-Type": "application/json",
            },
            body: JSON.stringify({
              batchItems: [
                {
                  addressLine: startAddress,
                },
                {
                  addressLine: endAddress,
                },
              ],
            }),
          }
        )
          .then((response) => response.json())
          .then((data) => {
            var startCoordinates =
              data.batchItems[0].features[0].geometry.coordinates;
            var endCoordinates =
              data.batchItems[1].features[0].geometry.coordinates;
            getRoute(startCoordinates, endCoordinates);
          });
      }

      function getRoute(startCoordinates, endCoordinates) {
        fetch(
          `https://atlas.microsoft.com/route/directions?api-version=2023-10-01-preview&subscription-key=${subscriptionKey}`,
          {
            method: "POST",
            headers: {
              "Content-Type": "application/json",
            },
            body: JSON.stringify({
              type: "FeatureCollection",
              features: [
                {
                  type: "Feature",
                  geometry: {
                    coordinates: startCoordinates,
                    type: "Point",
                  },
                  properties: {
                    pointIndex: 0,
                    pointType: "waypoint",
                  },
                },
                {
                  type: "Feature",
                  geometry: {
                    coordinates: endCoordinates,
                    type: "Point",
                  },
                  properties: {
                    pointIndex: 1,
                    pointType: "waypoint",
                  },
                },
              ],
              routeOutputOptions: ["routePath"],
              travelMode: "driving",
            }),
          }
        )
          .then((response) => response.json())
          .then((data) => {
            dataSource.clear();
            dataSource.add(data);
            map.setCamera({
              bounds: atlas.data.BoundingBox.fromData(data),
              padding: 50,
            });
          });
      }

      map = new atlas.Map("myMap", {
        authOptions: {
          authType: "subscriptionKey",
          subscriptionKey: subscriptionKey,
        },
      });

      map.events.add("ready", function () {
        dataSource = new atlas.source.DataSource();
        map.sources.add(dataSource);

        map.layers.add(new atlas.layer.LineLayer(dataSource));
        map.layers.add(new atlas.layer.SymbolLayer(dataSource));

        document
          .getElementById("submitBtn")
          .addEventListener("click", getCoordinates);
      });
    </script>
  </body>
</html>

Providing examples of Azure Maps API request inputs and response outputs can help GitHub Copilot generate more accurate and relevant code snippets. Minify the JSON to reduce the token count when necessary. The same technique can also be applied when calling your own API services, allowing GitHub Copilot to understand how your API works.
Known limitations
Keep in mind that the generated code snippet requires engineering effort to review and there are a few limitations:
- CSS styling is typically not included unless you explicitly instruct GitHub Copilot to add it.
- If you ask Copilot to translate Bing Maps Web SDK code into Azure Maps Web SDK code, it usually yields poor results because there isn't always a one-to-one mapping between them.
- You might encounter occasional inaccuracies, and it requires debugging skills and some trial and error.
Conclusion
This how-to guide demonstrates how to use GitHub Copilot to generate code snippets for your application. This capability can be helpful when migrating applications from Bing Maps for Enterprise to Azure Maps.
We have covered the following:
- Write your prompts in clear sentences.
- Provide detailed, step-by-step instructions.
- Include examples for Azure Maps API request inputs and response outputs.
Next steps
Explore other advanced Prompt engineering techniques to assist you in refining your prompts.