Install solution upgrade on Azure Local
Applies to: Azure Local 2311.2 and later
Important
Azure Stack HCI, version 22H2 will reach end of support on May 31, 2025. After this date, you won't receive monthly security and quality updates. Support requests (SR) will only be available when performing an operating system upgrade. To continue receiving updates, we recommend that you upgrade your operating system to version 23H2.
If you're currently running an Azure Stack HCI, version 22H2 stretch cluster or managing Azure Local via System Center - Virtual Machine Manager, review the Supported workloads and configurations table for update timelines.
This article describes how to install the solution upgrade on your Azure Local instance after the operating system (OS) was upgraded from version 22H2 to version 23H2.
Throughout this article, we refer to OS version 23H2 as the new version and version 22H2 as the old version.
Important
While the OS upgrade is generally available, the solution upgrade will have a phased rollout.
Prerequisites
Before you install the solution upgrade, make sure that you:
Validate the system using the Environment Checker as per the instructions in Assess solution upgrade readiness.
Verify that latest
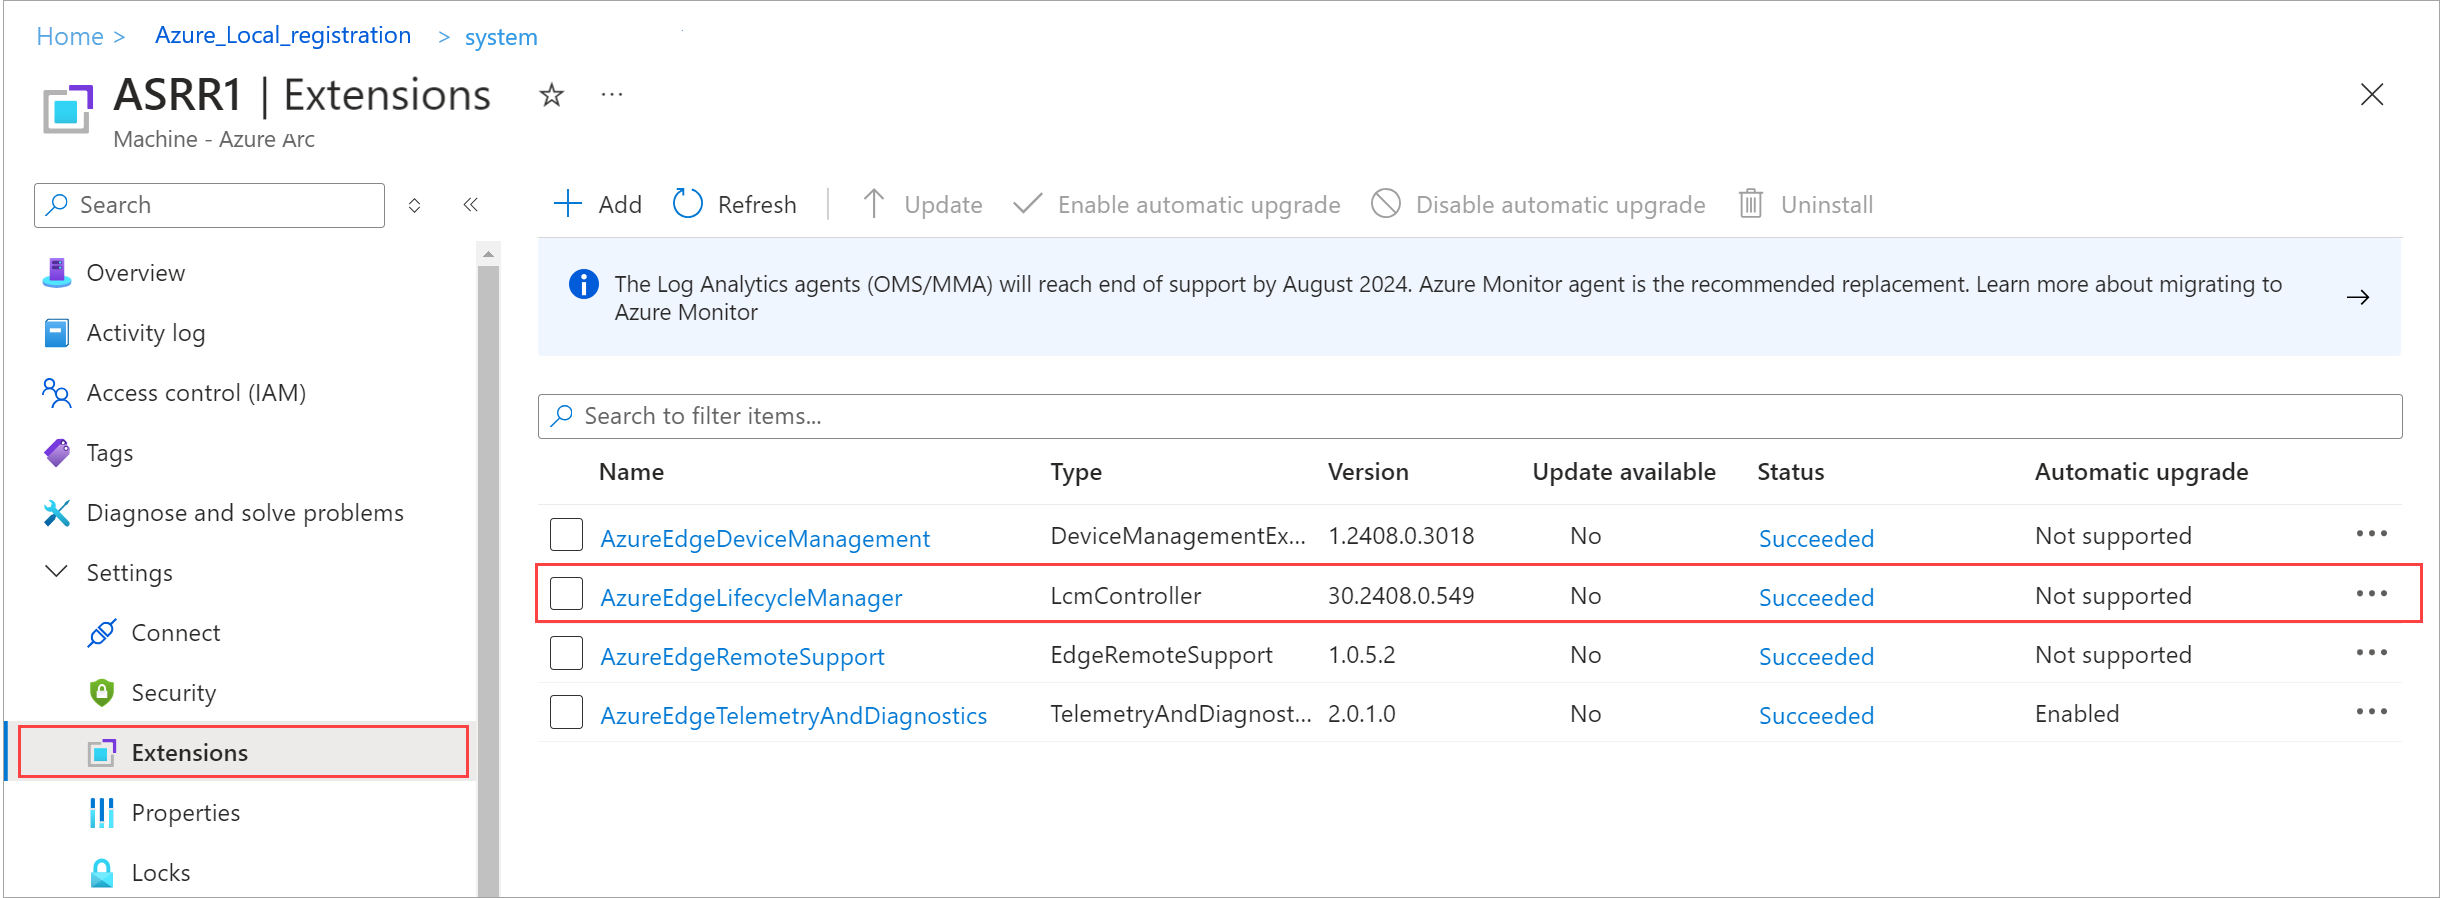
AzureEdgeLifecycleManagerextension on each machine is installed as per the instructions in Check the Azure Arc extension.Have an Active Directory user credential that's a member of the local Administrator group. Work with your Active Directory administrator to obtain this credential.
Have IPv4 network range with six, contiguous IP addresses available for new Azure Arc services. Work with your network administrator to ensure that the IP addresses aren't in use and meet the outbound connectivity requirement.
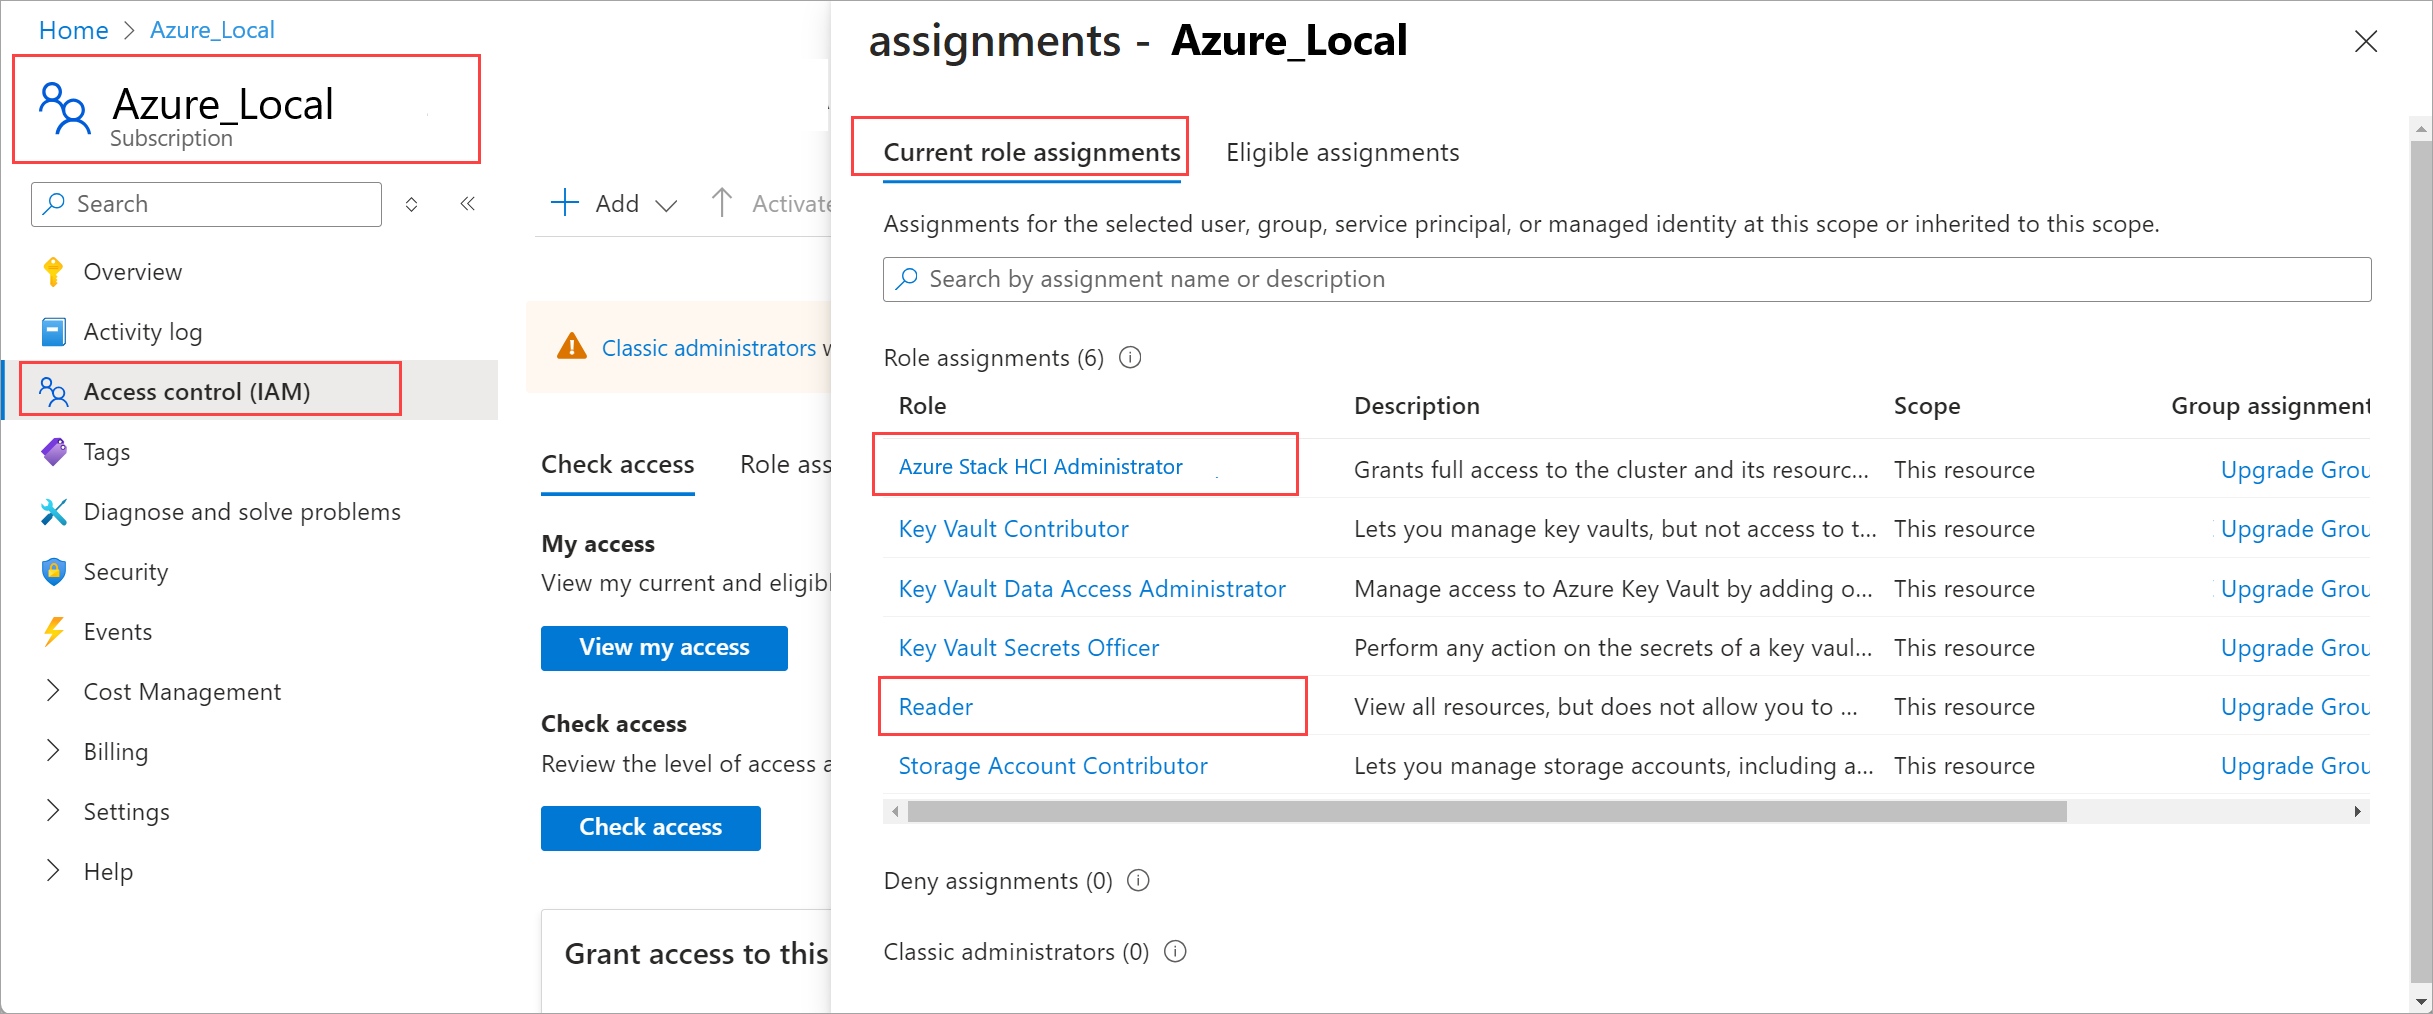
Have Azure subscription permissions for Azure Stack HCI Administrator and Reader.
Install the solution upgrade via Azure portal
You install the solution upgrade via the Azure portal.
Important
Microsoft only supports upgrade applied from Azure Local resource page. Use of 3rd party tools to install upgrades is not supported.
Follow these steps to install the solution upgrade:
Go to your Azure Local resource in Azure portal.
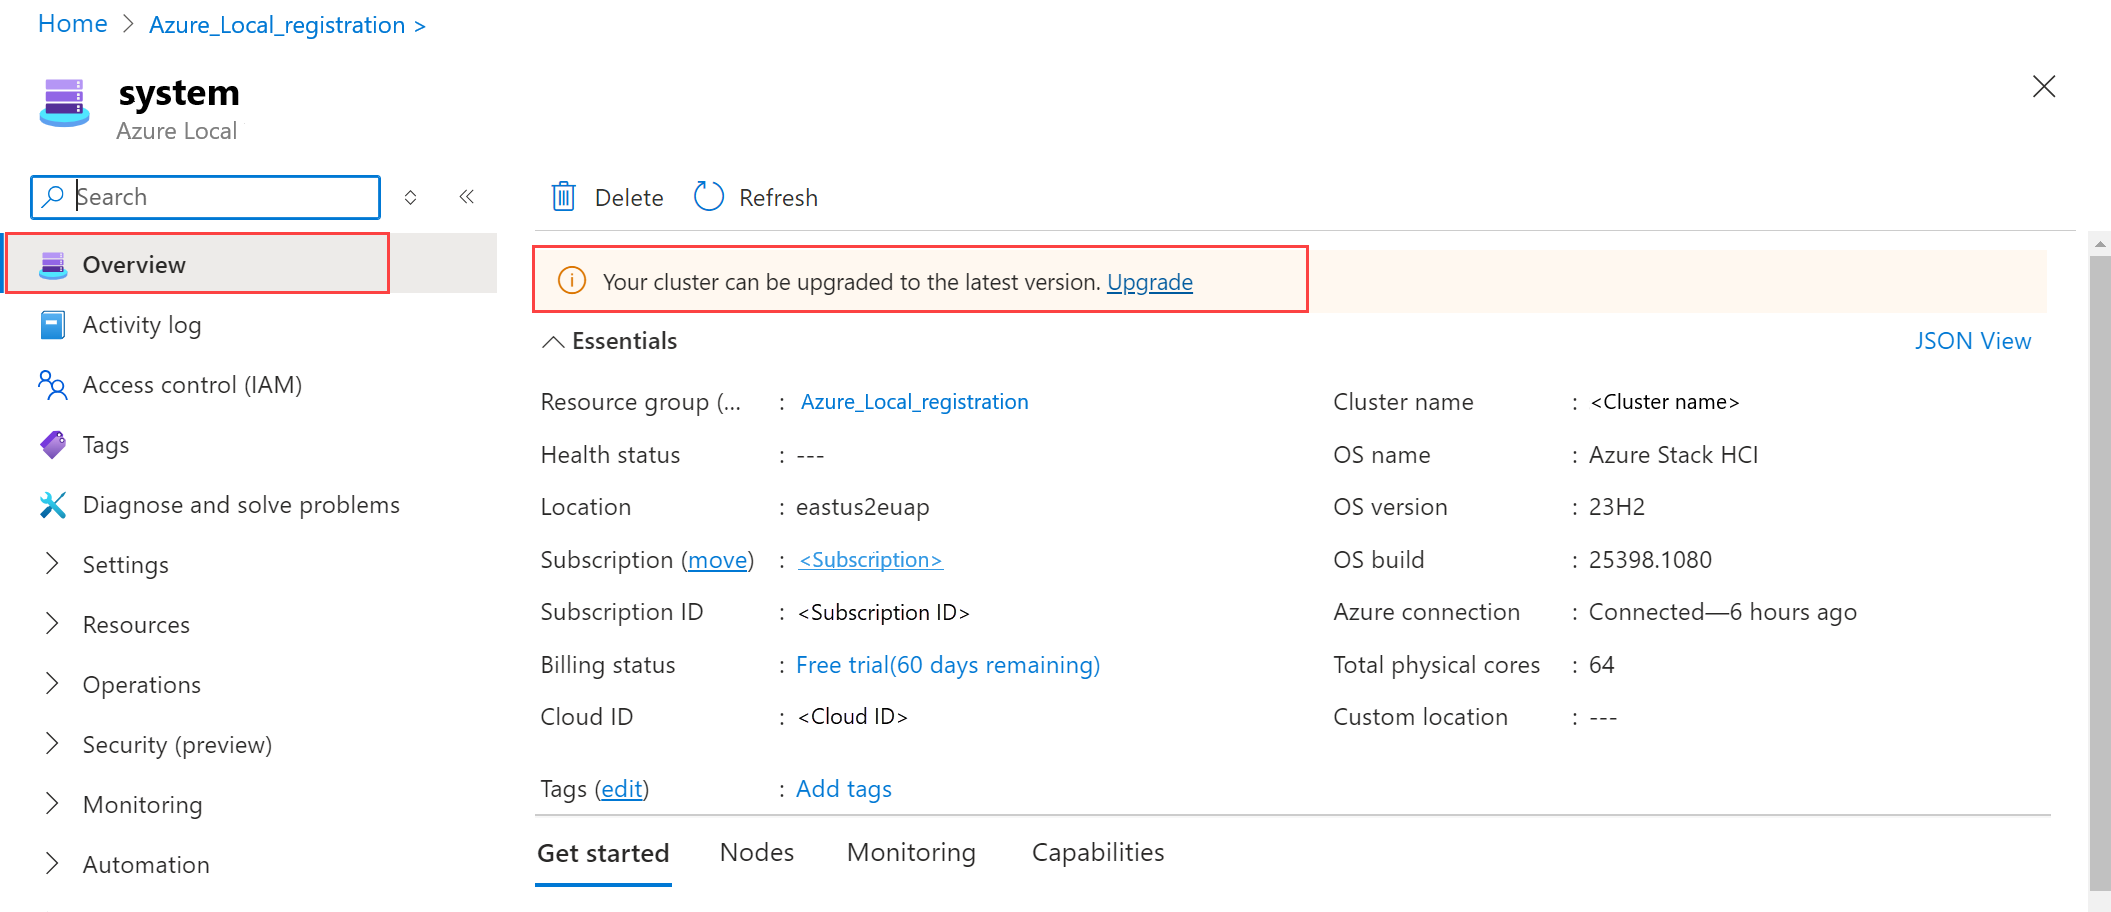
In the Overview page, you can see a banner indicating that a solution upgrade is available. Select the Upgrade link in the banner.
Basics tab
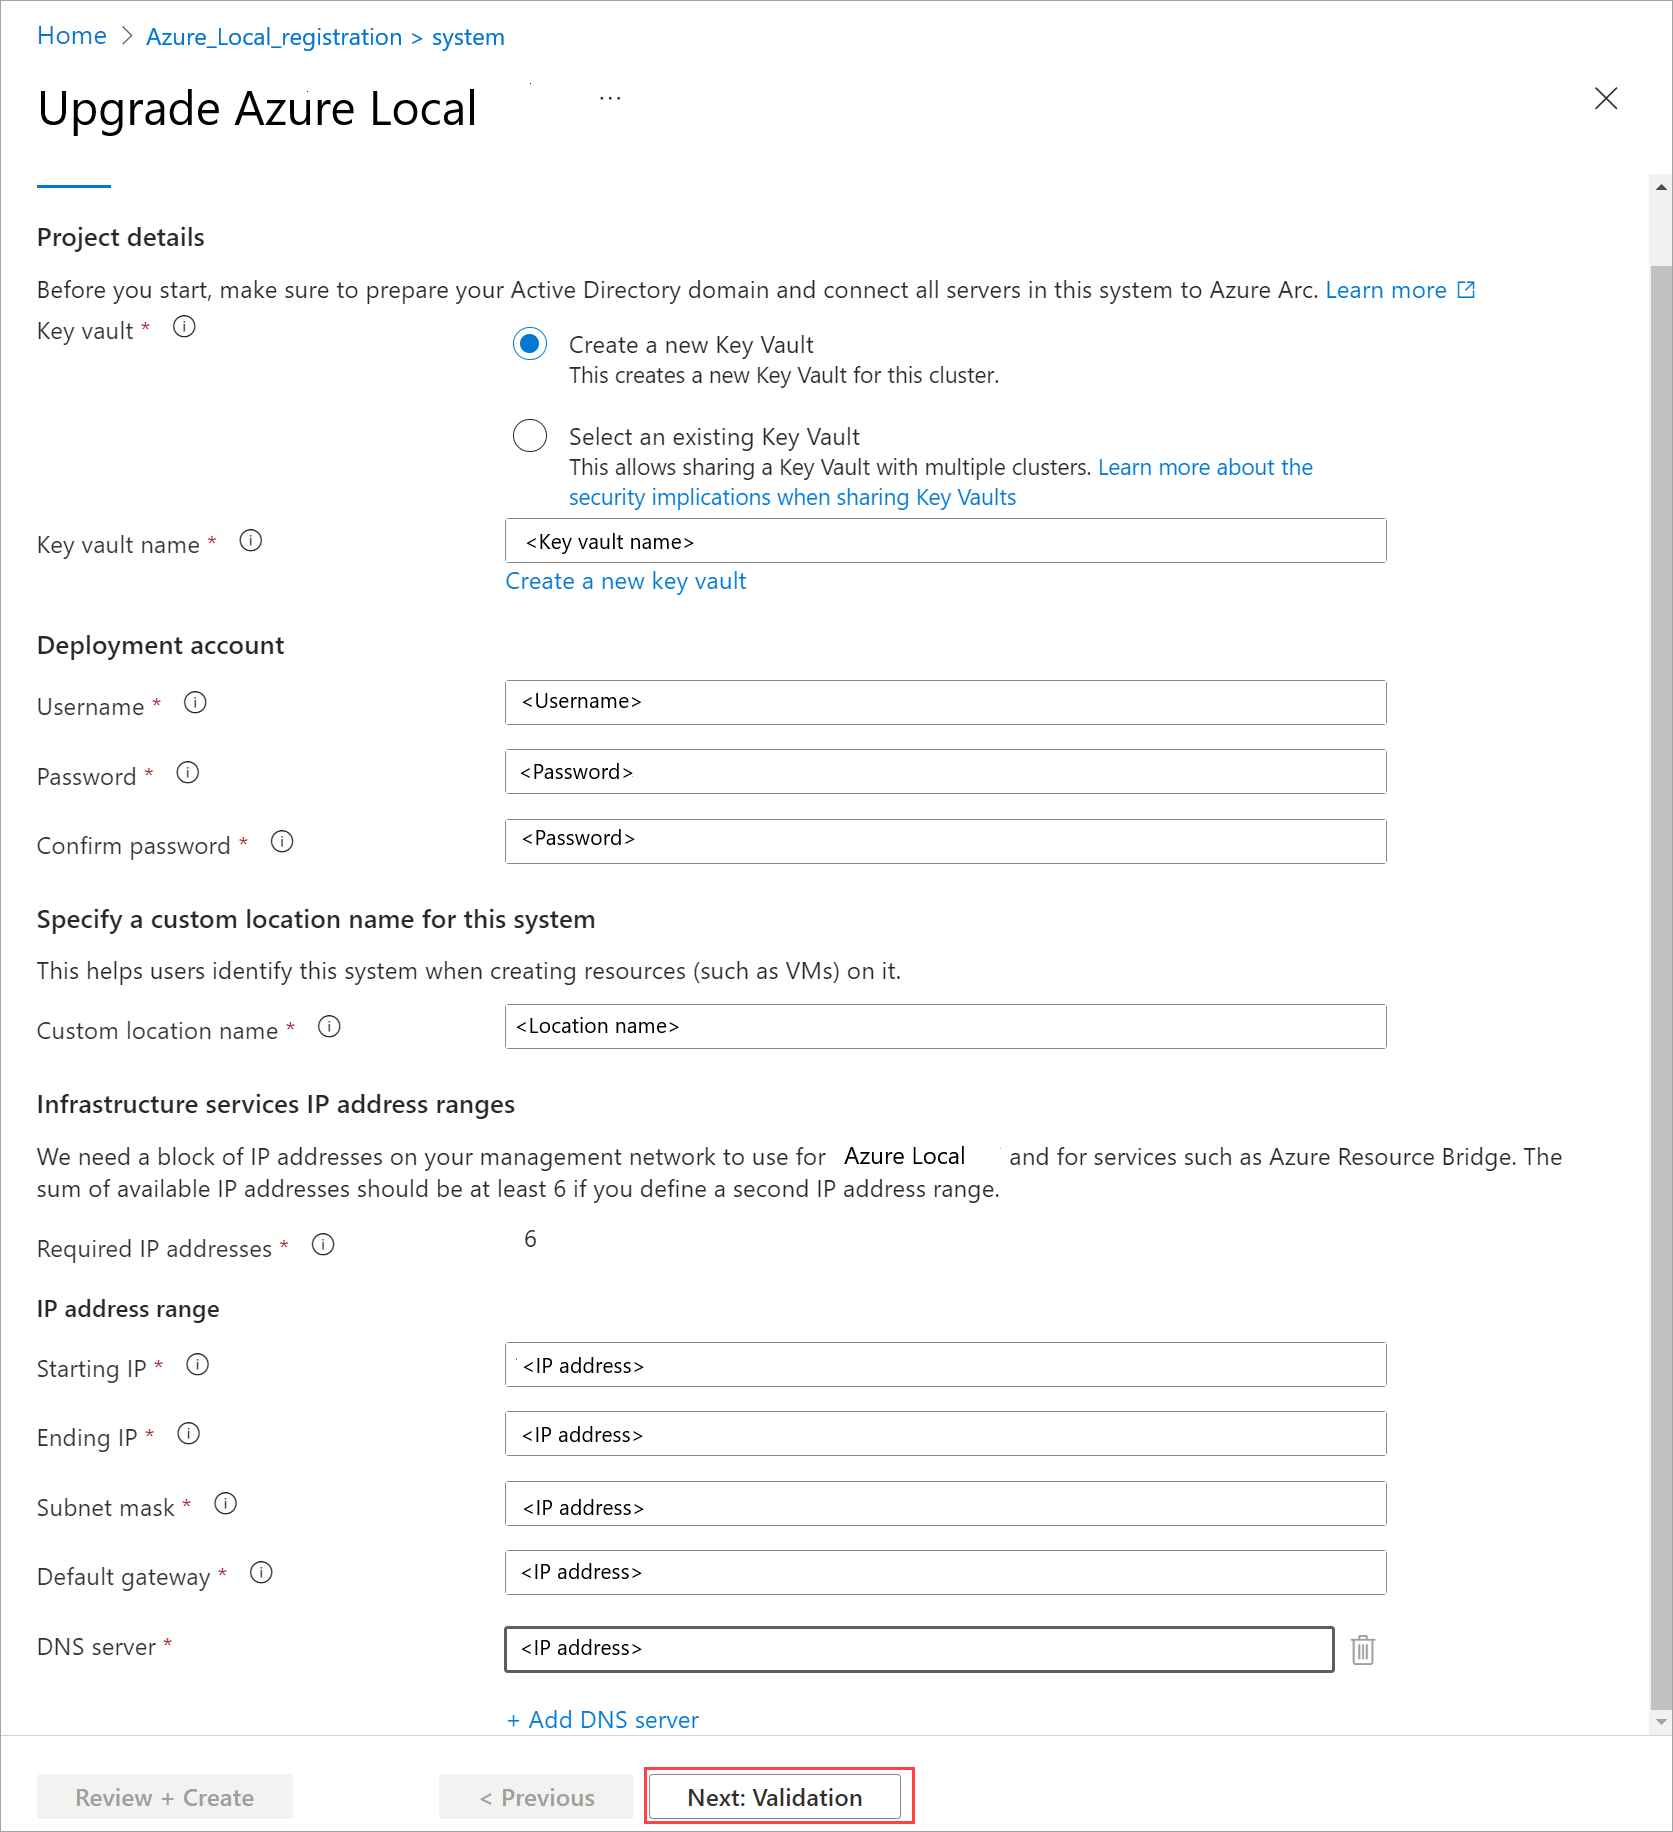
On the Basics tab, specify the following information:
Select an existing key vault from vaults in the resource group. Sharing an existing key vault can have security implications. If you don't have a key vault, you can create a new one to store the credentials.
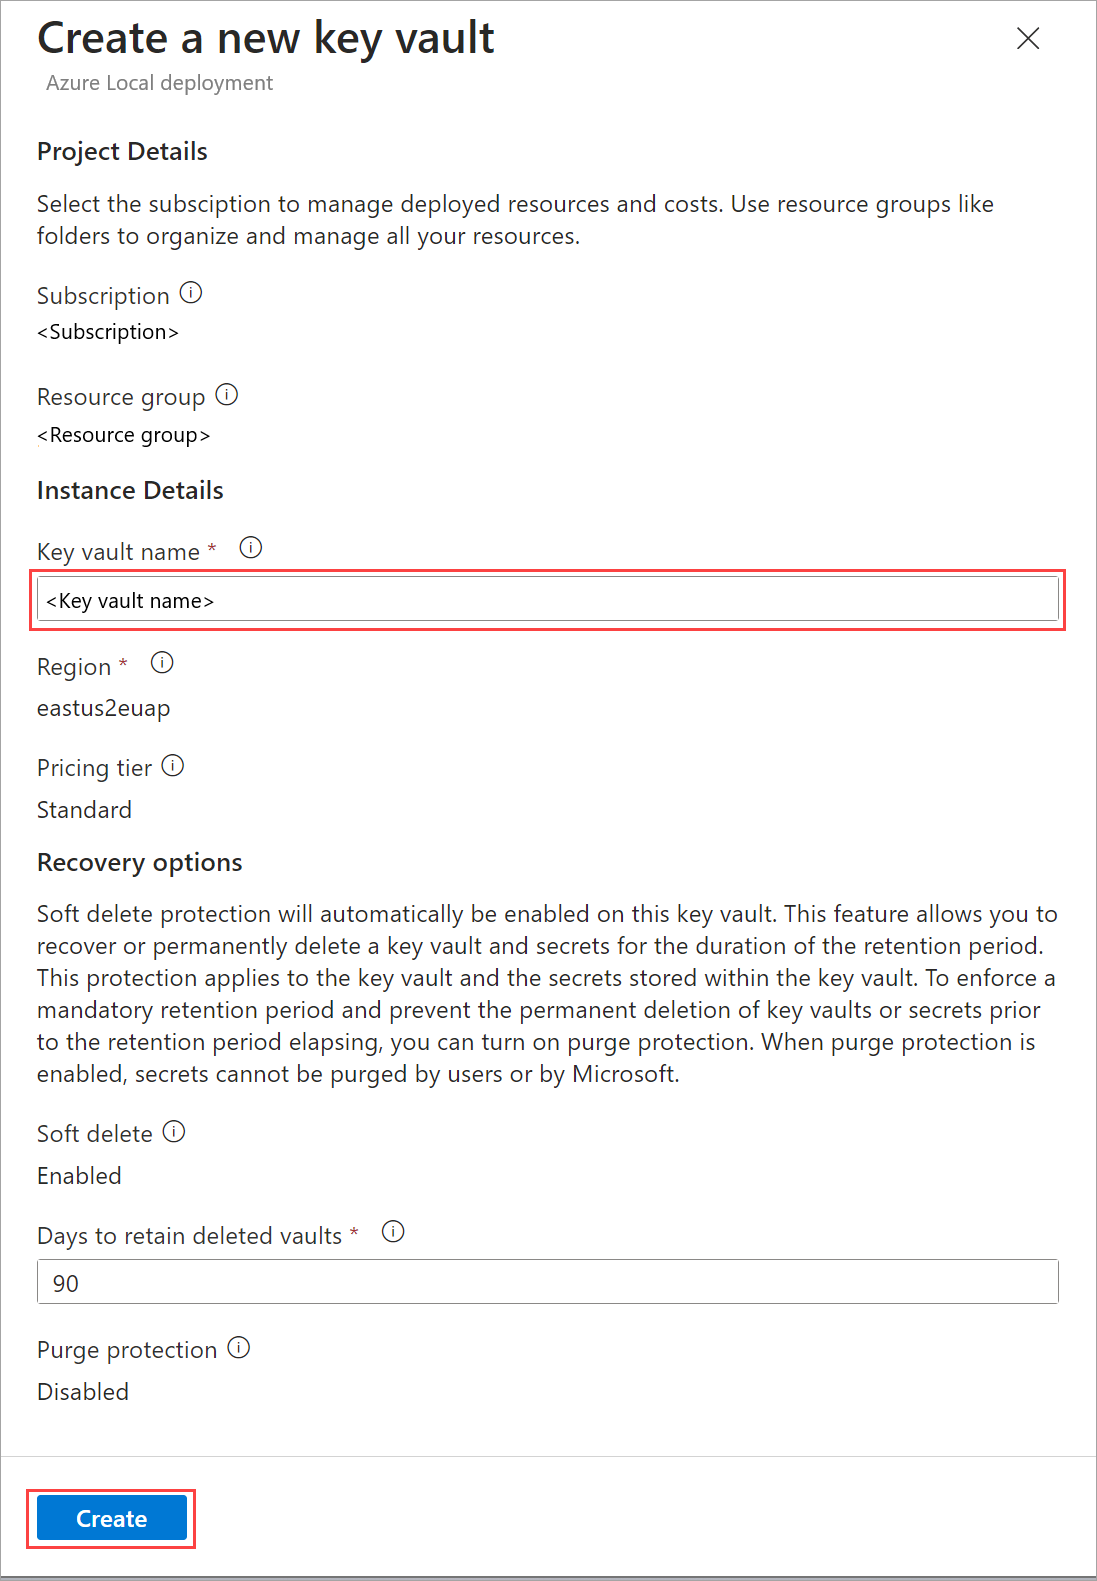
- Select Create a new key vault.
- Provide a Name for the new key vault. The name should be 3 to 24 characters long and contain only letters, numbers, and hyphens. Two consecutive hyphens are not allowed.
Specify the deployment account credential. This credential is from your Active Directory for a principal that is a member of the local Administrator group on each machine.
Note
The user can't be Administrator and can't use format
domain\username.Accept default name or specify the custom location name used for Azure Arc services.
Specify network IP address information. A total of six, contiguous IP addresses is required, defined by an IP address range. IP addresses in the range must:
- Not be in use.
- Meet outbound connectivity requirements.
- Communicate to the host IP addresses.
Select Next: Validation.
Validation tab
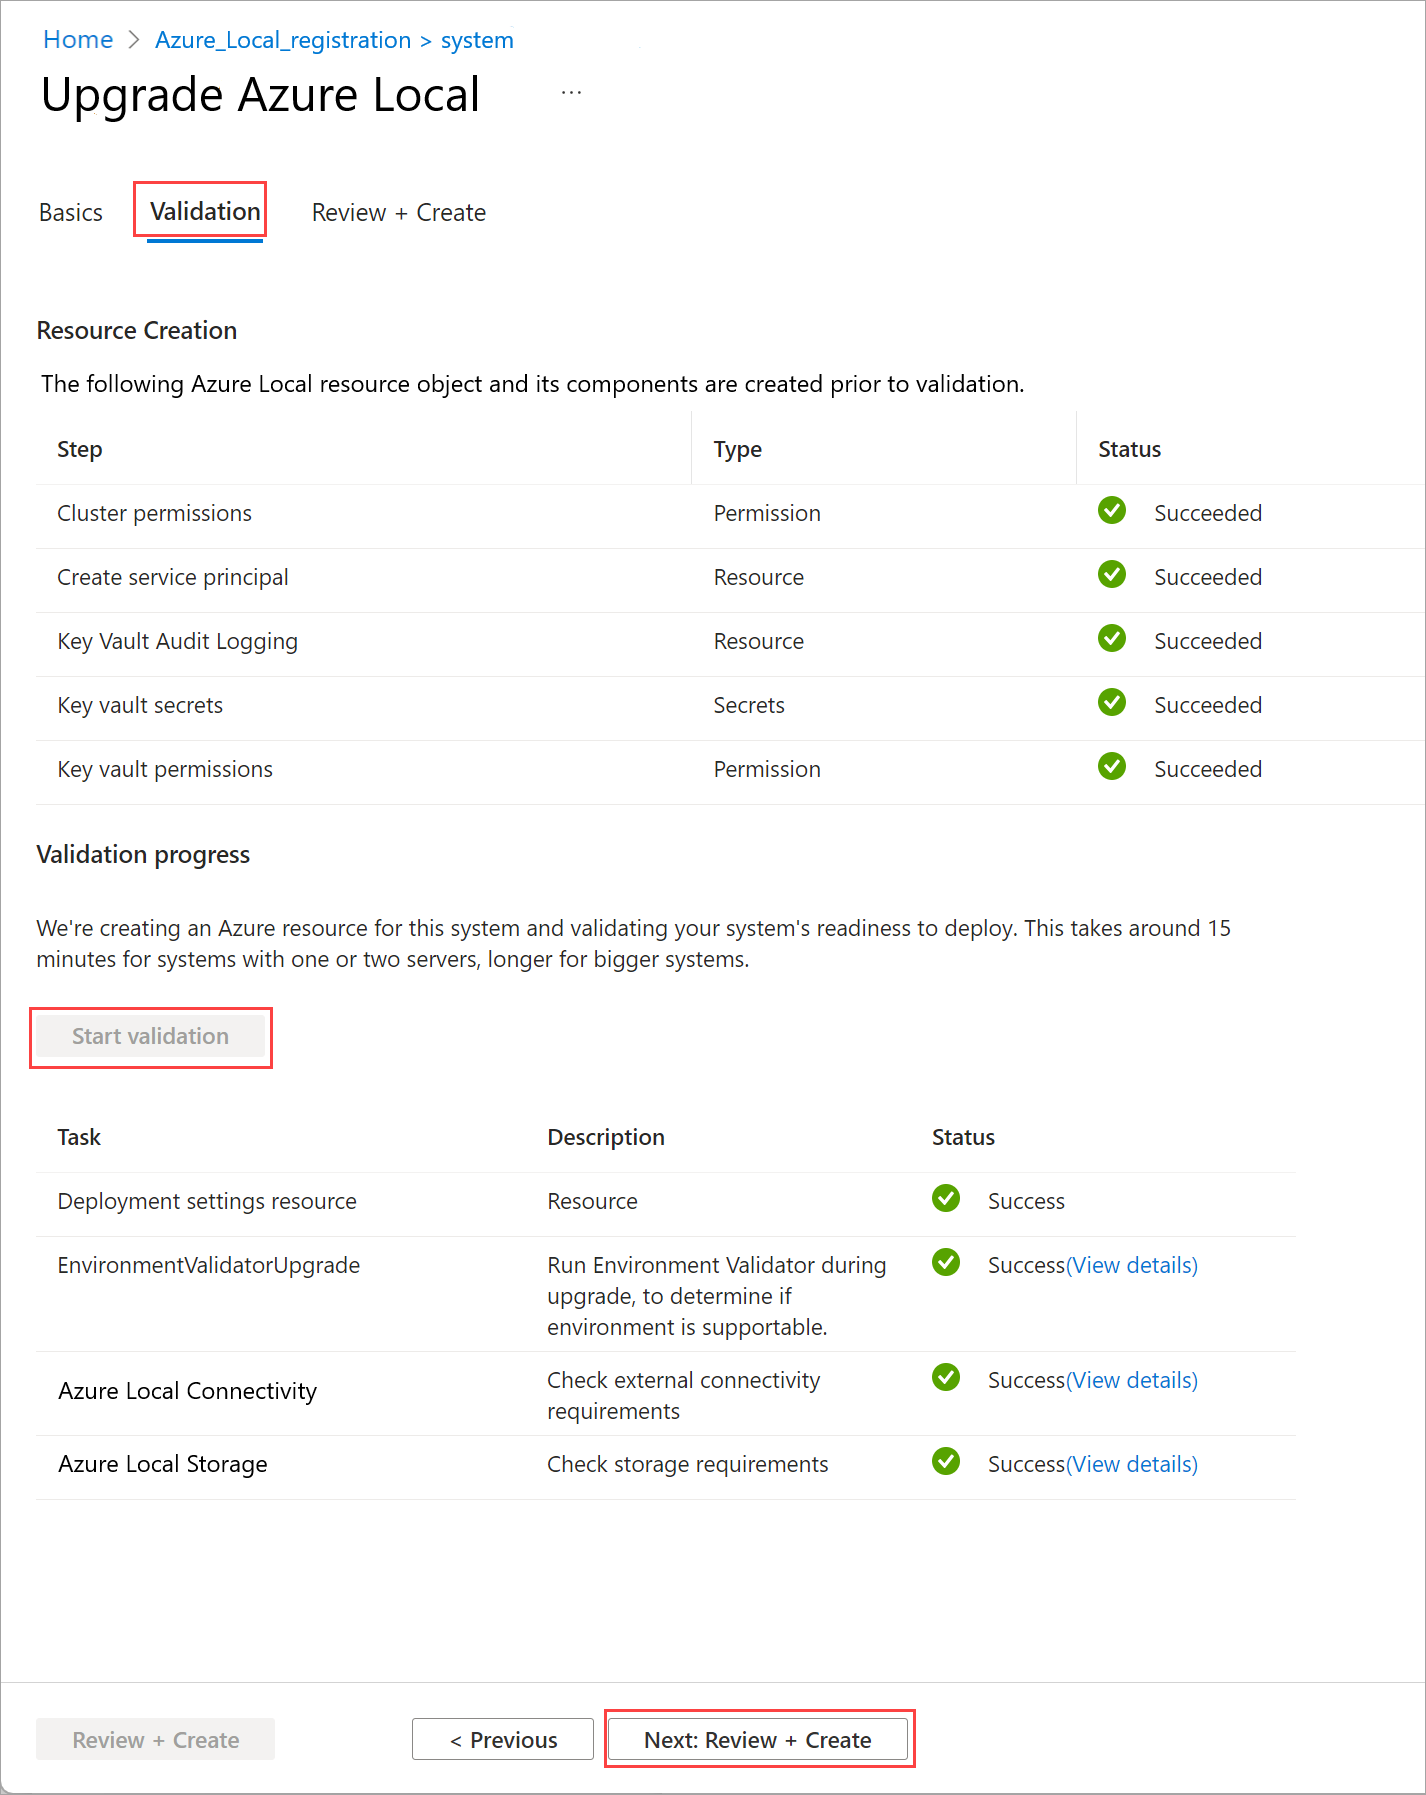
On the Validation tab, the operation automatically creates Azure resources and also configures permissions and the audit login.
Select Start validation to begin the operation. This operation involves running the Environment Checker to check external connectivity and storage requirements and that the environment is ready for solution upgrade. To learn more about validation, see Validate solution upgrade readiness of your Azure Local instance.
After the validation is complete, select Next: Review + Create.
Review + Create tab
On the Review + Create tab, review the summary for the solution upgrade.
Select Review + Create to start the upgrade process. You see a notification that the deployment is in progress.
Monitor upgrade progress
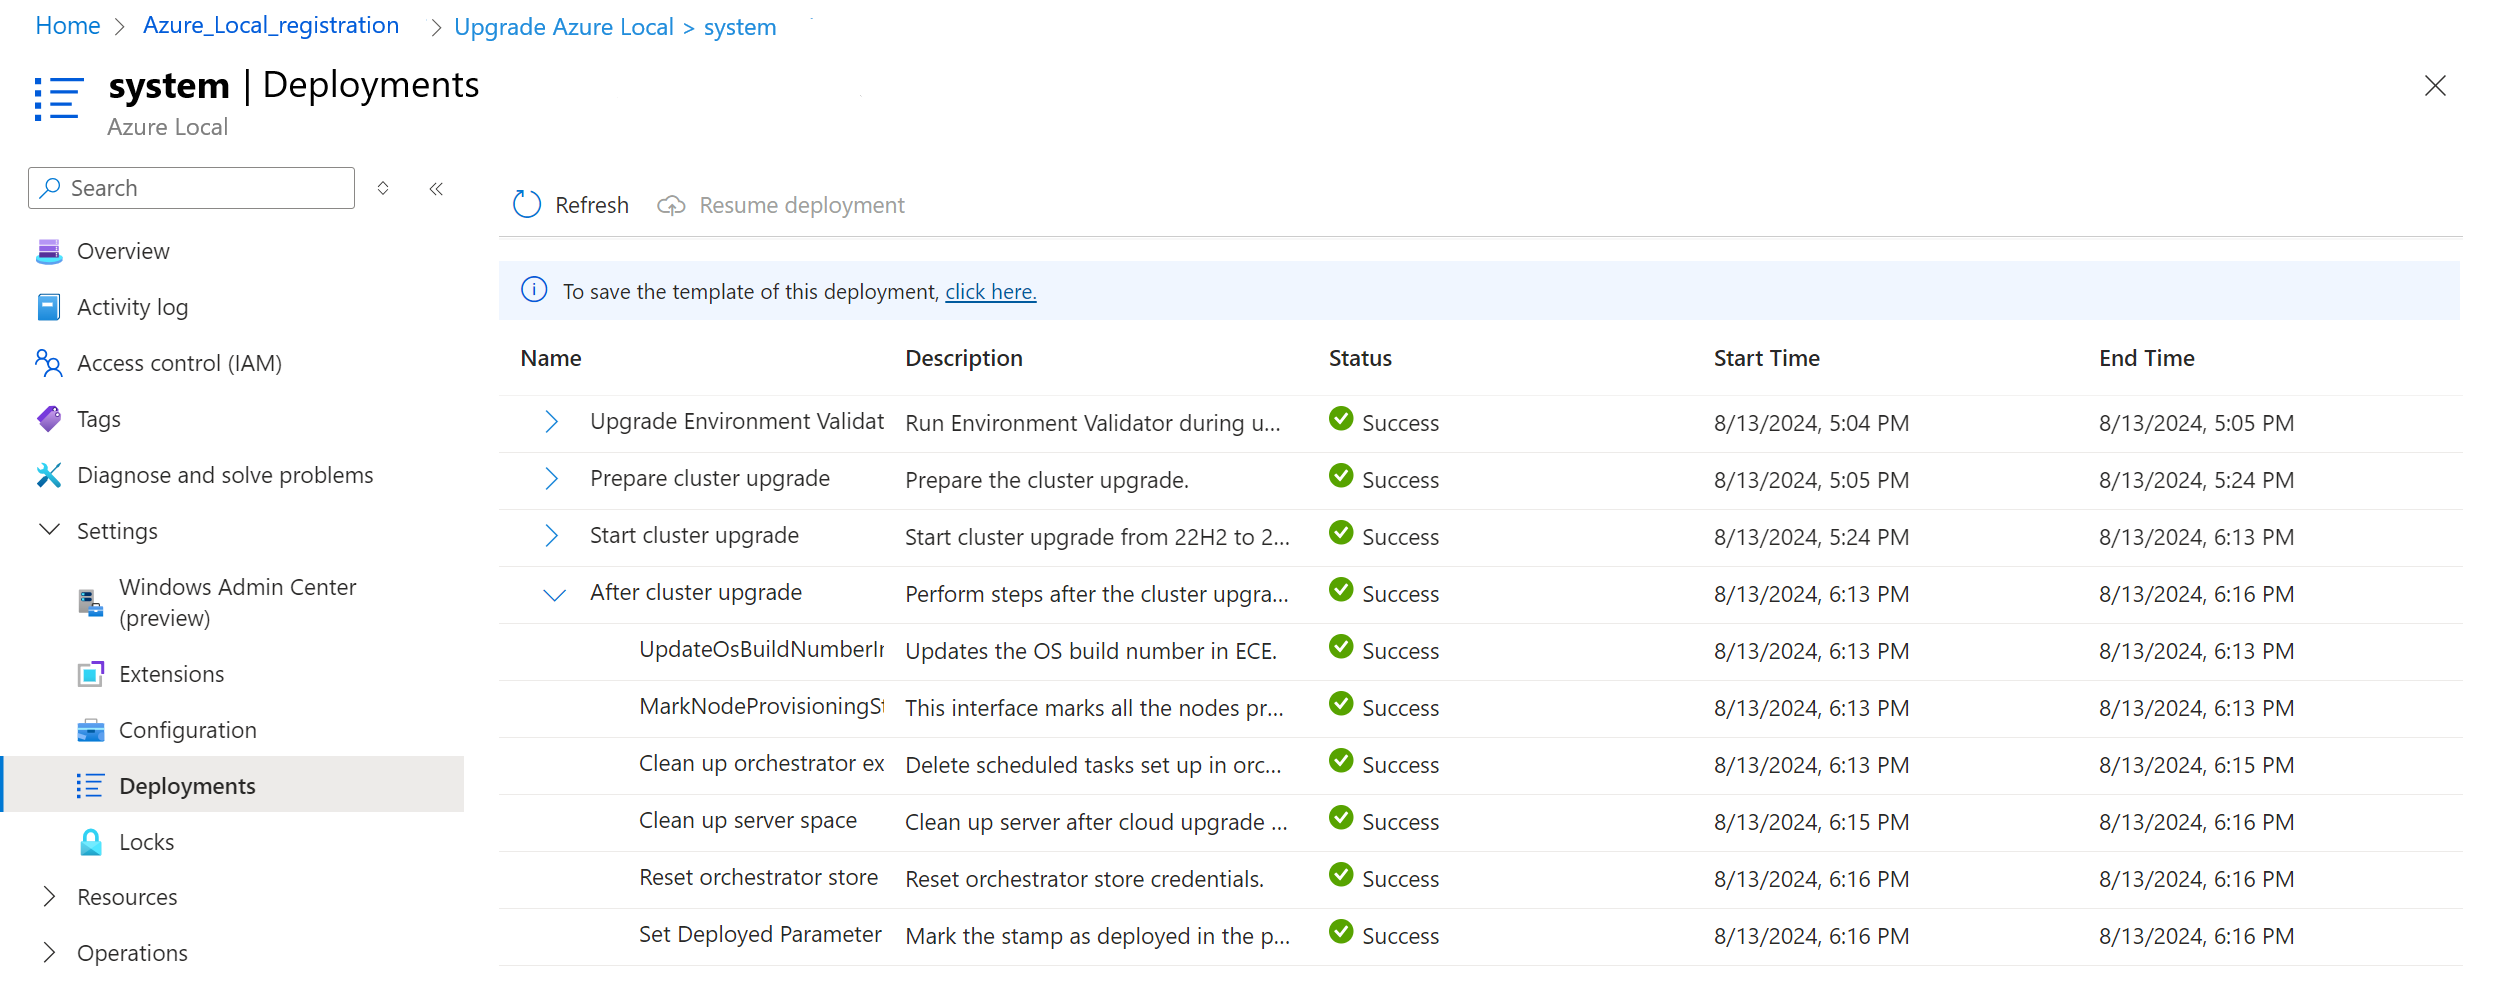
Once the upgrade starts, you are automatically taken to Settings > Deployment. Refresh the screen periodically and monitor the upgrade progress.
Wait for the upgrade to complete. The solution upgrade process can take a few hours depending upon the number of machines in the system.
Note
If the upgrade fails, restart the upgrade operation to try again.
Verify a successful upgrade
Follow these steps to verify that the upgrade was successful:
In Azure portal, go to the resource group where you deployed the Azure Local instance.
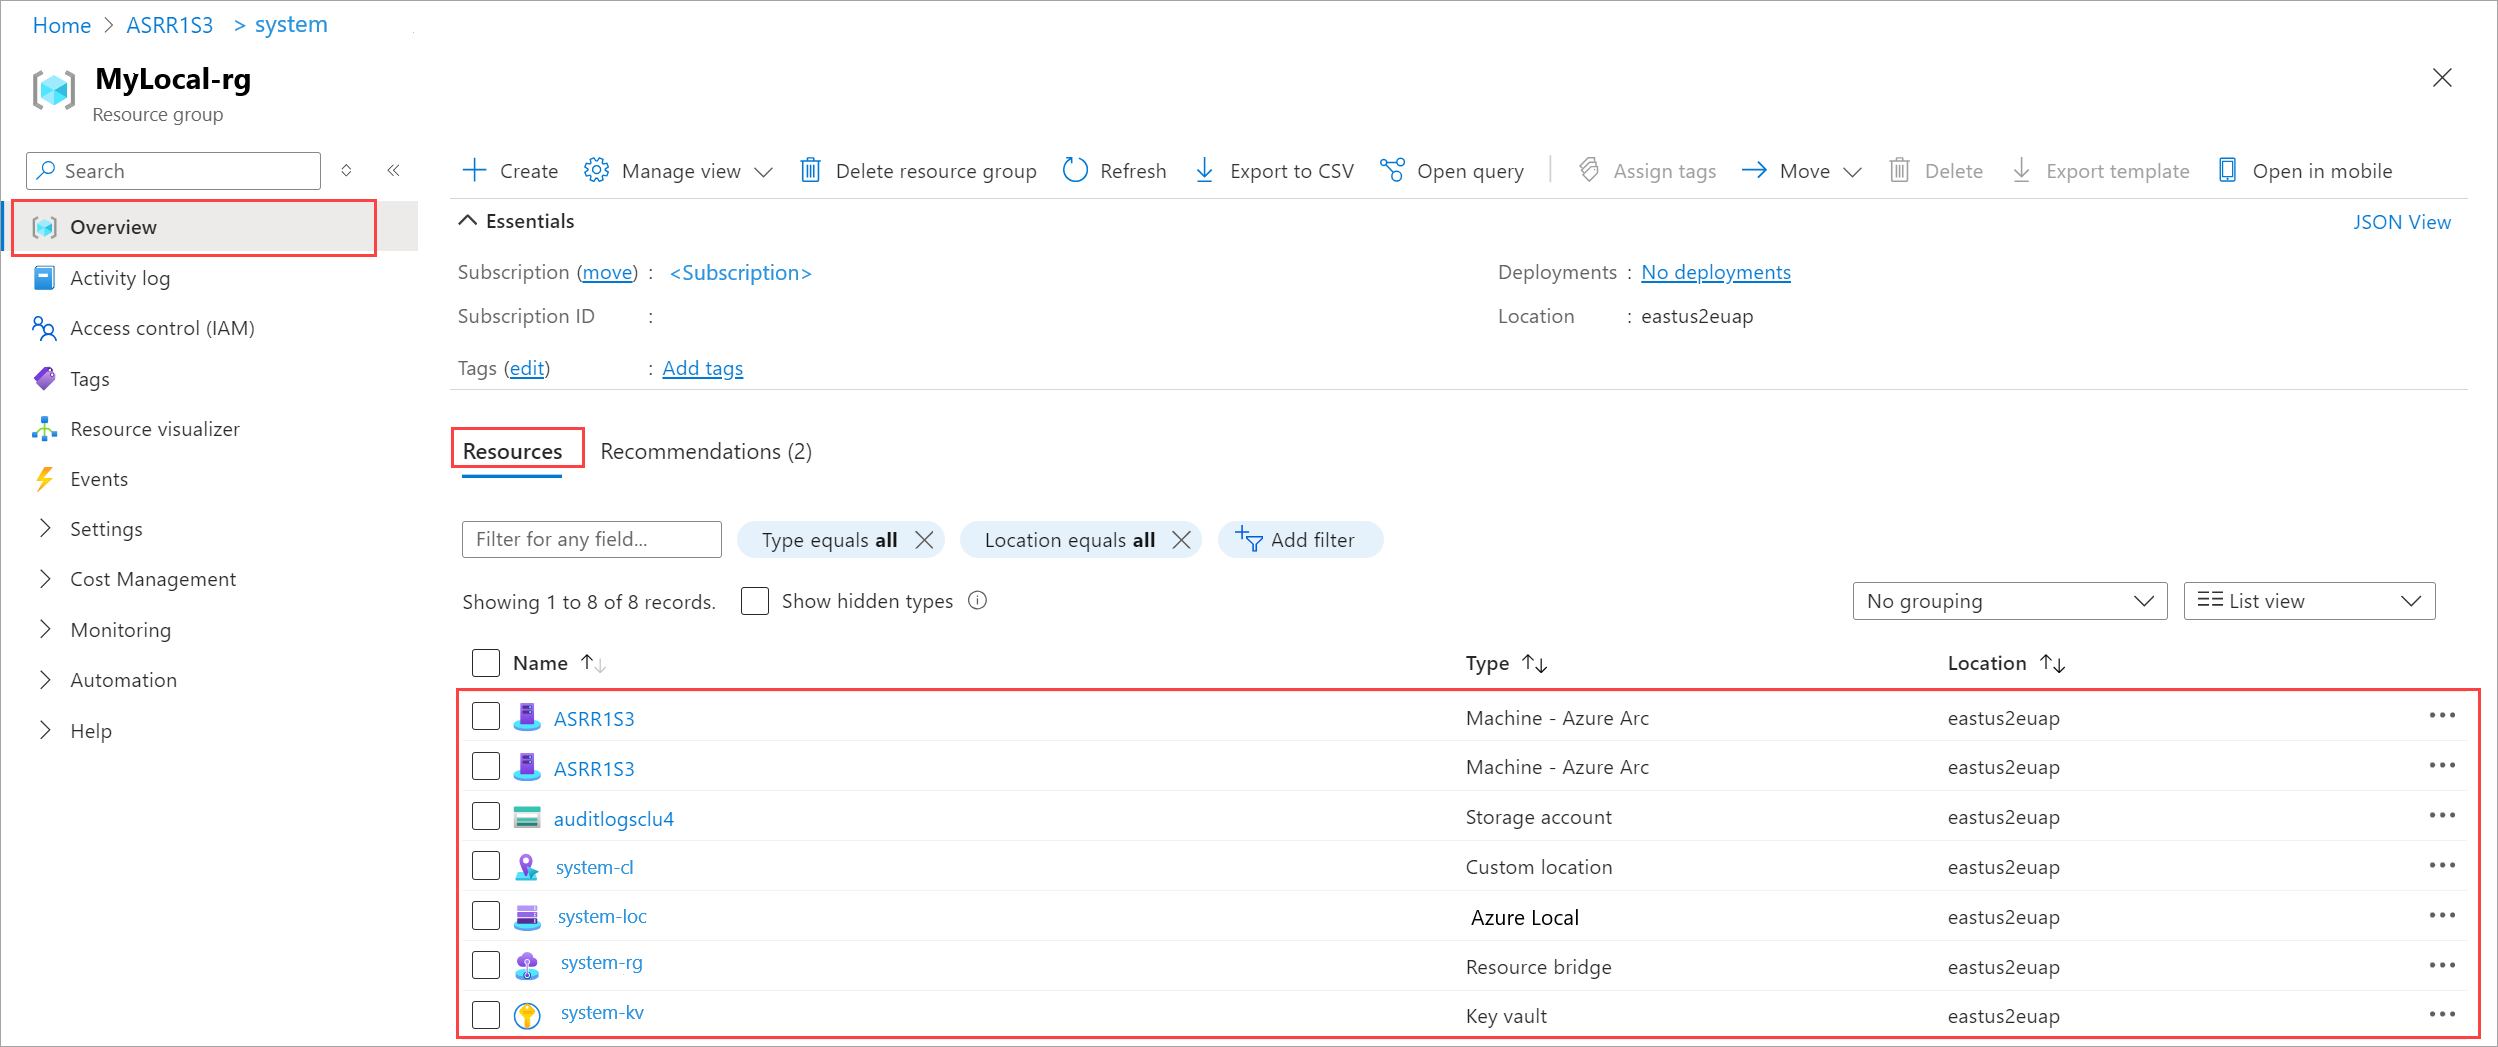
On the Overview > Resources page, you should see the following resources:
Resource type Number of resources Machine - Azure Arc 1 per machine Azure Local 1 Arc Resource Bridge 1, -arcbridge suffix by default Custom location 1, -cl suffix by default Key Vault 1 Here is a screenshot of the resources in the resource group:
Post solution upgrade tasks
Important
As additional services are installed during the solution upgrade, the resource consumption increases after the solution upgrade is complete.
After the solution upgrade is complete, you may need to perform additional tasks to secure your system and ensure it's ready for workloads.
You may need to connect to the system via Remote Desktop Protocol (RDP) to deploy workloads. For more information, see Enable RDP.
To prevent the accidental deletion of resources, you can lock resources.
You need to upgrade the security posture. For more information, see Update security posture on Azure Local after upgrade.
You may need to create workloads and storage paths for each volume. For details, see Create volumes on Azure Local and Create storage path for Azure Local.
If you haven't used Cluster-Aware Updating (CAU) for patching your system, you must ensure the permissions are set correctly. For more information, see Cluster aware updating (CAU)
Next steps
If you run into issues during the upgrade process, see Troubleshoot solution upgrade on Azure Local.
