Discover and replicate VMware VMs for migration to Azure Local using Azure Migrate (preview)
Applies to: Azure Local 2311.2 and later
This article describes the discovery and replication phase for VMware virtual machine (VM) migration to Azure Local using Azure Migrate.
Important
This feature is currently in PREVIEW. See the Supplemental Terms of Use for Microsoft Azure Previews for legal terms that apply to Azure features that are in beta, preview, or otherwise not yet released into general availability.
For more information on appliances for Azure Migrate and how to manage them, see Azure Migrate appliance.
Before you begin
For both the source VMware vCenter Server and target Azure Local appliances, make sure that the underlying hardware has sufficient resources to support the creation of a Windows Server 2022 VM with a minimum of 16 GB RAM, 80 GB of disk storage (HDD), 8 vCPUs, and an external virtual switch.
Ensure all VMs that you wish to migrate are powered on and have VMware tools installed. Migration will fail if the VMs are not powered on and do not have VMware tools installed.
Step 1: Create and configure the source VMware appliance
Generate the project key
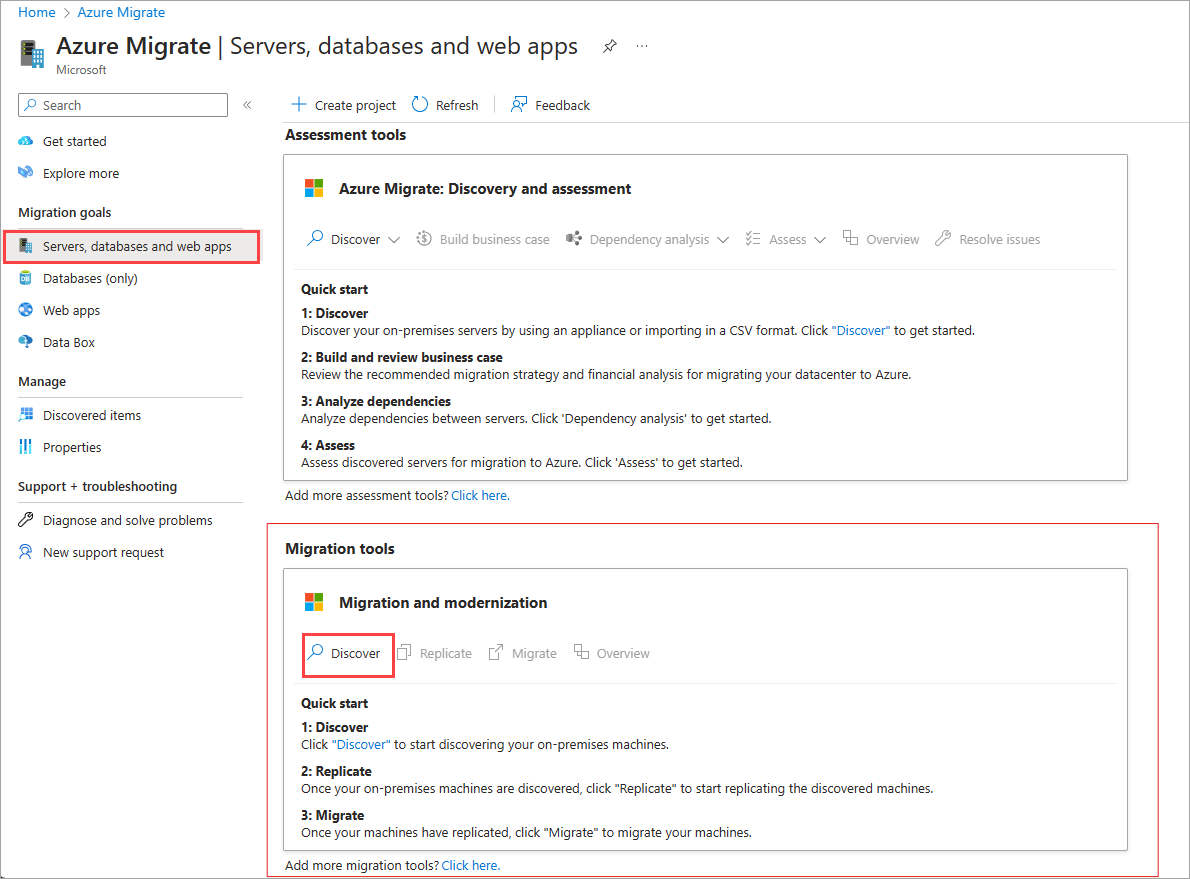
In the Azure portal, go to your Azure Migrate project and then go to Servers, databases and webapps.
On the Migration tools tile, select Discover. Make sure to use the Migration and Modernization Discover page for Azure Local. If you use the Discovery and Assessment Discover page, Azure Local migrations will be blocked.
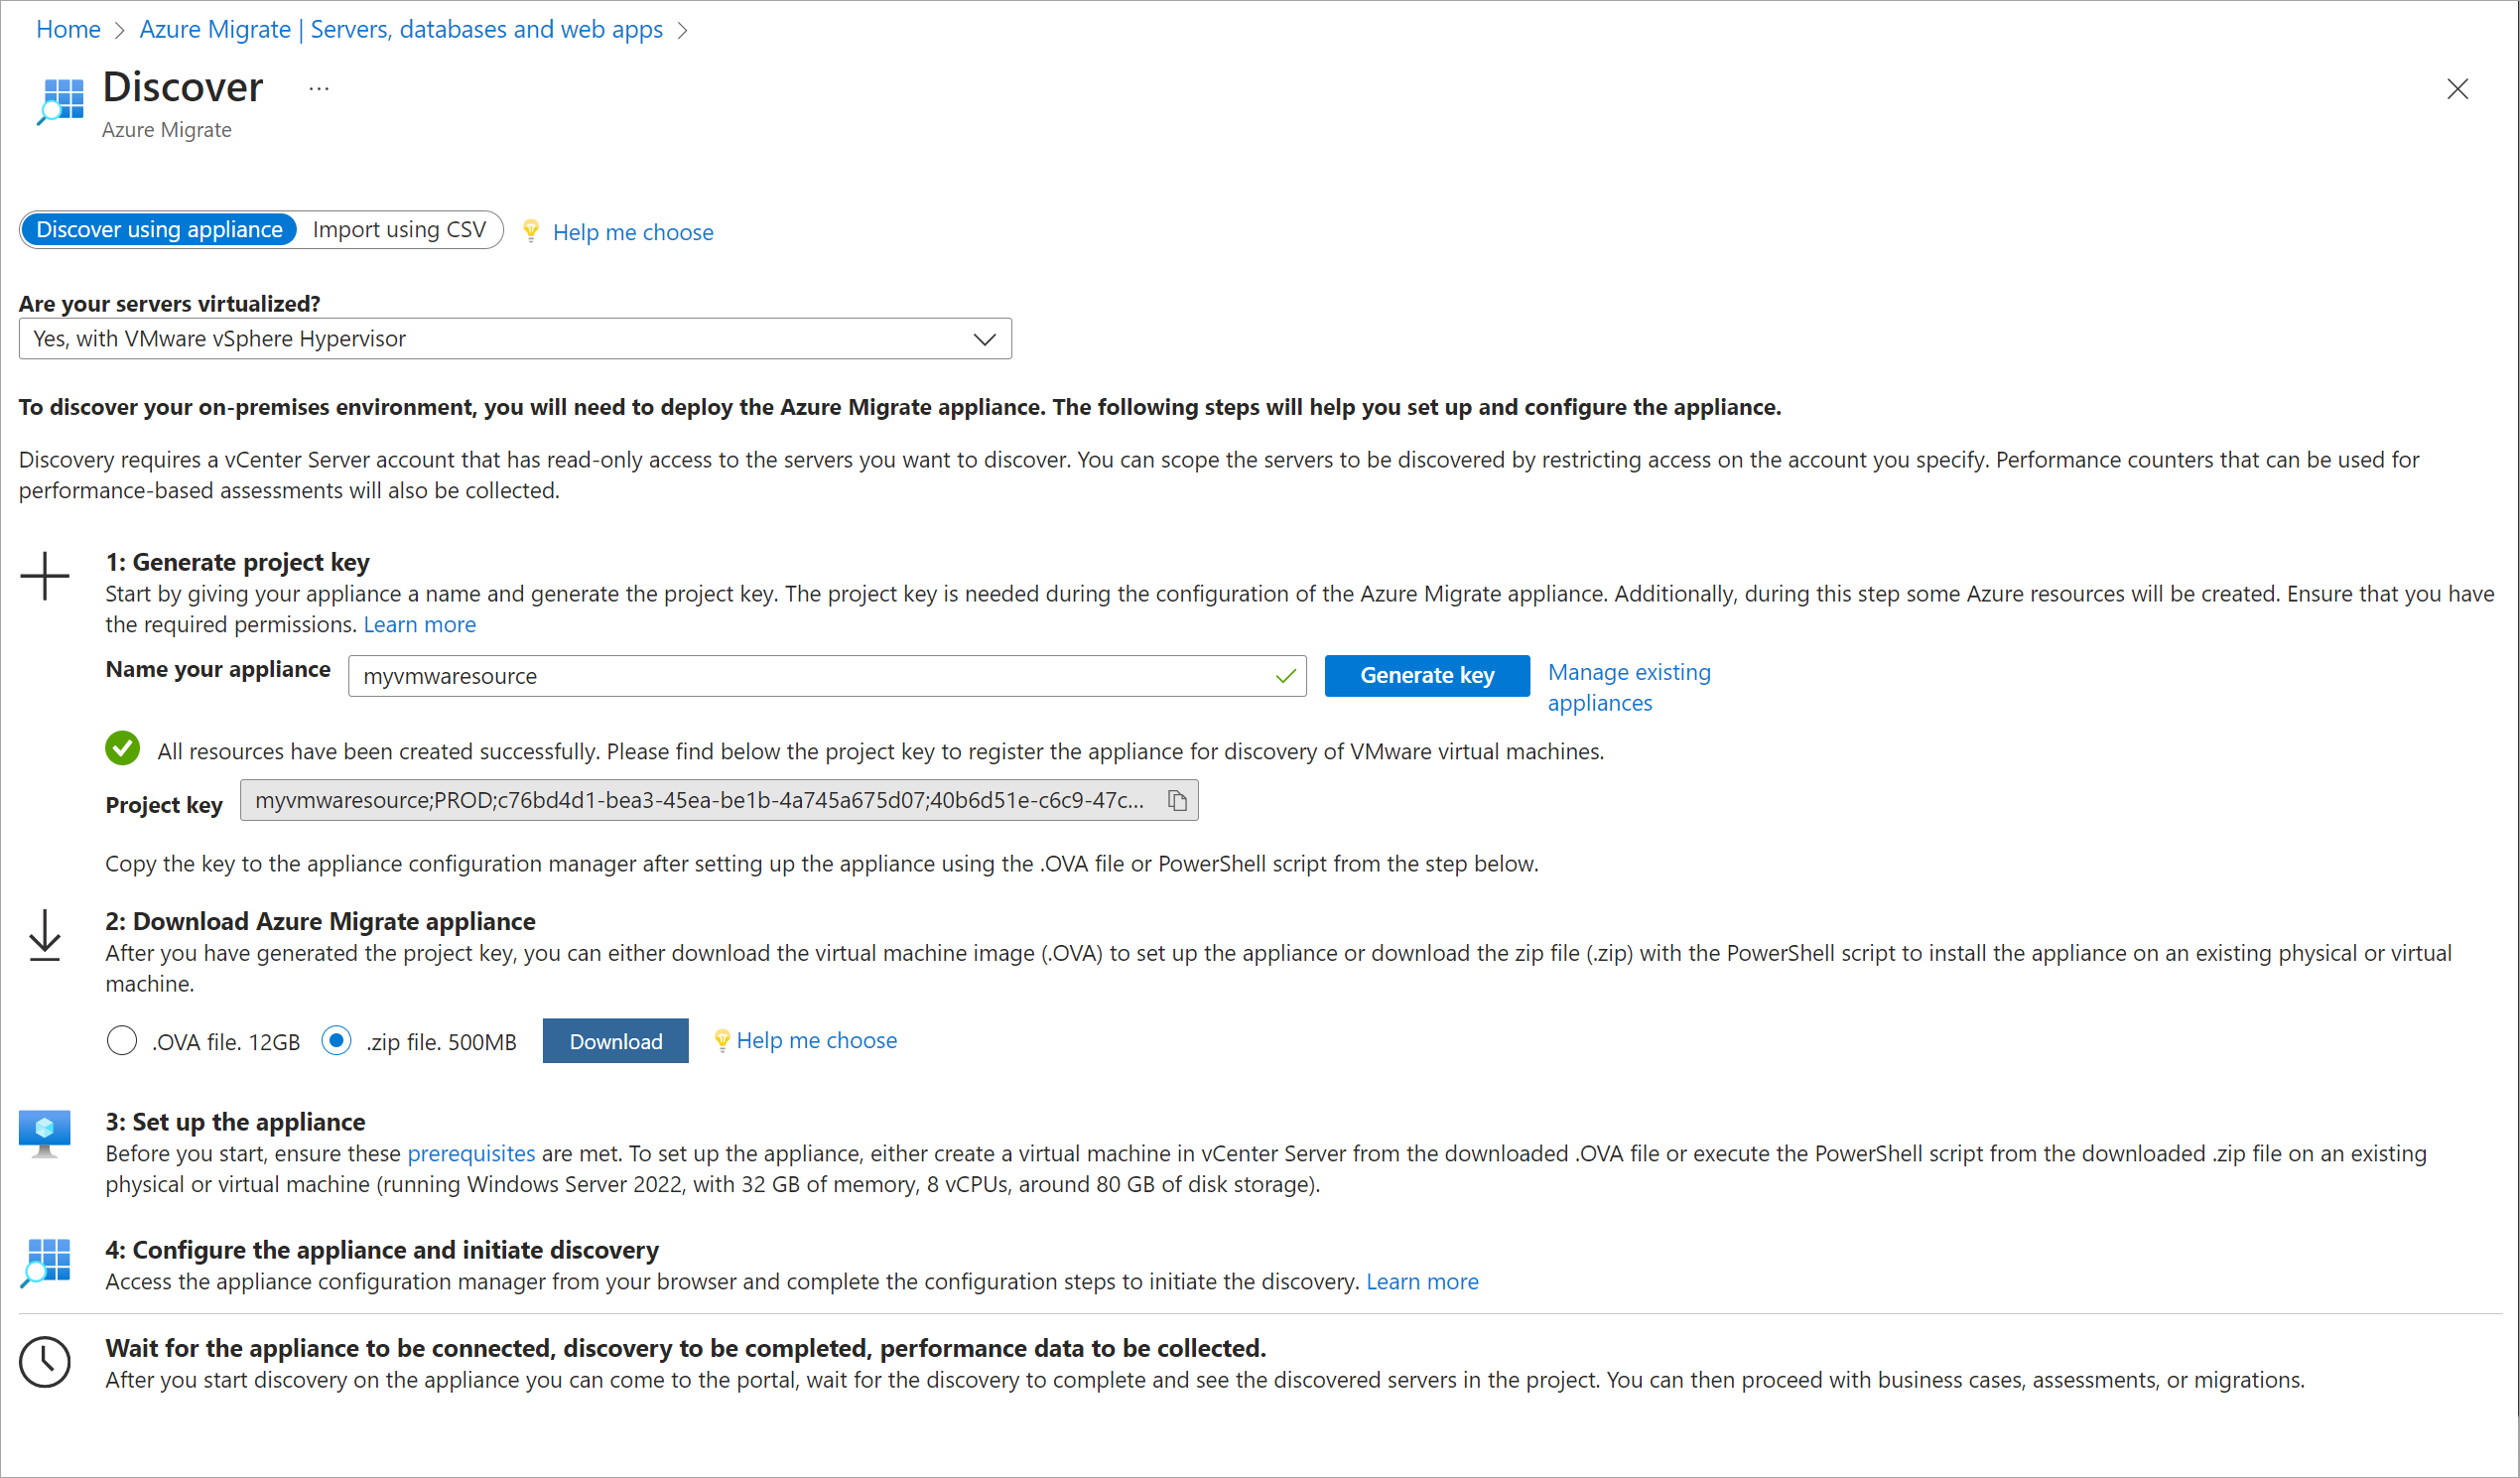
On the Discover page, select Azure Local under Where do you want to migrate to and then select Yes, with VMware vSphere Hypervisor under Are your machines virtualized in Azure Migrate.
Enter a name for your source appliance and generate the key for the source VMware appliance. For detailed steps, see Generate the project key.
Copy the Project key (to a text editor such as Notepad) and save it for later use.
You can now Download the Azure Migrate source appliance using either a .ova file or a .zip file. The detailed steps are provided in the subsequent sections.
Create the source appliance
You can install the appliance using either an .ova file or a .zip file that you download to your VMware host server.
Install using an .OVA file
This step applies only if you are deploying the source VMware appliance using an .OVA file.
- Once you have downloaded the .OVA file, Verify that the file is secure.
- Create the source VMware appliance.
- Verify that the appliance can access Azure.
Install using a .zip file
This step applies only if you downloaded the .zip file. You use the AzureMigrateInstaller.ps1 PowerShell script to install the source appliance. For specific information, see Set up an appliance with a script.
Create a VM in the VMware vCenter with the following configuration:
- Operating system: Windows Server 2022
- vCPU: 8
- Disk: >80 GB
- Memory: 16 GB
Once the VM is created, sign into the VM as an administrator.
Copy the downloaded zip file to the new VM that you created in the vCenter. Extract the zip to a folder and go where the AzureMigrateInstaller.ps1 PowerShell script resides in the extracted folder.
Open a PowerShell window as an administrator and run the following command:
Set-ExecutionPolicy -ExecutionPolicy Unrestricted

.\AzureMigrateInstaller.ps1 -Scenario VMware -Cloud Public -PrivateEndpoint:$false -EnableAzureStackHCITarget
Select option 1 as the desired configuration: Primary appliance to discover, assess and migrate servers.
Follow the rest of the onscreen instructions to install the source appliance and uninstall Internet Explorer.
Restart the VM after the installation is complete. Sign in to the VM.
Configure the source appliance and discover VMs
Once the source appliance is installed, follow these steps:
- Configure the source appliance. Complete these steps.
Make sure that the VMware Virtual Disk Development Kit (VDDK) is installed. Download and extract the VMware Virtual Disk Development Kit in zip format to the provided folder path. Versions 8.0.0, 8.0.1, and 8.0.2 are currently supported. Version 6.7.0 is also supported but the package is deprecated, hence the new deployments are unable to use this version.
Important
Do not use VDDK 7.0.X. These versions have known issues and result in errors during migration.
Select Verify to make sure that the VMware VDDK is successfully installed.
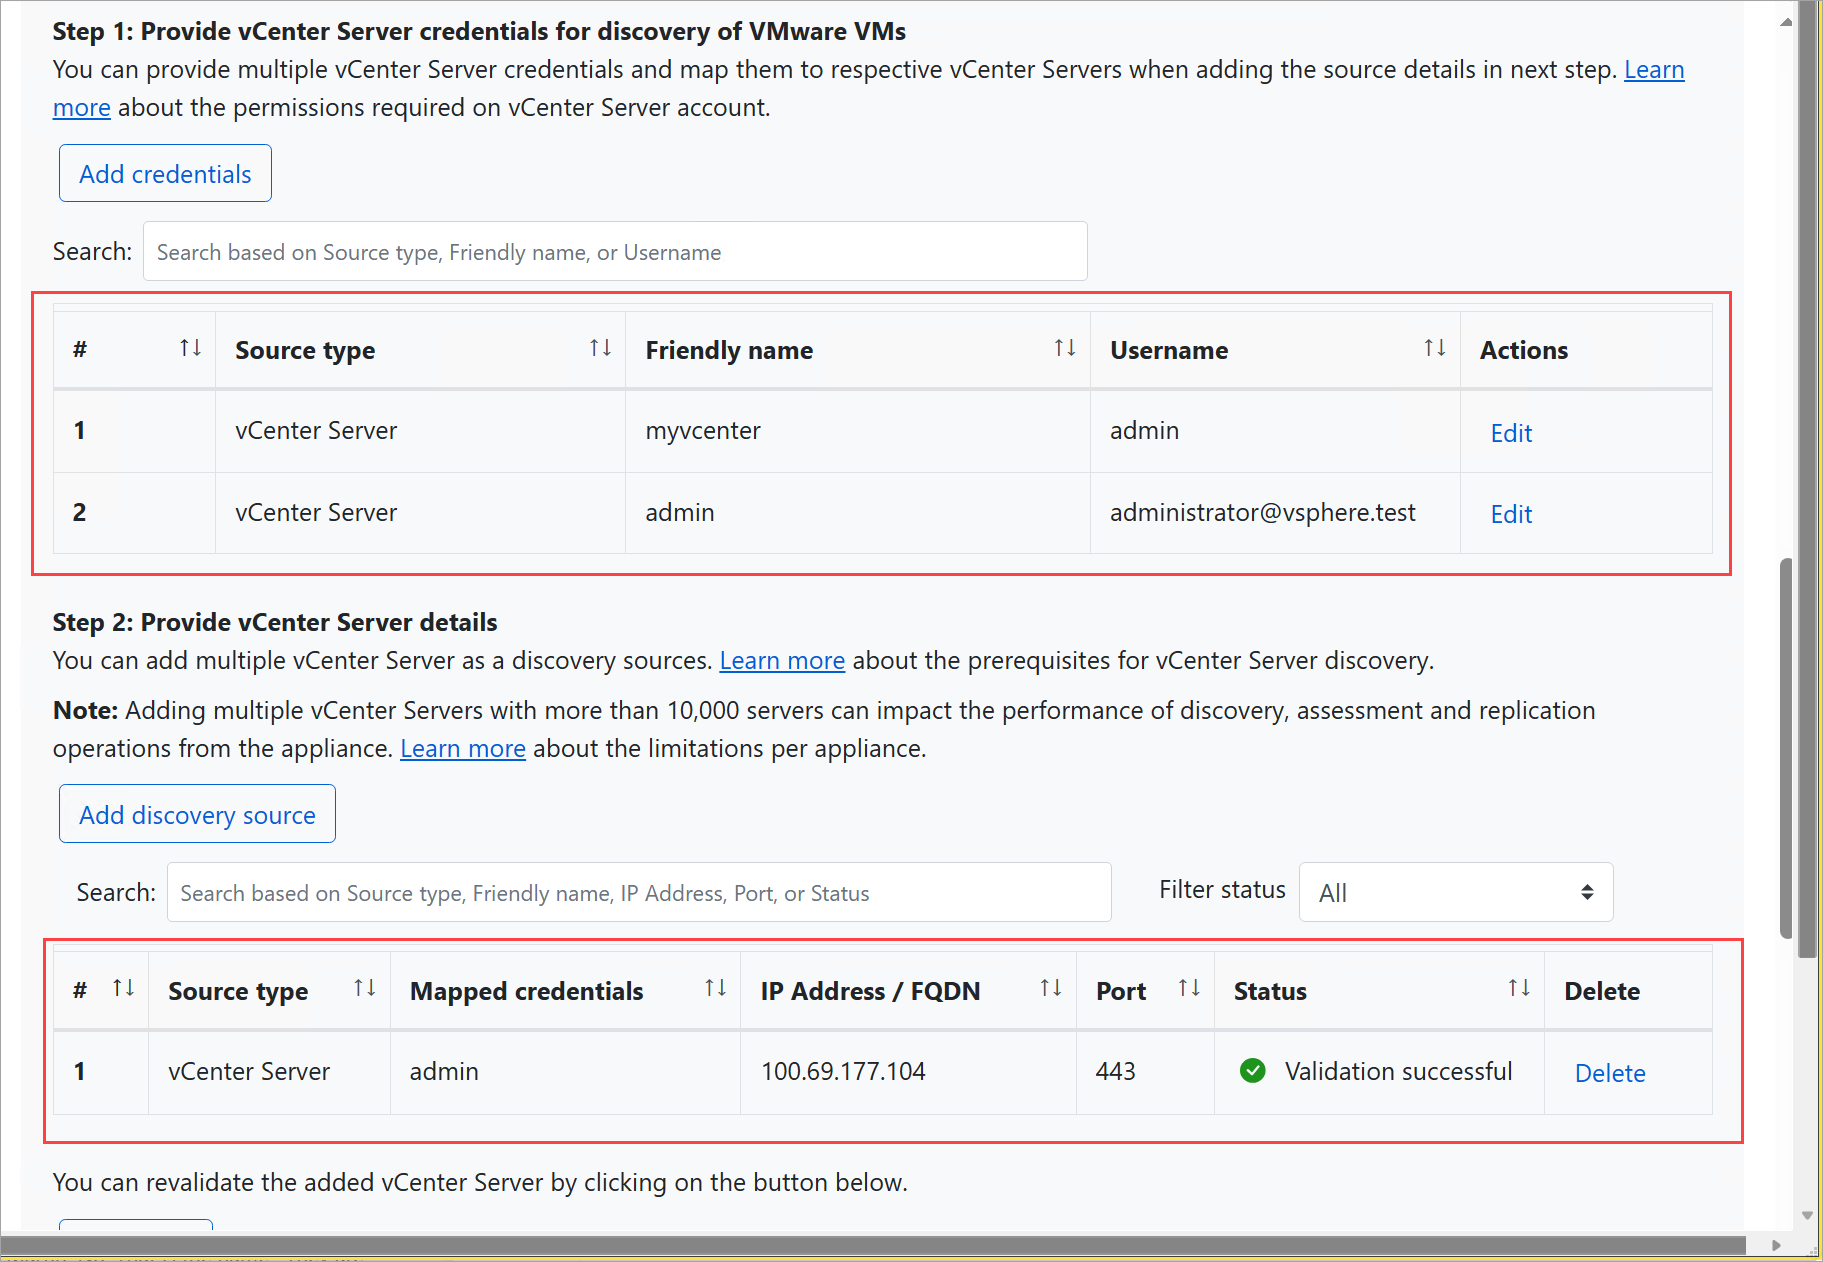
Provide vCenter server credentials for the discovery of VMware VMs.
- Select Add credentials.
- Select the Source type as vCenter Server.
- Provide a Friendly name for the credentials.
- Enter the Username and the Password for the vCenter server.
- Save the credentials.
Add discovery sources.
- Add the vCenter discovery source.
- Enter the IP address or FQDN of the vCenter server.
- Enter the friendly name for the credentials used when discovering the VMware VMs.
- Select Save. Select Add more to repeat this step for each vCenter server. The discovery source table is updated.
Disable the slider under the Applications discovery and agentless dependency analysis section, as this is currently not supported in VMware to Azure Local migrations.
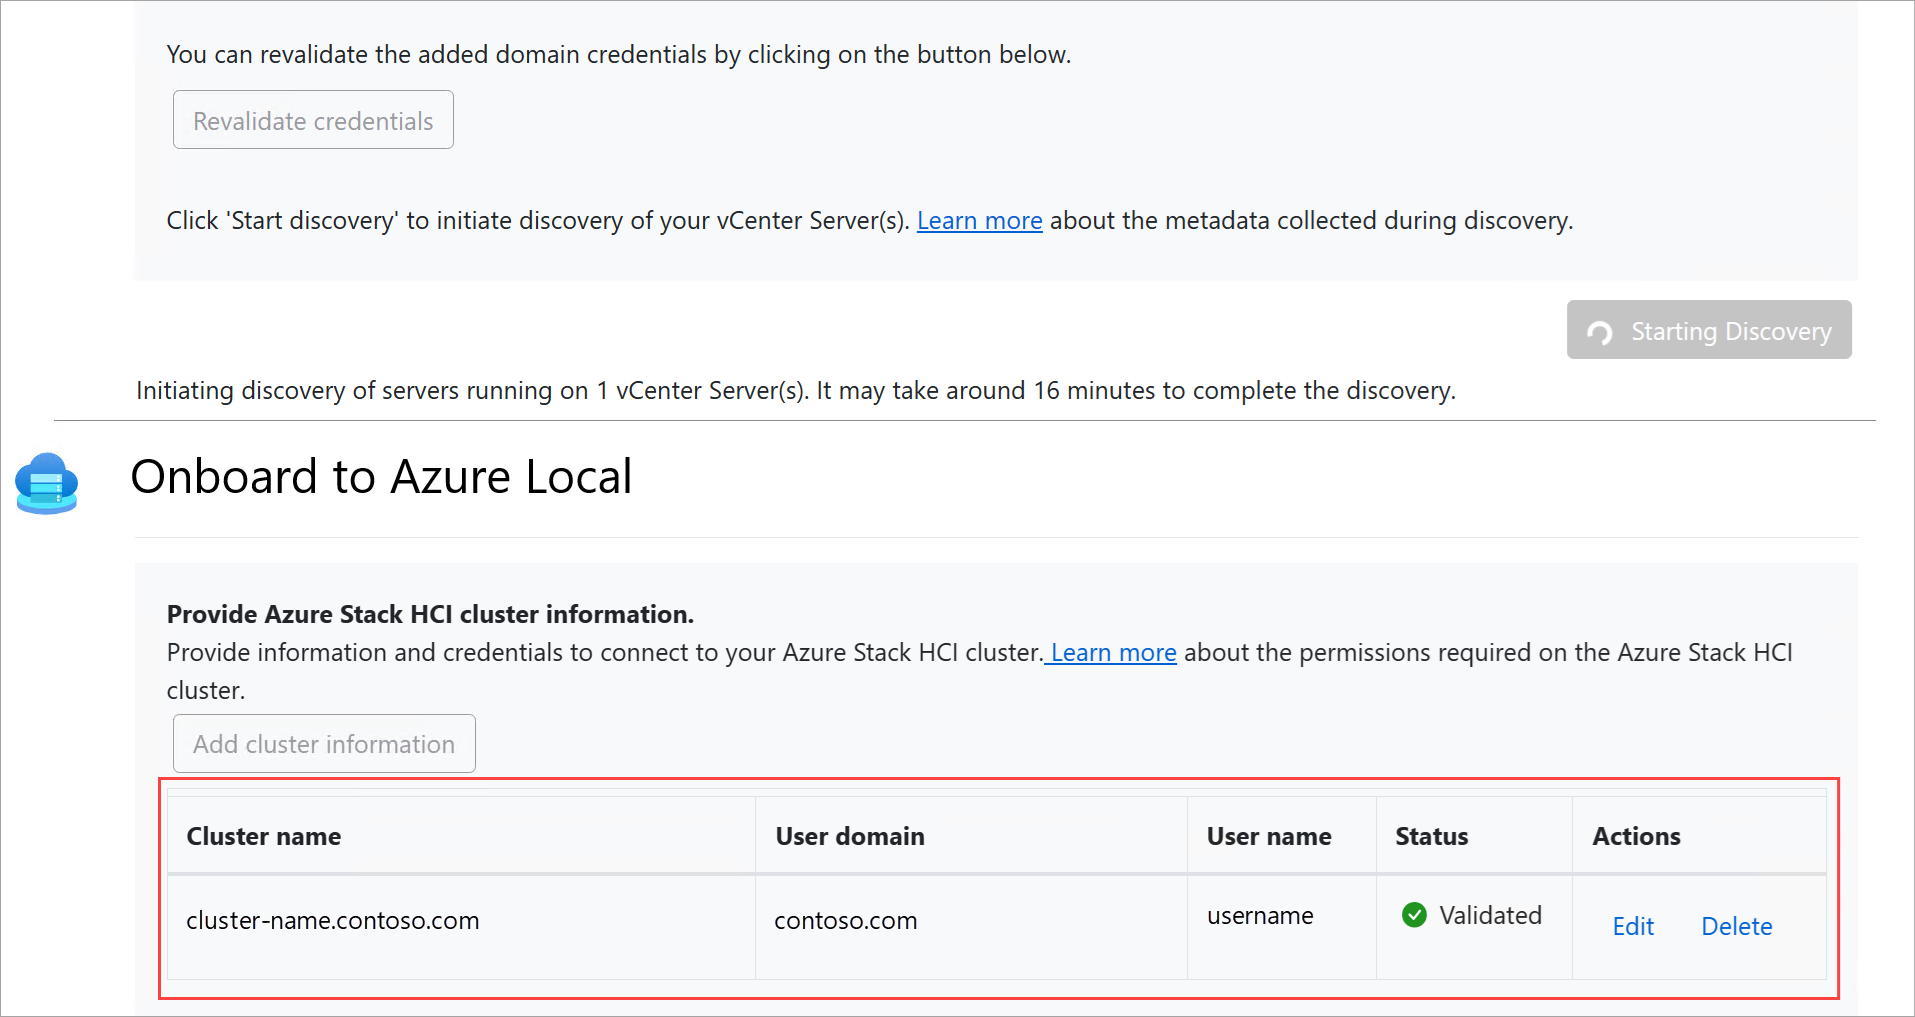
Select Start Discovery. The discovery may take several minutes to finish.
You'll next onboard to the target Azure Local instance.
Onboard to Azure Local
You now add information to onboard the discovered VMs.
- Select Add information.
- Enter the Domain for your target Azure Local system.
- Provide the Username and the Password for the target Azure Local system.
- Select Save.
The information table is updated and the status changes to Validated.
Wait for the discovery to complete
Wait until you have a green checkmark indicating that the discovery is finished. The migration readiness checks are also completed successfully. After the discovery is complete, go to the Azure portal to review the VM inventory.
Ensure that all VMs you want to migrate are powered on and have VMware tools installed before or during the discovery process.
Step 2: Create and configure the target appliance
Generate target appliance key
Complete the following tasks to generate the target appliance key:
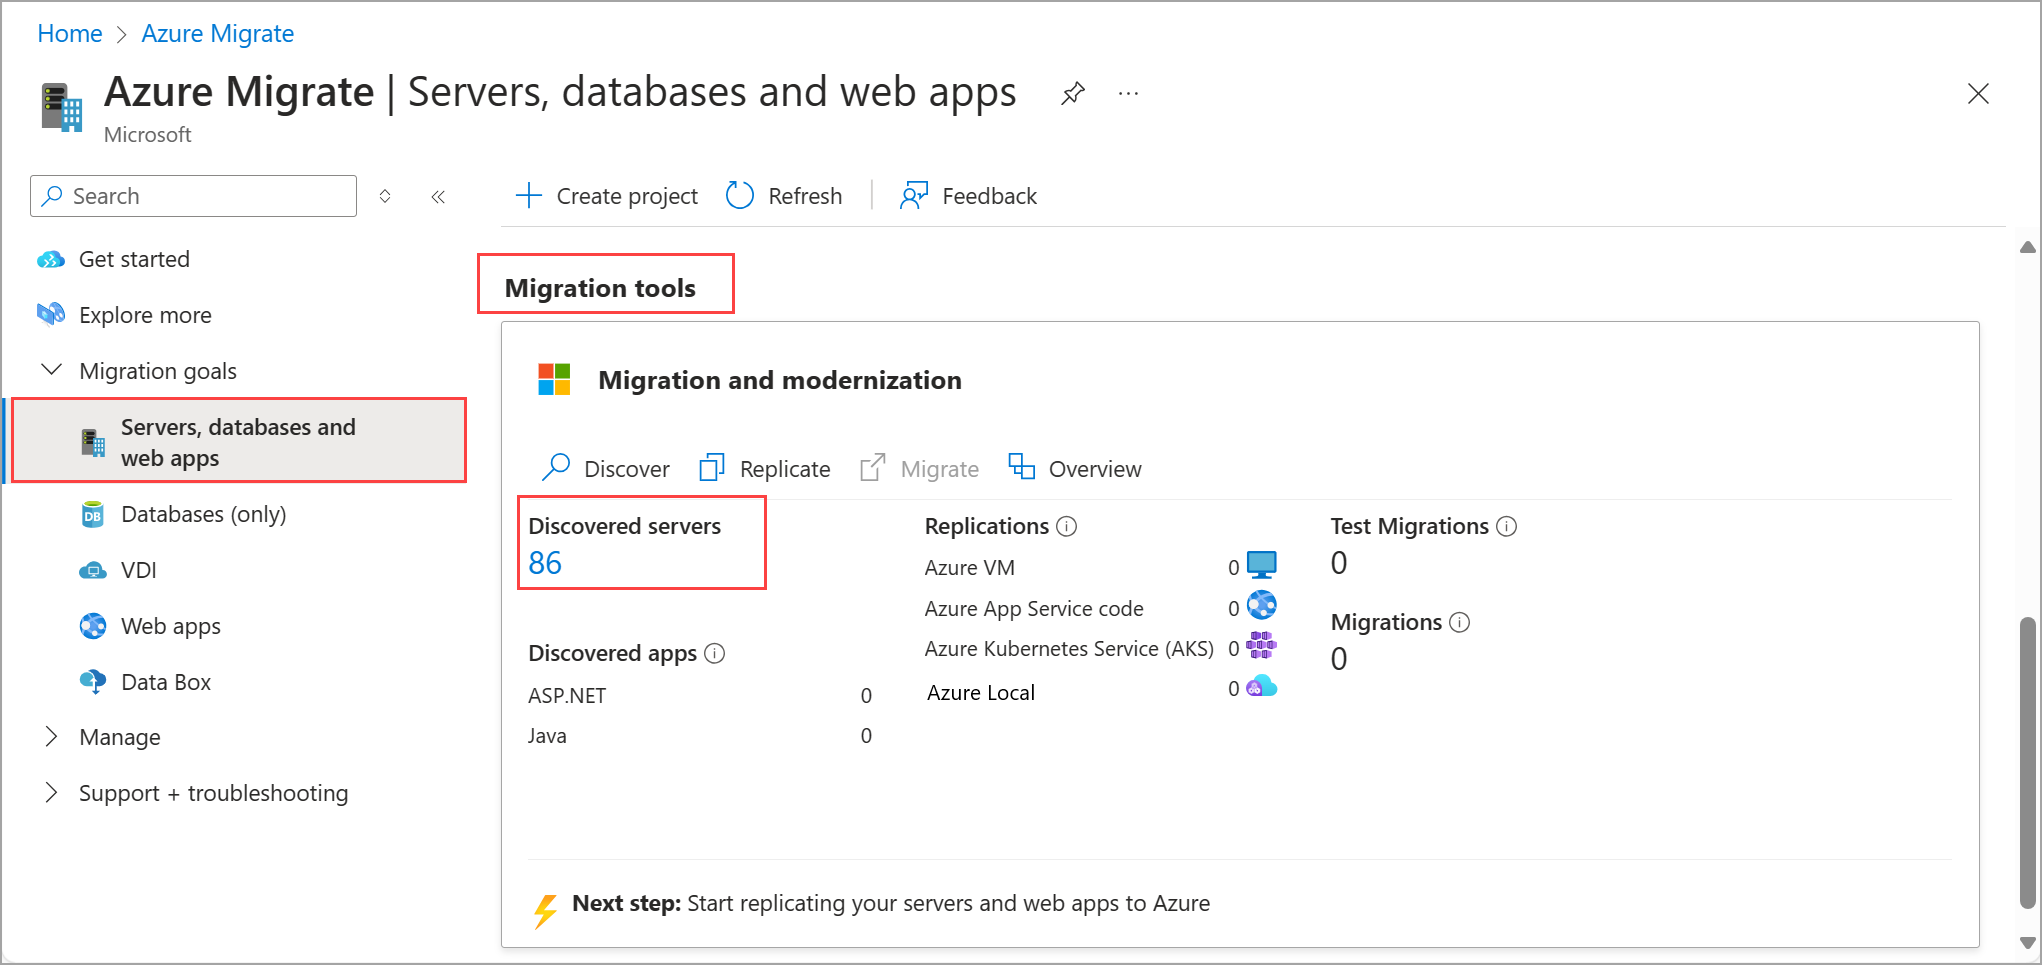
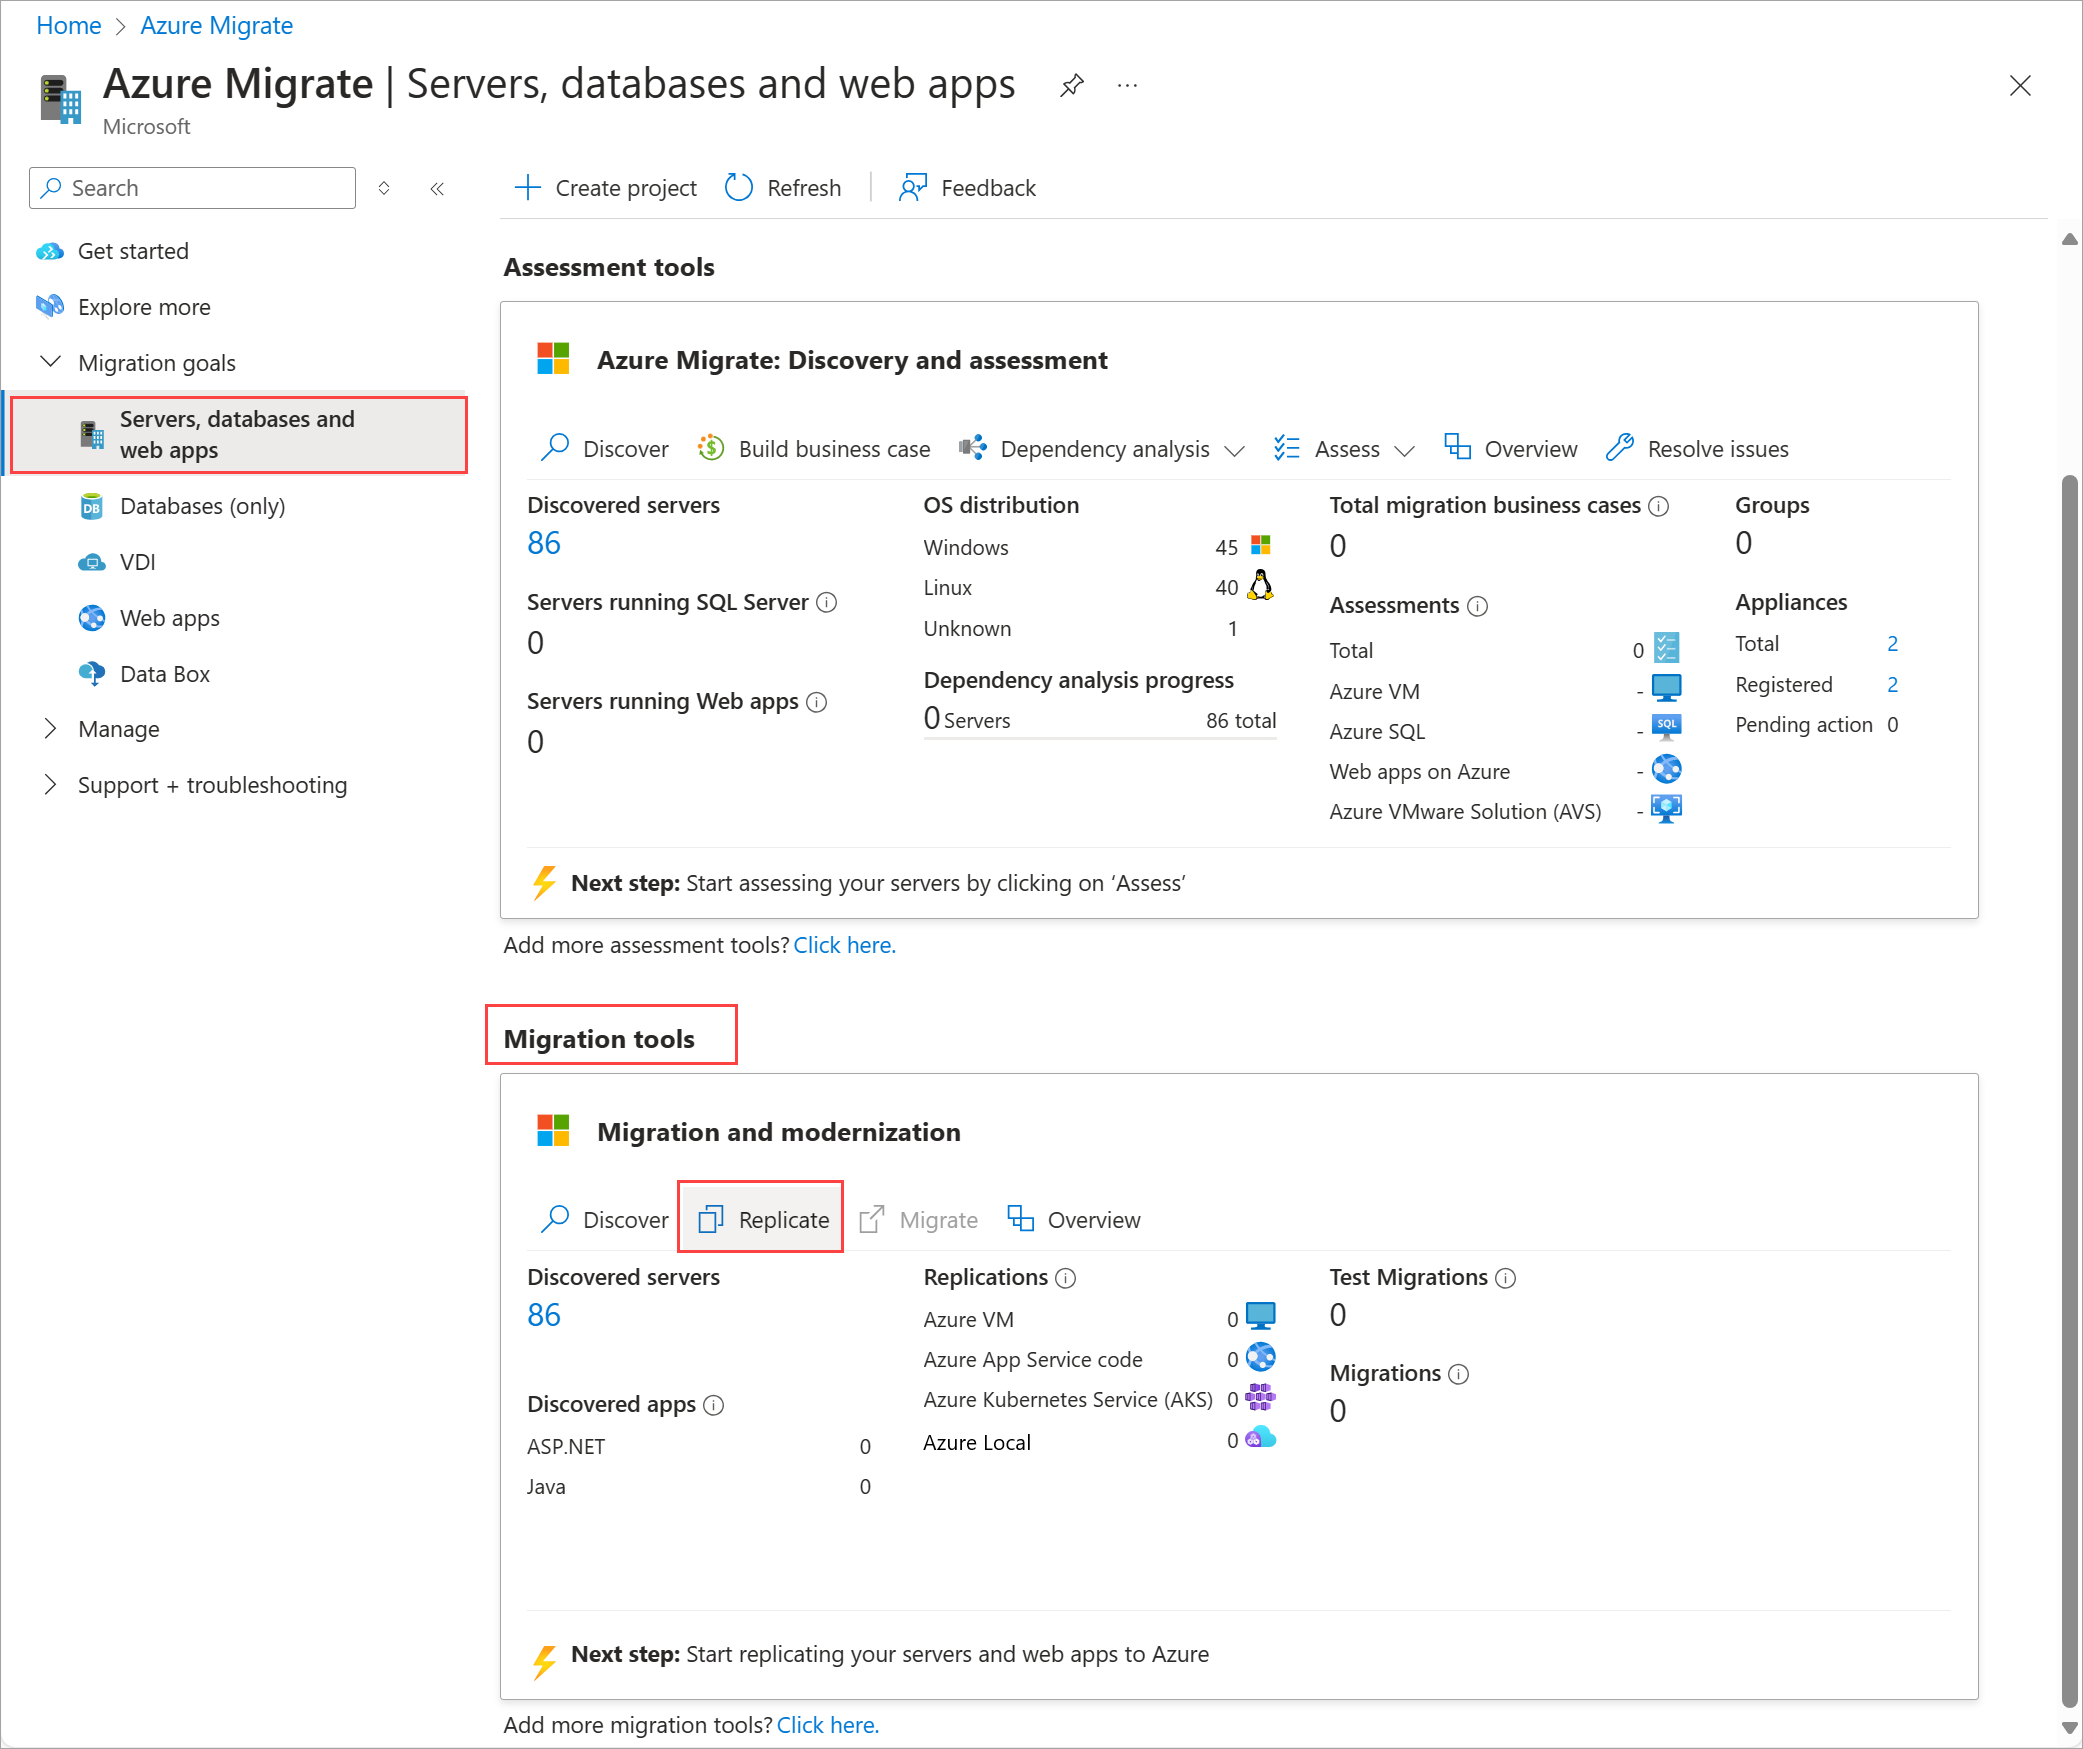
In the Azure portal, go to your Azure Migrate project and select Servers, databases and web apps.
Verify that you see a nonzero value for Discovered servers under Migration tools.
Under Migration and modernization, select Replicate.
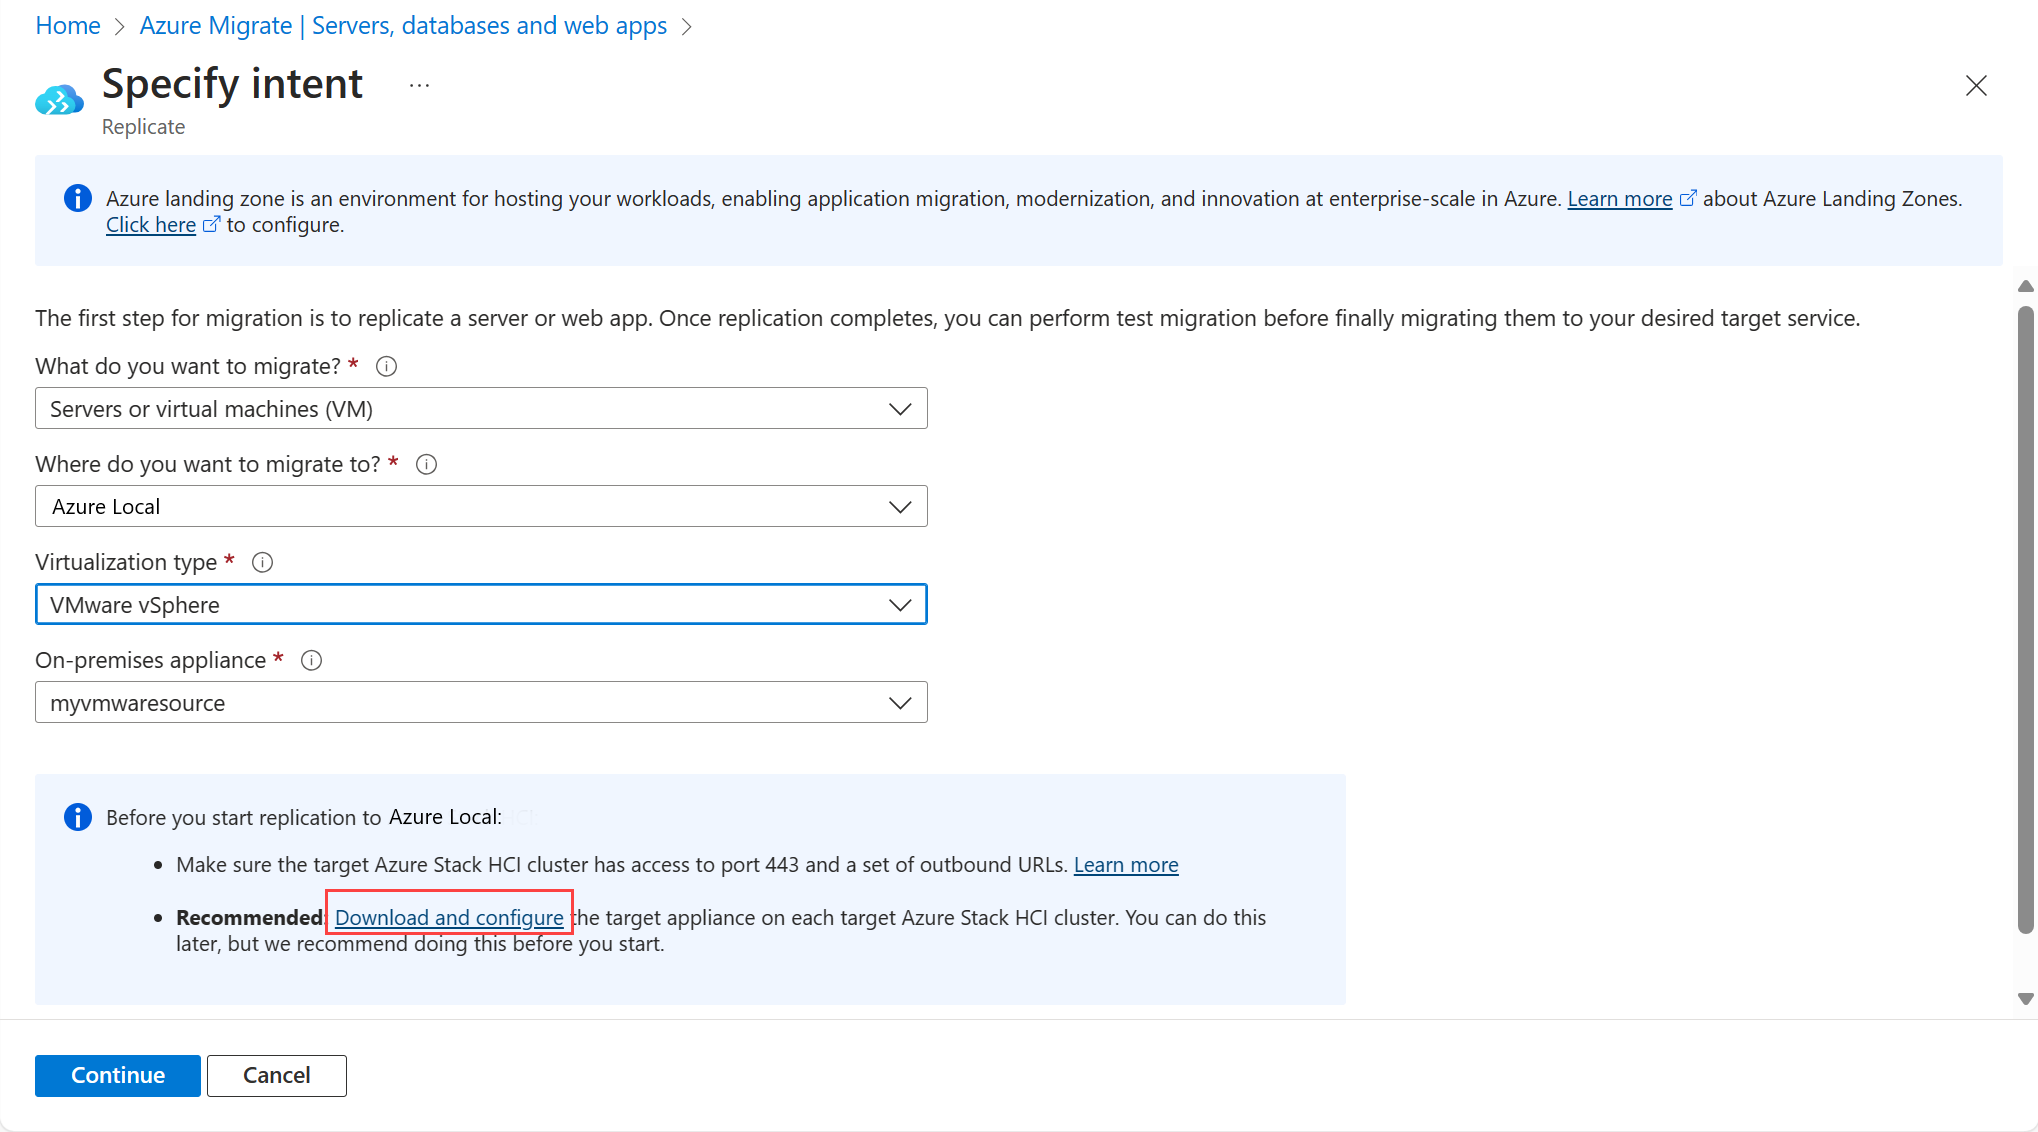
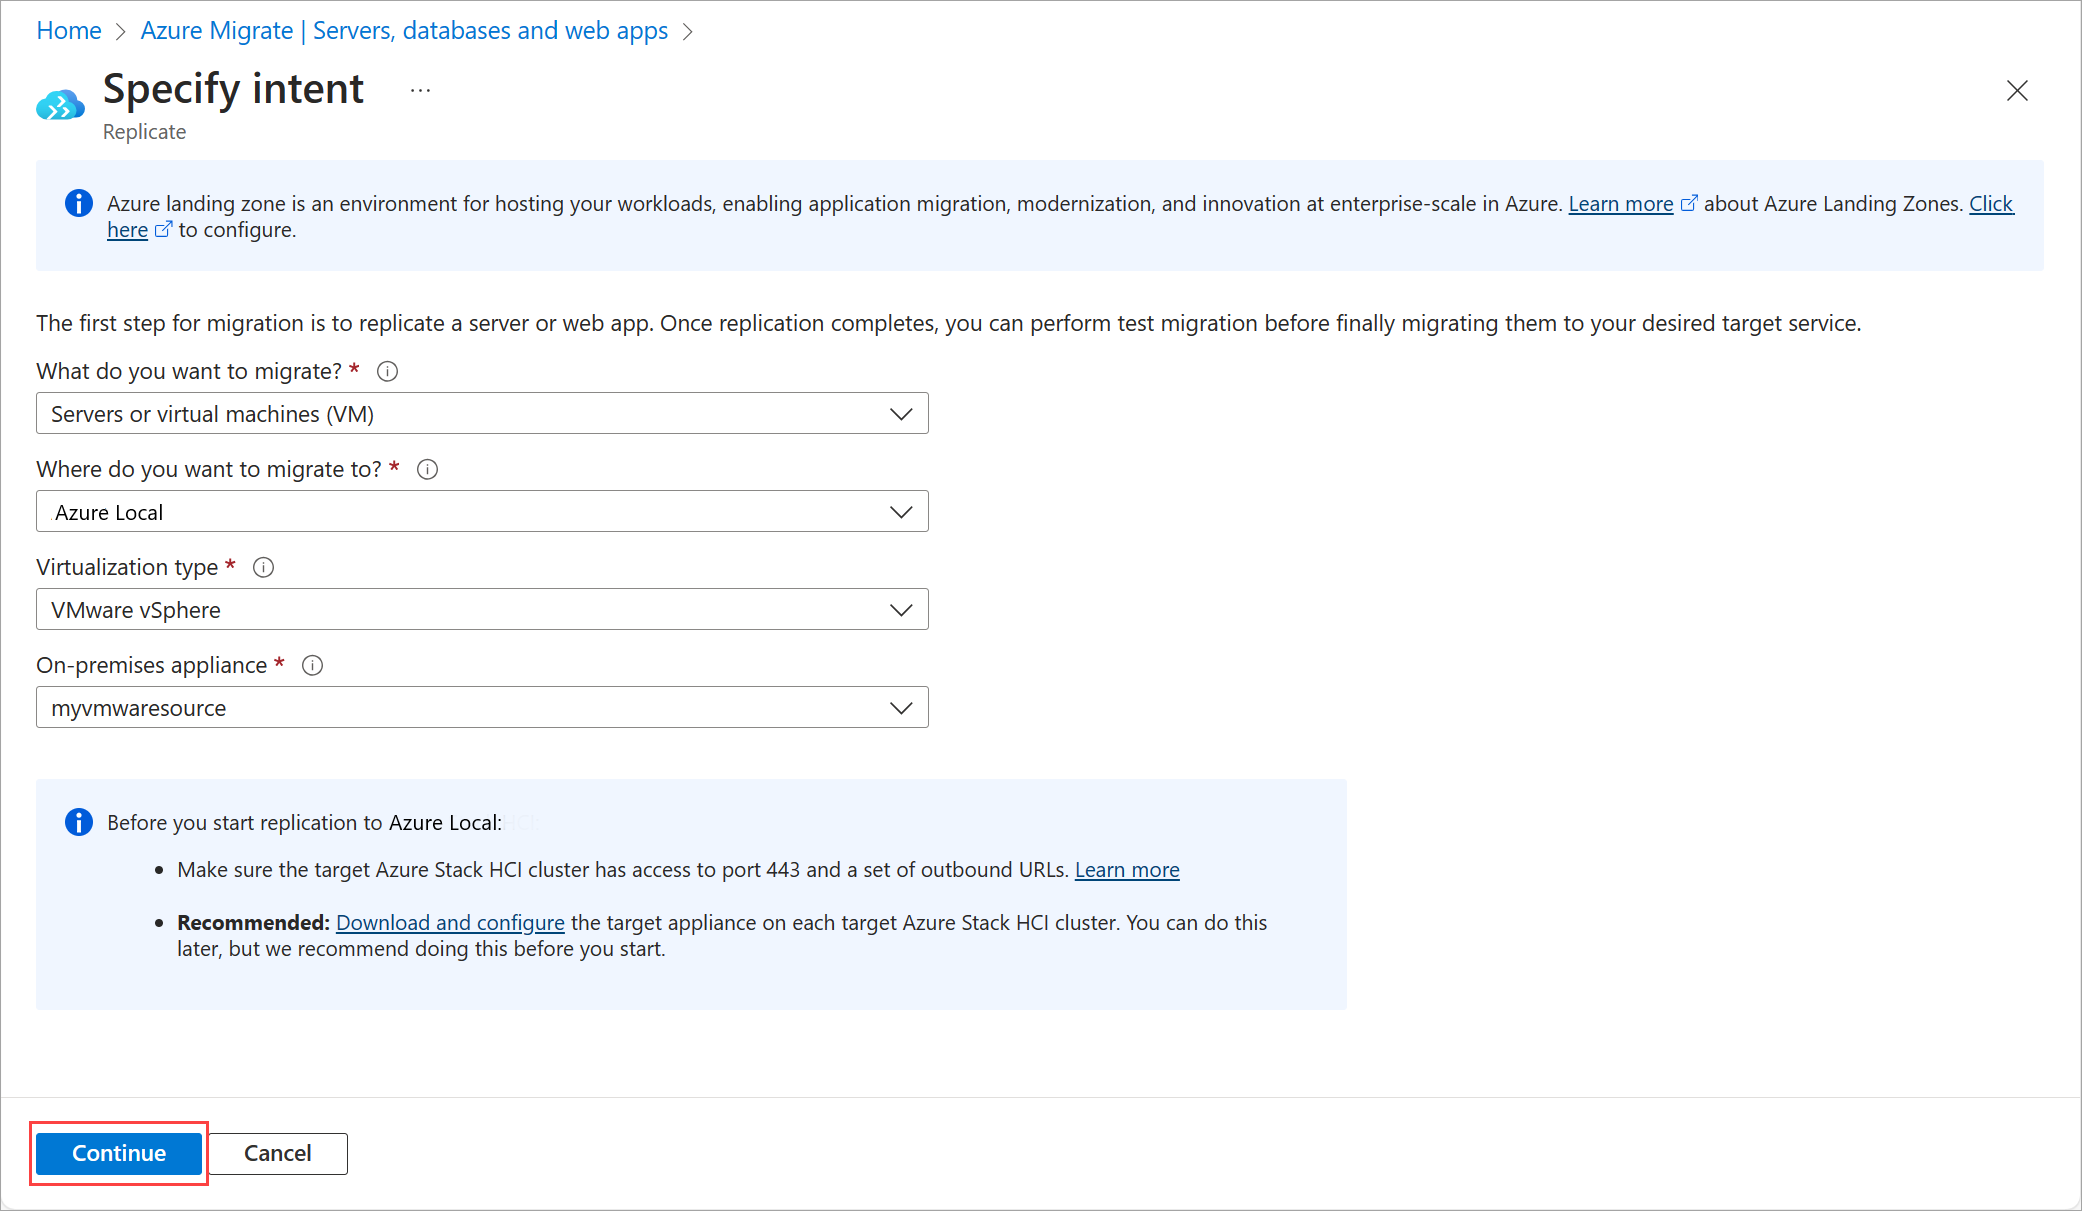
On the Specify intent page, provide the following inputs:
- Select Servers or virtual machines (VM) for What do you want to migrate?.
- Select Azure Local for Where do you want to migrate?.
- Select VMware vSphere for Virtualization type.
- For the On-premises appliance the source appliance is pre-populated. If you have more than one source appliance, select the applicable one from the dropdown list.
Select Download and configure in Before you start replication to Azure Local from the information block.
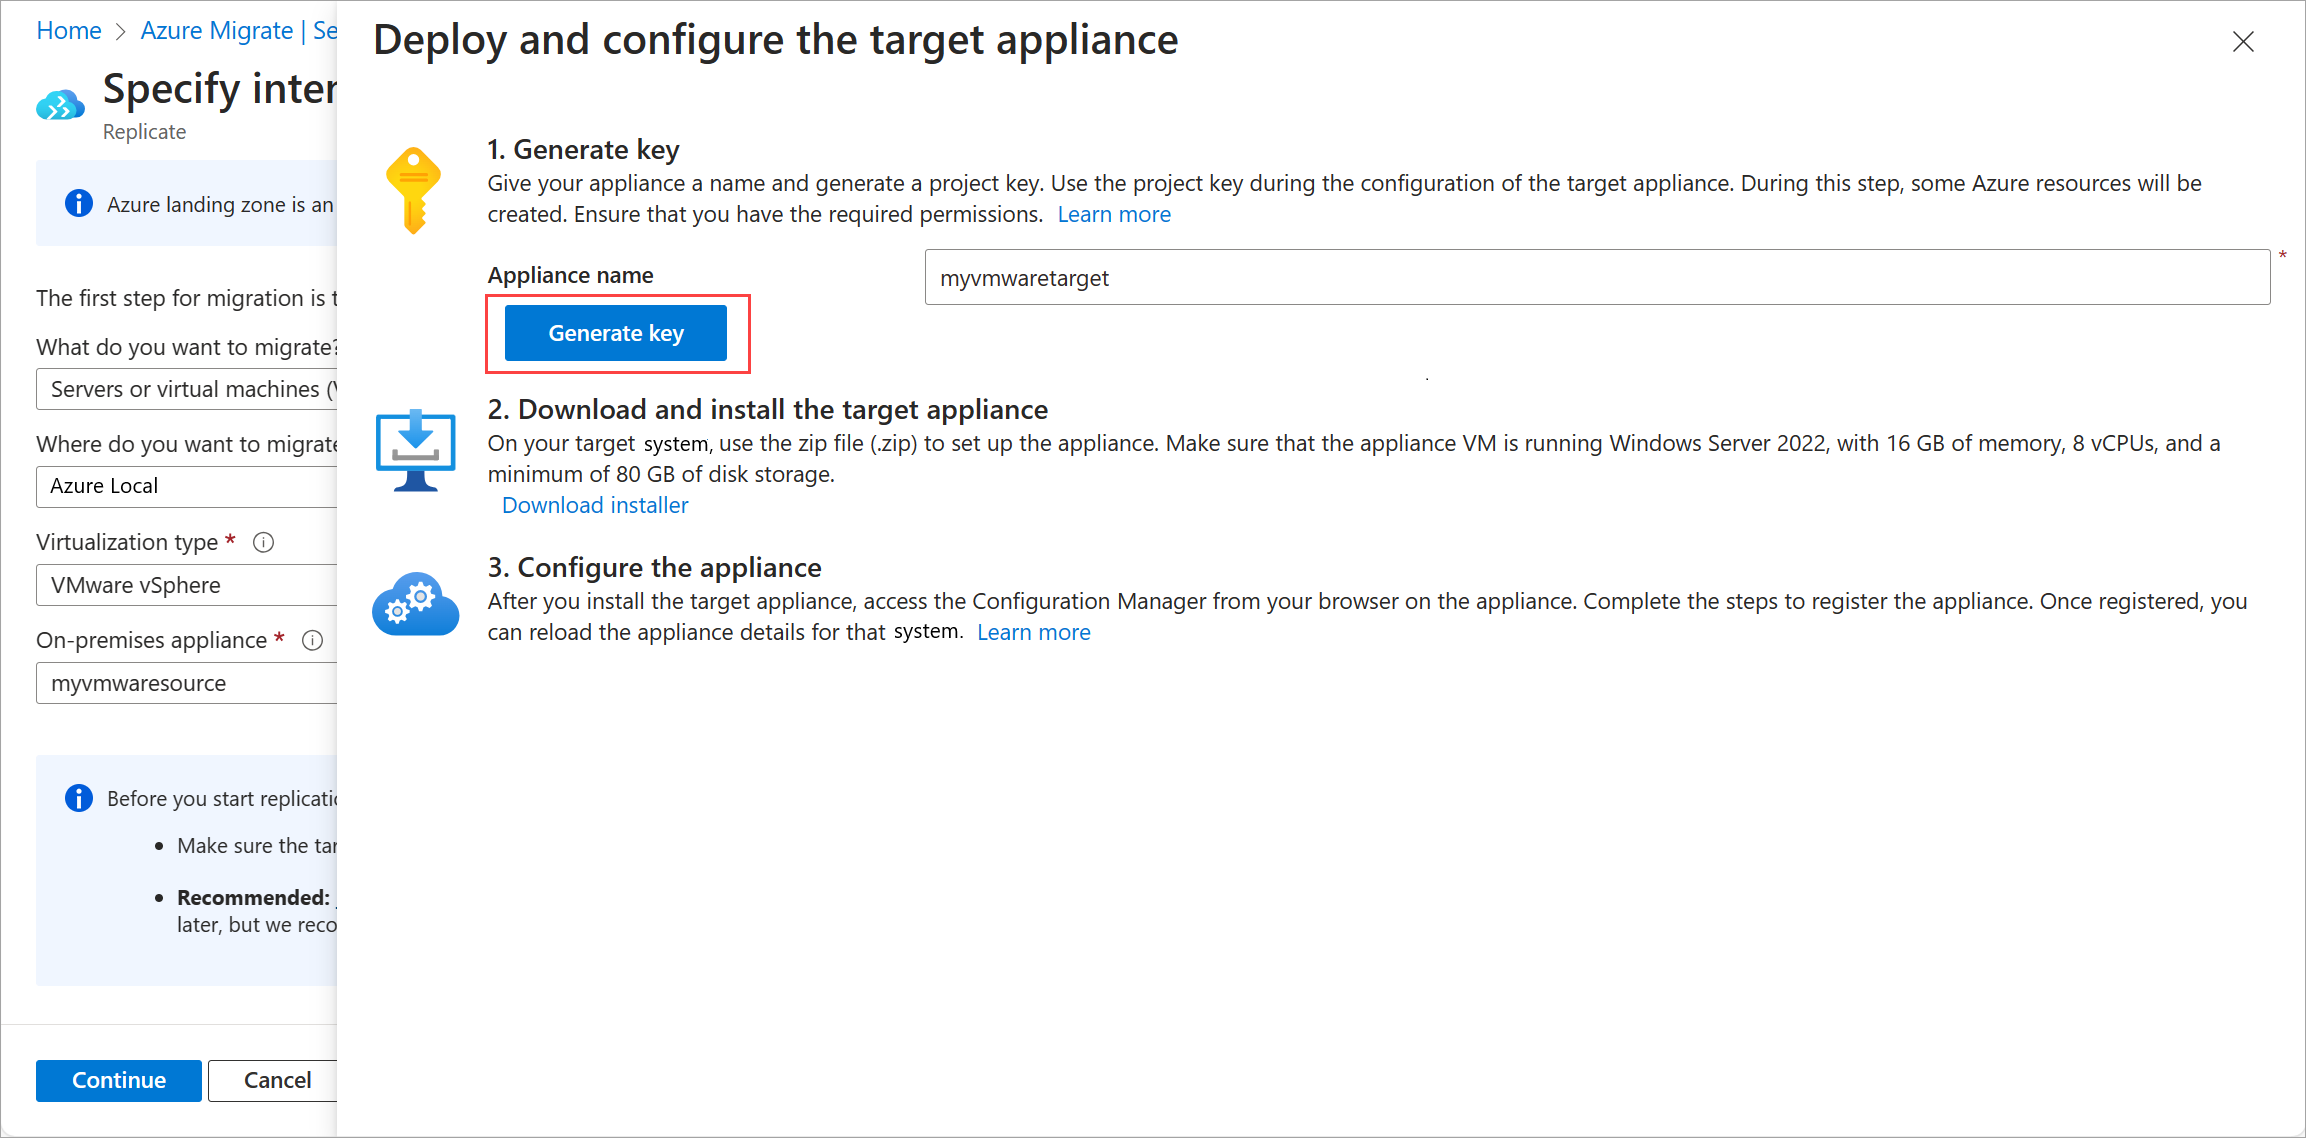
On the Deploy and configure the target appliance pane, provide a name for the target appliance and then select Generate key.
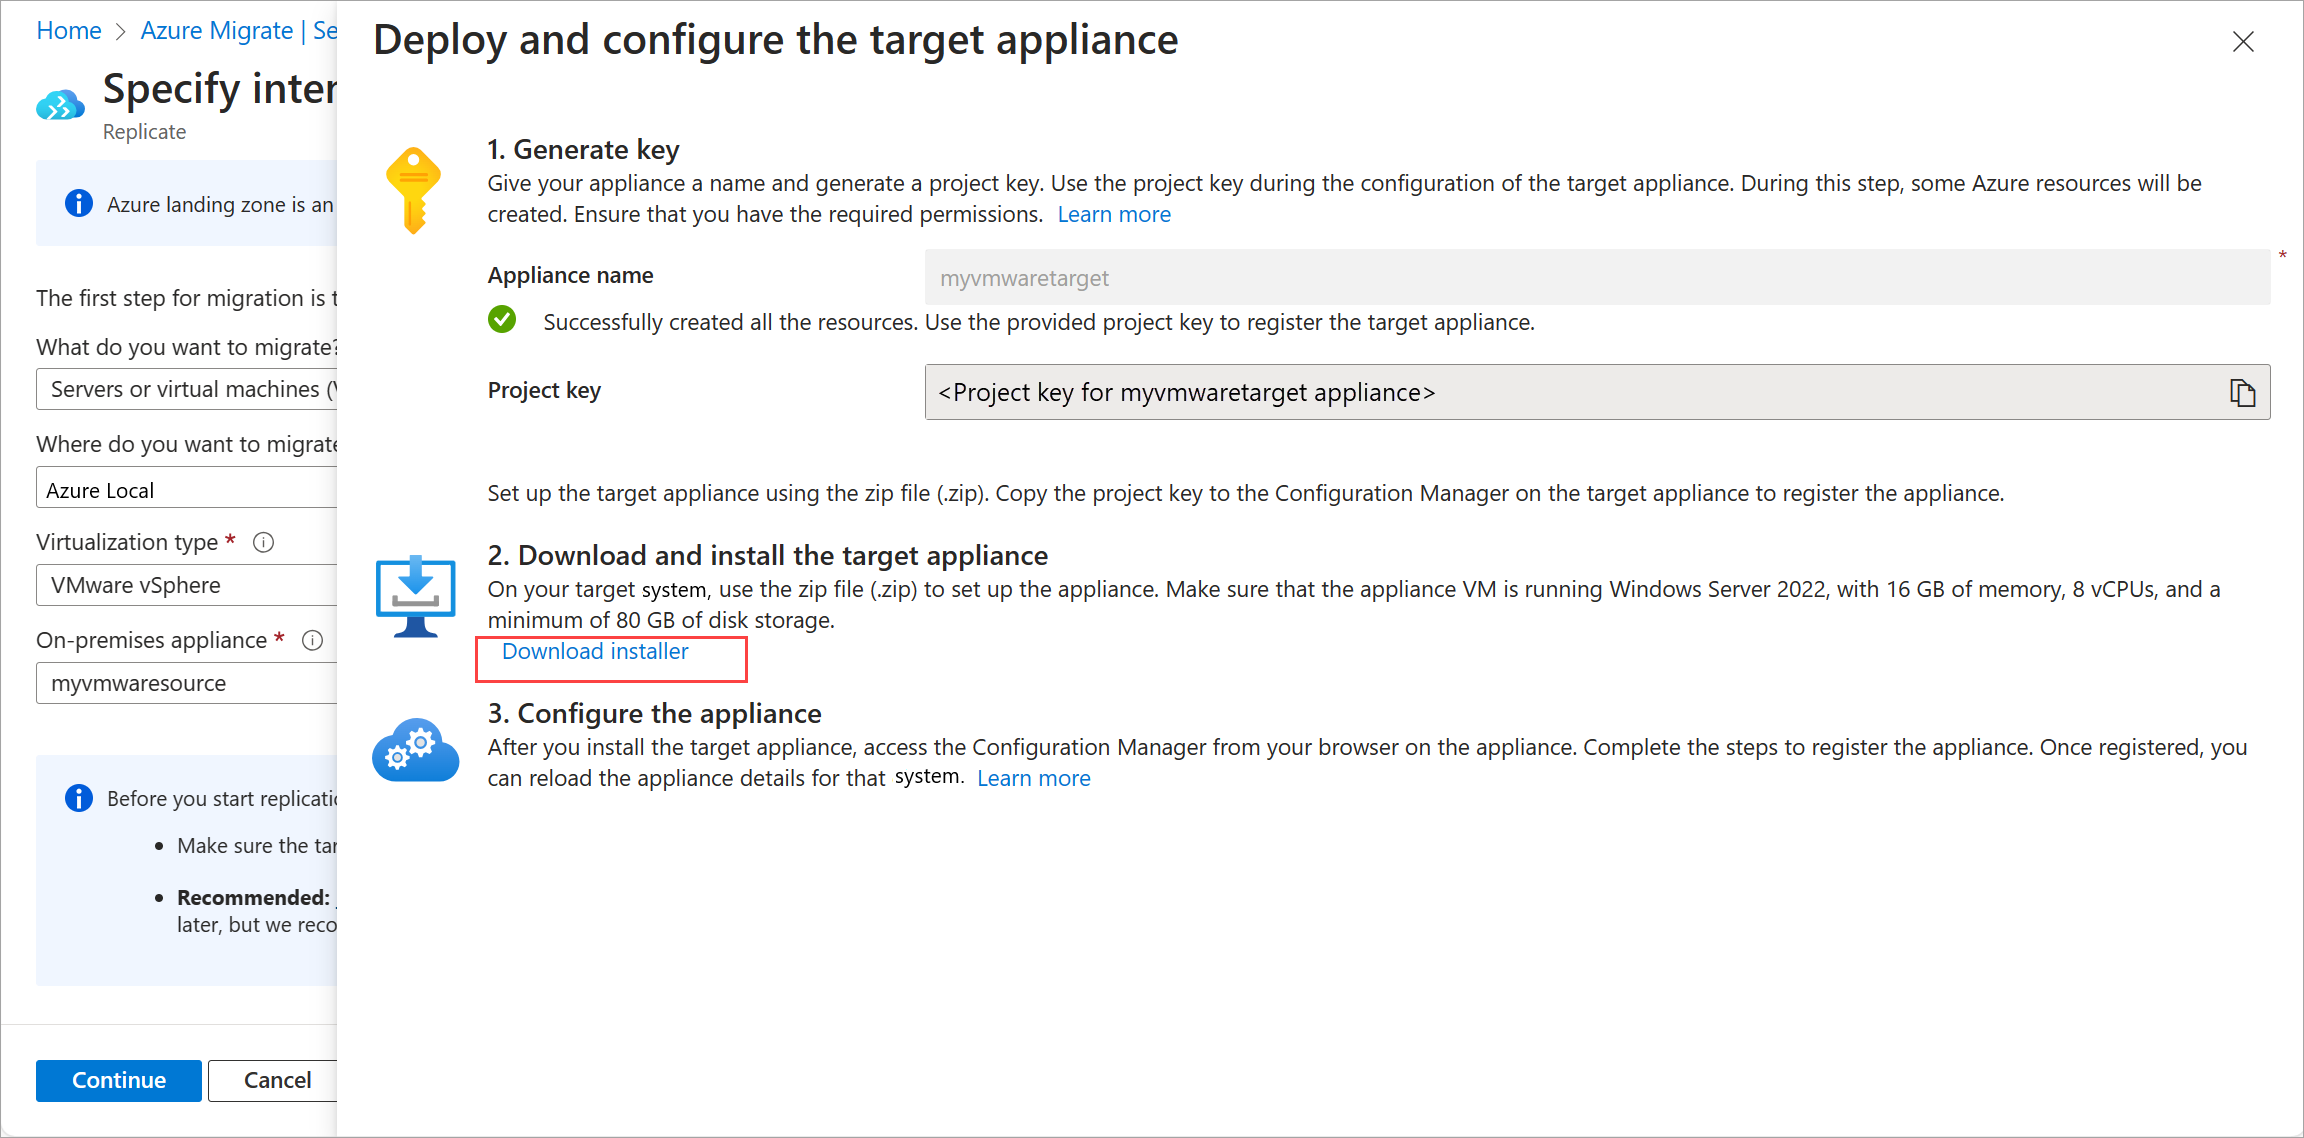
Copy the Project key (to a text editor such as Notepad) and save it for later use.
Create the target appliance
You can download the appliance from a .zip file. Under Step 2: Download Azure Migrate appliance, select Download installer.
Install using a script (.zip file)
This step applies to the downloaded .zip file.
Using Hyper-V Manager, create a standalone (non-HA) VM on the target Azure Local machine running on Windows Server 2022 with 80 GB (min) disk storage, 16 GB (min) memory, and 8 virtual processors. Make sure that the VM has access to the internet.
In Hyper-V Manager, select the host.
Under Hyper-V settings, select Enhanced Session Mode Policy and ensure Allow enhanced session mode is enabled. For more information, see Turn on enhanced session mode on a Hyper-V host.
Sign into the VM as an administrator.
Copy and paste the downloaded .zip file to the VM virtual disk that you created and extract it as needed.
As an administrator, run the following PowerShell script from the folder of the extracted files to install the target appliance:
Set-ExecutionPolicy -ExecutionPolicy Unrestricted
.\AzureMigrateInstaller.ps1 -Scenario AzureStackHCI -Cloud Public -PrivateEndpoint:$false
Restart and sign into the VM.
Register the target appliance
Sign in to the target appliance VM.
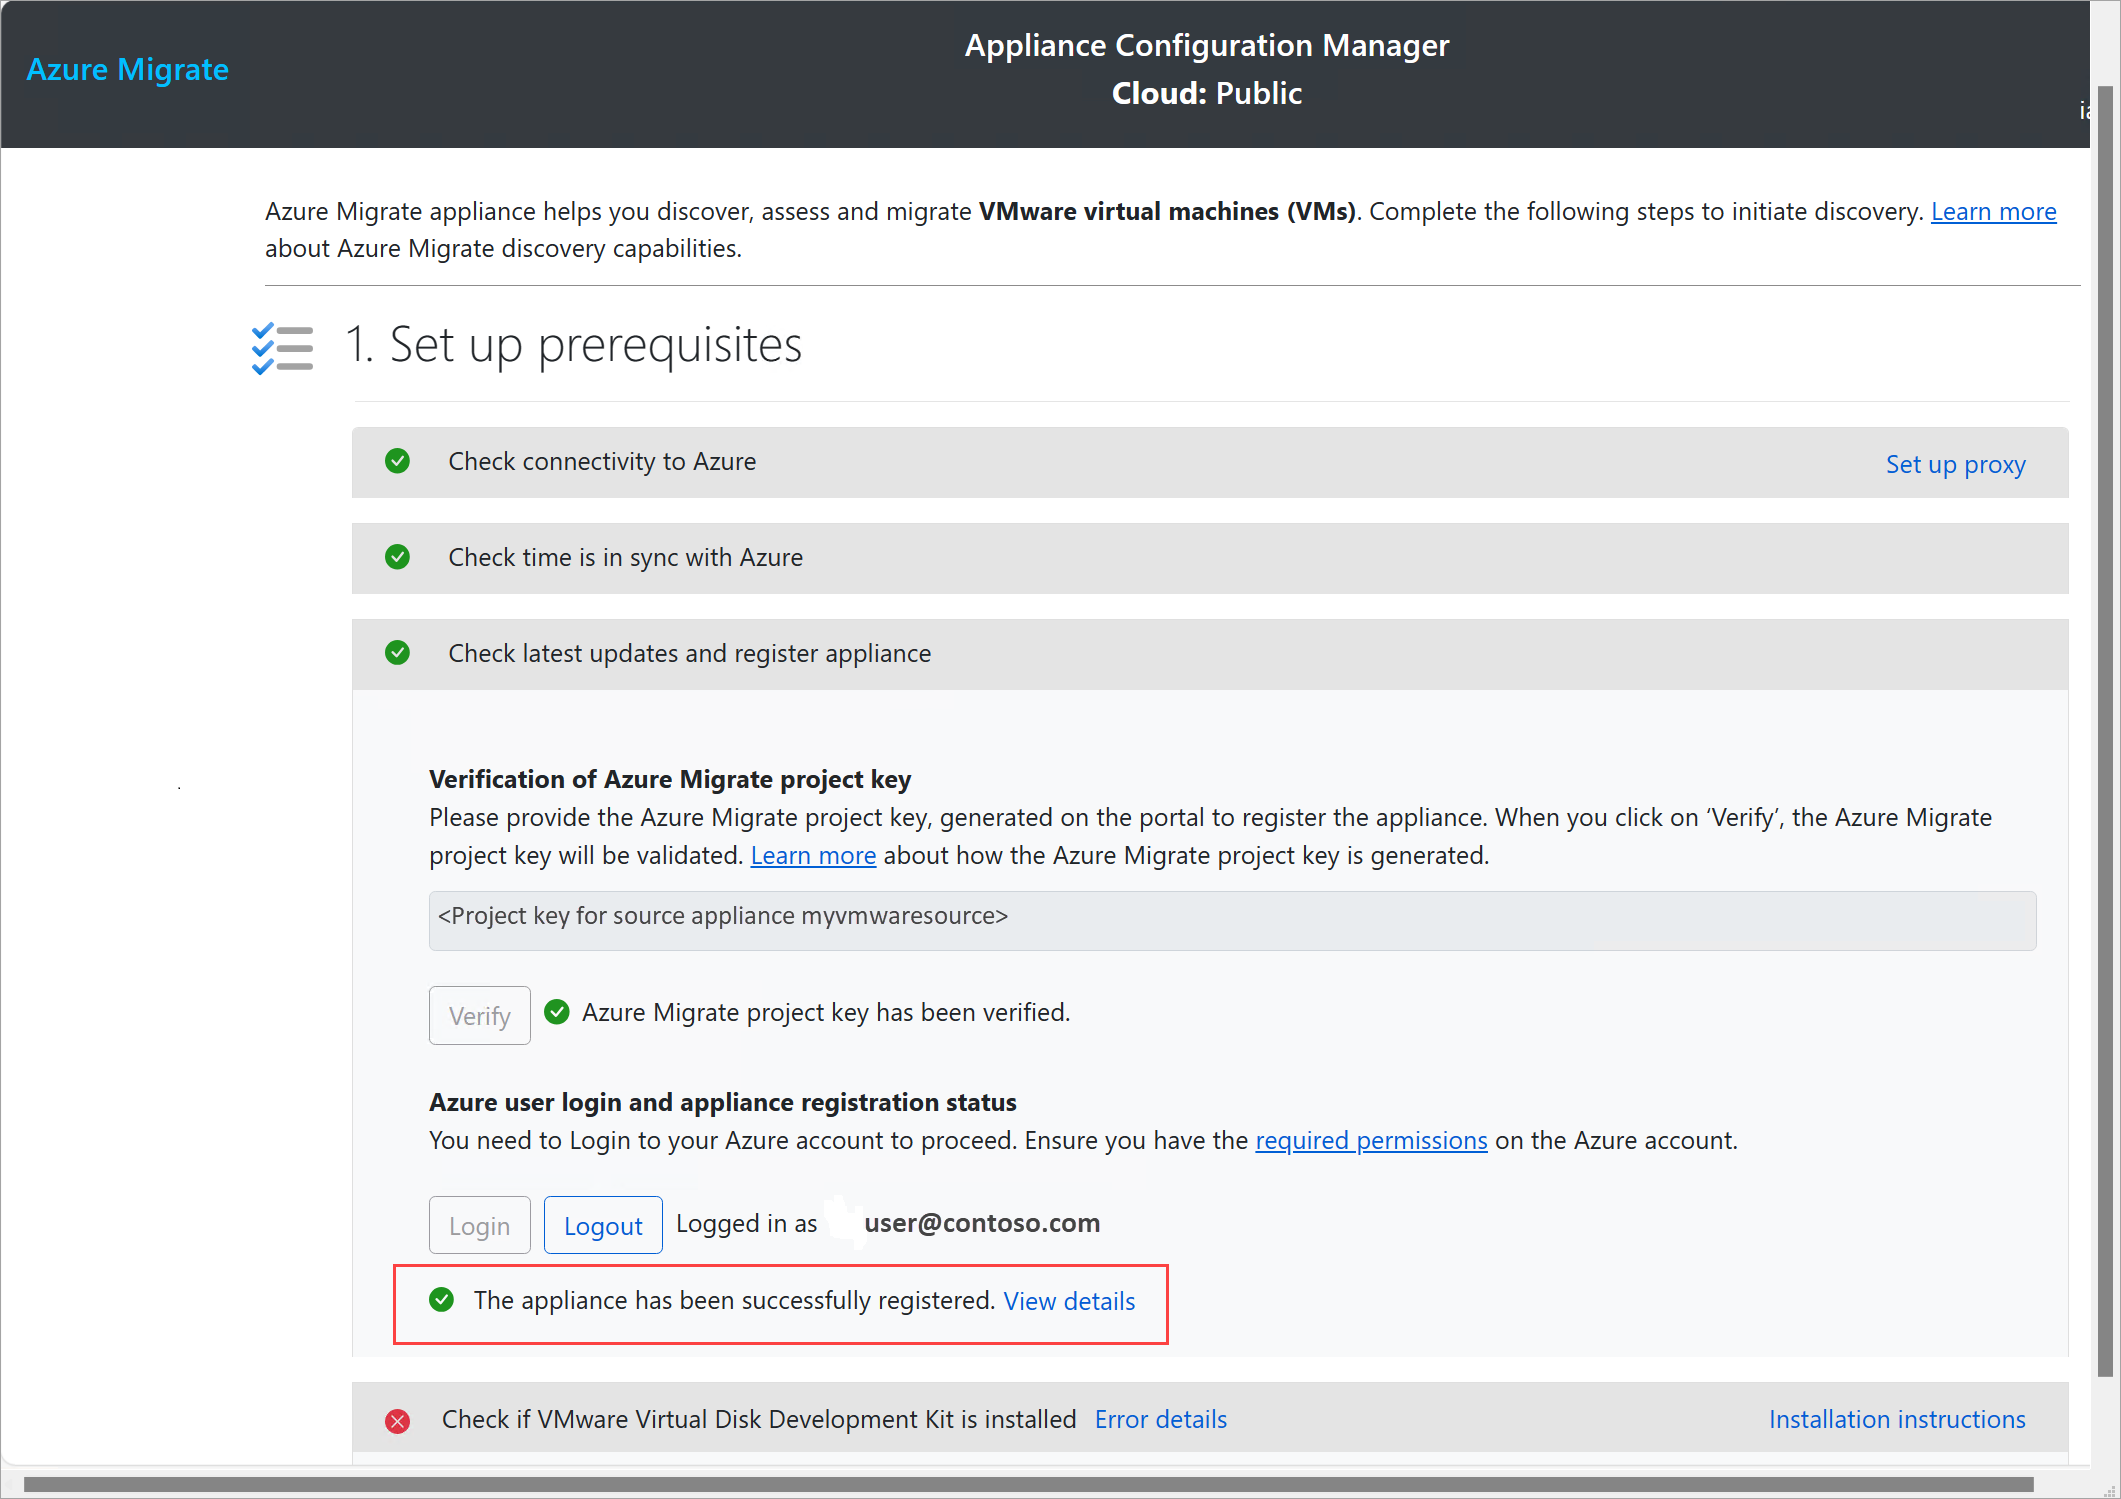
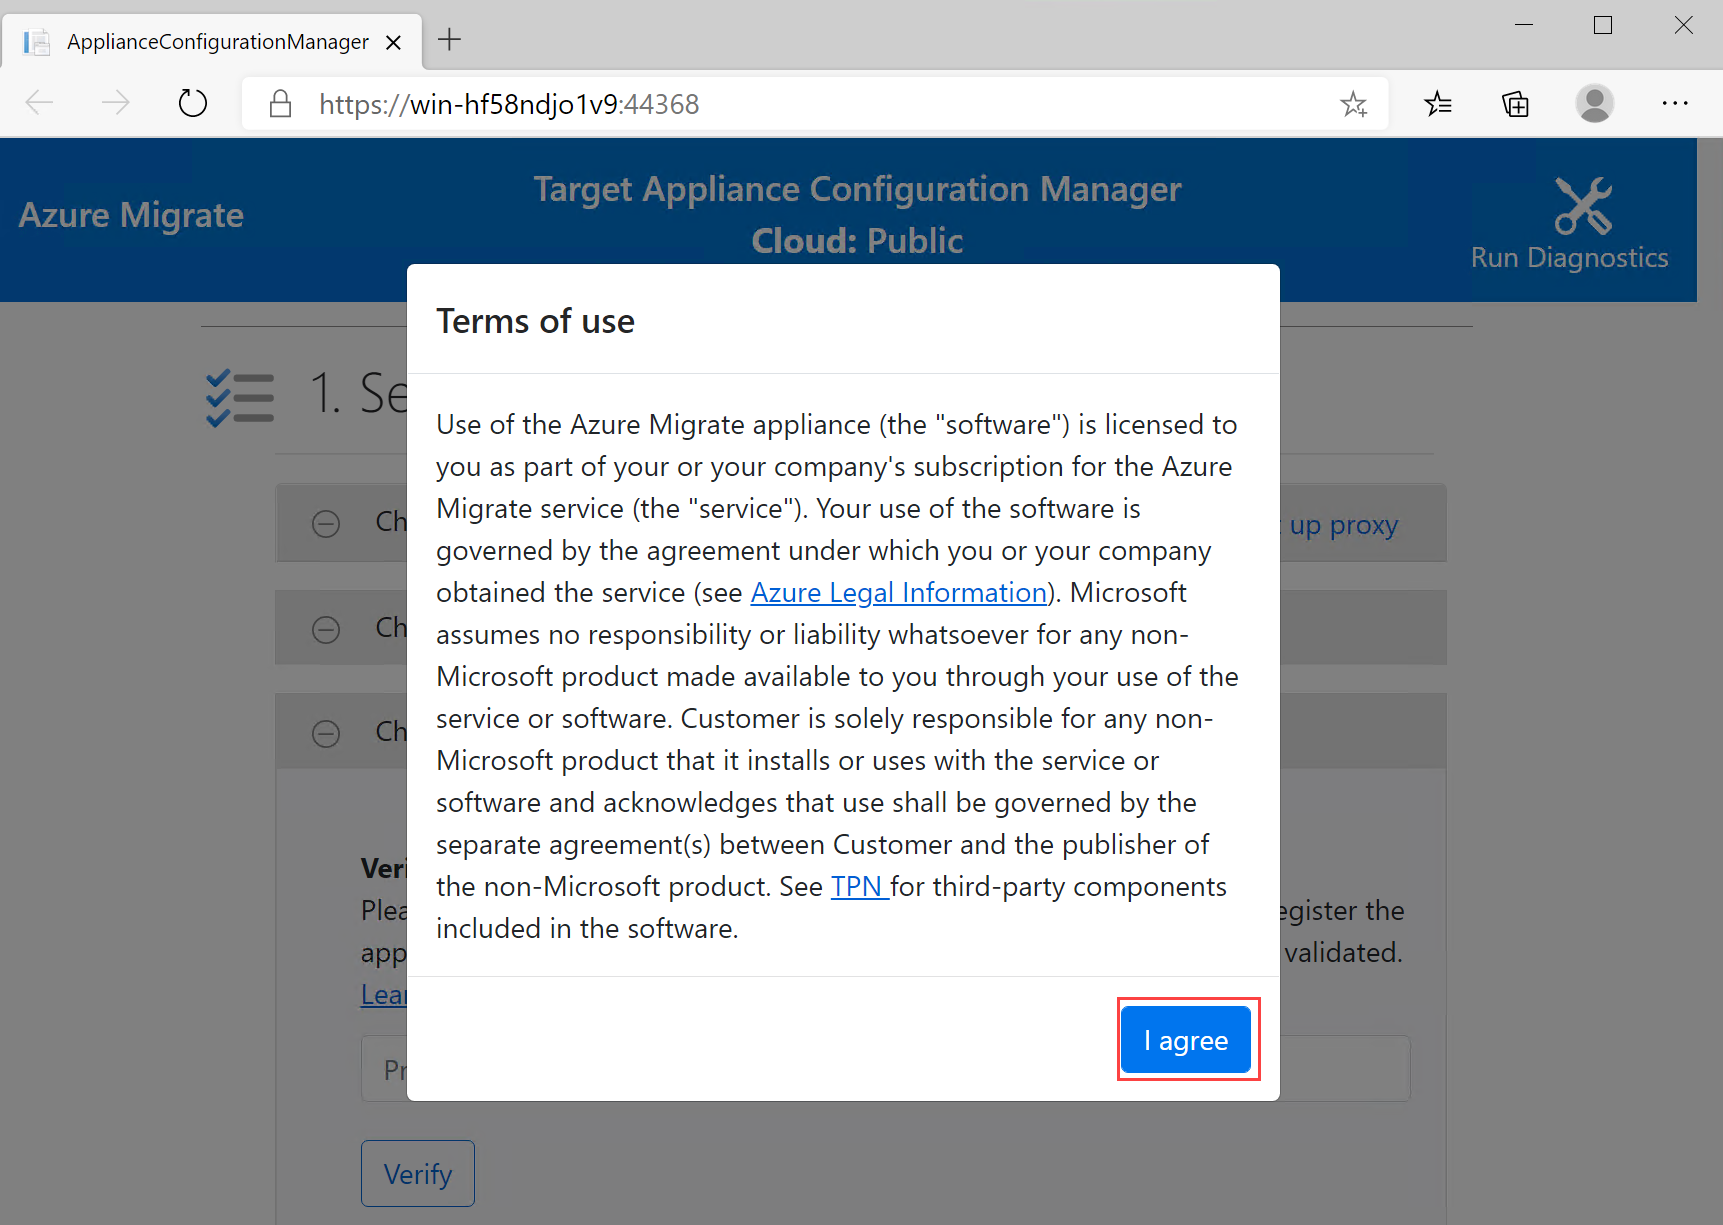
Open Azure Migrate Target Appliance Configuration Manager from the desktop shortcut. Read and accept the Terms of Use.
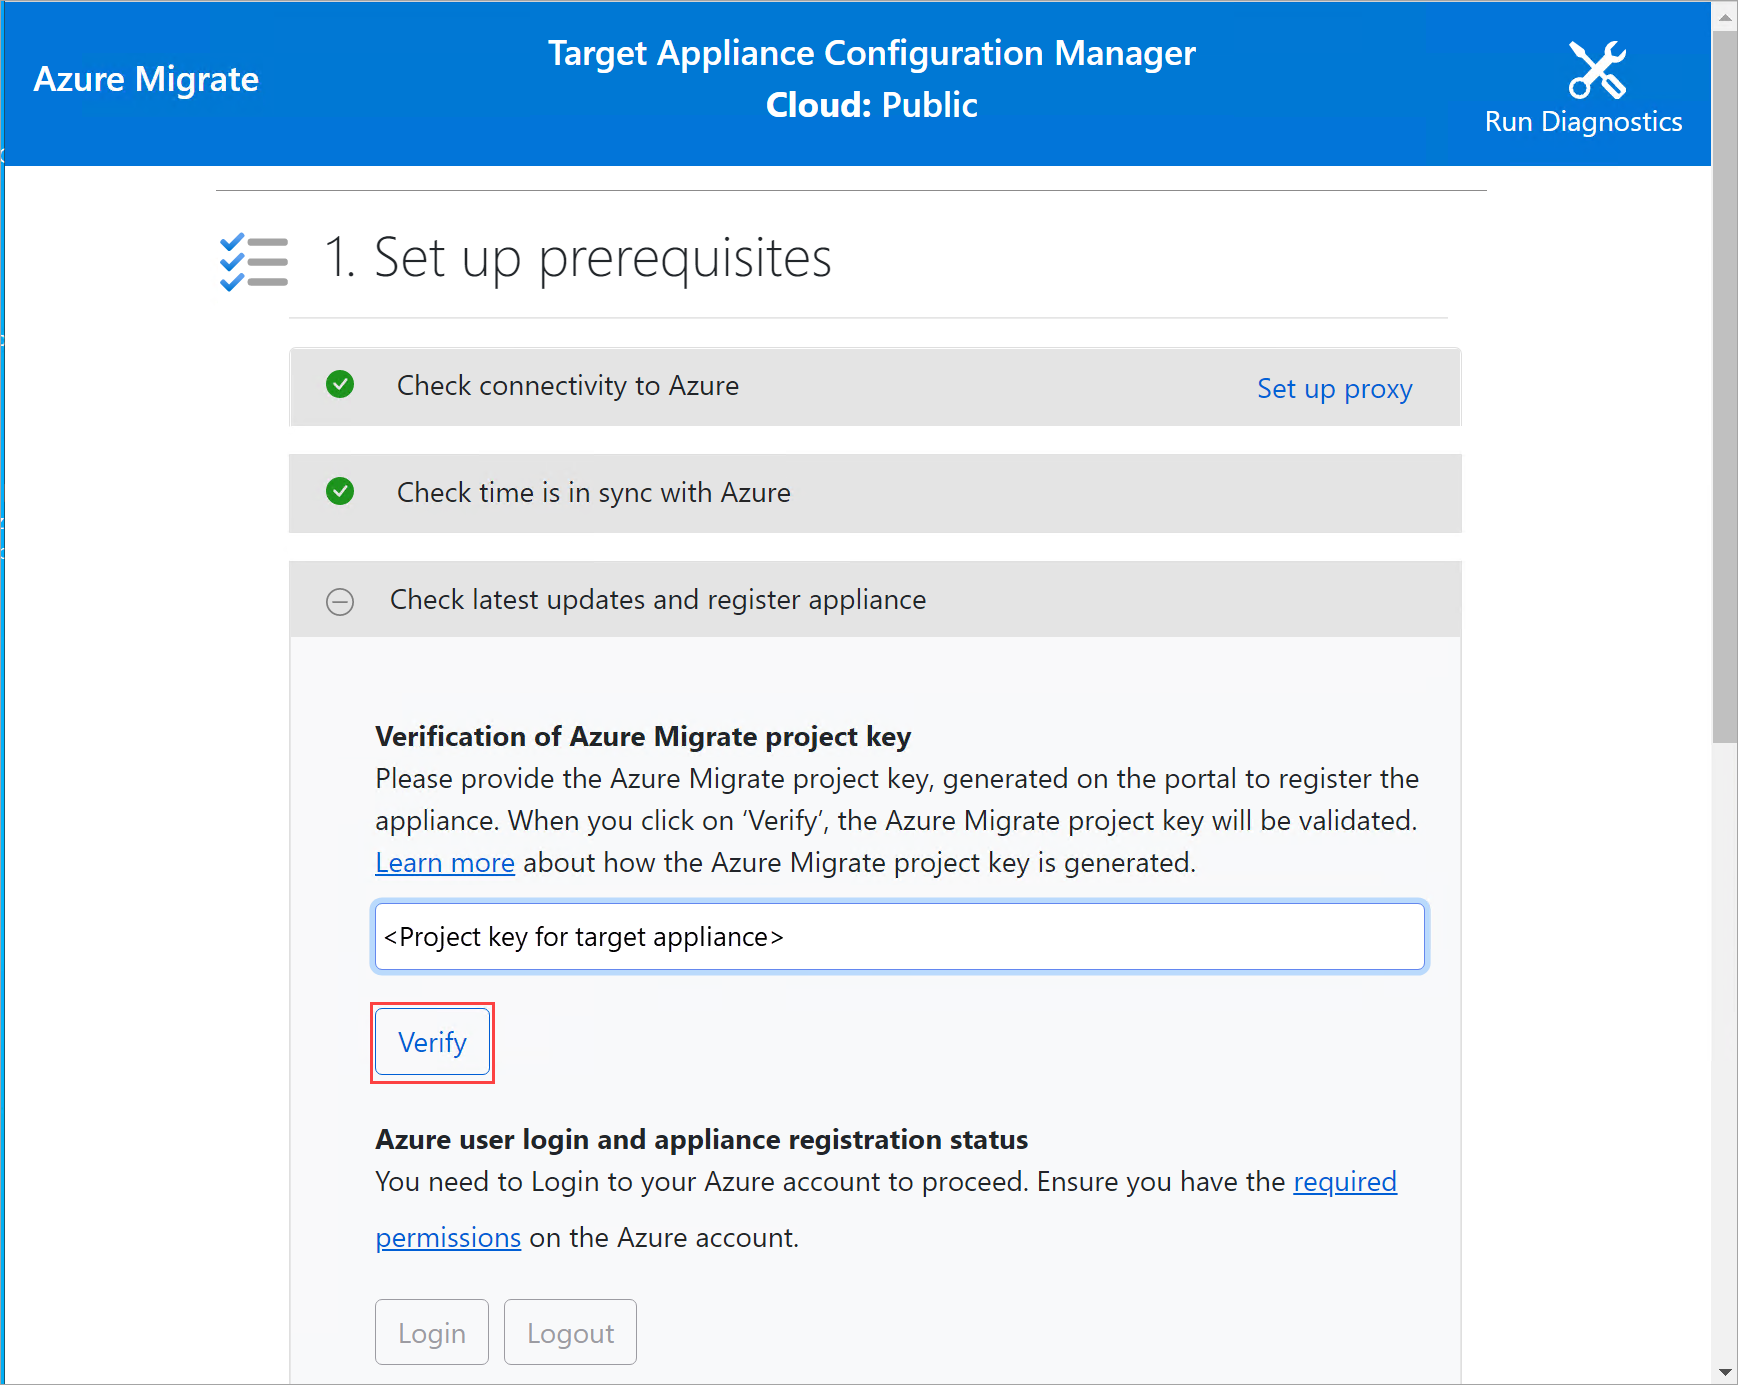
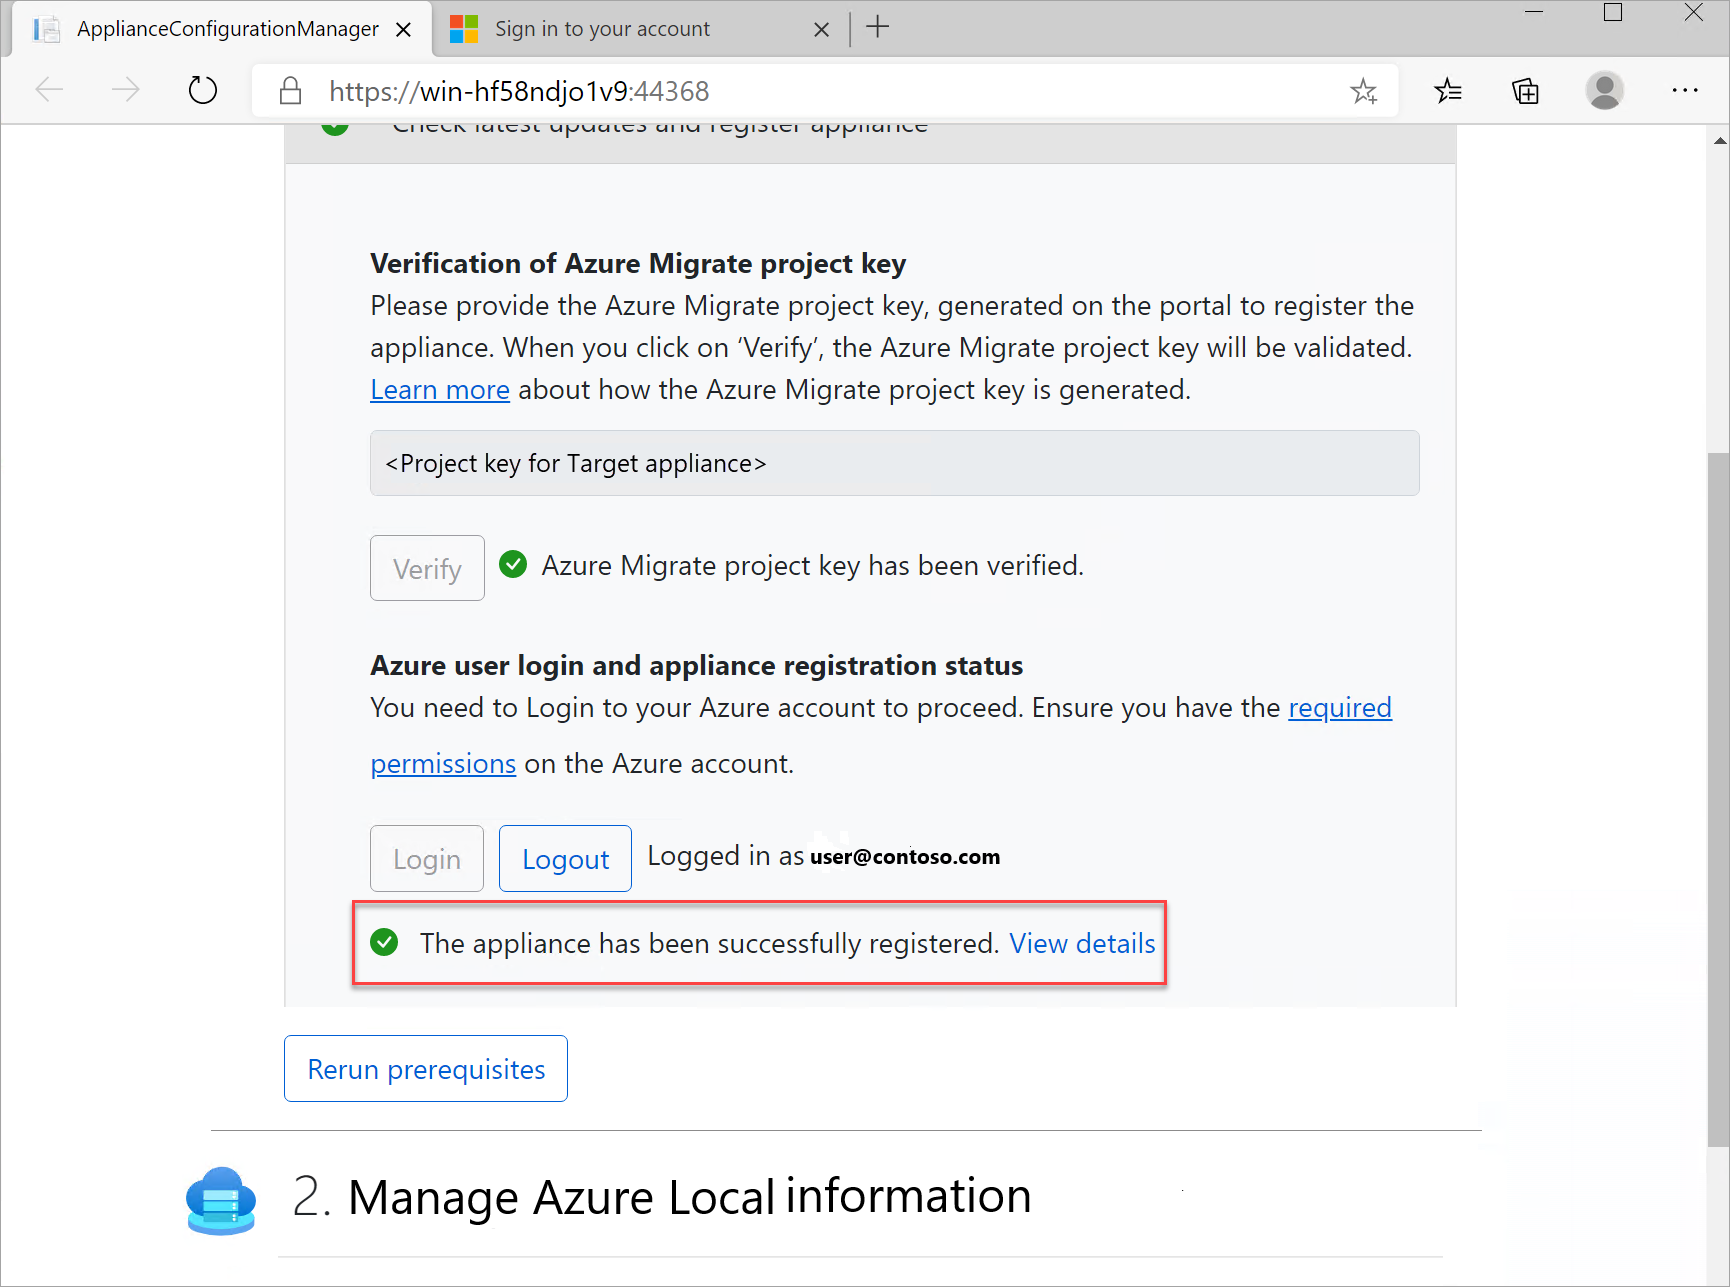
Locate the target key that you previously generated, paste it in the field under Verification of Azure Migrate project key, and then select Verify.
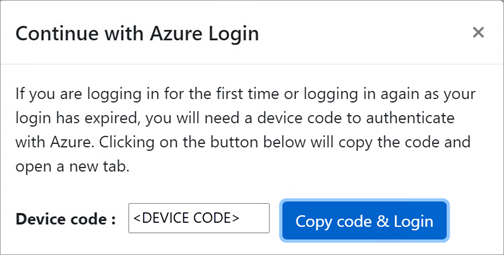
After the verification is complete, select Log in and sign in to your Azure account.
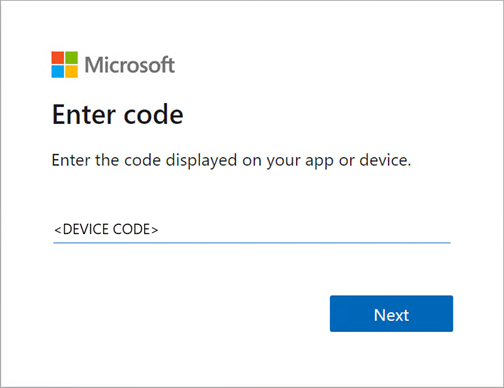
Enter the code that is displayed in your Authenticator (or similar) app for MFA authentication.
Wait until you see The appliance has been successfully registered message.
Sign in to Microsoft Azure PowerShell using the code displayed in your Authenticator app. It can take up to 10 minutes for the appliance to be registered.
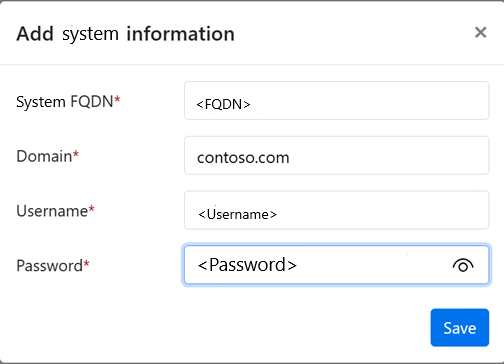
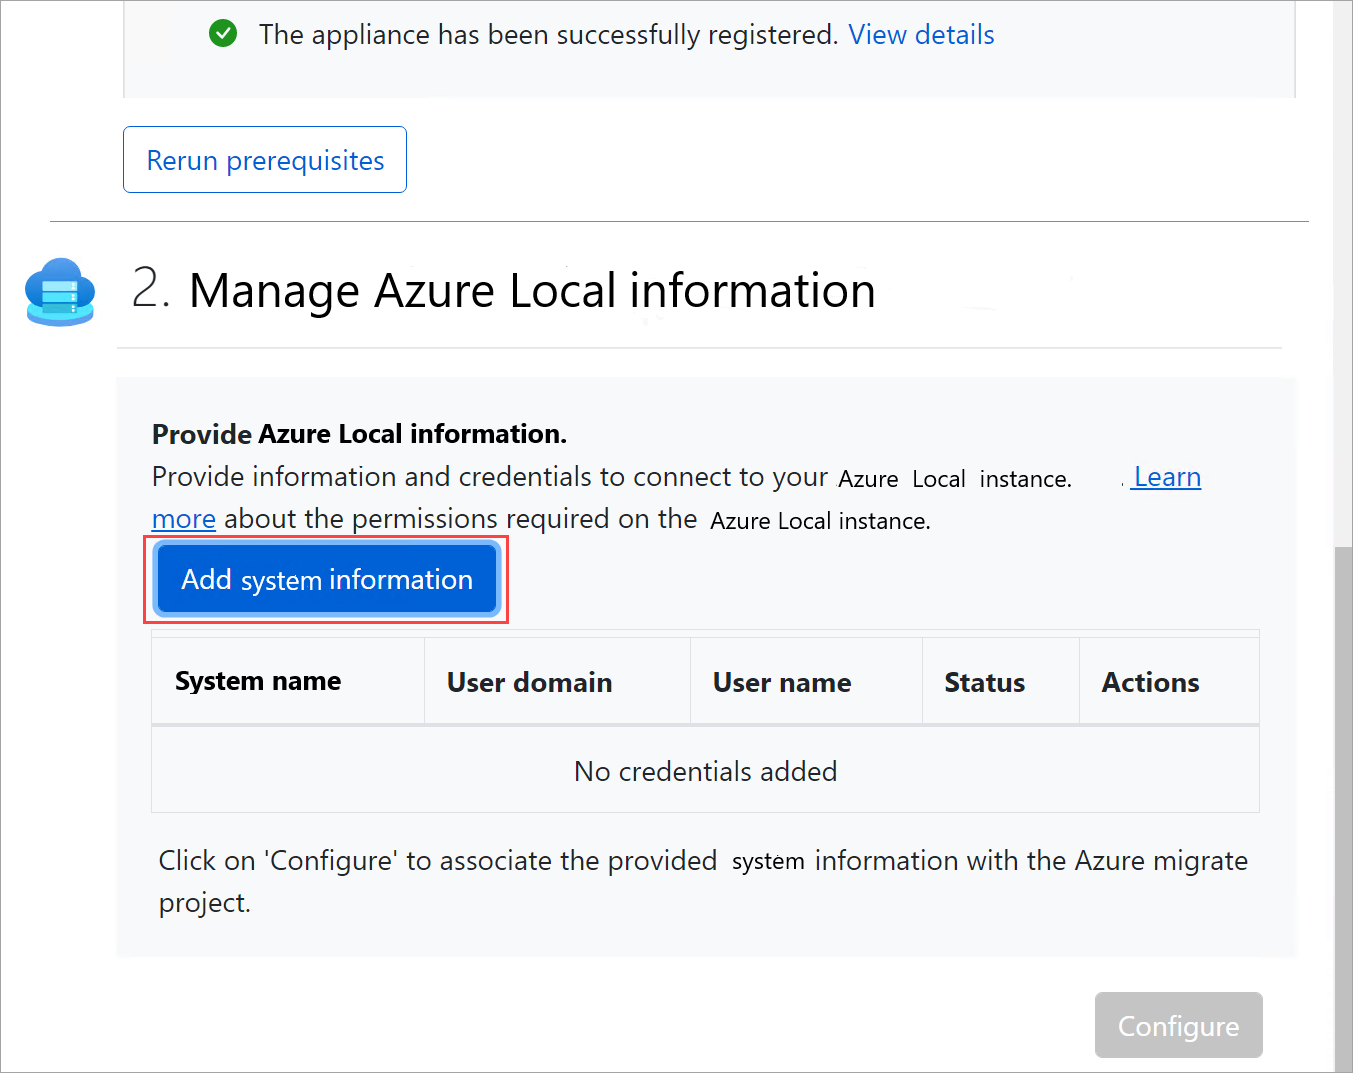
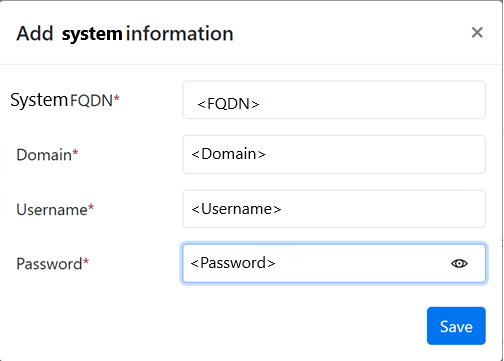
After the appliance is registered, under Manage Azure Local instance information, select Add system information.
For your target Azure Local instance, enter the system FQDN (example format is systemname.domain.com), domain name, username, and password, and then select Save.
After the credentials are accepted, the status changes to Validated. Select Configure.
Wait until the configuration is complete and you see this message: Successfully configured Azure Migrate project.
Step 3: Start replication
In the Azure portal, go to your Azure Migrate project and select Servers, databases and web apps.
Under Migration tools, select Replicate.
On the Specify intent page:
- What do you want to migrate is automatically populated as Servers or virtual machines (VM).
- Select Azure Local for Where do you want to migrate to ?
- Select VMware vSphere for the Virtualization type.
- Select the source appliance as the On-premises appliance used for discovery.
- When finished, select Continue.
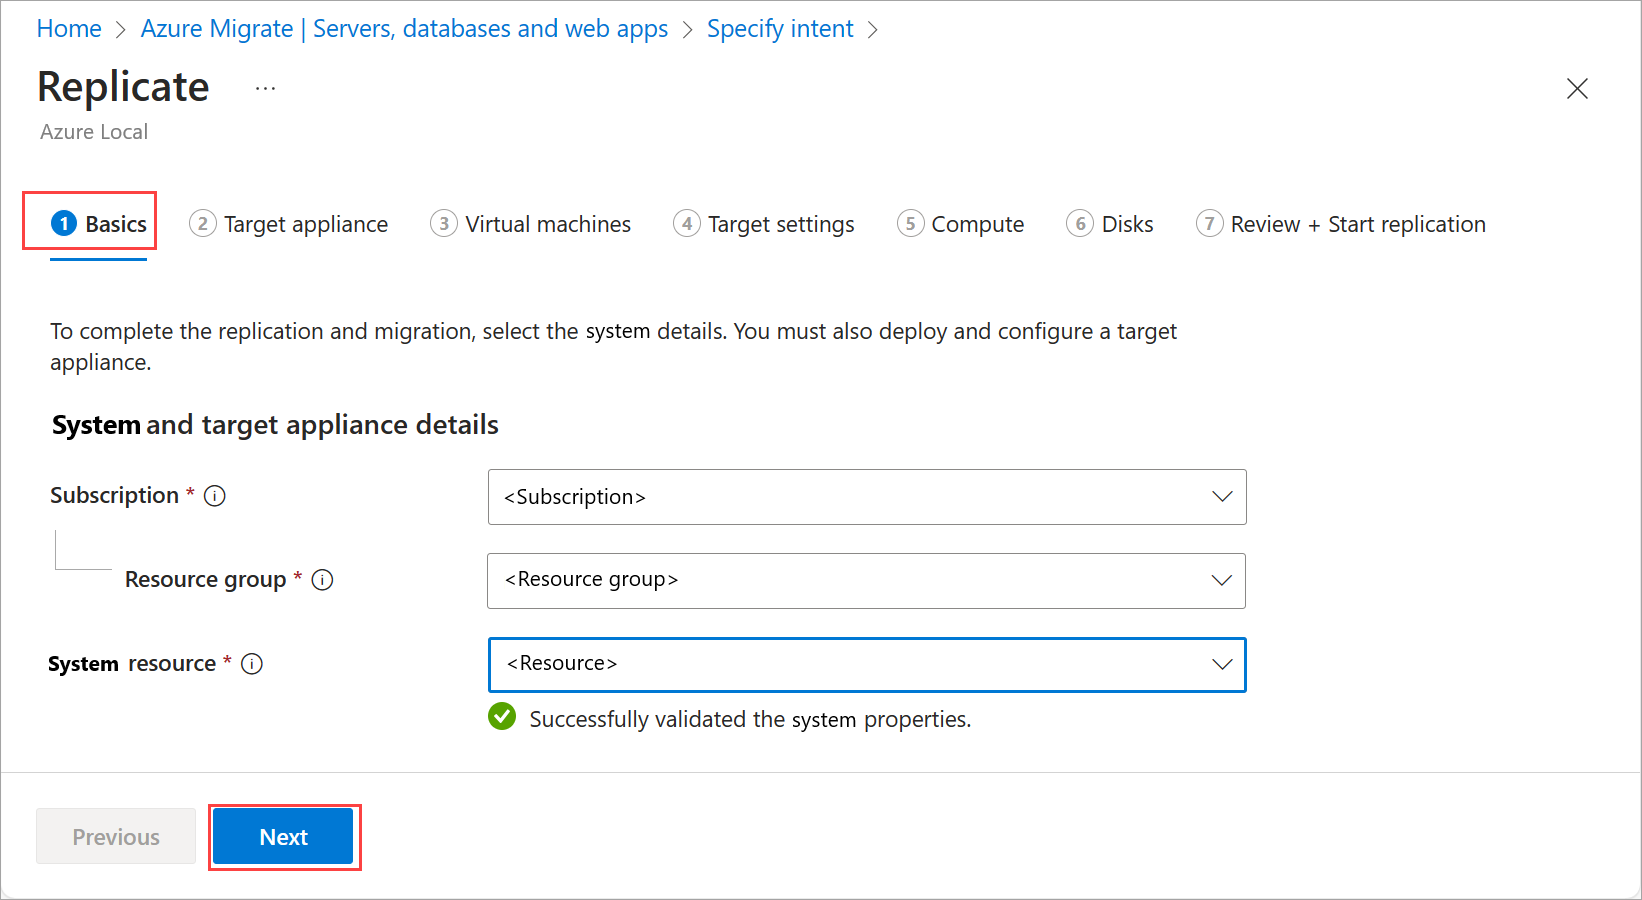
On the Replicate page, on the Basics tab:
- The subscription field is automatically populated. If this isn't the subscription that has your target Azure Local instance, choose the Azure subscription that has the system.
- Select the resource group associated with your target system.
- For Target system, select the Azure Local resource.
- Verify there's a green check for the system. A green check indicates that all the prerequisites such as Arc Resource Bridge are configured on this system.
- When finished, select Next.
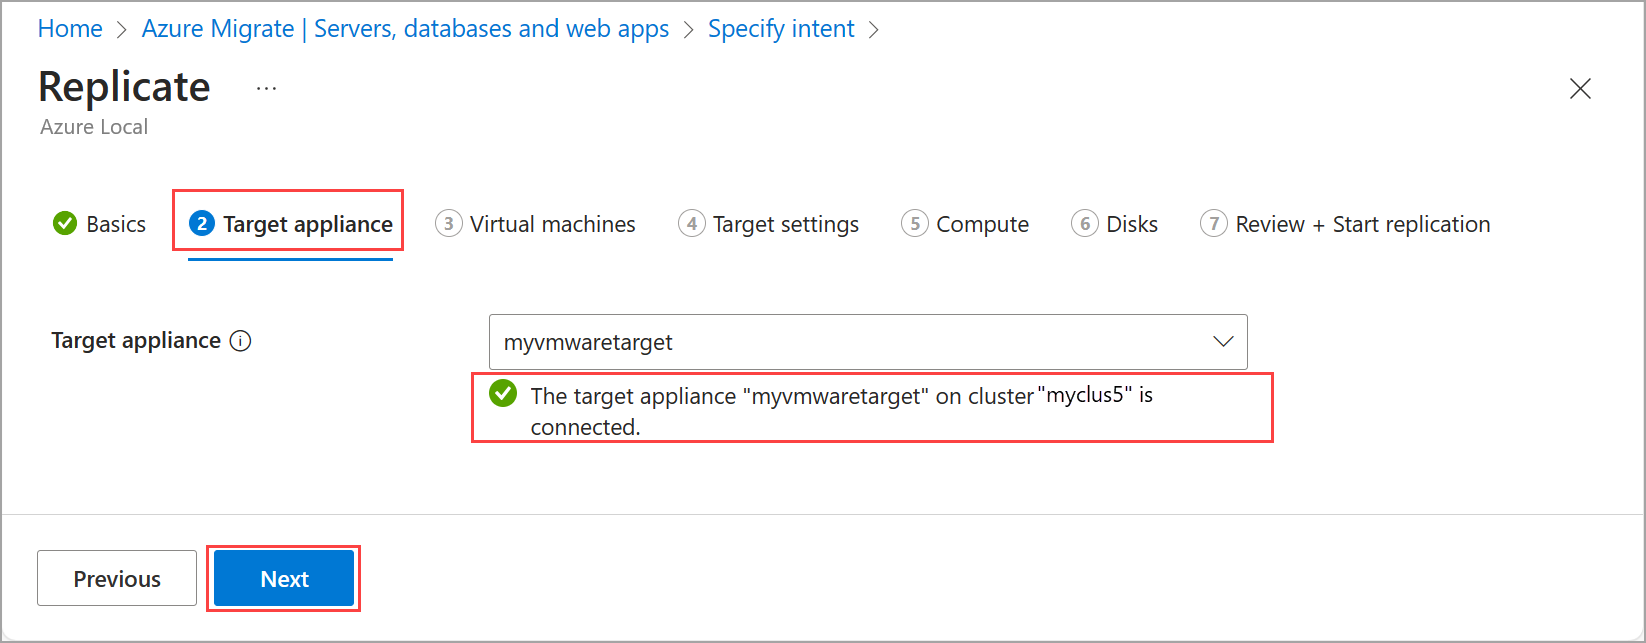
On the Target appliance tab, look for a green checkmark to verify that the target appliance is connected.
Note
A green checkmark indicates that the target appliance is successfully registered and configured. If you haven't configured your target appliance yet, you will see the configuration page here instead.
Select Next.
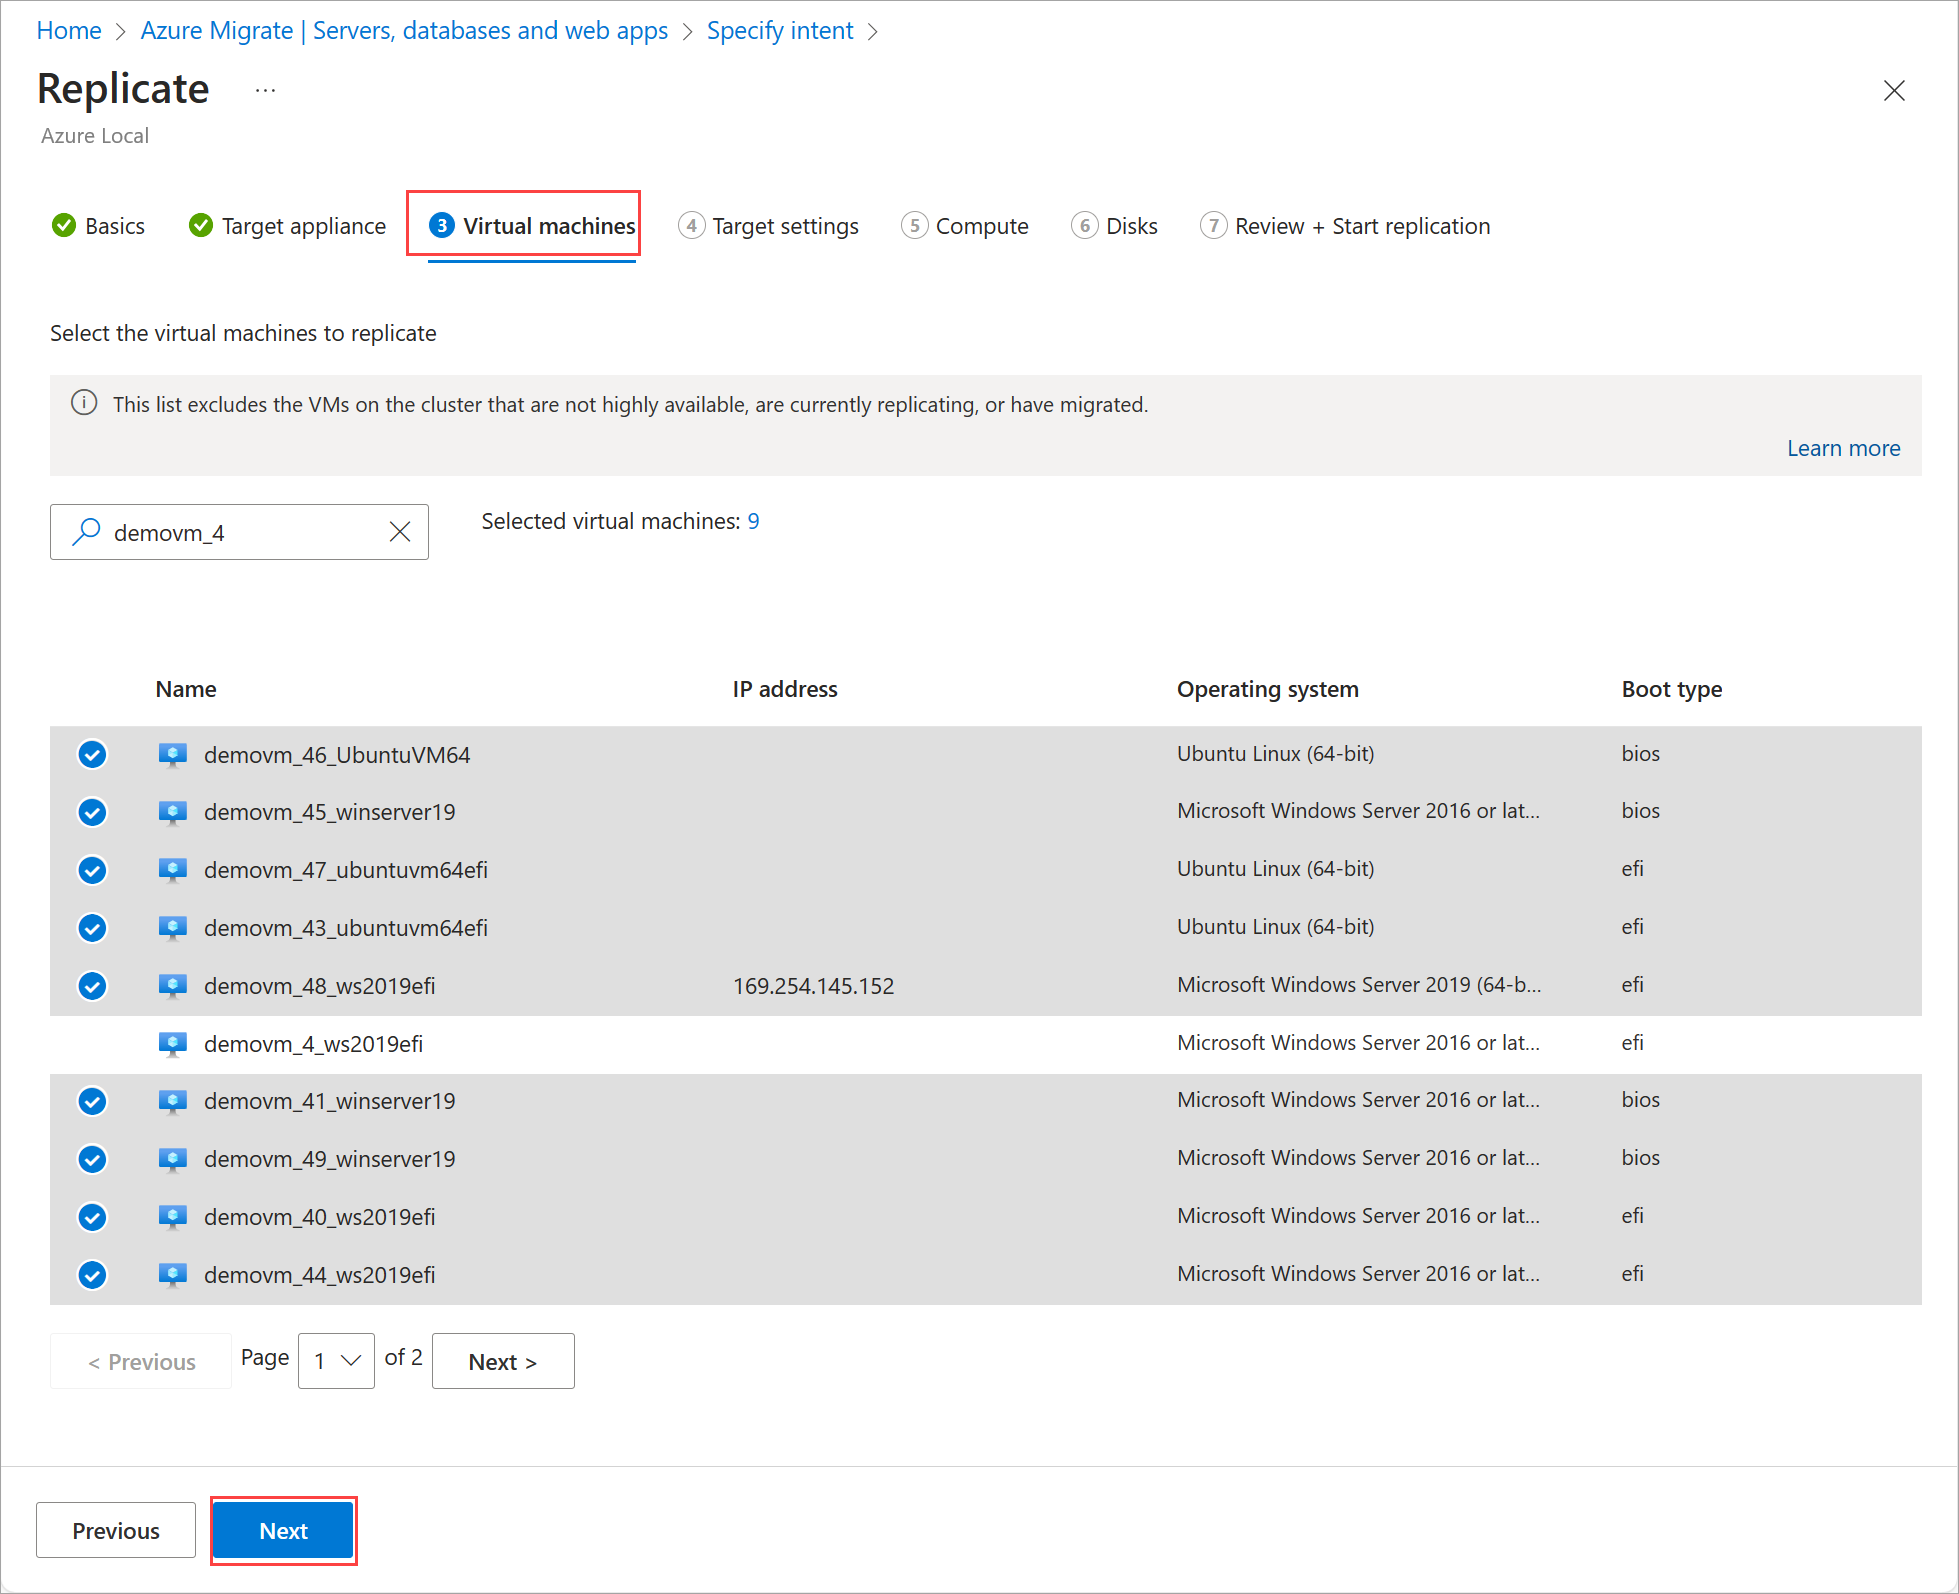
On the Virtual machines tab, verify the VMs were discovered and are listed. You can select up to 10 VMs from the portal list to replicate at one time. Select Next.
On the Target settings tab, complete these tasks:
The Storage account subscription is automatically populated. If this isn't the subscription where you want to create the storage account, choose another subscription.
Note
Migration requires a storage account to be created. This account must reside in the same subscription as your Azure project.
Select the Resource group to associate with your storage account.
The VM subscription is automatically populated.
For your Cache storage account, select an existing storage account. You can also select (New) Storage account to create a new storage account with a randomly generated name.
Note
We recommend that you create a new storage account to be used as your cache storage account.
Select a resource group to associate with your migrated VMs. This resource group can be different than the resource group associated with your storage account.
Select the logical network that you created as a prerequisite. The VMs are connected to this network.
If you don't see a logical network in the dropdown list, Create a logical network and select Reload logical network.
Select the storage path that you created as a prerequisite. The VMs are created at this storage path.
If you don't see a storage path in the dropdown list, Create a storage path and select Reload storage path.
When finished, select Next.
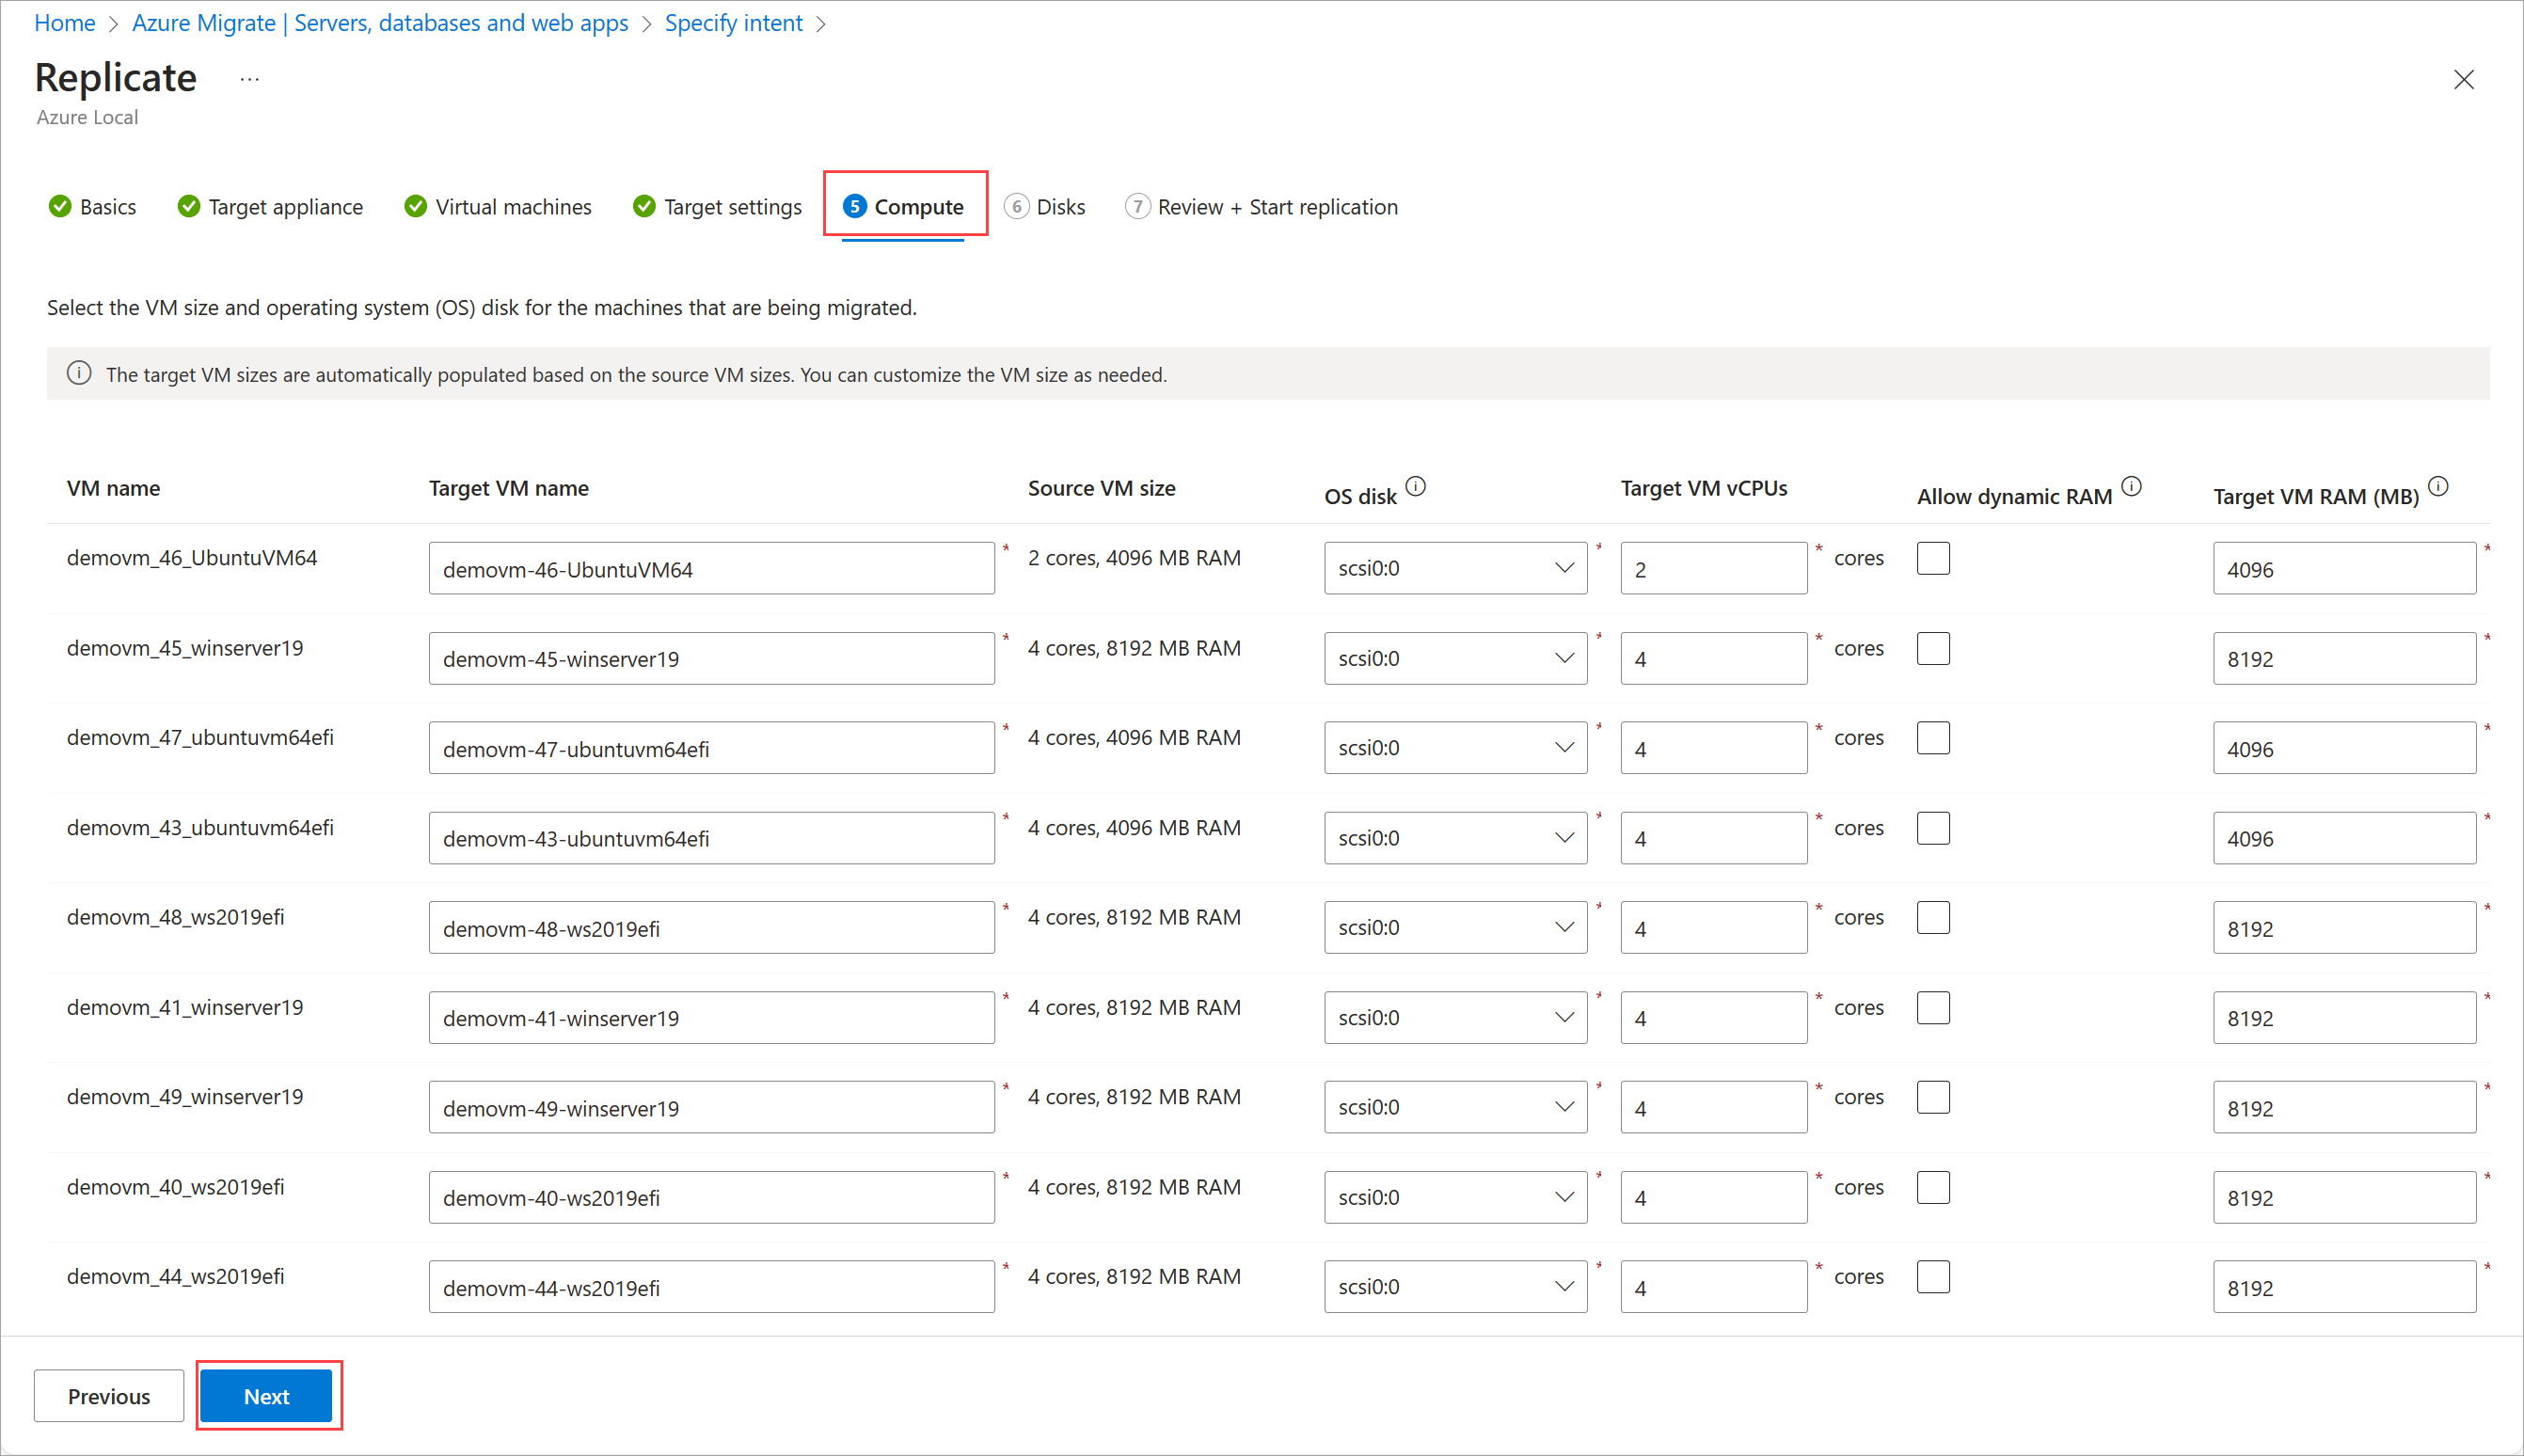
On the Compute tab:
Rename target VMs as needed. Make sure that the VM names conform to the Azure naming conventions.
Select the OS disk for each VM from the dropdown lists.
Configure number of vCPUs and RAM including selecting dynamic RAM for each VM, as needed.
When finished, select Next.
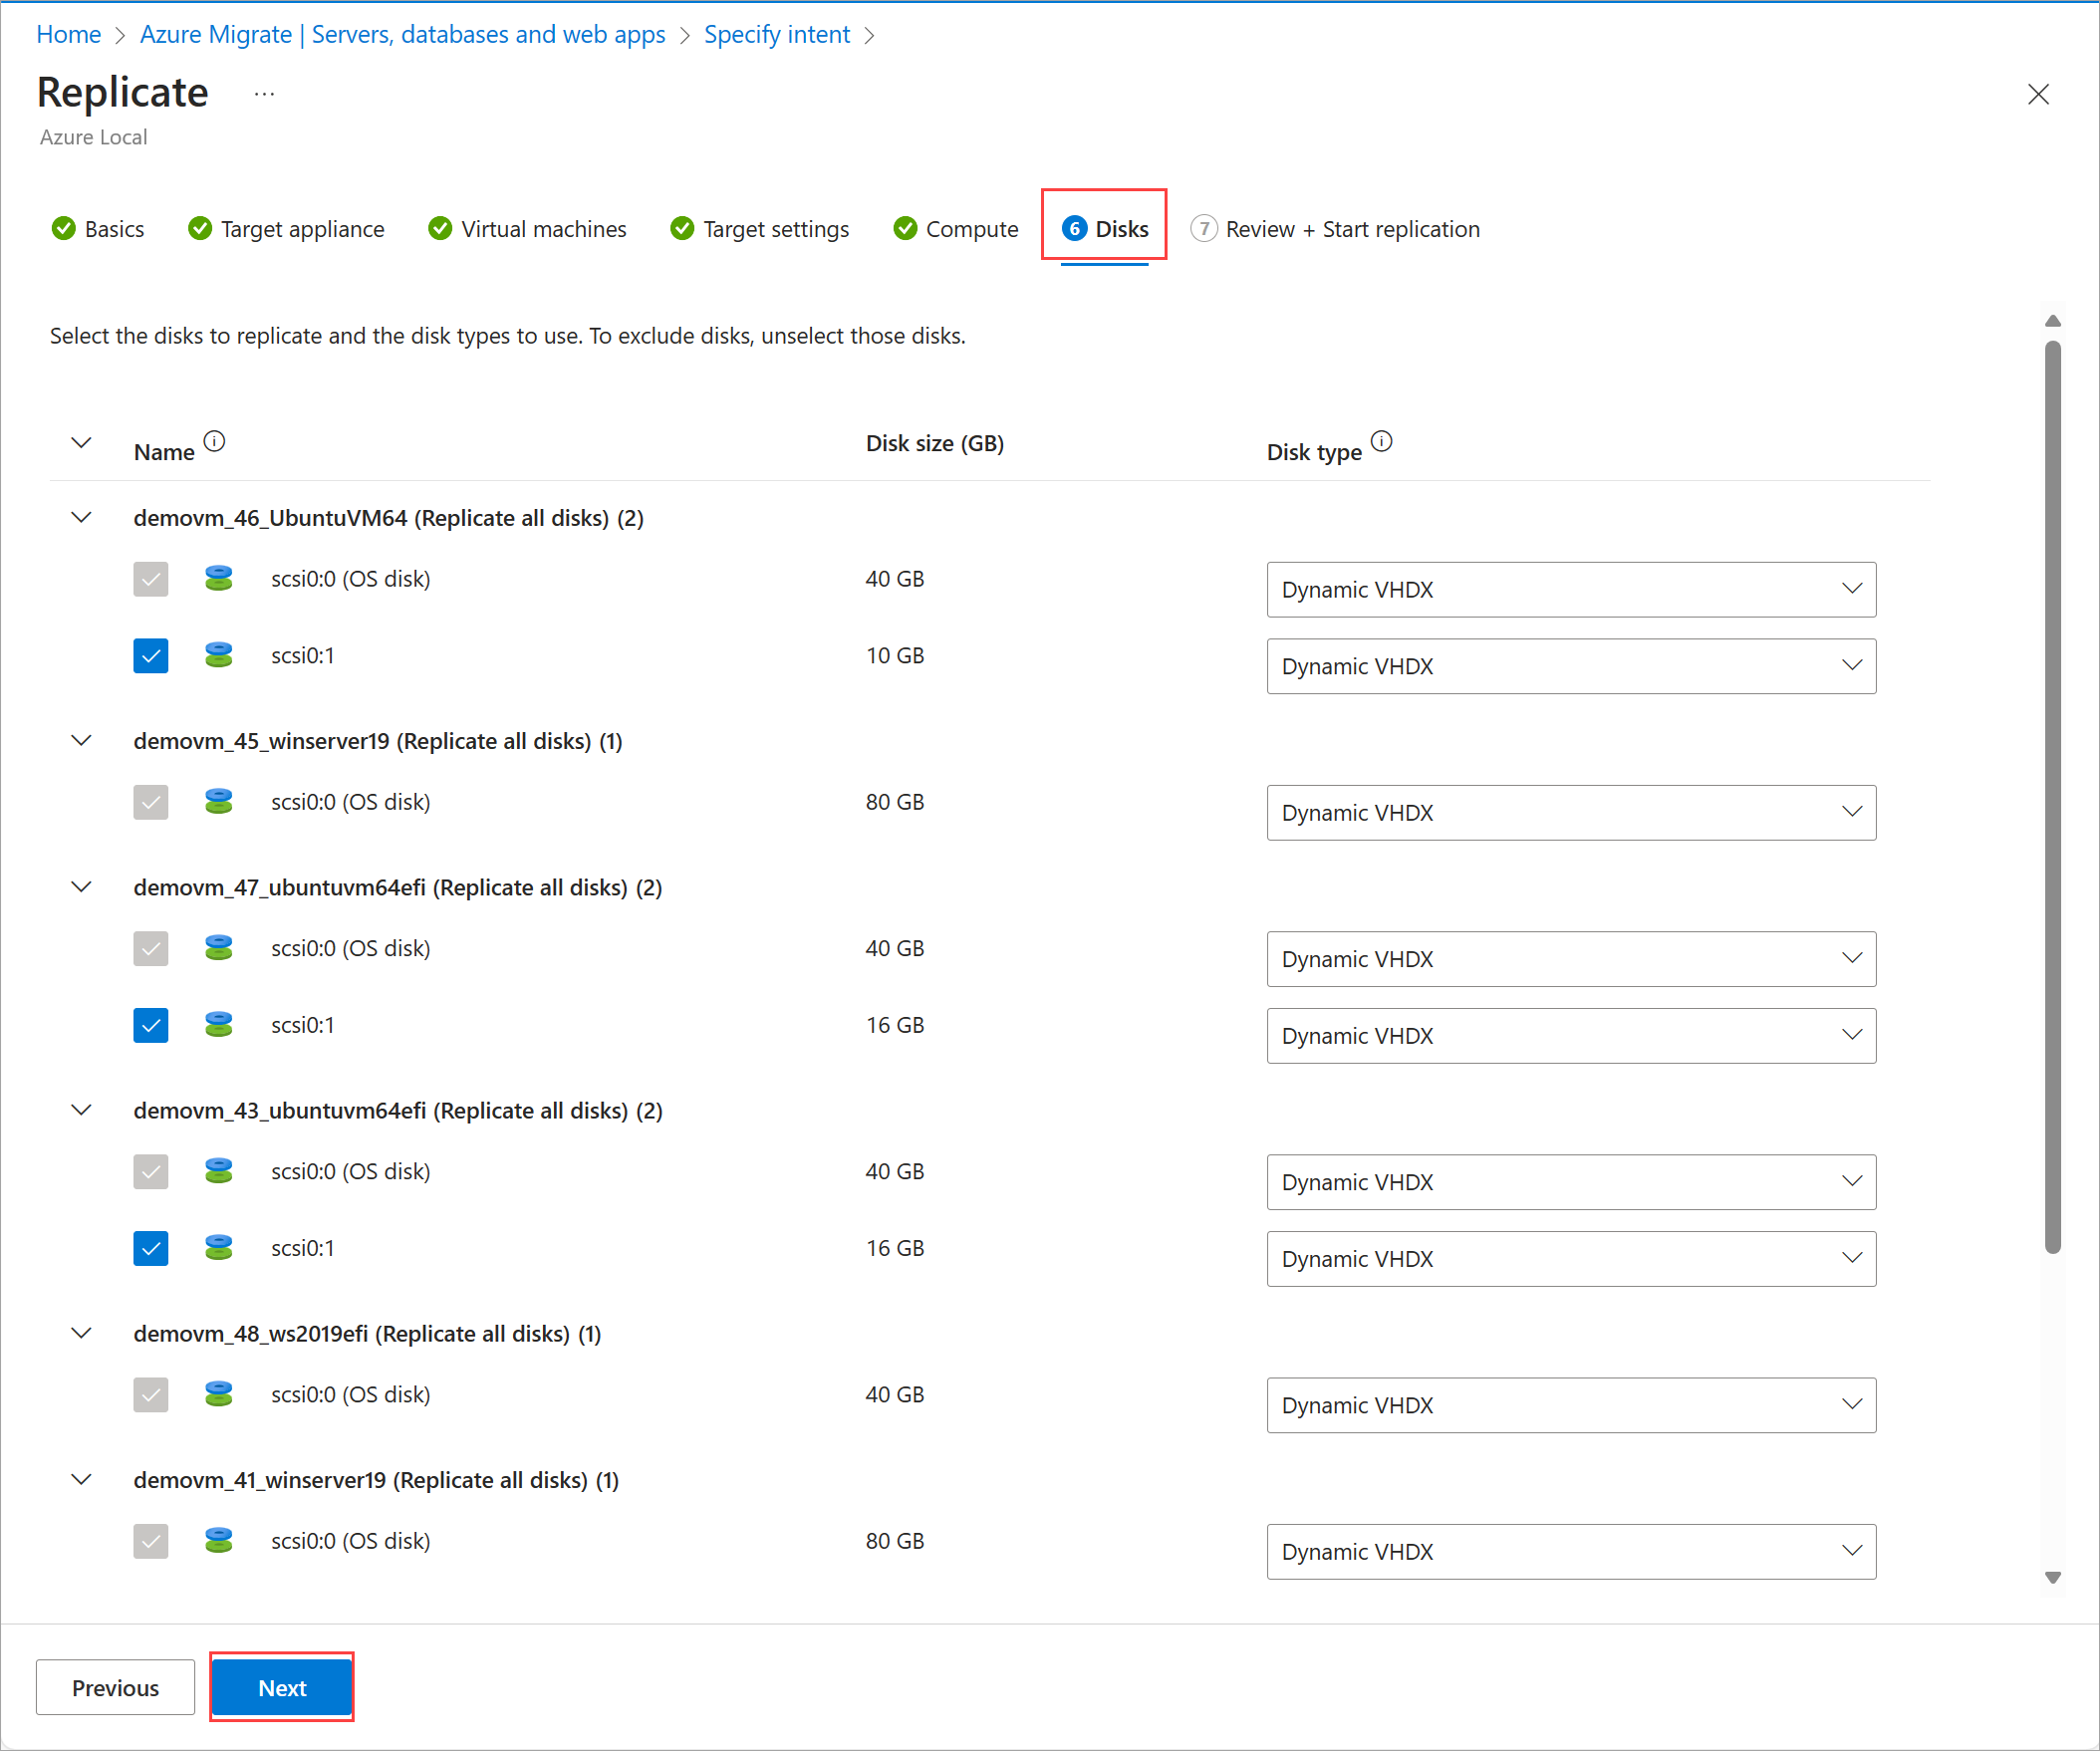
On the Disks tab, select which disks you would like to replicate.
Note
Once selected, the OS disks can't be unselected.
Change the disk type if needed and select Next.
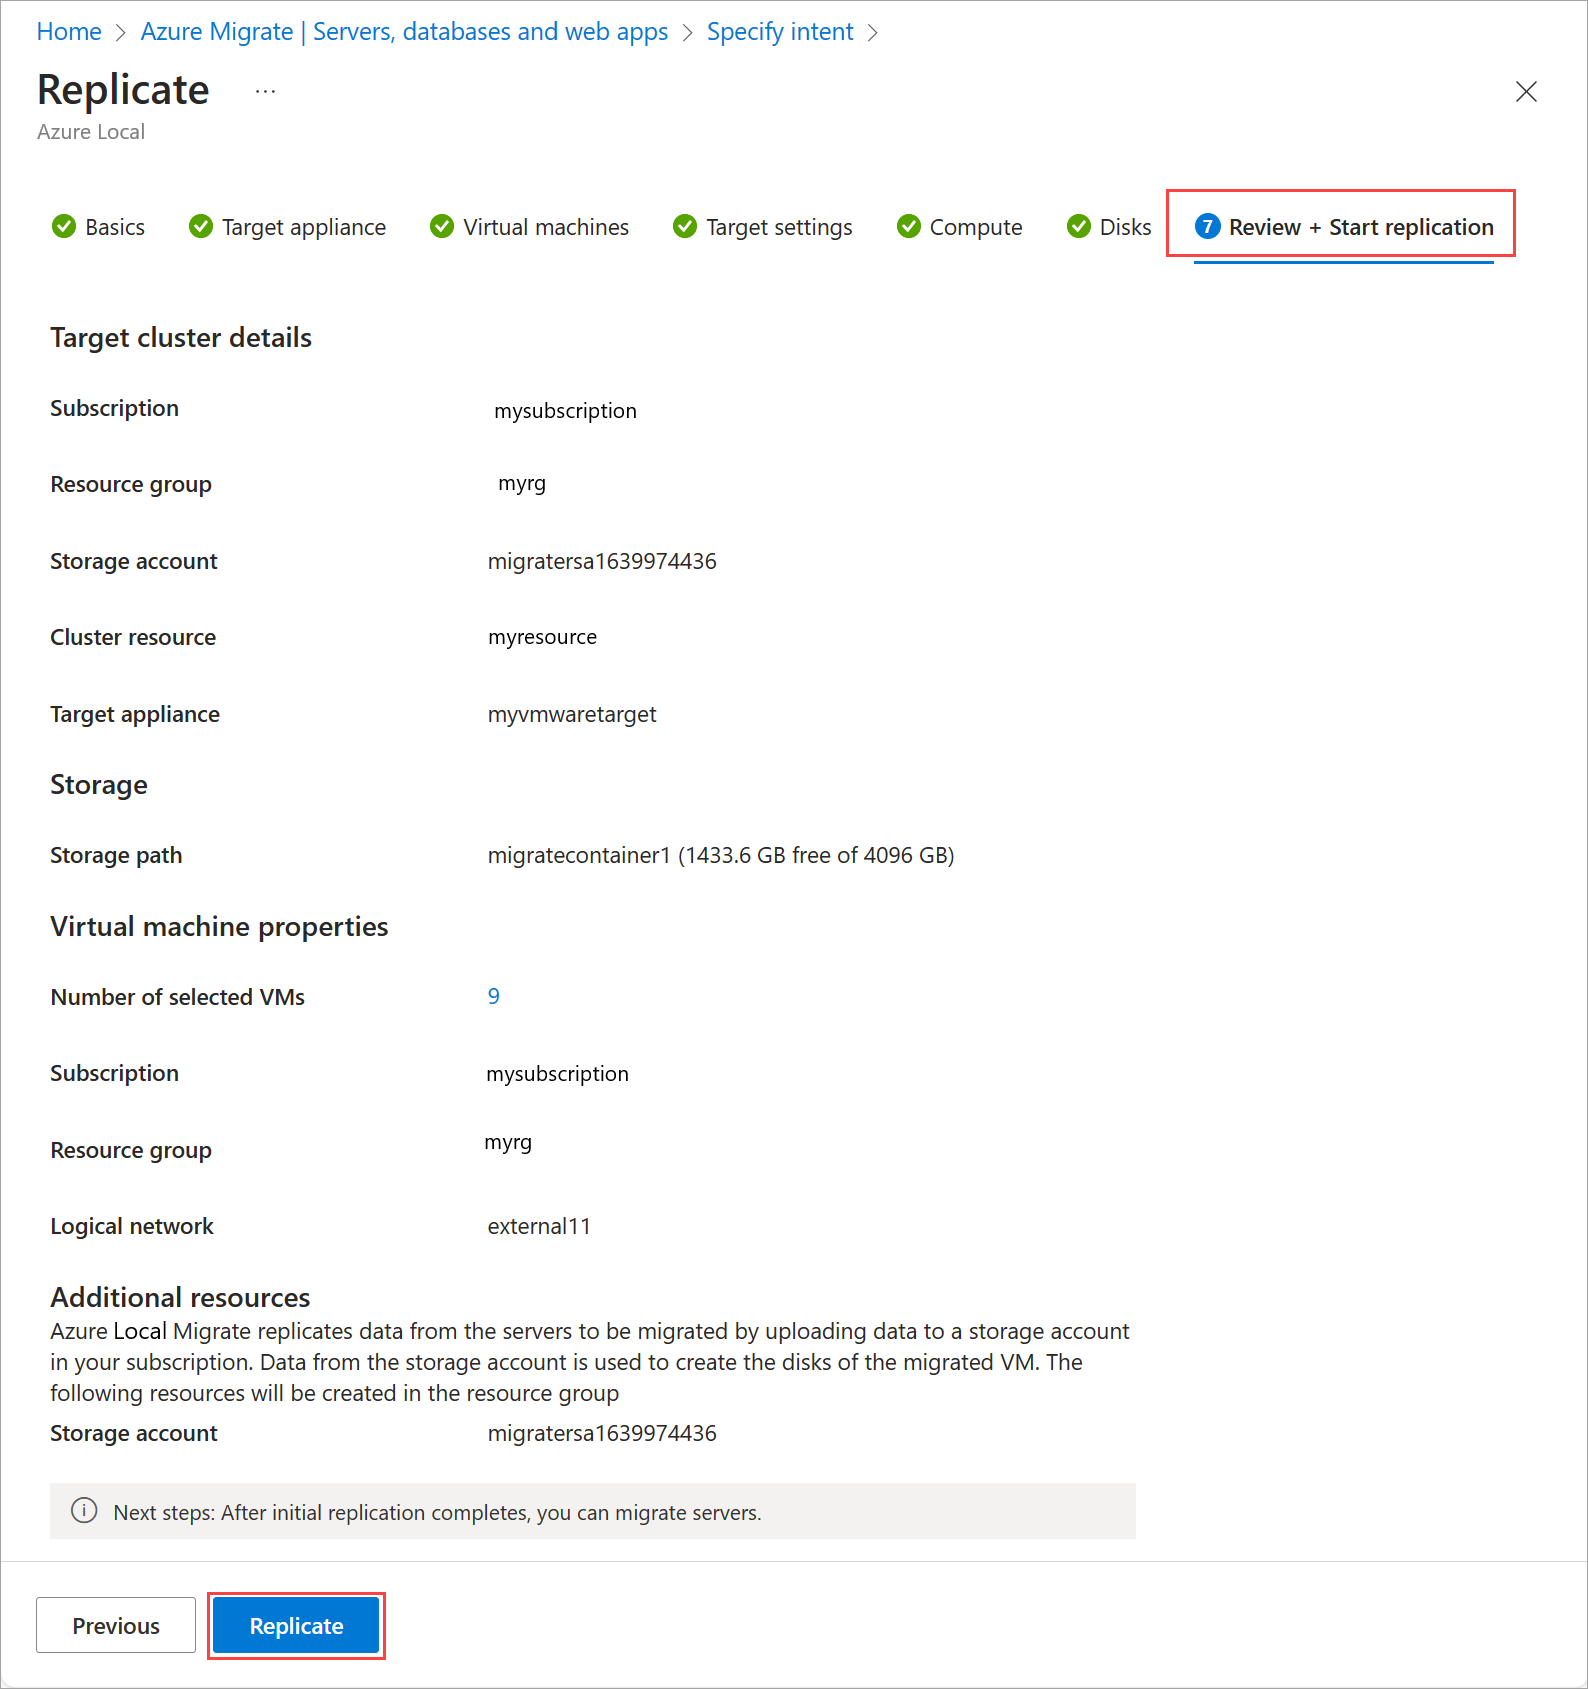
On the Review + Start replication tab, make sure that all the values are correct and then select Replicate.
Stay on this page until the process is complete (this might take 5-10 minutes). If you move away from this page, the replication artifacts won't be created fully leading to a failure in replication and eventually migration.
You're automatically taken to Servers, databases and web apps page. On the Migration tools tile, select Overview.
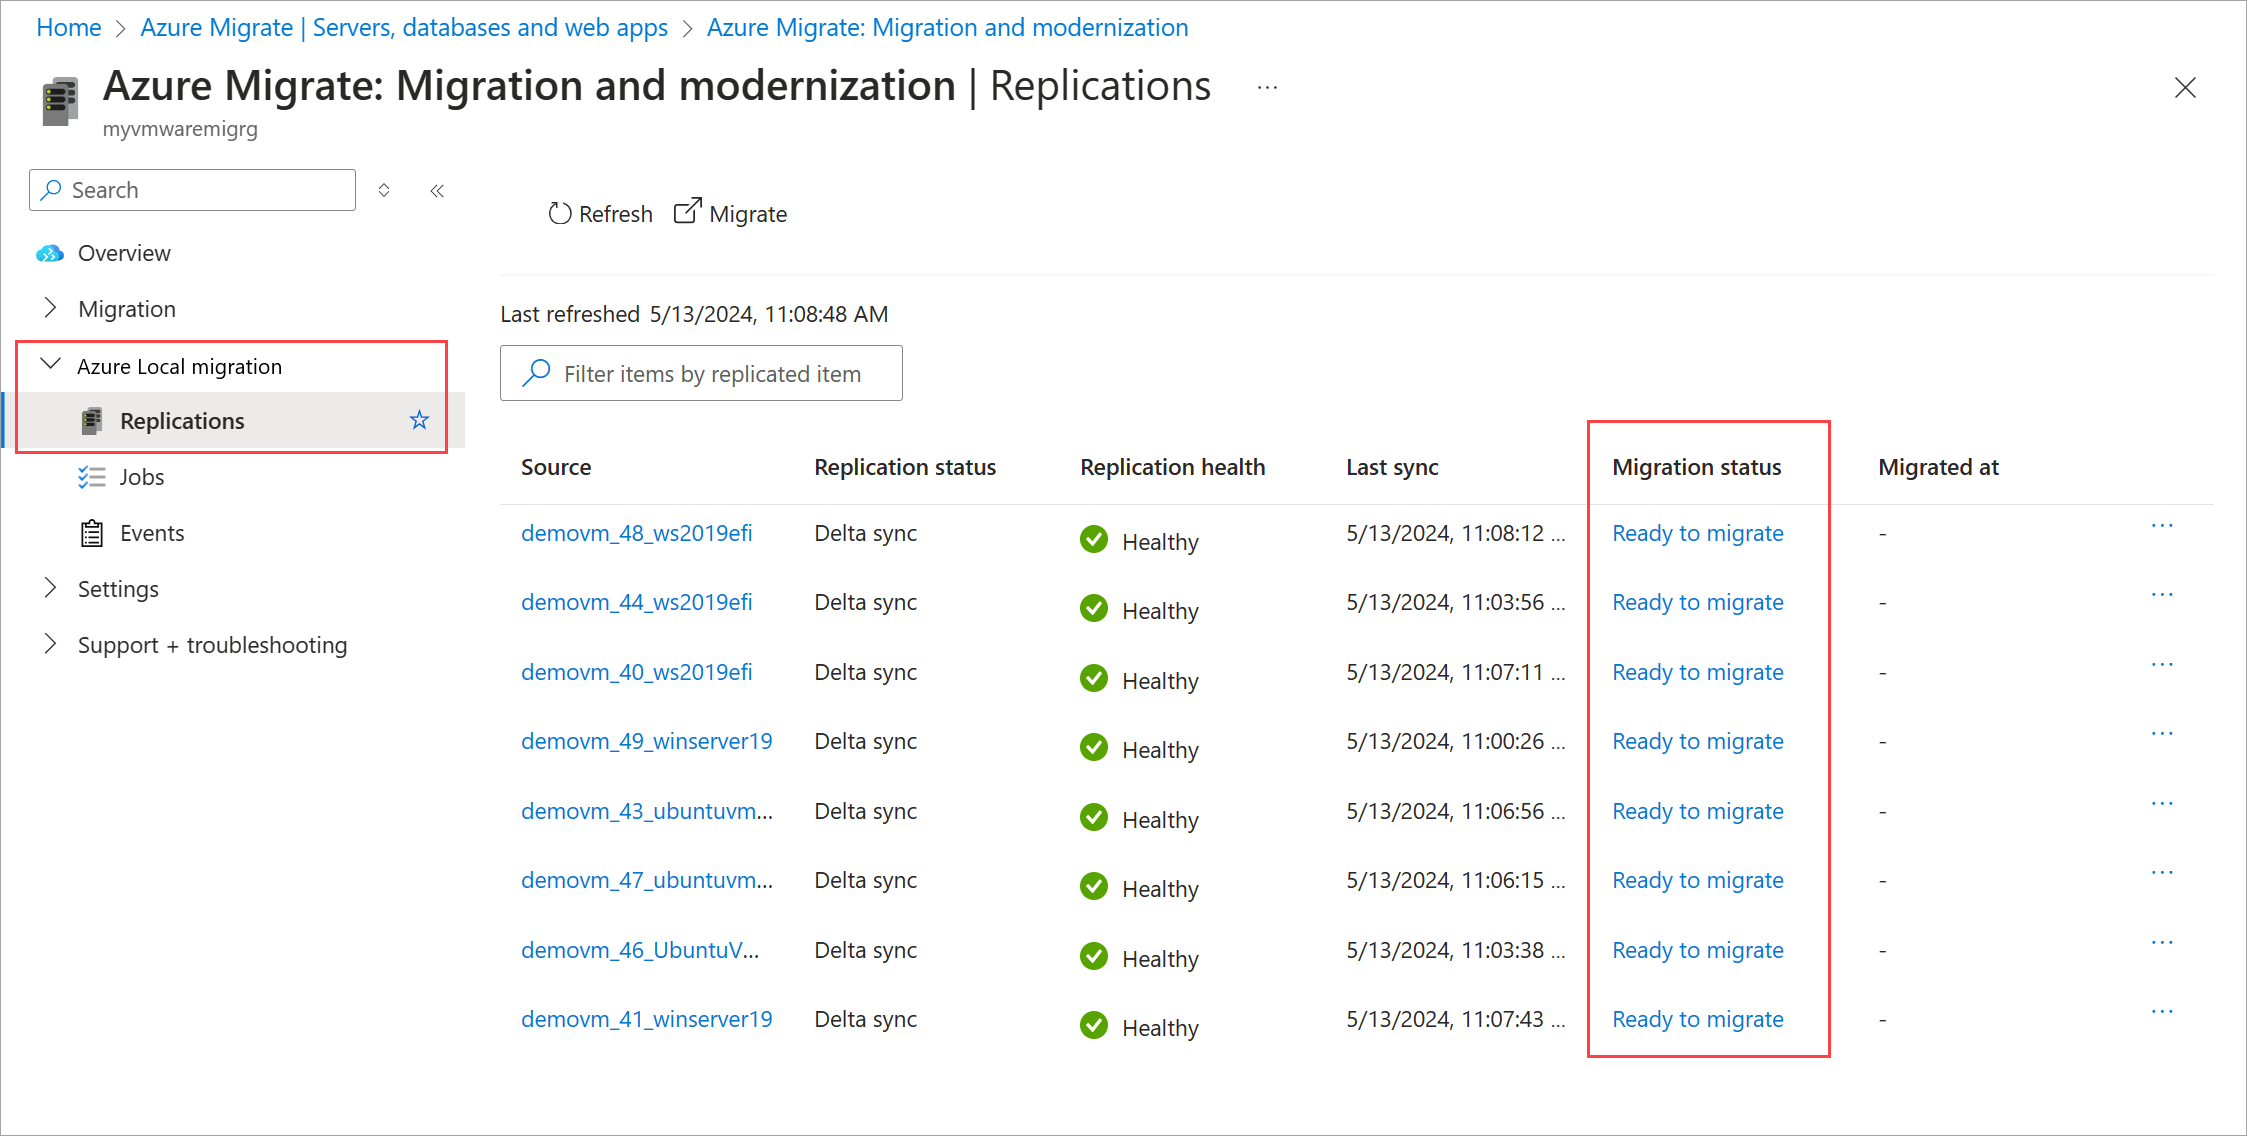
Go to Azure Local migration > Replications. Review the replication status. Select Refresh to see the replicated VMs appear.
As the replication continues, replication status shows progress. Continue refreshing periodically. After the initial replication is complete, hourly delta replications begin. The Migration status changes to Ready to migrate. The VMs can be migrated.
Next steps
- Complete VMware VM Migration.
