Migrate Hyper-V VMs to Azure Local using Azure Migrate (preview)
Applies to: Azure Local 2311.2 and later
This article describes how to migrate Hyper-V virtual machines (VMs) to Azure Local using Azure Migrate and includes the steps to verify the migration.
Important
This feature is currently in PREVIEW. See the Supplemental Terms of Use for Microsoft Azure Previews for legal terms that apply to Azure features that are in beta, preview, or otherwise not yet released into general availability.
Before you begin
Before you migrate your VMs:
- Make sure that you have replicated the VM on your Azure Local instance. To replicate a VM, use the instructions in Replicate Hyper-V VMs to Azure Local using Azure Migrate.
- Make sure the replication has completed and the migration status is Ready to migrate.
Migrate VMs
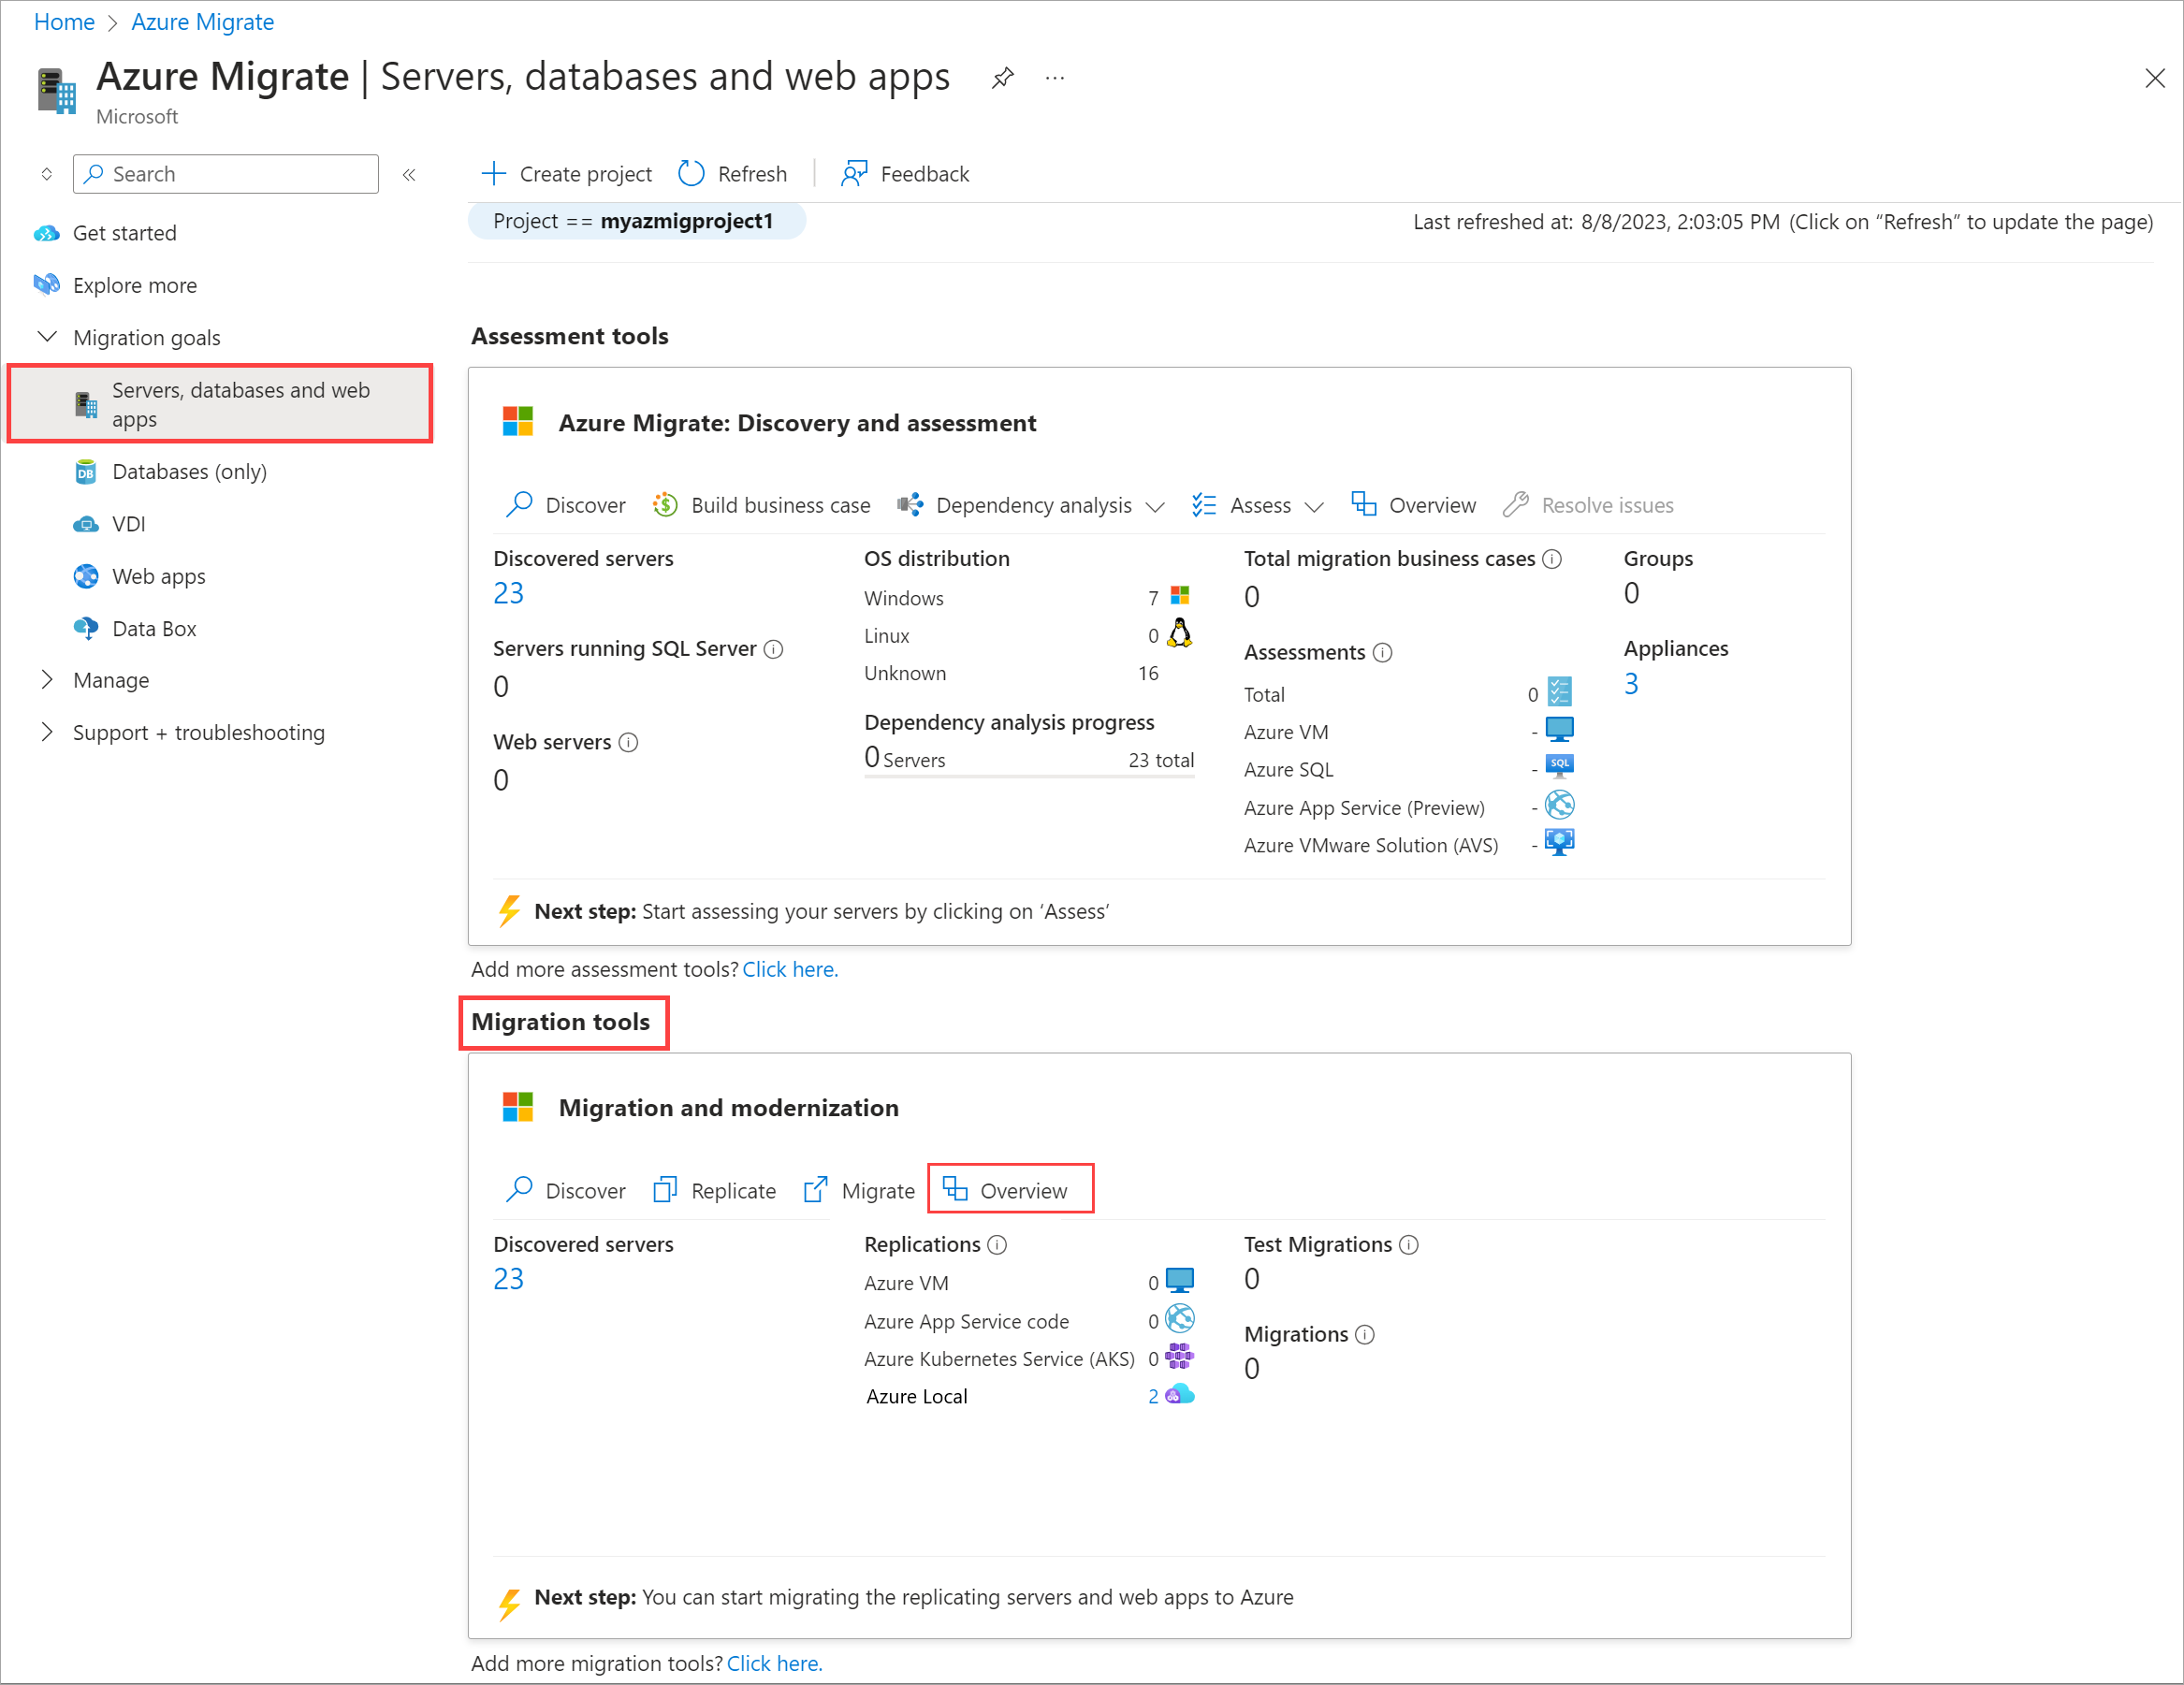
In the Azure portal, go to your Azure Migrate project > Servers, databases and web apps.
On the Migration tools tile, select Overview.
Go to Azure Local migration > Replications.
From the top command bar of the Replications page, select Migrate to migrate multiple VMs that are ready.
Alternatively, you can select Migrate from the context menu for a single VM that is ready to migrate.
On the Migrate page:
- Review the details of the VMs that you want to migrate.
- Select whether or not you would like to shut down VMs before migration. We recommend that you shut down VMs as that ensures no data is lost.
- Select Migrate to start the migration. A notification appears that the migration has started.
Refresh the page periodically to view the migration status. You can also select the migration status at any time to view the progress details.
The Planned failover blade indicates the various migration tasks in progress.

The migration status changes from Migration in progress to Completed when the migration is complete.
Once the migration is complete, the VMs are running on your Azure Local instance. You can view the VMs in the Azure portal.
Verify and complete migration
Important
After verifying the status of the migrated VM, be sure to complete migration as detailed below. Failing to do so may lead to unexpected behavior.
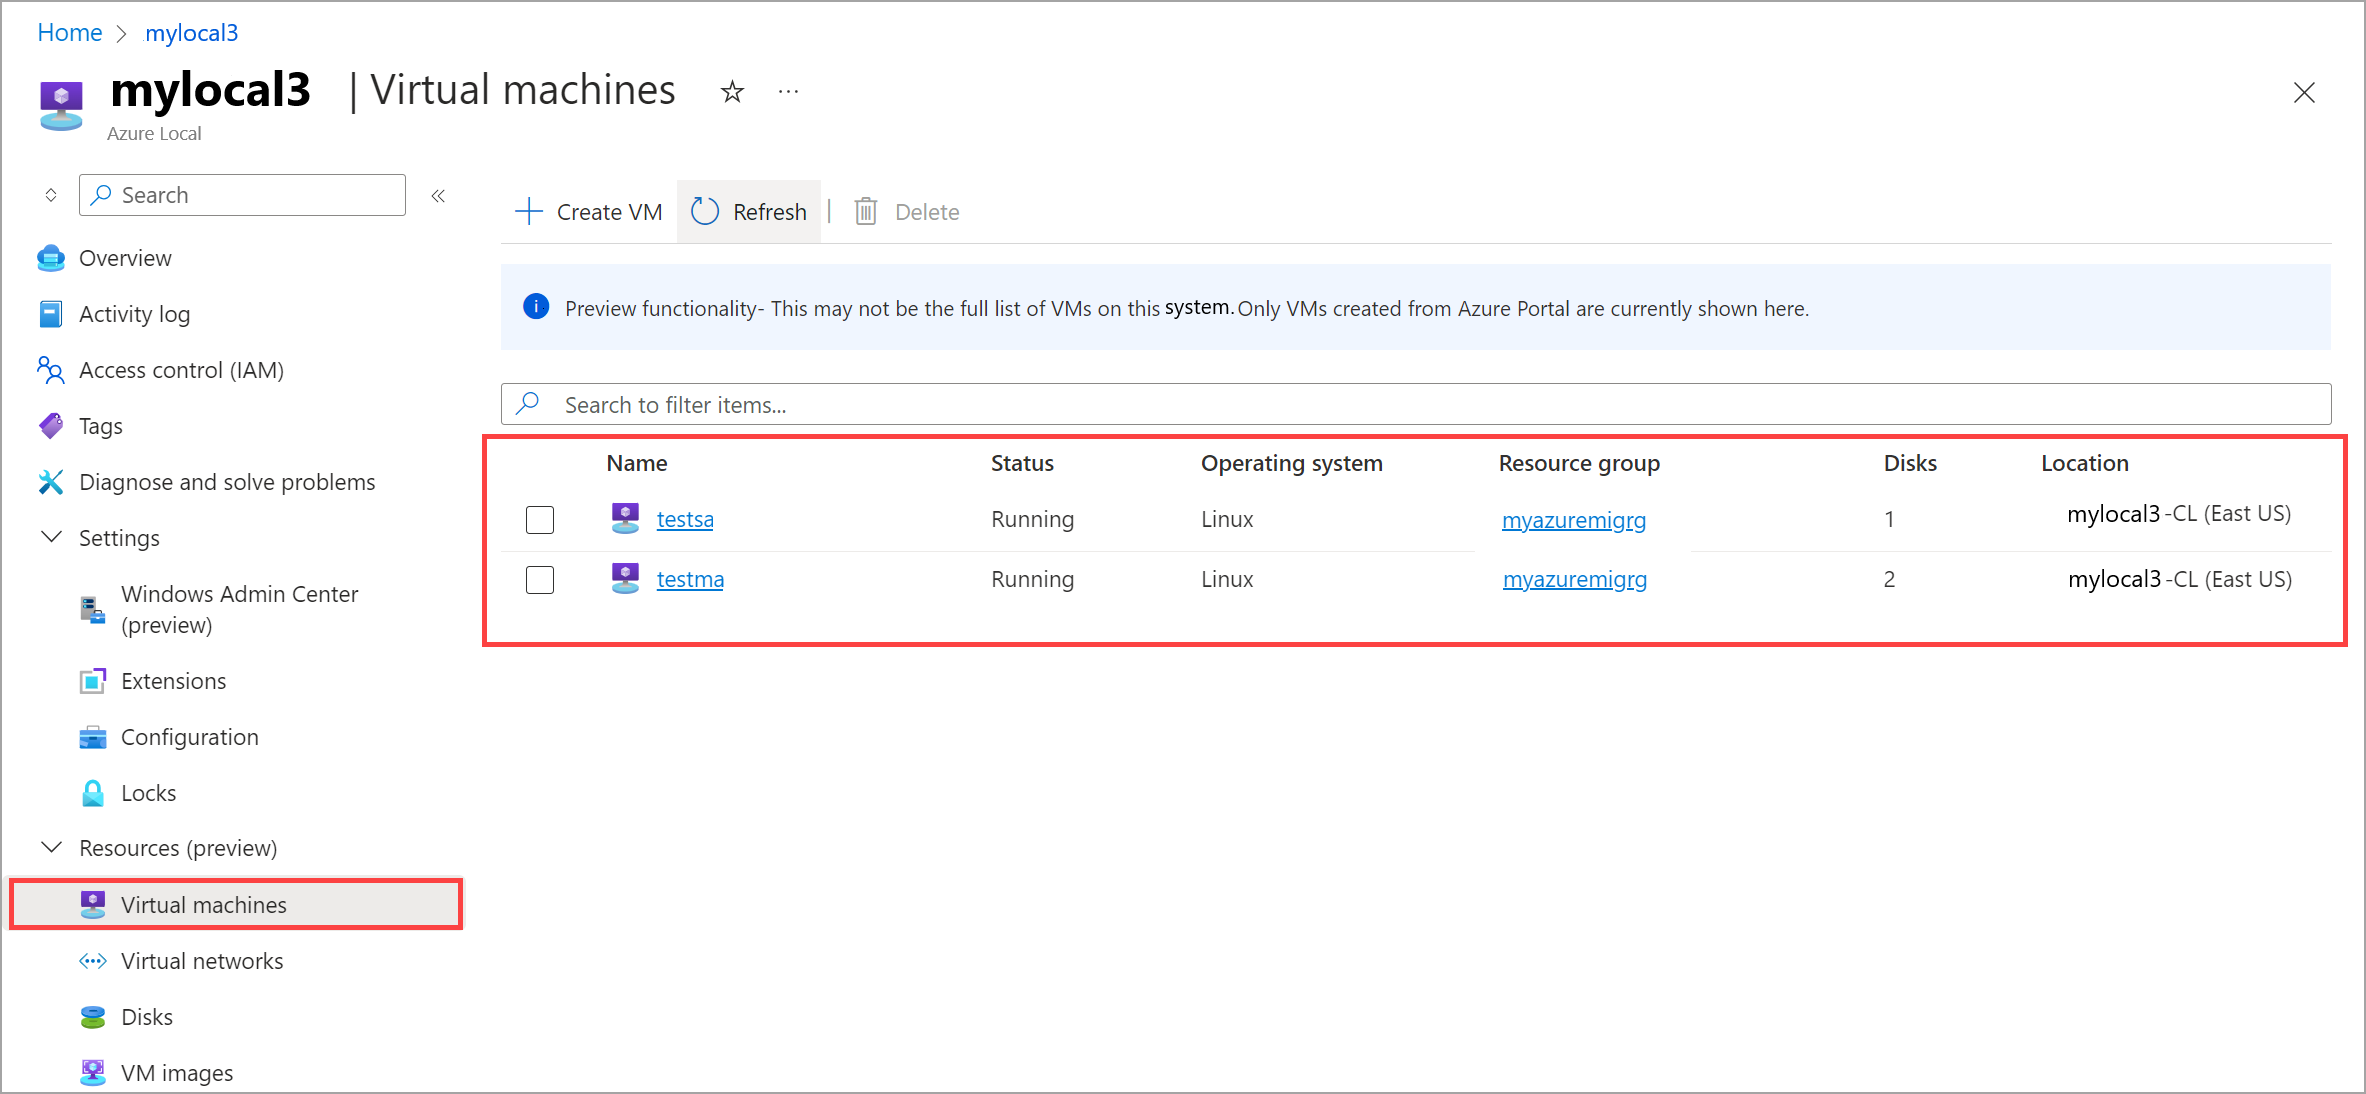
In the Azure portal, go to your Azure Local resource, then select Virtual machines.
In the list of VMs in the right-pane, verify that the VMs that you migrated are present.
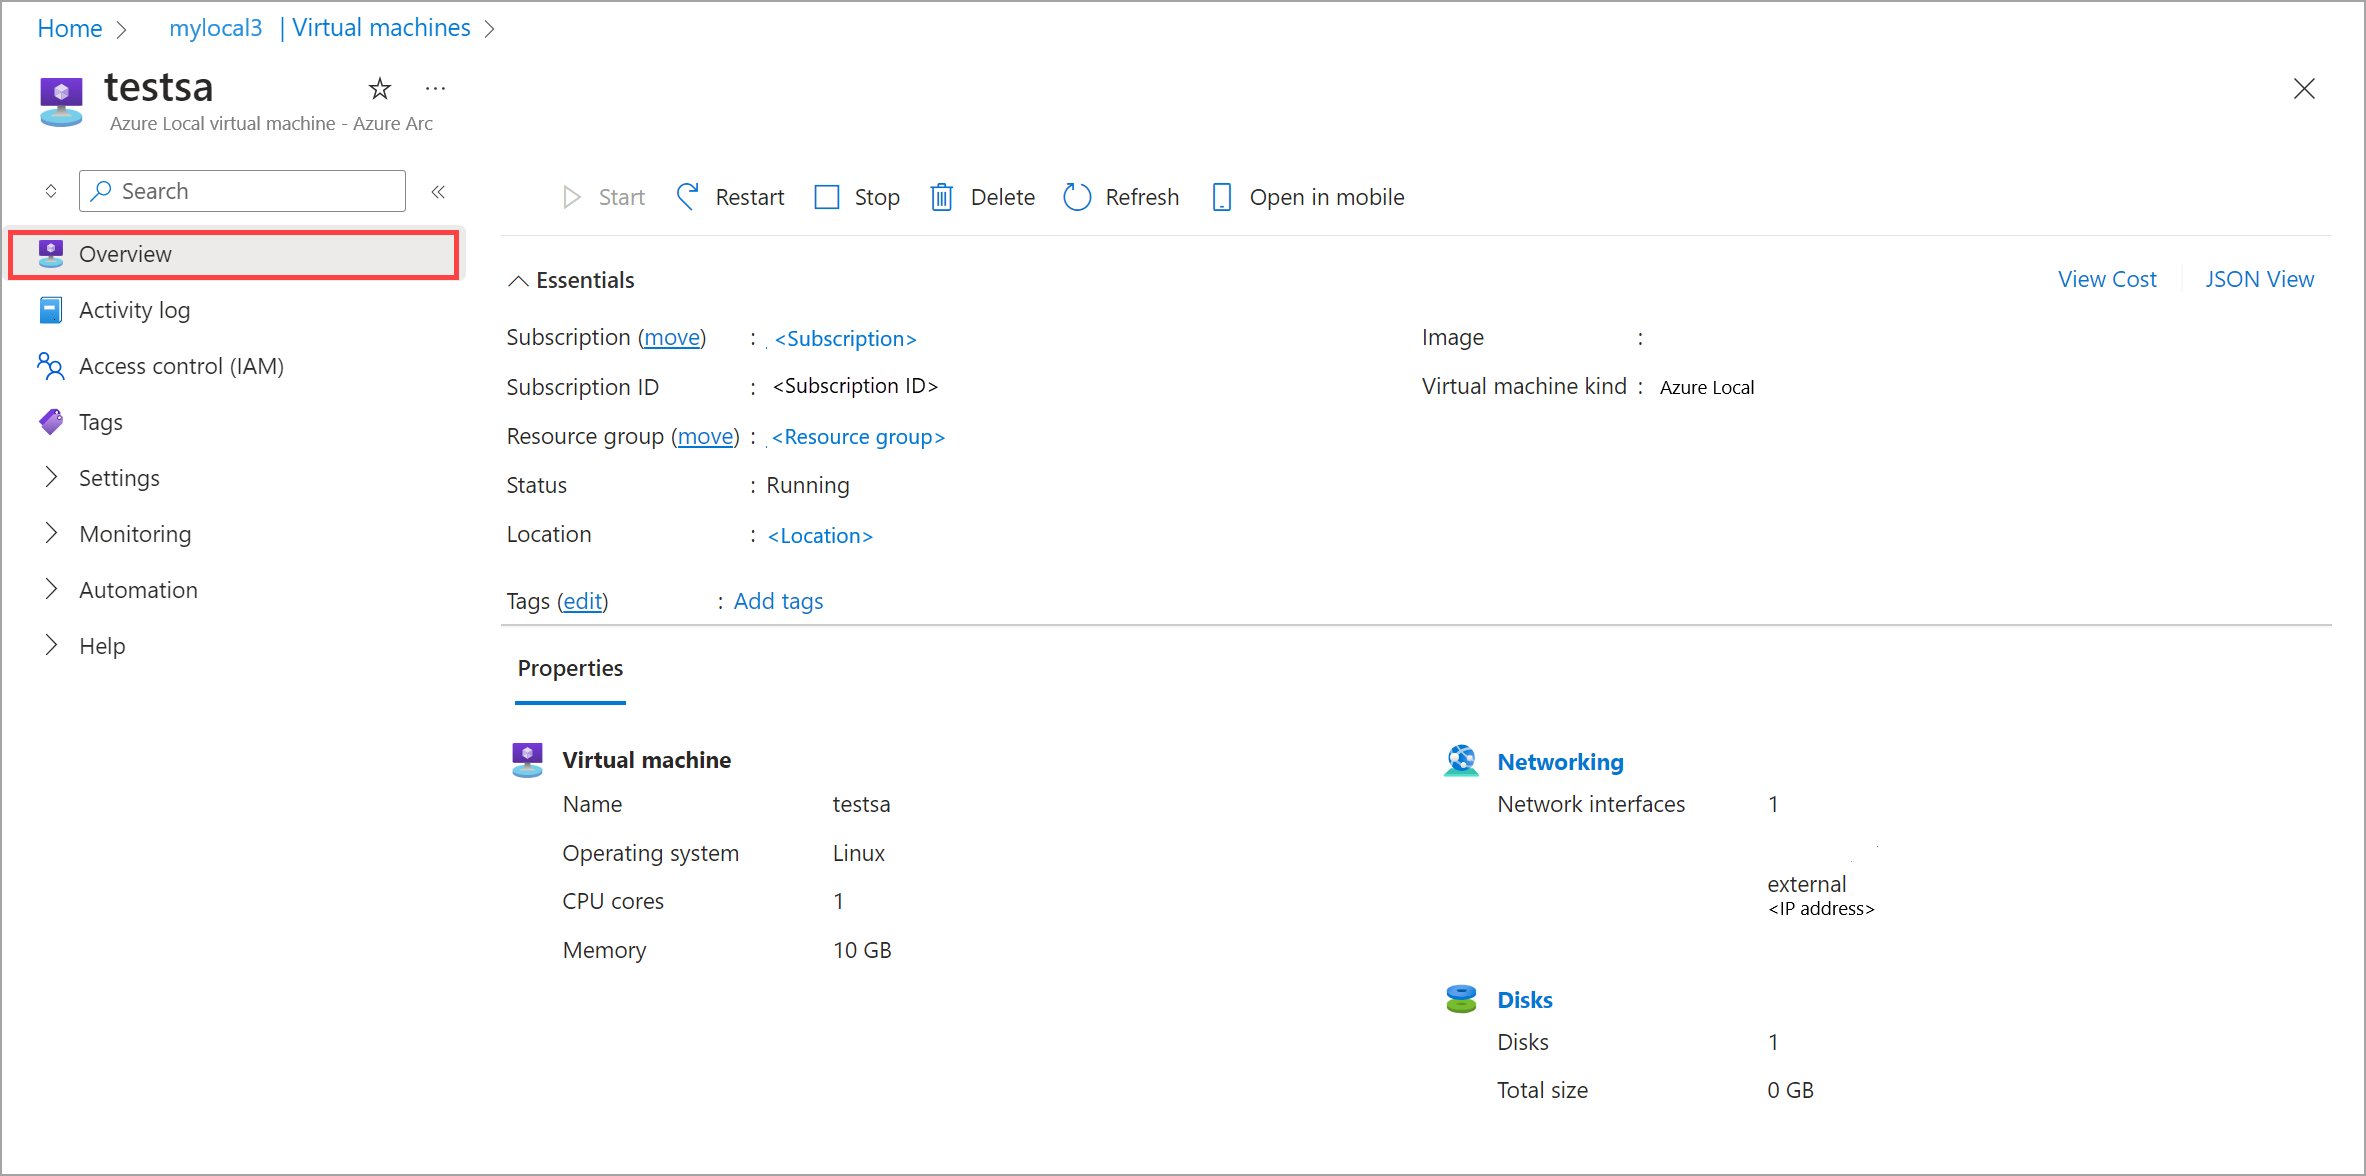
Select a VM to view its details. Verify that:
- The VM is running. The corresponding source VM in the Hyper-V server is turned off.
- The VM has the disk and network configuration as configured during replication.
Sign into the VM using Hyper-V VMConnect. Verify that:
- The VM behaves as expected.
- Your applications work as expected.
In the Azure portal, select the ellipses ... next to the VM and select Complete migration.
Alternatively, select the VM name.
From the top command bar, select Complete migration. When prompted for confirmation, select Yes to continue. Repeat this action for all the migrated VMs.
The Complete migrate action starts the Delete protected item job that you can track from the Jobs page. This job will only clean up the replication by deleting the delete protected item job - this will not affect your migrated VM.
Completing the migration or deleting the protected item will automatically remove any leftover seed files, such as the seed.iso file attached to the migrated VM and seed disks used during replication. These files can occupy significant space on the target Azure Local system, so it's important to finalize the migration after verifying the VMs. If migrations are not completed, these files will continue to occupy space on the target system.
After the migrate resource is deleted, it is also removed from the Replications view. You'll also see the migrated VM job disappear from the Replications view.
Clean up
Once you have verified that migration is complete and no more machines need to be migrated, the last step is to clean up. Cleanup requires deletion of the following resources created during migration:
- Source VMs and the associated VM disks from the Hyper-V server and the Failover Cluster Manager.
- Source and target appliance VMs.
Next steps
- If you experience any issues during migration, see Troubleshoot migration issues.


