Create a virtual machine on VMware vCenter using Azure Arc
This article describes how to provision a VM using vCenter resources from Azure portal.
Create a VM in the Azure portal
Once your administrator has connected a VMware vCenter to Azure, represented VMware vCenter resources in Azure, and provided you with permissions on those resources, you'll create a virtual machine.
Prerequisites
- An Azure subscription and resource group where you have an Arc VMware VM contributor role.
- A resource pool/cluster/host on which you have Arc Private Cloud Resource User Role.
- A virtual machine template resource on which you have Arc Private Cloud Resource User Role.
- A virtual network resource on which you have Arc Private Cloud Resource User Role.
Follow these steps to create VM in the Azure portal:
From your browser, go to the Azure portal. Navigate to virtual machines browse view. You'll see a unified browse experience for Azure and Arc virtual machines.
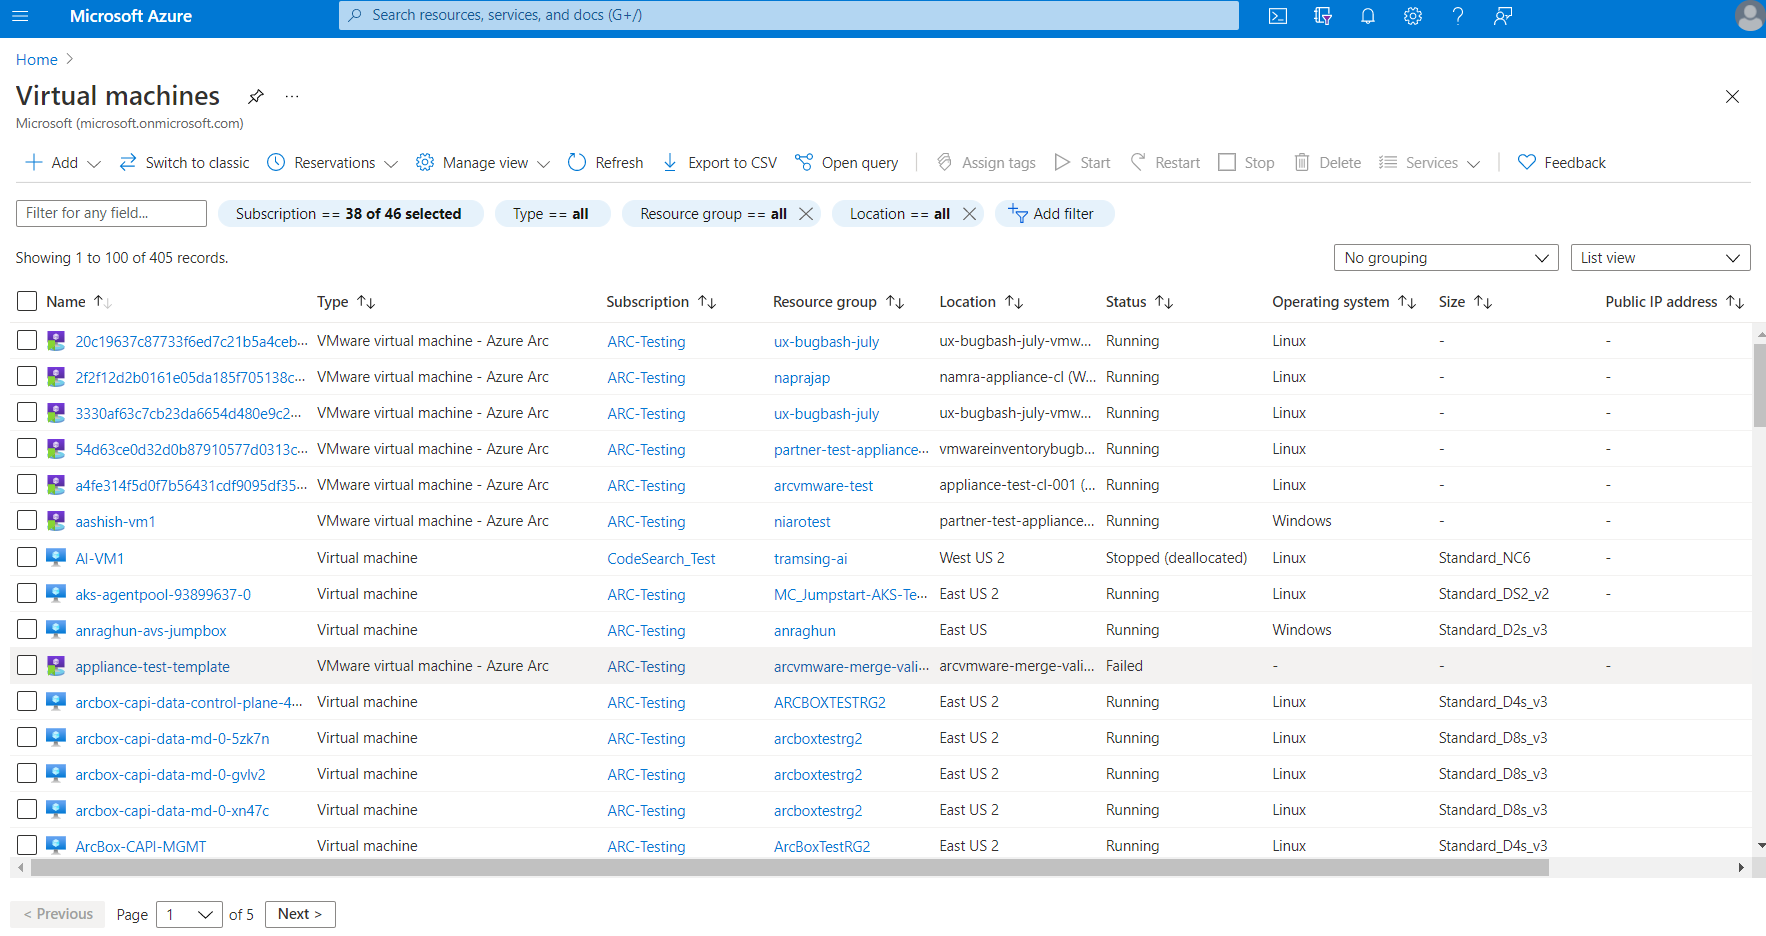
Select Add and then select Azure Arc machine from the drop-down.

Select the Subscription and Resource group where you want to deploy the VM.
Provide the Virtual machine name and then select a Custom location that your administrator has shared with you.
If multiple kinds of VMs are supported, select VMware from the Virtual machine kind drop-down.
Select the Resource pool/cluster/host into which the VM should be deployed.
Select the datastore that you want to use for storage.
Select the Template based on which you'll create the VM.
Tip
You can override the template defaults for CPU Cores and Memory.
If you selected a Windows template, provide a Username, Password for the Administrator account.
(Optional) Change the disks configured in the template. For example, you can add more disks or update existing disks. All the disks and VM will be on the datastore selected in step 6.
(Optional) Change the network interfaces configured in the template. For example, you can add network interface (NIC) cards or update existing NICs. You can also change the network to which this NIC will be attached, provided you have appropriate permissions to the network resource.
(Optional) Add tags to the VM resource if necessary.
Select Create after reviewing all the properties. It should take a few minutes to create the VM.


This article describes how to provision a VM using vCenter resources using a Bicep template.
Create an Arc VMware machine using Bicep template
The following bicep template can be used to create an Arc VMware machine. Here is the list of available Azure Resource Manager (ARM), Bicep, and Terraform templates for Arc-enabled VMware resources. To trigger any other Arc operation, convert the corresponding ARM template to Bicep template.
// Parameters
param vmName string = 'contoso-vm'
param vmAdminPassword string = 'examplepassword!#'
param vCenterId string = '/subscriptions/aaaa0a0a-bb1b-cc2c-dd3d-eeeeee4e4e4e/resourceGroups/contoso-rg/providers/Microsoft.ConnectedVMwarevSphere/vcenters/contoso-vcenter'
param templateId string = '/subscriptions/aaaa0a0a-bb1b-cc2c-dd3d-eeeeee4e4e4e/resourceGroups/contoso-rg/providers/Microsoft.ConnectedVMwarevSphere/VirtualMachineTemplates/contoso-template-win22'
param resourcePoolId string = '/subscriptions/aaaa0a0a-bb1b-cc2c-dd3d-eeeeee4e4e4e/resourceGroups/contoso-rg/providers/Microsoft.ConnectedVMwarevSphere/ResourcePools/contoso-respool'
param datastoreId string = '/subscriptions/aaaa0a0a-bb1b-cc2c-dd3d-eeeeee4e4e4e/resourceGroups/contoso-rg/providers/Microsoft.ConnectedVMwarevSphere/Datastores/contoso-datastore'
param networkId string = '/subscriptions/aaaa0a0a-bb1b-cc2c-dd3d-eeeeee4e4e4e/resourceGroups/contoso-rg/providers/Microsoft.ConnectedVMwarevSphere/VirtualNetworks/contoso-network'
param extendedLocation object = {
  type: 'customLocation'
  name: '/subscriptions/aaaa0a0a-bb1b-cc2c-dd3d-eeeeee4e4e4e/resourceGroups/contoso-rg/providers/Microsoft.ExtendedLocation/customLocations/contoso-customlocation'
}
param ipSettings object = {
  allocationMethod: 'static'
  gateway: ['172.24.XXX.1']
  ipAddress: '172.24.XXX.105'
  subnetMask: '255.255.255.0'
  dnsServers: ['172.24.XXX.9']
}

resource contosoMachine 'Microsoft.HybridCompute/machines@2023-10-03-preview' = {
  name: vmName
  location:'westeurope'
  kind:'VMware'
  properties:{}
  tags: {
    foo: 'bar'
  }
}

resource vm 'Microsoft.ConnectedVMwarevSphere/virtualMachineInstances@2023-12-01' = {
  name: 'default'
  scope: contosoMachine
  extendedLocation: extendedLocation
  properties: {
    hardwareProfile: {
      memorySizeMB: 4096
      numCPUs: 2
    }
    osProfile: {
      computerName: vmName
      adminPassword: vmAdminPassword
    }
    placementProfile: {
      resourcePoolId: resourcePoolId
      datastoreId: datastoreId
    }
    infrastructureProfile: {
      templateId: templateId
      vCenterId: vCenterId
    }
    networkProfile: {
      networkInterfaces: [
        {
          nicType: 'vmxnet3'
          ipSettings: ipSettings
          networkId: networkId
          name: 'VLAN103NIC'
          powerOnBoot: 'enabled'
        }
      ]
    }
  }
}

// Outputs
output vmId string = vm.id
This article describes how to provision a VM using vCenter resources using a Terraform template.
Create an Arc VMware machine with Terraform
Prerequisites
- Azure Subscription: Ensure you have an active Azure subscription.
- Terraform: Install Terraform on your machine.
- Azure CLI: Install Azure CLI to authenticate and manage resources.
Follow these steps to create an Arc VMware machine using Terraform. The following two scenarios are covered in this article:
- For VMs discovered in vCenter inventory, perform enable in Azure operation and install Arc agents.
- Create a new Arc VMware VM using templates, Resource pool, Datastore and install Arc agents.
Scenario 1
For VMs discovered in vCenter inventory, perform enable in Azure operation and install Arc agents.
Step 1: Define variables in a variables.tf file
Create a file named variables.tf and define all the necessary variables.
variable "subscription_id" {
  description = "The subscription ID for the Azure account."
  type        = string
}

variable "resource_group_name" {
  description = "The name of the resource group."
  type        = string
}

variable "location" {
  description = "The location/region where the resources will be created."
  type        = string
}

variable "machine_name" {
  description = "The name of the machine."
  type        = string
}

variable "inventory_item_id" {
  description = "The ID of the Inventory Item for the VM."
  type        = string
}

variable "custom_location_id" {
  description = "The ID of the custom location."
  type        = string
}

variable "vm_username" {
  description = "The admin username for the VM."
  type        = string
}

variable "vm_password" {
  description = "The admin password for the VM."
  type        = string
}

variable "resource_group_name" {
  description = "The name of the resource group."
  type        = string
}

variable "location" {
  description = "The location/region where the resources will be created."
  type        = string
}

variable "machine_name" {
  description = "The name of the machine."
  type        = string
}

variable "vm_username" {
  description = "The admin username for the VM."
  type        = string
}

variable "vm_password" {
  description = "The admin password for the VM."
  type        = string
}

variable "inventory_id" {
  description = "The Inventory ID for the VM."
  type        = string
}

variable "vcenter_id" {
  description = "The ID of the vCenter."
  type        = string
}

variable "custom_location_id" {
  description = "The ID of the custom location."
  type        = string
}
Step 2: Create a tfvars file
Create a file named CreateVMwareVM.tfvars and provide sample values for the variables.
subscription_id      = "your-subscription-id"
resource_group_name  = "your-resource-group"
location             = "eastus"
machine_name         = "test_machine0001"
inventory_item_id    = "/subscriptions/your-subscription-id/resourceGroups/your-resource-group/providers/Microsoft.ConnectedVMwarevSphere/VCenters/your-vcenter-id/InventoryItems/your-inventory-item-id"
custom_location_id   = "/subscriptions/your-subscription-id/resourceGroups/your-resource-group/providers/Microsoft.ExtendedLocation/customLocations/your-custom-location-id"
vm_username          = "Administrator"
vm_password          = " The admin password for the VM "
Step 3: Modify the configuration to use variables
Create a file named main.tf and insert the following code.
terraform {
  required_providers {
    azurerm = {
      source  = "hashicorp/azurerm"
      version = ">= 3.0"
    }
    azapi = {
      source  = "azure/azapi"
      version = ">= 1.0.0"
    }
  }
}

# Configure the AzureRM provider with the subscription ID
provider "azurerm" {
  features {}
  subscription_id = var.subscription_id
}

# Configure the AzAPI provider with the subscription ID
provider "azapi" {
  subscription_id = var.subscription_id
}

# Retrieve the resource group details
data "azurerm_resource_group" "example" {
  name = var.resource_group_name
}

# Create a VMware machine resource in Azure
resource "azapi_resource" "test_machine0001" {
  schema_validation_enabled = false
  parent_id = data.azurerm_resource_group.example.id
  type = "Microsoft.HybridCompute/machines@2023-06-20-preview"
  name = var.machine_name
  location = data.azurerm_resource_group.example.location
  body = jsonencode({
      kind = "VMware"
      identity = {
        type = "SystemAssigned"
      }
  })
}

# Create a Virtual Machine instance using the VMware machine and Inventory Item ID
resource "azapi_resource" "test_inventory_vm0001" {
  schema_validation_enabled = false
  type = "Microsoft.ConnectedVMwarevSphere/VirtualMachineInstances@2023-10-01"
  name = "default"
  parent_id = azapi_resource.test_machine0001.id
  body = jsonencode({
      properties = {
          infrastructureProfile = {
            inventoryItemId = var.inventory_item_id
          }
      }
      extendedLocation = {
        type = "CustomLocation"
        name = var.custom_location_id
      }
  })
  depends_on = [azapi_resource.test_machine0001]
}

# Install Arc agent on the VM
resource "azapi_resource" "guestAgent" {
  type      = "Microsoft.ConnectedVMwarevSphere/virtualMachineInstances/guestAgents@2023-10-01"
  parent_id = azapi_resource.test_inventory_vm0001.id
  name      = "default"
  body = jsonencode({
    properties = {
      credentials = {
        username = var.vm_username
        password = var.vm_password
      }
      provisioningAction = "install"
    }
  })
  schema_validation_enabled = false
  ignore_missing_property   = false
  depends_on = [azapi_resource.test_inventory_vm0001]
}
Step 4: Run Terraform commands
Use the -var-file flag to pass the .tfvars file during Terraform commands.
- Initialize Terraform (if not already initialized):
terraform init - Validate the configuration:
terraform validate -var-file="CreateVMwareVM.tfvars" - Plan the changes:
terraform plan -var-file="CreateVMwareVM.tfvars" - Apply the changes:
terraform apply -var-file="CreateVMwareVM.tfvars"
Confirm the prompt by entering yes to apply the changes.
Best practices
- Use version control: Keep your Terraform configuration files under version control (for example, Git) to track changes over time.
- Review plans carefully: Always review the output of terraform plan before applying changes to ensure that you understand what changes will be made.
- State management: Regularly back up your Terraform state files to avoid data loss.
By following these steps, you can effectively create and manage HCRP and Arc VMware VMs on Azure using Terraform and install guest agents on the created VMs.
Scenario 2
Create a new Arc VMware VM using templates, Resource pool, Datastore and install Arc agents.
Step 1: Define variables in a variables.tf file
Create a file named variables.tf and define all the necessary variables.
variable "subscription_id" {
  description = "The subscription ID for the Azure account."
  type        = string
}

variable "resource_group_name" {
  description = "The name of the resource group."
  type        = string
}

variable "location" {
  description = "The location/region where the resources will be created."
  type        = string
}

variable "machine_name" {
  description = "The name of the machine."
  type        = string
}

variable "vm_username" {
  description = "The admin username for the VM."
  type        = string
}

variable "vm_password" {
  description = "The admin password for the VM."
  type        = string
}

variable "template_id" {
  description = "The ID of the VM template."
  type        = string
}

variable "vcenter_id" {
  description = "The ID of the vCenter."
  type        = string
}

variable "resource_pool_id" {
  description = "The ID of the resource pool."
  type        = string
}

variable "datastore_id" {
  description = "The ID of the datastore."
  type        = string
}

variable "custom_location_id" {
  description = "The ID of the custom location."
  type        = string
}
Step 2: Create tfvars file
Create a file named CreateVMwareVM.tfvars and provide sample values for the variables.
subscription_id      = "your-subscription-id"
resource_group_name  = "your-resource-group"
location             = "eastus"
machine_name         = "test_machine0002"
vm_username          = "Administrator"
vm_password          = "*********"
template_id          = "/subscriptions/your-subscription-id/resourceGroups/your-resource-group/providers/Microsoft.ConnectedVMwarevSphere/virtualmachinetemplates/your-template-id"
vcenter_id           = "/subscriptions/your-subscription-id/resourceGroups/your-resource-group/providers/Microsoft.ConnectedVMwarevSphere/VCenters/your-vcenter-id"
resource_pool_id     = "/subscriptions/your-subscription-id/resourceGroups/your-resource-group/providers/Microsoft.ConnectedVMwarevSphere/resourcepools/your-resource-pool-id"
datastore_id         = "/subscriptions/your-subscription-id/resourceGroups/your-resource-group/providers/Microsoft.ConnectedVMwarevSphere/datastores/your-datastore-id"
custom_location_id   = "/subscriptions/your-subscription-id/resourceGroups/your-resource-group/providers/Microsoft.ExtendedLocation/customLocations/your-custom-location-id"
Step 3: Modify the configuration to use variables
Create a file named main.tf and insert the following code.
terraform {
  required_providers {
    azurerm = {
      source  = "hashicorp/azurerm"
      version = ">= 3.0"
    }
    azapi = {
      source  = "azure/azapi"
      version = ">= 1.0.0"
    }
  }
}

# Configure the AzureRM provider with the subscription ID
provider "azurerm" {
  features {}
  subscription_id = var.subscription_id
}

# Configure the AzAPI provider with the subscription ID
provider "azapi" {
  subscription_id = var.subscription_id
}

# Retrieve the resource group details
data "azurerm_resource_group" "example" {
  name = var.resource_group_name
}

# Create a VMware machine resource in Azure
resource "azapi_resource" "test_machine0002" {
  schema_validation_enabled = false
  parent_id = data.azurerm_resource_group.example.id
  type = "Microsoft.HybridCompute/machines@2023-06-20-preview"
  name = var.machine_name
  location = data.azurerm_resource_group.example.location
  body = jsonencode({
      kind = "VMware"
      identity = {
        type = "SystemAssigned"
      }
  })
}

# Create a Virtual Machine instance using the VMware machine created above
resource "azapi_resource" "test_vm0002" {
  schema_validation_enabled = false
  type = "Microsoft.ConnectedVMwarevSphere/VirtualMachineInstances@2023-10-01"
  name = "default"
  parent_id = azapi_resource.test_machine0002.id
  body = jsonencode({
      properties = {
          infrastructureProfile = {
            templateId = var.template_id
            vCenterId = var.vcenter_id
          }

          placementProfile = {
            resourcePoolId = var.resource_pool_id
            datastoreId = var.datastore_id
          }

          osProfile = {
            adminPassword = var.vm_password
          }
      }
      extendedLocation = {
        type = "CustomLocation"
        name = var.custom_location_id
      }
  })
  depends_on = [azapi_resource.test_machine0002]
}

# Create a guest agent for the VM instance
resource "azapi_resource" "guestAgent" {
  type      = "Microsoft.ConnectedVMwarevSphere/virtualMachineInstances/guestAgents@2023-10-01"
  parent_id = azapi_resource.test_vm0002.id
  name      = "default"
  body = jsonencode({
    properties = {
      credentials = {
        username = var.vm_username
        password = var.vm_password
      }
      provisioningAction = "install"
    }
  })
  schema_validation_enabled = false
  ignore_missing_property   = false
  depends_on = [azapi_resource.test_vm0002]
}
Step 4: Run Terraform commands
Use the -var-file flag to pass the .tfvars file during Terraform commands.
- Initialize Terraform (if not already initialized):
terraform init - Validate the configuration:
terraform validate -var-file="CreateVMwareVM.tfvars" - Plan the changes:
terraform plan -var-file="CreateVMwareVM.tfvars" - Apply the changes:
terraform apply -var-file="CreateVMwareVM.tfvars"
Confirm the prompt by entering yes to apply the changes.
Best practices
- Use version control: Keep your Terraform configuration files under version control (for example, Git) to track changes over time.
- Review plans carefully: Always review the output of terraform plan before applying changes to ensure that you understand what changes will be made.
- State management: Regularly back up your Terraform state files to avoid data loss.