Create an application gateway with TLS termination using the Azure CLI
You can use the Azure CLI to create an application gateway with a certificate for TLS termination. For backend servers, you can use a Virtual Machine Scale Set. In this example, the scale set contains two virtual machine instances that are added to the default backend pool of the application gateway.
In this article, you learn how to:
- Create a self-signed certificate
- Set up a network
- Create an application gateway with the certificate
- Create a Virtual Machine Scale Set with the default backend pool
If you prefer, you can complete this procedure using Azure PowerShell.
If you don't have an Azure subscription, create an Azure free account before you begin.
Prerequisites
Use the Bash environment in Azure Cloud Shell. For more information, see Quickstart for Bash in Azure Cloud Shell.

If you prefer to run CLI reference commands locally, install the Azure CLI. If you're running on Windows or macOS, consider running Azure CLI in a Docker container. For more information, see How to run the Azure CLI in a Docker container.
If you're using a local installation, sign in to the Azure CLI by using the az login command. To finish the authentication process, follow the steps displayed in your terminal. For other sign-in options, see Sign in with the Azure CLI.
When you're prompted, install the Azure CLI extension on first use. For more information about extensions, see Use extensions with the Azure CLI.
Run az version to find the version and dependent libraries that are installed. To upgrade to the latest version, run az upgrade.
- This tutorial requires version 2.0.4 or later of the Azure CLI. If using Azure Cloud Shell, the latest version is already installed.
Create a self-signed certificate
For production use, you should import a valid certificate signed by trusted provider. For this article, you create a self-signed certificate and pfx file using the openssl command.
openssl req -x509 -sha256 -nodes -days 365 -newkey rsa:2048 -keyout privateKey.key -out appgwcert.crt
Enter values that make sense for your certificate. You can accept the default values.
openssl pkcs12 -export -out appgwcert.pfx -inkey privateKey.key -in appgwcert.crt
Enter the password for the certificate. In this example, Azure123456! is being used.
Create a resource group
A resource group is a logical container into which Azure resources are deployed and managed. Create a resource group using az group create.
The following example creates a resource group named myResourceGroupAG in the eastus location.
az group create --name myResourceGroupAG --location eastus
Create network resources
Create the virtual network named myVNet and the subnet named myAGSubnet using az network vnet create. You can then add the subnet named myBackendSubnet needed by the backend servers using az network vnet subnet create. Create the public IP address named myAGPublicIPAddress using az network public-ip create.
az network vnet create \
  --name myVNet \
  --resource-group myResourceGroupAG \
  --location eastus \
  --address-prefix 10.0.0.0/16 \
  --subnet-name myAGSubnet \
  --subnet-prefix 10.0.1.0/24

az network vnet subnet create \
  --name myBackendSubnet \
  --resource-group myResourceGroupAG \
  --vnet-name myVNet \
  --address-prefix 10.0.2.0/24

az network public-ip create \
  --resource-group myResourceGroupAG \
  --name myAGPublicIPAddress \
  --allocation-method Static \
  --sku Standard \
  --location eastus
Create the application gateway
You can use az network application-gateway create to create the application gateway. When you create an application gateway using the Azure CLI, you specify configuration information, such as capacity, sku, and HTTP settings.
The application gateway is assigned to myAGSubnet and myAGPublicIPAddress that you previously created. In this example, you associate the certificate that you created and its password when you create the application gateway.
az network application-gateway create \
  --name myAppGateway \
  --location eastus \
  --resource-group myResourceGroupAG \
  --vnet-name myVNet \
  --subnet myAGsubnet \
  --capacity 2 \
  --sku Standard_v2 \
  --http-settings-cookie-based-affinity Disabled \
  --frontend-port 443 \
  --http-settings-port 80 \
  --http-settings-protocol Http \
  --priority "1" \
  --public-ip-address myAGPublicIPAddress \
  --cert-file appgwcert.pfx \
  --cert-password "Azure123456!"
It may take several minutes for the application gateway to be created. After the application gateway is created, you can see these new features of it:
- appGatewayBackendPool - An application gateway must have at least one backend address pool.
- appGatewayBackendHttpSettings - Specifies that port 80 and an HTTP protocol is used for communication.
- appGatewayHttpListener - The default listener associated with appGatewayBackendPool.
- appGatewayFrontendIP - Assigns myAGPublicIPAddress to appGatewayHttpListener.
- rule1 - The default routing rule that is associated with appGatewayHttpListener.
Create a Virtual Machine Scale Set
In this example, you create a Virtual Machine Scale Set that provides servers for the default backend pool in the application gateway. The virtual machines in the scale set are associated with myBackendSubnet and appGatewayBackendPool. To create the scale set, you can use az vmss create.
az vmss create \
  --name myvmss \
  --resource-group myResourceGroupAG \
  --image Ubuntu2204 \
  --admin-username azureuser \
  --admin-password Azure123456! \
  --instance-count 2 \
  --vnet-name myVNet \
  --subnet myBackendSubnet \
  --vm-sku Standard_DS2 \
  --upgrade-policy-mode Automatic \
  --app-gateway myAppGateway \
  --backend-pool-name appGatewayBackendPool
Install NGINX
az vmss extension set \
  --publisher Microsoft.Azure.Extensions \
  --version 2.0 \
  --name CustomScript \
  --resource-group myResourceGroupAG \
  --vmss-name myvmss \
  --settings '{ "fileUris": ["https://raw.githubusercontent.com/Azure/azure-docs-powershell-samples/master/application-gateway/iis/install_nginx.sh"],
  "commandToExecute": "./install_nginx.sh" }'
Test the application gateway
To get the public IP address of the application gateway, you can use az network public-ip show.
az network public-ip show \
  --resource-group myResourceGroupAG \
  --name myAGPublicIPAddress \
  --query [ipAddress] \
  --output tsv
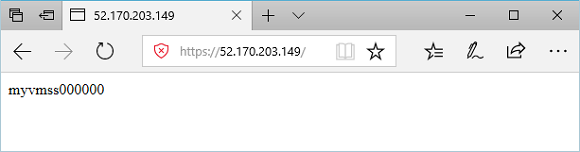
Copy the public IP address, and then paste it into the address bar of your browser. For this example, the URL is: https://52.170.203.149.

To accept the security warning if you used a self-signed certificate, select Details and then Go on to the webpage. Your secured NGINX site is then displayed as in the following example:
Clean up resources
When no longer needed, remove the resource group, application gateway, and all related resources.
az group delete --name myResourceGroupAG --location eastus