Synchronize APIs from Amazon API Gateway to Azure API Center (preview)
This article shows how to integrate an Amazon API Gateway so that the gateway's APIs are continuously kept up to date in your API center inventory.
About integrating Amazon API Gateway
Integrating Amazon API Gateway as an API source for your API center enables continuous synchronization so that the API inventory stays up to date. Azure API Center can also synchronize APIs from sources including Azure API Management.
When you integrate an Amazon API Gateway as an API source, the following happens:
- APIs, and optionally API definitions (specs), from the API Gateway are added to the API center inventory.
- You configure an environment of type Amazon API Gateway in the API center.
- An associated deployment is created for each synchronized API definition.
Synchronization is one-way from Amazon API Gateway to your Azure API center, meaning API updates in the API center aren't synchronized back to Amazon API Gateway.
Note
- Integration of Amazon API Gateway is currently in preview.
- There are limits for the number of integrated API sources.
- APIs in Amazon API Gateway synchronize to your API center once per hour. Only REST APIs are synchronized.
- API definitions also synchronize to the API center if you select the option to include them during integration. Only definitions from deployed APIs are synchronized.
Entities synchronized from Amazon API Gateway
You can add or update metadata properties and documentation to the synchronized APIs in your API center to help stakeholders discover, understand, and consume the APIs. Learn more about Azure API Center's built-in and custom metadata properties.
The following table shows entity properties that can be modified in Azure API Center and properties that are set based on their values in the API source.
| Entity | Properties configurable in API Center | Properties determined in integrated API source |
|---|---|---|
| API | summary lifecycleStage termsOfService license externalDocumentation customProperties |
title description kind |
| API version | lifecycleStage | title definitions (if synchronized) |
| Environment | title description kind server.managementPortalUri onboarding customProperties |
server.type |
| Deployment | title description server state customProperties |
server.runtimeUri |
Note
Resource and system IDs for entities synchronized to Azure API Center are automatically generated and can't be changed.
Prerequisites
An API center in your Azure subscription. If you haven't created one, see Quickstart: Create your API center.
An Azure key vault. If you need to create one, see Quickstart: Create a key vault using the Azure portal. To add or manage secrets in the key vault, at least the Key Vault Secrets Officer role or equivalent permissions are required.
An AWS IAM user identity with the
AmazonAPIGatewayAdministratorpolicy attached.For Azure CLI:
Use the Bash environment in Azure Cloud Shell. For more information, see Quickstart for Bash in Azure Cloud Shell.

If you prefer to run CLI reference commands locally, install the Azure CLI. If you're running on Windows or macOS, consider running Azure CLI in a Docker container. For more information, see How to run the Azure CLI in a Docker container.
If you're using a local installation, sign in to the Azure CLI by using the az login command. To finish the authentication process, follow the steps displayed in your terminal. For other sign-in options, see Sign in with the Azure CLI.
When you're prompted, install the Azure CLI extension on first use. For more information about extensions, see Use extensions with the Azure CLI.
Run az version to find the version and dependent libraries that are installed. To upgrade to the latest version, run az upgrade.
Note
az apiccommands require theapic-extensionAzure CLI extension. If you haven't usedaz apiccommands, the extension can be installed dynamically when you run your firstaz apiccommand, or you can install the extension manually. Learn more about Azure CLI extensions.See the release notes for the latest changes and updates in the
apic-extension. Certain features may require a preview or specific version of the extension.Note
Azure CLI command examples in this article can run in PowerShell or a bash shell. Where needed because of different variable syntax, separate command examples are provided for the two shells.
Create IAM user access keys
To authenticate your API center to Amazon API Gateway, you need access keys for an AWS IAM user.
To generate the required access key ID and secret key using the AWS Management Console, see Create an access key for yourself in the AWS documentation.
Save your access keys in a safe location. You'll store them in Azure Key Vault in the next steps.
Caution
Access keys are long-term credentials, and you should manage them as securely as you would a password. Learn more about securing access keys
Store IAM user access keys in Azure Key Vault
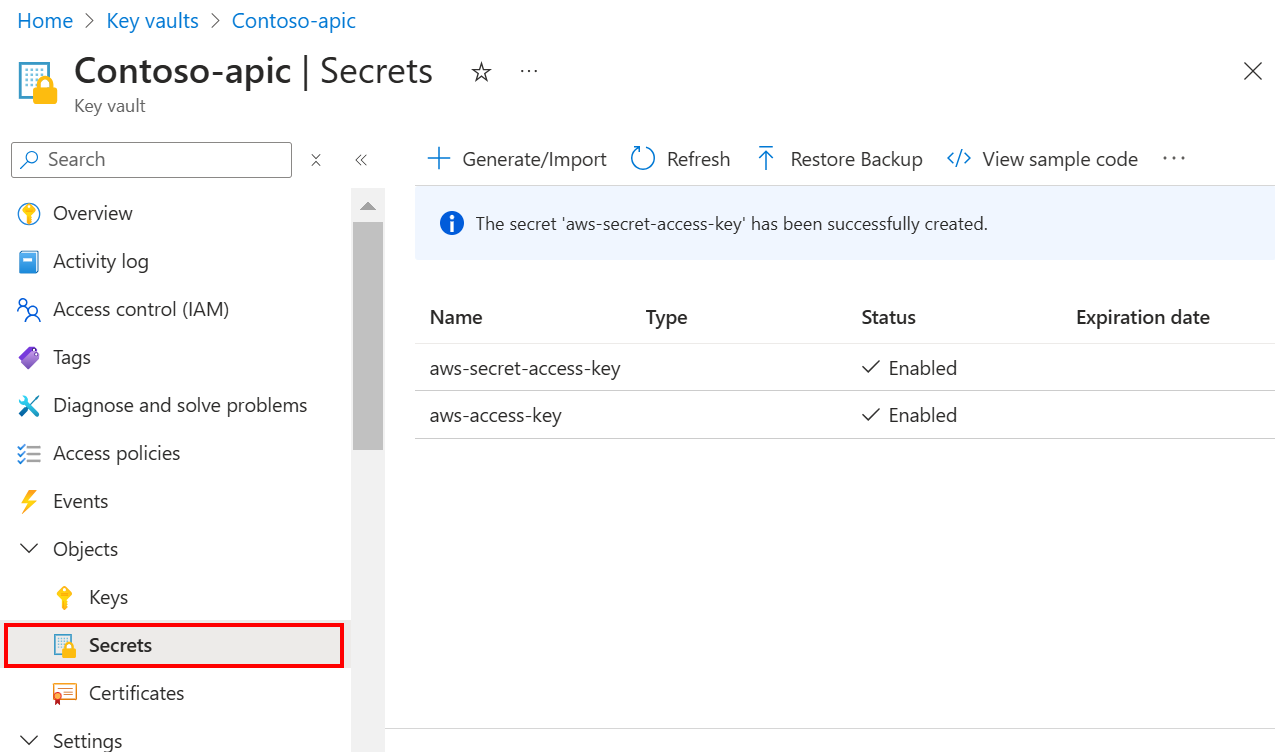
Manually upload and securely store the two IAM user access keys in Azure Key Vault using the configuration recommended in the following table. For more information, see Quickstart: Set and retrieve a secret from Azure Key Vault using the Azure portal.
| AWS secret | Upload options | Name | Secret value |
|---|---|---|---|
| Access key | Manual | aws-access-key | Access key ID retrieved from AWS |
| Secret access key | Manual | aws-secret-access-key | Secret access key retrieved from AWS |
Take note of the Secret identifier of each secret, a URI similar to https://<key-vault-name>.vault.azure.net/secrets/<secret-name>. You'll use these identifiers in the next steps.
Enable a managed identity in your API center
For this scenario, your API center uses a managed identity to access Azure resources. Depending on your needs, enable either a system-assigned or one or more user-assigned managed identities.
The following examples show how to enable a system-assigned managed identity by using the Azure portal or the Azure CLI. At a high level, configuration steps are similar for a user-assigned managed identity.
- In the portal, navigate to your API center.
- In the left menu, under Security, select Managed identities.
- Select System assigned, and set the status to On.
- Select Save.
Assign the managed identity the Key Vault Secrets User role
To allow import of APIs, assign your API center's managed identity the Key Vault Secrets User role in your Azure key vault. You can use the portal or the Azure CLI.
- In the portal, navigate to your key vault.
- In the left menu, select Access control (IAM).
- Select + Add role assignment.
- On the Add role assignment page, set the values as follows:
- On the Role tab, select Key Vault Secrets User.
- On the Members tab, in Assign access to - Select Managed identity > + Select members.
- On the Select managed identities page, select the system-assigned managed identity of your API center that you added in the previous section. Click Select.
- Select Review + assign.
Integrate an Amazon API Gateway
Run the az apic integration create aws (preview) command to integrate an Amazon API Gateway to your API center.
Provide the names of the resource group, API center, and integration.
Provide the Key Vault secret identifiers for the AWS access key and secret access key, and the AWS region where the Amazon API Gateway is deployed.
az apic integration create aws \
    --resource-group <resource-group-name> \
    --service-name-name <api-center-name> \
    --integration-name <aws-integration-name> \
    --aws-access-key-reference <access-key-uri> \
    --aws-secret-access-key-reference <secret-access-key-uri>
    --aws-region-name <aws-region>
The environment is added in your API center. The Amazon API Gateway APIs are imported to the API center inventory.
Delete an integration
While an API source is integrated, you can't delete synchronized APIs from your API center. If you need to, you can delete the integration. When you delete an integration:
- The synchronized APIs in your API center inventory are deleted
- The environment and deployments associated with the API source are deleted
To delete an integration using the Azure CLI, run the az apic integration delete (preview) command. Provide the names of the resource group, API center, and integration.
az apic integration delete \
    --resource-group <resource-group-name> \
    --service-name <api-center-name> \
    --integration-name <integration-name>