Analyze APIs in your API center - Microsoft managed
Your organization's API center includes built-in, Microsoft-managed linting capabilities (preview) to analyze API definitions for adherence to organizational style rules, generating both individual and summary reports. API analysis identifies and helps you correct common errors and inconsistencies in your API definitions.
With API analysis:
- Azure API Center automatically analyzes your API definitions whenever you add or update an API definition. API definitions are linted by default with a spectral:oas ruleset (API style guide).
- API analysis reports are generated in the Azure portal, showing how your API definitions conform to the style guide.
- You can use the Azure API Center extension for Visual Studio Code to customize and test your own API style guide locally and then deploy it to your API center.
Important
If you prefer, you can enable self-managed linting and analysis using a custom Azure function, overriding the built-in capabilities. Disable any function used for self-managed linting before using managed API analysis.
Limitations
- Currently, only OpenAPI and AsyncAPI specification documents in JSON or YAML format are analyzed.
- Currently, you configure a single ruleset, and it's applied to all OpenAPI definitions in your API center.
- There are limits for the maximum number of API definitions analyzed. Analysis can take a few minutes to up to 24 hours to complete.
Prerequisites
- An API center in your Azure subscription. If you haven't created one already, see Quickstart: Create your API center.
- For customizing the ruleset, Visual Studio Code and the following Visual Studio Code extensions:
View API analysis reports
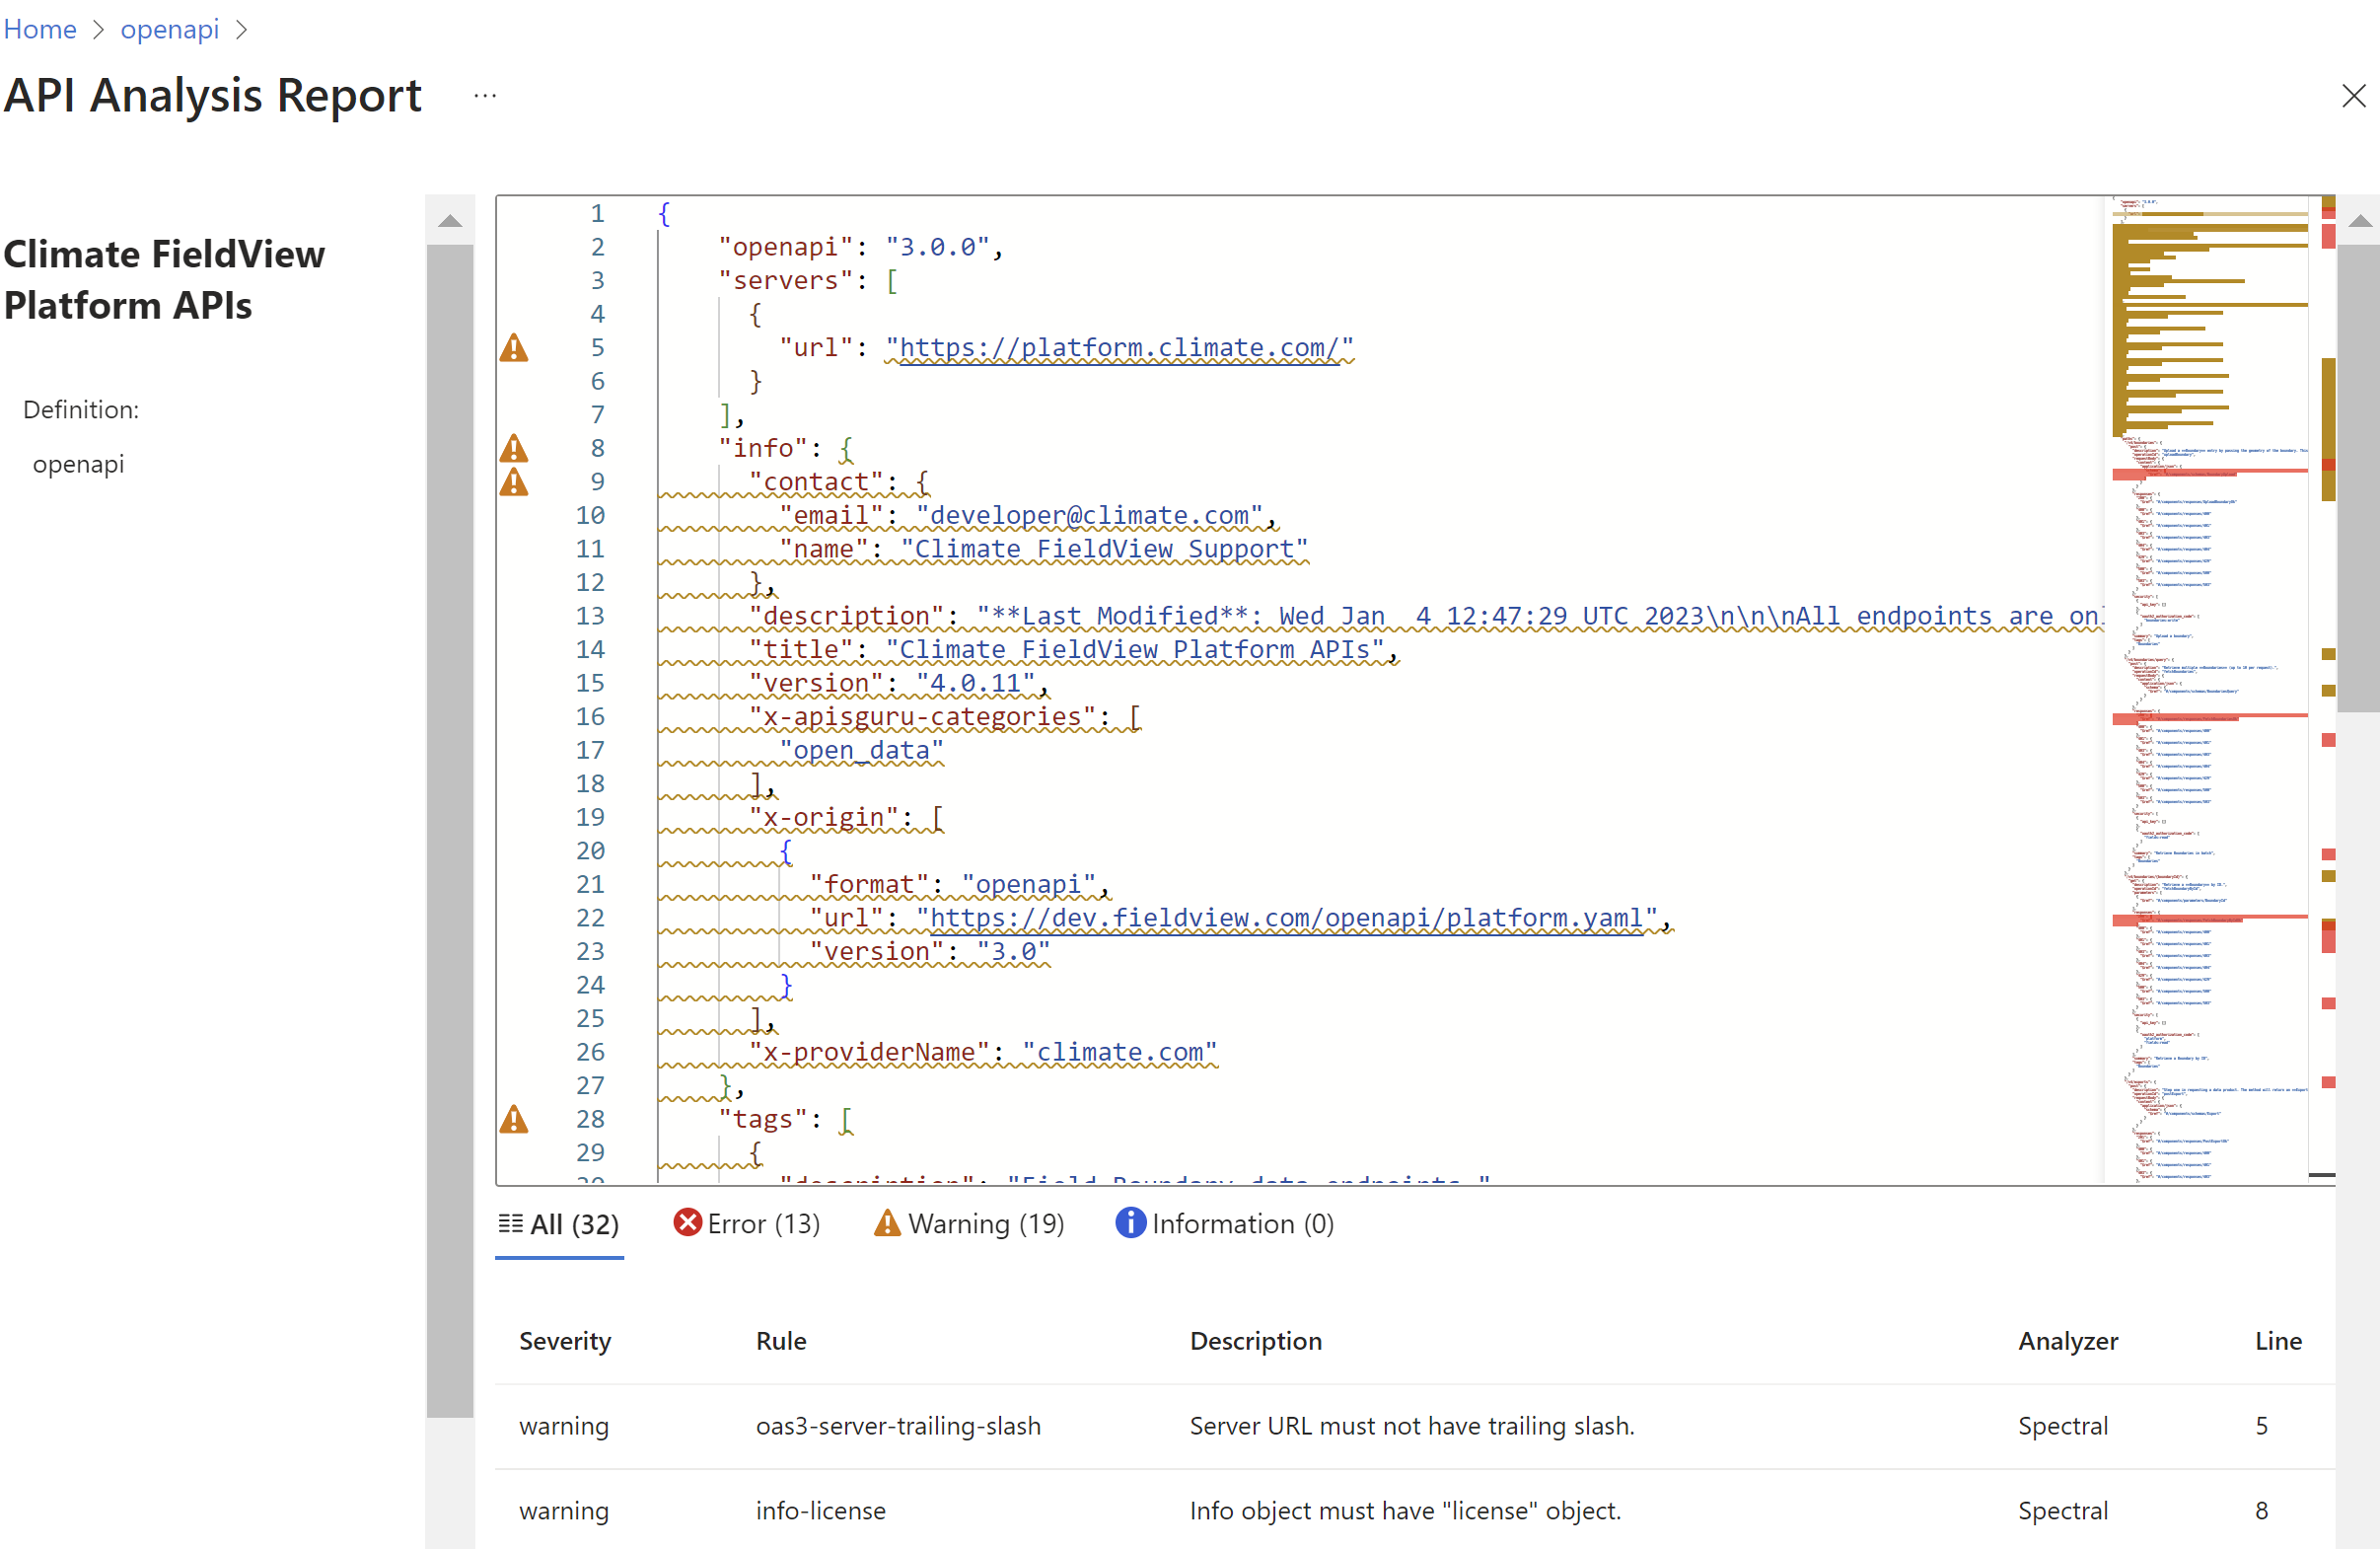
View an analysis summary and the analysis reports for your API definitions in the Azure portal. After API definitions are analyzed, the reports list errors, warnings, and information based on the configured API style guide.
In the API analysis report, also review the ruleset that was used for the analysis and the history of linting passes.
To view an analysis summary in your API center:
In the portal, navigate to your API center.
In the left-hand menu, under Governance, select API Analysis. The summary appears.
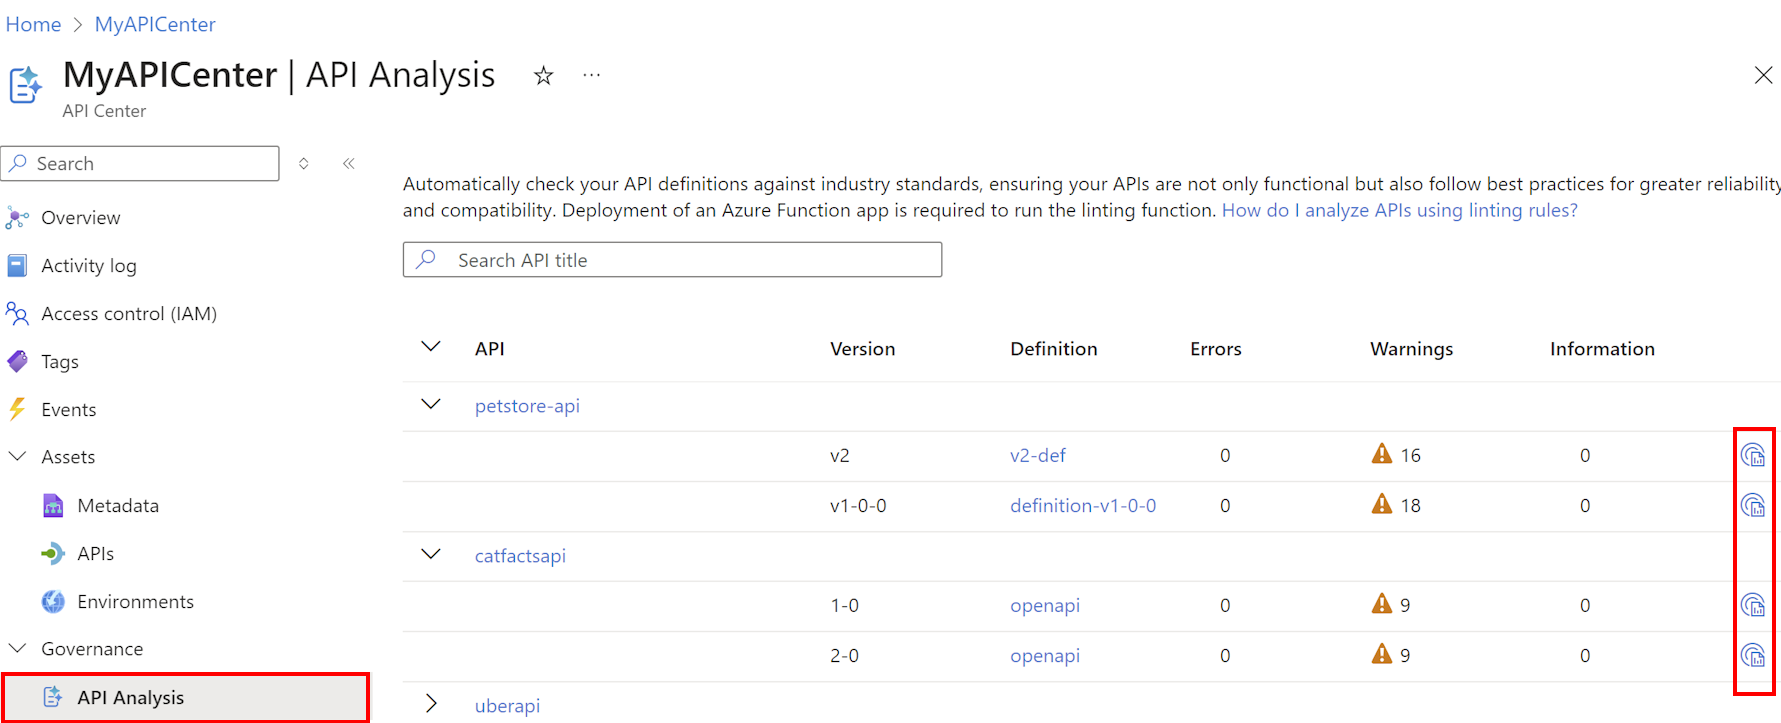
Optionally select the API Analysis Report icon for an API definition. The definition's API analysis report appears, as shown in the following screenshot.
Tip
You can also view the API analysis report by selecting Analysis from the API definition's menu bar.


Customize ruleset
You can use the Azure API Center extension for Visual Studio Code to customize the default ruleset for your API center or replace it as your organization's API style guide. For example, you can extend the ruleset or add custom functions.
To customize or replace the ruleset:
- In Visual Studio Code, select the Azure API Center icon from the Activity Bar.
- Open the
.api-center-rulesfolder at the root of your working folder. - In the folder for your API center resource, open the
ruleset.ymlfile. - Modify or replace the content as needed.
- Save your changes to
ruleset.yml.
Test ruleset locally
Before deploying the custom ruleset to your API center, validate it locally. The Azure API Center extension for Visual Studio Code provides integrated support for API specification linting with Spectral.
In Visual Studio Code, use the Ctrl+Shift+P keyboard shortcut to open the Command Palette.
Type Azure API Center: Set active API Style Guide and hit Enter.
Choose Select Local File and specify the
ruleset.ymlfile that you customized. Hit Enter.This step makes the custom ruleset the active API style guide for linting.
Now, when you open an OpenAPI-based API definition file, a local linting operation is automatically triggered in Visual Studio Code. Results are displayed inline in the editor and in the Problems window (View > Problems or Ctrl+Shift+M).
Tip
API developers in your organization can also use this local linting capability to help improve their API definitions before registering APIs in your API center.

Review the linting results. Make any necessary adjustments to the ruleset and continue to test it locally until it performs the way you want.
Deploy ruleset to your API center
To deploy the custom ruleset to your API center:
- In Visual Studio Code, select the Azure API Center icon from the Activity Bar.
- In the API Center pane, expand the API center resource in which you customized the ruleset.
- Right-click Rules and select Deploy Rules to API Center.
A message notifies you after the rules are successfully deployed to your API center. The linting engine uses the updated ruleset to analyze API definitions.
To see the results of linting with the updated ruleset, view the API analysis reports in the portal.
Related content
- To learn more about the default built-in ruleset, see the Spectral GitHub repo.
- Enable API analysis in your API center - self-managed