Design and develop APIs using API Center plugin for GitHub Copilot for Azure
The API Center plugin for GitHub Copilot for Azure (preview) accelerates design and development of new APIs starting from natural language prompts. With AI assistance available through the API Center plugin combined with the API Center VS Code extension, simply describe your API and quickly generate an OpenAPI spec for API development that complies with your organization's standards. After you generate a compliant spec, you can register the API with your API center.
Note
This feature is available in the pre-release version of the API Center extension.
Prerequisites
One or more API centers in your Azure subscription.
- Currently, you need to be assigned the Azure API Center Service Contributor role or higher permissions on an API center to manage APIs with the extension.
- GitHub Copilot for Azure - to generate OpenAPI specification files using the Azure API Center Plugin for GitHub Copilot for Azure (preview)
Extension setup
Install the Azure API Center extension for Visual Studio Code from the Visual Studio Code Marketplace. Install other extensions listed in the Prerequisites.
Note
Where noted, certain features are available only in the Azure API Center extension's pre-release version. When installing the extension from the Visual Studio Code Marketplace, you can choose to install the release version or a pre-release version. Switch between the two versions at any time by using the extension's Manage button context menu in the Extensions view.
In Visual Studio Code, in the Activity Bar on the left, select API Center.

If you're not signed in to your Azure account, select Sign in to Azure..., and follow the prompts to sign in. Select an Azure subscription with the API center (or API centers) you wish to view APIs from. You can also filter on specific subscriptions if you have many to view from.
Make request to the @azure agent
Follow these steps to generate an OpenAPI specification using natural language prompts with GitHub Copilot for Azure:
If desired, set an active API style guide in the Azure API Center extension. Use the Ctrl+Shift+P keyboard shortcut to open the Command Palette. Type Azure API Center: Set API Style Guide, make a selection, and hit Enter.
If no style guide is set, the default
spectral:oasruleset is used. Learn more about API specification linting using the API Center extension.In the chat panel, make a request in natural language to the
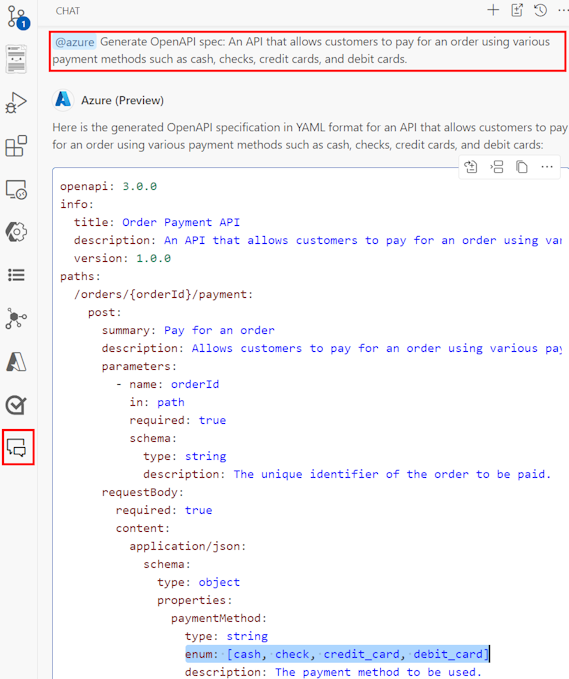
@azureagent to describe what the API does. Example:@azure Generate an OpenAPI spec: An API that allows customers to pay for an order using various payment methods such as cash, checks, credit cards, and debit cards. Check that there are no duplicate keys.Copilot is powered by AI, so surprises and mistakes are possible. For more information, see Copilot FAQs.
The agent responds with an OpenAPI specification document.
Review the generated output for accuracy, completeness, and compliance with your API style guide.
Refine the prompt if needed to regenerate the spec, or repeat the process using a different style guide that you set in the Azure API Center extension.
Tip
Effective prompts focus on an API's business requirements rather than implementation details. Shorter prompts sometimes work better than longer ones.
When it meets your requirements, save the generated OpenAPI specification to a file.
Register the API in your API center
Use the Azure API Center extension for VS Code to register the API in your API center from the generated specification file. After registering the API, you can use the extension to view the API documentation, generate an HTTP client, perform further linting and analysis, and more.
In VS Code, select Register your API in API Center button in the chat panel, or select Azure API Center: Register API from the Command Palette.
Select Manual.
Select the API center to register APIs with.
Answer prompts with information including API title, type, version title, version lifecycle, definition title, specification name, and definition (specification) file to complete API registration.
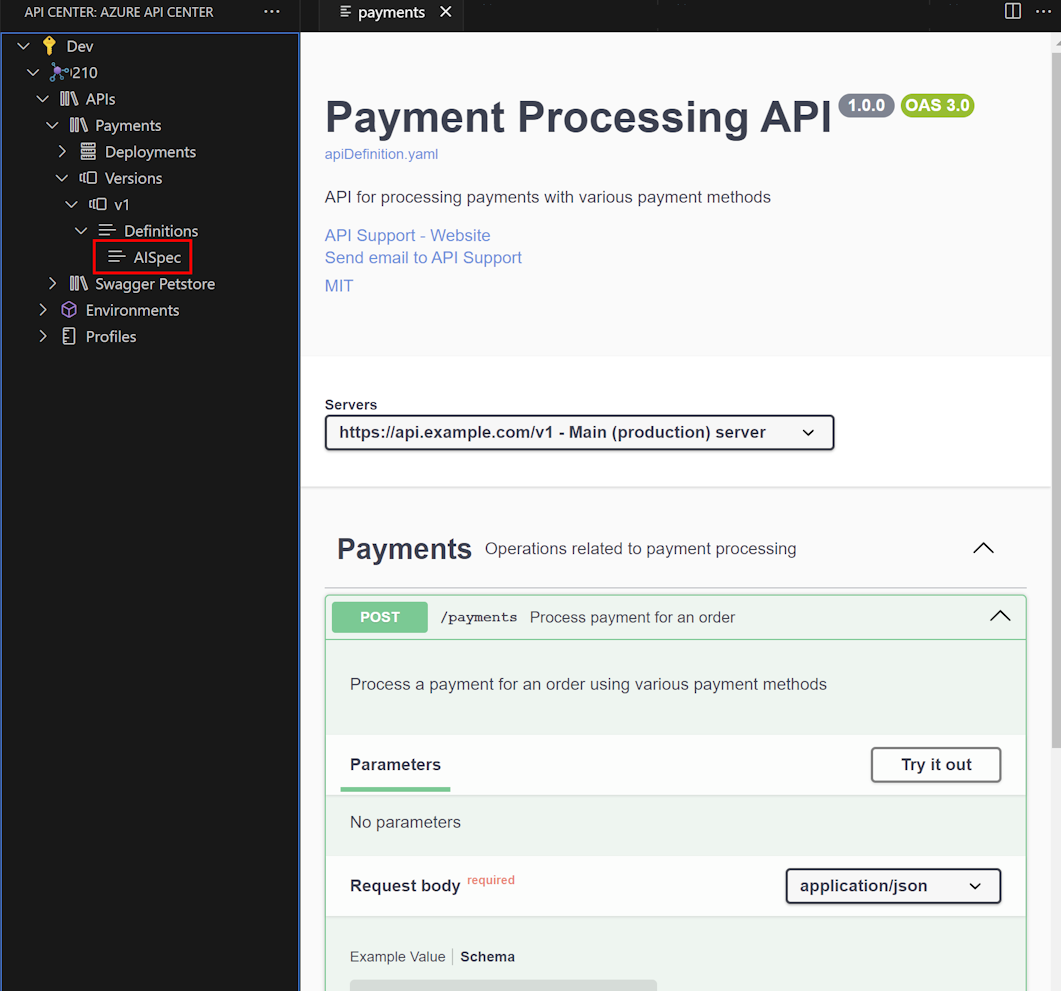
After the API is registered, you can perform various tasks using the extension. For example, view API documentation in the Swagger UI:
Expand the API Center tree view to select the definition for the API version that you registered.
Right-click on the definition, and select Open API Documentation. A new tab appears with the Swagger UI for the API definition.
Related content
- Azure API Center - key concepts
- Build and register APIs with the Azure API Center extension for Visual Studio Code
- Discover and consume APIs with the Azure API Center extension for Visual Studio Code
- Govern APIs with the Azure API Center extension for Visual Studio Code
- Enable and view platform API catalog in Visual Studio Code
- Overview of GitHub Copilot for Azure