Deploy an Azure Kubernetes application by using an ARM template
To deploy a Kubernetes application programmatically through Azure CLI, you select the Kubernetes application and settings, generate an ARM template, accept legal terms and conditions, and finally deploy the ARM template.
Select Kubernetes application
First, you need to select the Kubernetes application that you want to deploy in the Azure portal.
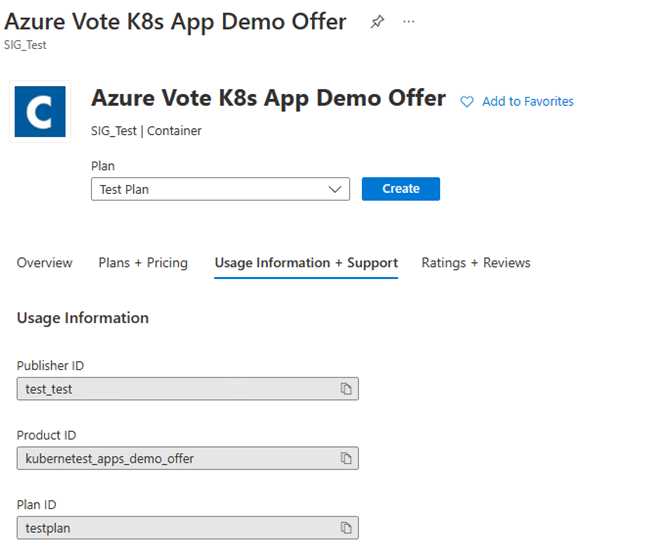
In the Azure portal, go to the Marketplace page.
Select your Kubernetes application.
Select the required plan.
Select the Usage Information + Support tab. Copy the values for
publisherID,productID, andplanID. You'll need these values later.
Generate ARM template
Continue on to generate the ARM template for your deployment.
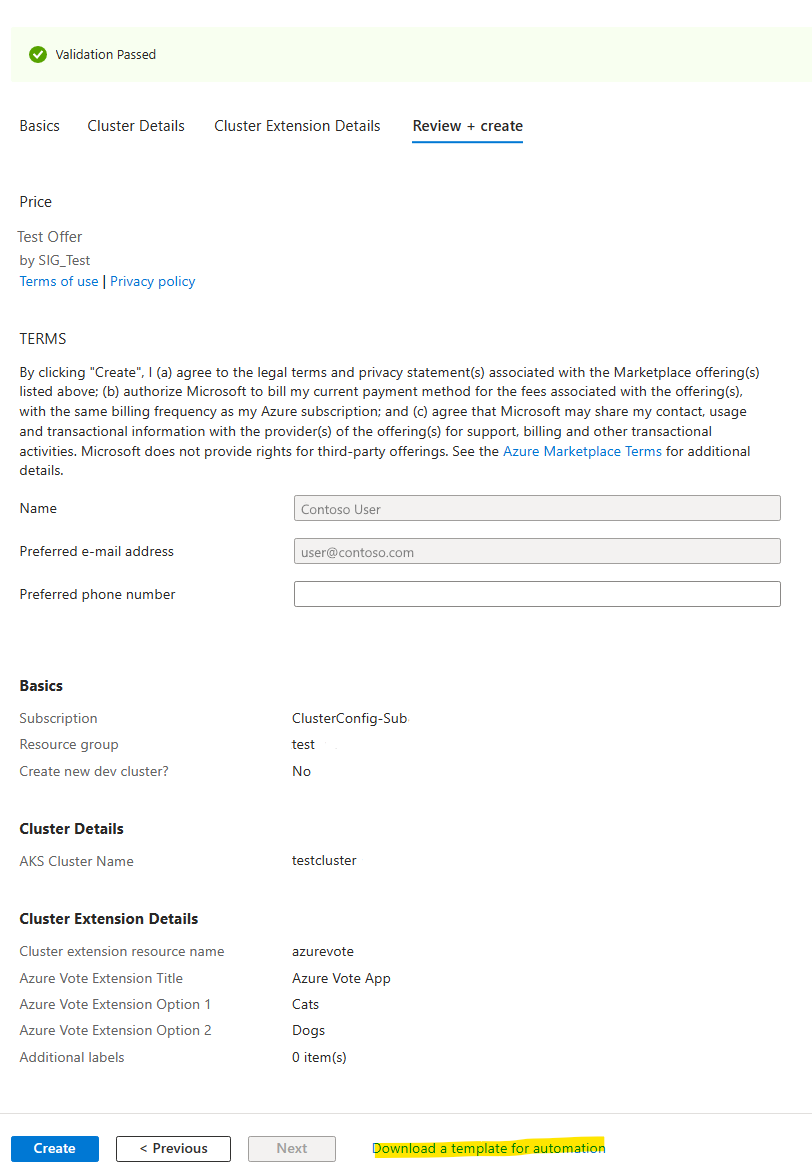
Select the Create button.
Fill out all the application (extension) details.
At the bottom of the Review + Create tab, select Download a template for automation.

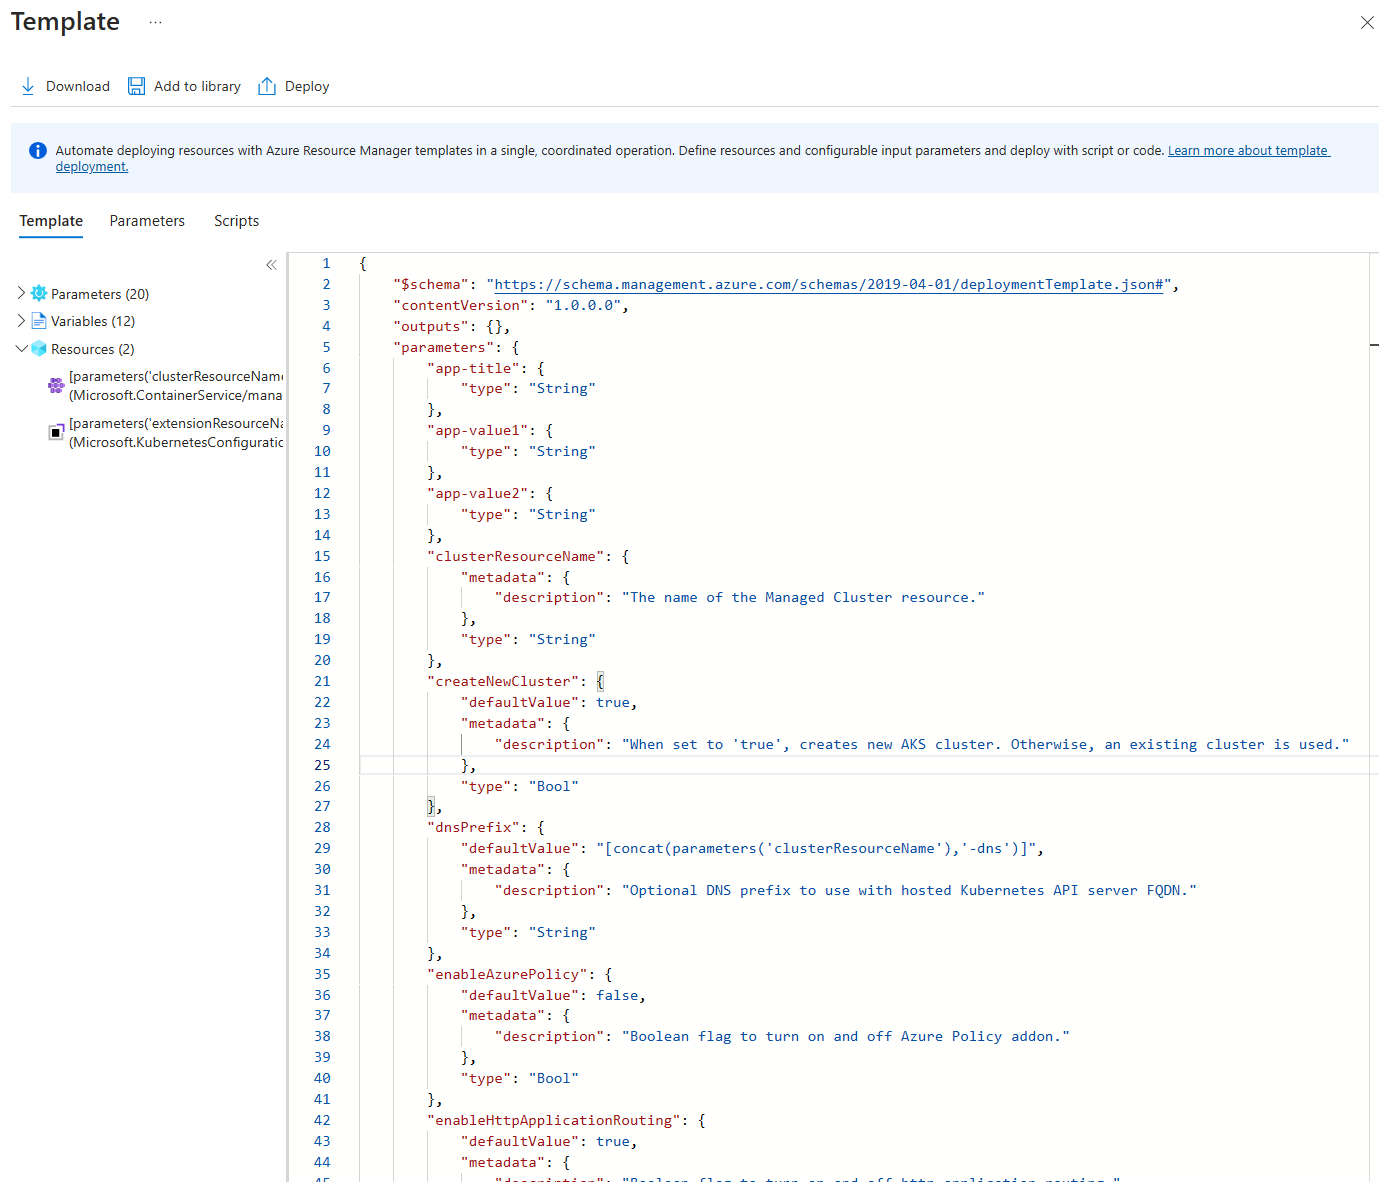
If all the validations are passed, you'll see the ARM template in the editor.

Download the ARM template and save it to a file on your computer.
Accept terms and agreements
Before you can deploy a Kubernetes application, you need to accept its terms and agreements. To do so, use Azure CLI or Azure PowerShell. Be sure to use the values you copied for plan-publisher, plan-offerID, and plan-name in your command.
az vm image terms accept --offer <Product ID> --plan <Plan ID> --publisher <Publisher ID>
Note
Although this Azure CLI command is for VMs, it also works for containers. For more information, see the az cm image terms reference.
## Get-AzMarketplaceTerms -Publisher <Publisher ID> -Product <Product ID> -Name <Plan ID>
Deploy ARM template
Once you've accepted the terms, you can deploy your ARM template. For instructions, see Tutorial: Create and deploy your first ARM template.
Next steps
- Learn about Kubernetes applications available through Marketplace.
- Learn about cluster extensions.
Azure Kubernetes Service
