Automated deployments for Azure Kubernetes Service (AKS)
Automated deployments simplify the process of setting up a GitHub Action and creating an automated pipeline for your code releases to your Azure Kubernetes Service (AKS) cluster. Once connected, every new commit you make kicks off the pipeline, resulting in updates to your application.
Prerequisites
- A GitHub account.
- An AKS cluster. If you don't have one, you can create one using the steps in Deploy an Azure Kubernetes Service (AKS) cluster.
- An Azure Container Registry (ACR). If you don't have one, you can create one using the steps in Integrate Azure Container Registry (ACR) with an Azure Kubernetes Service (AKS) cluster.
- An application to deploy.
Configure an automated deployment
- In the Azure portal, navigate to your AKS cluster resource.
- From the service menu, under Settings, select Automated deployments > Create. This presents you with two options: Automatically containerize and deploy and Deploy an application.
- If you have an application that isn't yet containerized, you can select Automatically containerize and deploy to allow Azure to take care of the process for you. If you already have a containerized application, select Deploy an application.
Automatically containerize and deploy an application to your AKS cluster
- Enter a name for your workflow, and then select Authorize access to connect your Azure account with your GitHub account. After your accounts are linked, choose which repository and branch you would like to create the GitHub Action for.
- Back in the Azure portal, fill out the remaining fields, providing details about your application that will be used to automatically generate deployment artifacts.
- Review and verify the automated deployment.
Deploy an already containerized application to your AKS cluster
- Enter a name for your workflow, and then select Authorize access to connect your Azure account with your GitHub account. After your accounts are linked, choose which repository and branch you would like to create the GitHub Action for.
- Select Next: Image and choose your Dockerfile, Azure container registry, and image name.
- Select Next: Deployment details, and decide whether you want to deploy with Helm or regular Kubernetes manifests. Once decided, select the appropriate deployment files from your repository and decide which namespace you want to deploy into.
- Review and verify the automated deployment.
Review and verify the automated deployment
When finished, select Next: Review, and review your deployment.
Select Next: Deploy to finish the creation of the automated deployment.
Select View pull request to see your GitHub Action.
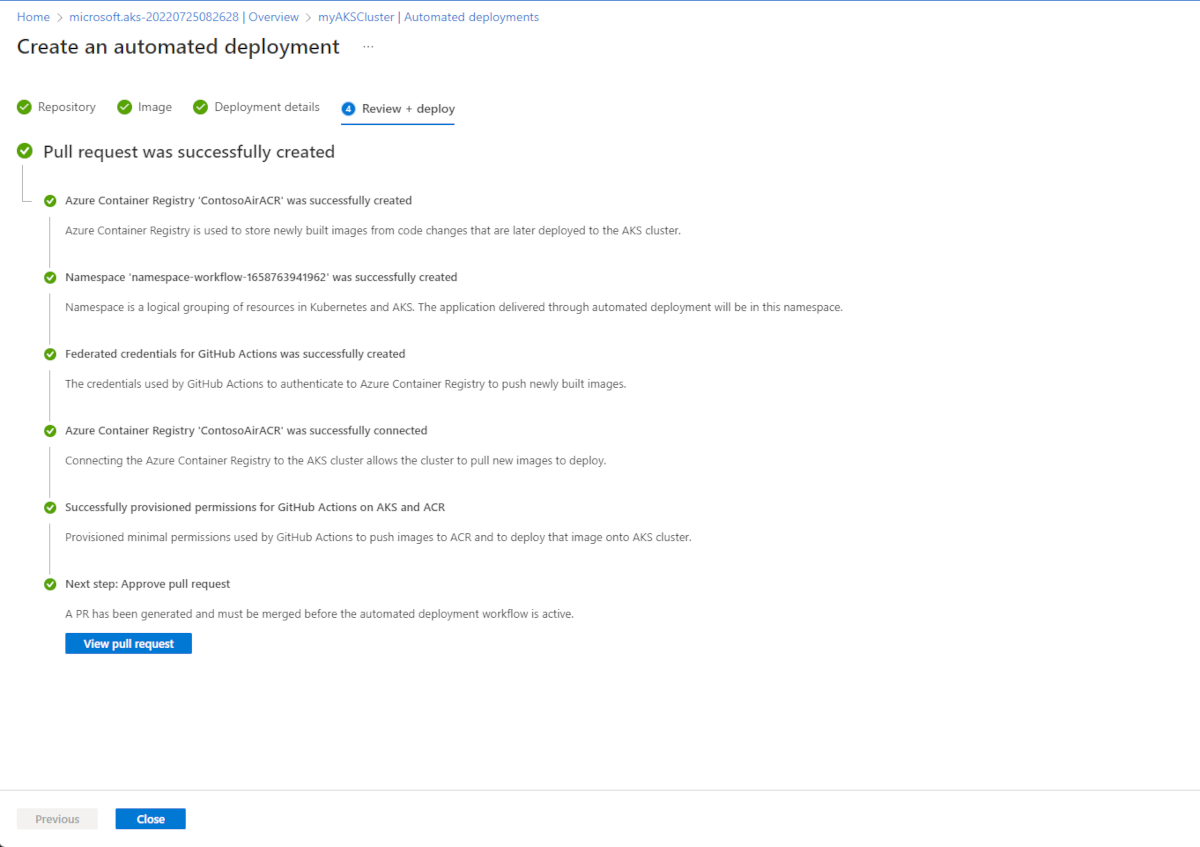
Merge the pull request to kick off the GitHub Action and deploy your application.

Once your application is deployed, go back to the Azure portal, navigate to your AKS cluster resource, and select Automated deployments to see the status of your deployment.


Clean up resources
You can remove any related resources that you created when you don't need them anymore individually or by deleting the resource group to which they belong. To delete your automated deployment, navigate to the automated deployment dashboard and select ..., then select Delete and confirm your action.
To switch GitHub profiles in Automated deployments, you will need to revoke access for the existing user. This is done by revoking access in GitHub's developer settings.
- Go to your GitHub profile settings.
- Inside
ApplicationsselectAuthorized OAuth Apps. - Select
AKS Developer Huband Revoke access.
You can now select a new GitHub account to authorize with Automated deployments.
Next steps
You can modify these GitHub Actions to meet the needs of your team by opening them up in an editor like Visual Studio Code and changing them as you see fit.
Learn more about GitHub Actions for Kubernetes.

Azure Kubernetes Service