Creating a Memory-Optimized Table
Applies to:
SQL Server
Azure SQL Database
Azure SQL Managed Instance
memory-Optimized tables are a feature of SQL Server where the entire table resides in memory. A second copy of the table data is maintained on disk. Data in memory-optimized tables is only read from disk during database recovery. For example, after a server restart. memory-Optimized tables can be created in the table designer in Azure Data Studio.
Note
memory-optimized tables must belong to a filegroup. To read more on this, check out this documentation on the memory optimized filegroup.
memory-Optimized tables must have a non-clustered primary key. For an introduction to memory-optimized Tables, check out the Introduction to Memory-Optimized Tables article. Additionally, all memory-optimized tables must have at least one index.
Create a memory-optimized table
To create a memory-optimized Table, we need to ensure that a filegroup has been created for our database. In the object explorer, open a new query editor window from the server level as we will be creating an entirely new database in which our memory-optimized table will reside. In the query editor, copy, paste and execute the following code:
CREATE DATABASE imoltp
GO

--------------------------------------
-- create database with a memory-optimized
-- filegroup and a container.

ALTER DATABASE imoltp ADD FILEGROUP imoltp_mod
    CONTAINS MEMORY_OPTIMIZED_DATA;

ALTER DATABASE imoltp ADD FILE (
    name='imoltp_mod1', filename='c:\data\imoltp_mod1')
    TO FILEGROUP imoltp_mod;

ALTER DATABASE imoltp
    SET MEMORY_OPTIMIZED_ELEVATE_TO_SNAPSHOT = ON;
GO
--
The code above creates a new database, adds a filegroup to the database, adds a file to the filegroup, and finally sets the isolation level for any memory-optimized table added to this database to SNAPSHOT.
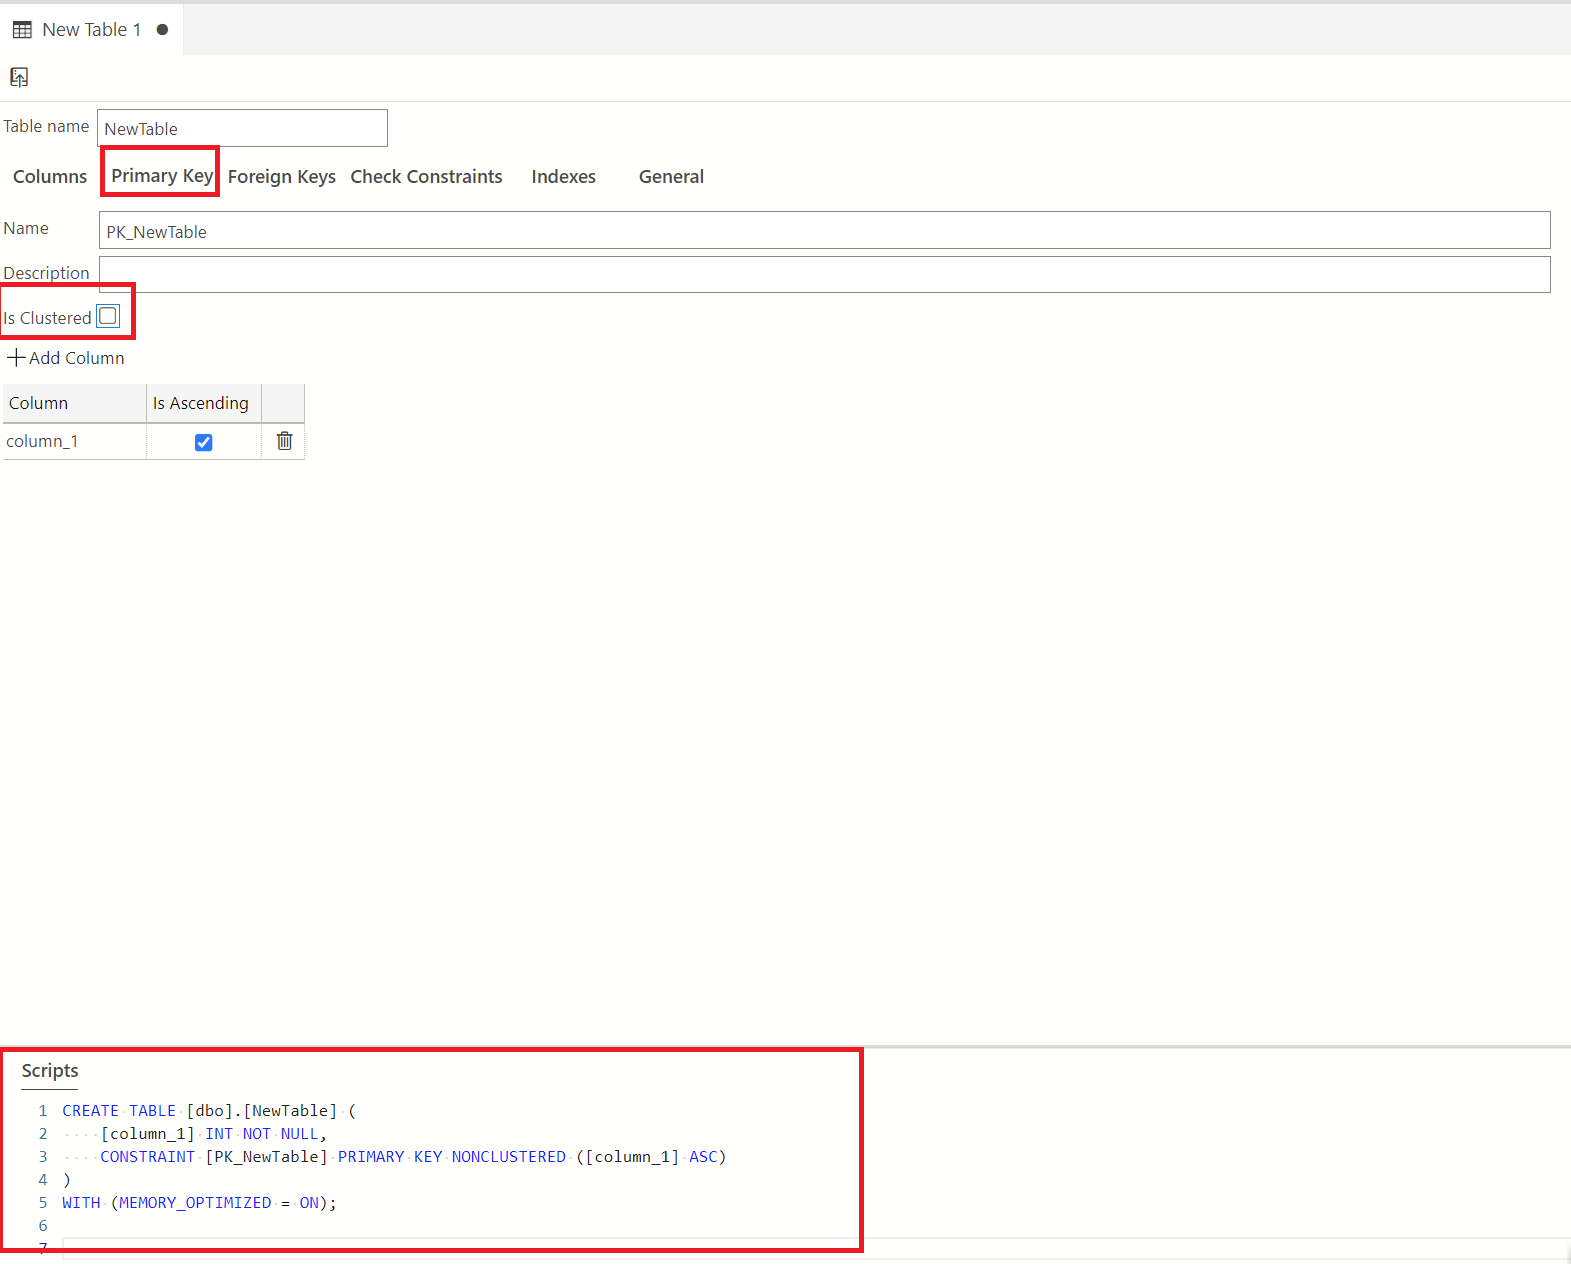
Next, create your table by opening the imoltp database from the object explorer, right-clicking the Tables folder, and selecting New Table. This will open up the table designer view. Assign the primary key for this table (ensure that this primary key is non-clustered by unchecking the Clustered checkbox in the Primary Key settings)

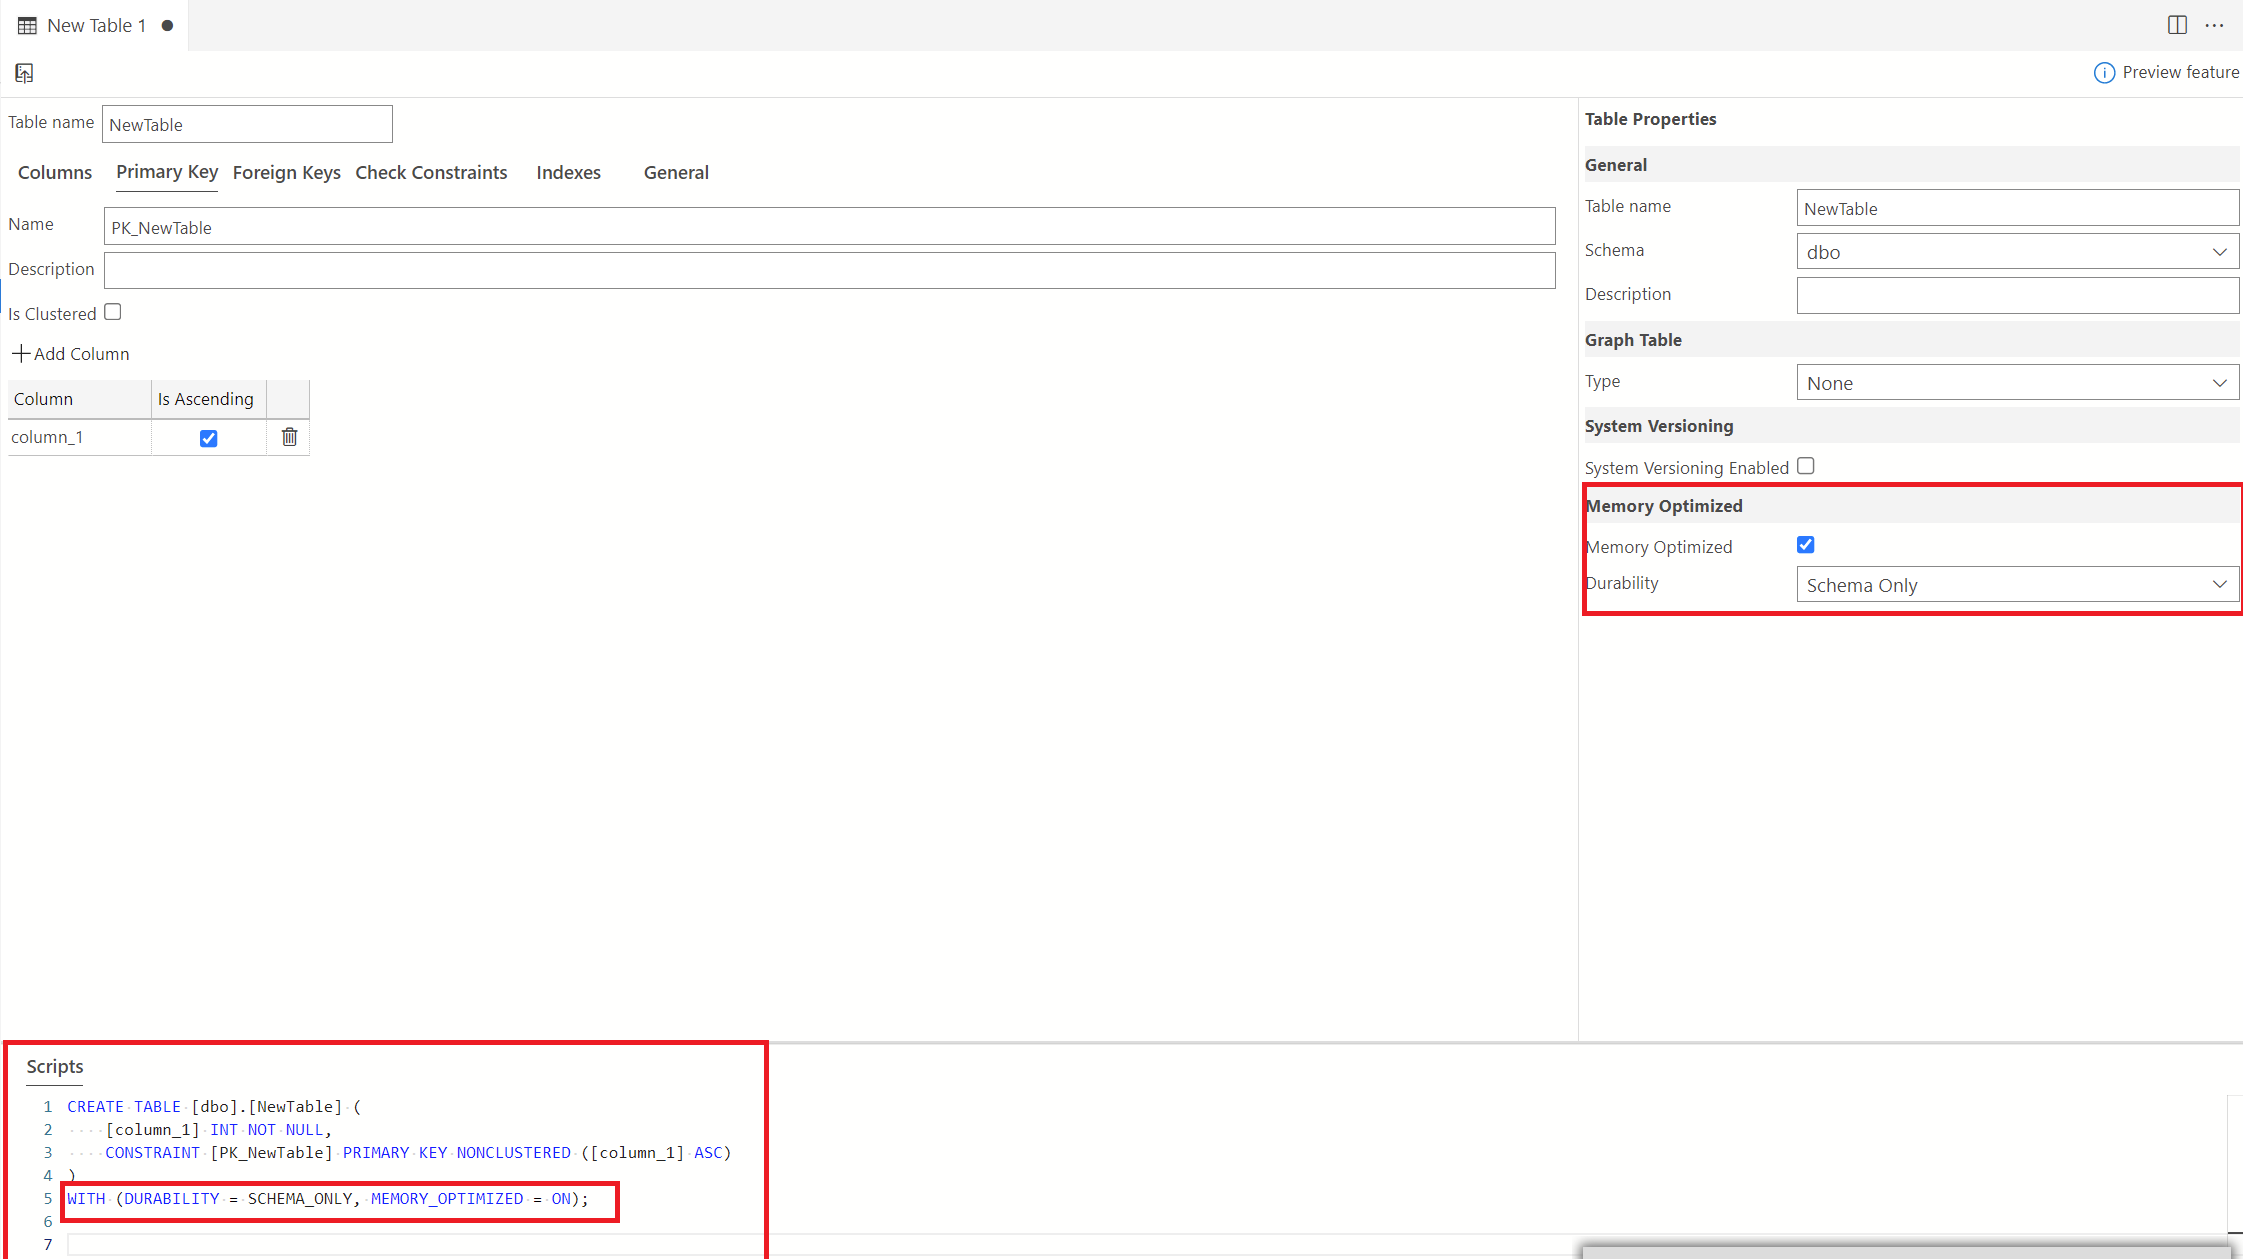
In the Table Properties pane. Select the Memory-Optimized checkbox. This will enable the durability drop-down where you can choose whether you want only the Schema to be stored in memory or both the Schema and Data. Choosing "Schema" only saves the schema of your database to memory. As you can see below, the script is updated to reflect the changes.

Choosing Schema saves only the schema to memory. Choosing Schema and Data saves both the schema and data to memory. Notice the change in the script.

Note
The table designer also supports hash indexes, columnstore indexes, and these can be configured while creating the memory-optimized table.