Simple Data Binding in XAML
Data binding is a great way to display your data. This step-by-step tutorial will teach you the basics. If you are already familiar with data binding you can skip this tutorial.
What is data binding
Data binding provides a simple and consistent way for applications to present and interact with data. Elements can be bound to data from a variety of data sources in the form of common language runtime (CLR) objects or XML. ContentControls such as Button and ItemsControls such as ListBox and ListView have built-in functionality to enable flexible styling of single data items or collections of data items. Sort, filter, and group views can be generated on top of the data.
Get started
To explain the basics of data binding we will create a simple Windows Phone 7 application. This application contains four textboxes which will show the three ways of data binding:
- OneTime
- OneWay
- TwoWay
What do they mean ?
OneTime binding sends data from the source to the target; however, it does this only when the application is started or when the DataContext changes and, as a result, does not listen for change notifications in the source.
When using OneWay binding the data flows from the source to the target each time a change is made on the source. OneWay binding is the default binding mode for the TextBlock's Text property and does not need to be specified.
TwoWay binding sends the source data to the target, and if there are changes in the target property's value, those will be sent back to the source.
Let’s create the application stub. For this demo I will use Expression Blend, because its support for XAML-based tooling, especially data binding, is great. Both designer and developers will find benefit in using Blend, although the advantage is now somewhat reduced since Visual Studio 2012+ use the Blend Designer rather than the older cider.
Name the projects as you want. After Blend has finished the creation of the project we will see the following screen
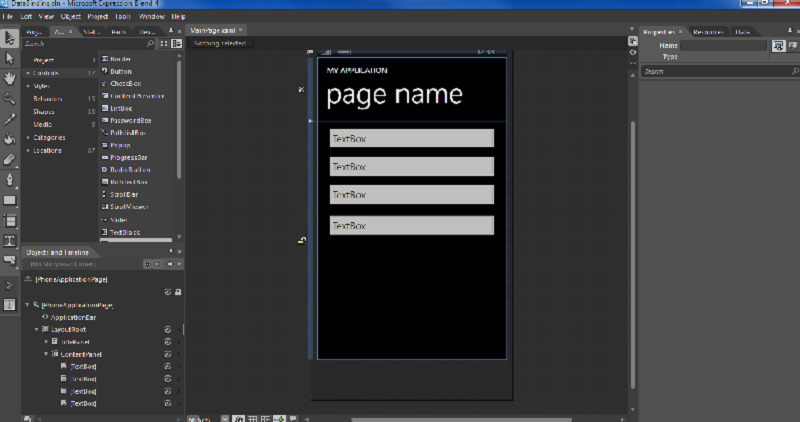
To show the functionality of the three data binding ways we will put four textboxes on our design surfaces. The first textbox will be the source, textbox number two will demonstrate OneTime binding, textbox number three OneWay binding, and the last textbox TwoWay binding. The application should now look something like this:
Now we will come to the exciting part. Click the second textbox from the top. You should see the Properties window (if not go to Window menu and select Properties option). In the Properties window go to Common Properties where you can find the Text property. On the right of it you can see a small white point. Click it and in the context menu choose Data Binding…
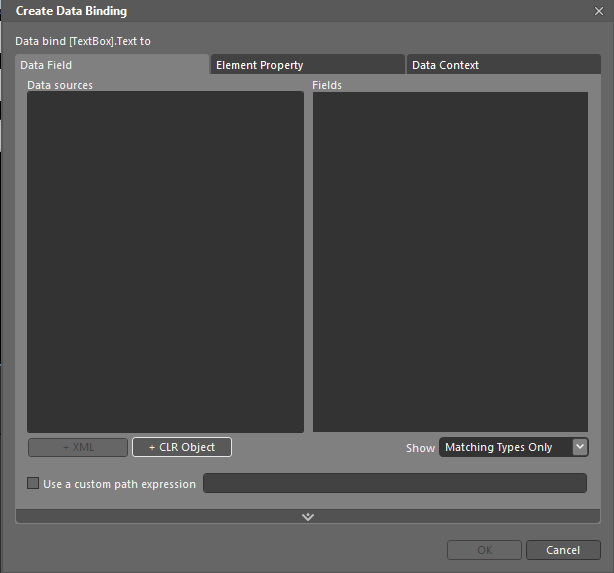
You should now see the Create Data Binding menu.
Choose the Element Property tab. At Scene elements choose the top textbox and on Properties the Text property. After you have done this slide down the accordion and select OneTime binding direction.
Do the same for the third textbox (with OneWay binding) and for the fourth textbox (with TwoWay binding). Don’t forget to mark the first textbox as the source element. If you are ready start the project. It should look something like this:
Now we will test our data binding. Change the text in the first textbox. You should see that the third and the fourth text will react to the changes immediately. But what happens with our second? Like said above, OneTime binding will only work the first time when the DataContext will be set. After that the binding will be deleted and changes are not reflected on it.
Let’s have a look at the OneWay binding. Like you have seen the third textbox reacts on changes of the first textbox. Does this also work in the other direction? Try it! You will see that the first textbox will keep its value.
The last binding mode is TwoWay binding. You have already seen that the fourth textbox reacts on changes of the first textbox immediately, but it should also do it in the other direction. Really?
Make some changes to the fourth textbox. Mh? The text of the first textbox does not react immediately on the changes, but why? This example shows how smart data binding is. In this case the text property of the first textbox will only be set if the fourth textbox will lose the focus. Why is that smart? Imagine it would not do that. In that case it will go into an infinite loop where the two textboxes will update each other.
With that we are finished and you can take the next steps in getting a data binding ninja.
Download
You can download the sample project from the MSDN Samples site.
Other Languages
This article is also available in the following languages:
Deutsch
Italian
Portuguese
See Also
Another important place to find a huge amount of Windows Phone related articles is the TechNet Wiki itself. The best entry point is Windows Phone Resources on the TechNet Wiki.


