Powershell V3: Using Scheduled Jobs
Using Scheduled Jobs in Powershell V3
What are “Scheduled Jobs”?
Scheduled Jobs are actually regular Scheduled Tasks, and follow all the same rules for trigger, action, etc. However, Scheduled Jobs are created in Powershell, and are specifically designed to run Powershell scripts.
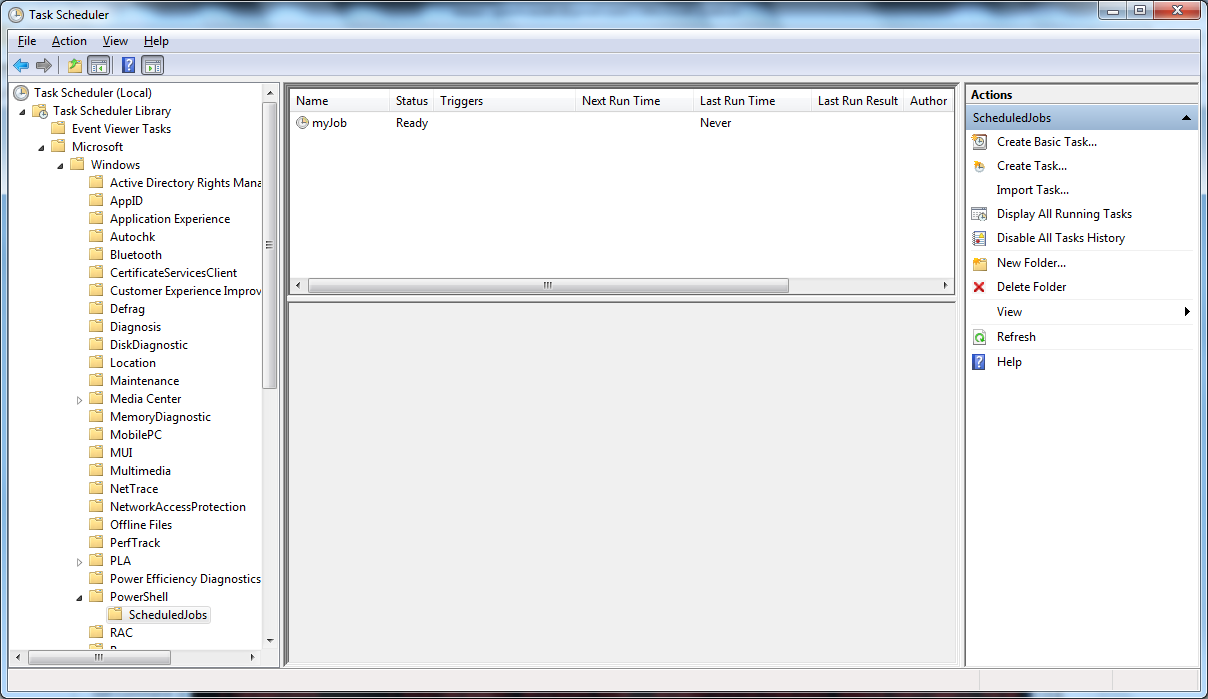
Powershell Scheduled Jobs will appear in the Task Scheduler under:
Task Scheduler Library/Microsoft/Windows/Powershell/ScheduledJobs
Here, you can modify triggers and other settings, just as you would with any other scheduled task.
Getting started with Powershell Scheduled Jobs
First, you must import the module. Run the following command:
Import-Module PSScheduledJob
Then run the following command to see all the cmdlets available to you from this module:
Get-Command -Module PSScheduledJob
This list may seem overwhelming, but the most important objects are ScheduledJobs and JobTriggers. Using just these two objects, we can create a working scheduled task.
Creating a new Scheduled Job
You have the option of creating the trigger(s) first, and including it in the job definition, or adding the trigger(s) afterwards.
In this example, we create a job, then create a trigger, and then add the trigger to the job. We then examine the job options and settings.
Please note that when working with Scheduled Jobs, you must be running in an elevated Powershell session.
Registering a Scheduled Job
Type the following command:
Register-ScheduledJob -Name myJob -FilePath c:\scripts\test.ps1
You will receive output similar to the following:
Id Name Triggers Command Enabled
-- ---- -------- ------- -------
1 myJob {} c:\scripts\test.ps1 True
Notice that the Scheduled Job “myJob” is Enabled, and has no Triggers. We can see this job in Task Scheduler, to make sure it was created as expected:

We can also check the status of all Powershell Scheduled Jobs with this command:
Get-ScheduledJob
Creating a Trigger
Type the following command:
$jt = New-JobTrigger -Daily -At 10:00
This will create a job trigger, and assign it to a variable called $jt.
Adding a Trigger to a Scheduled Job
Type the following command:
Add-JobTrigger -Trigger $jt -Name myJob
Checking the status of our Scheduled Job
Type the following command:
Get-ScheduledJob myJob
You will get results similar to this:
Id Name Triggers Command Enabled
-- ---- -------- ------- -------
1 myJob {1} c:\scripts\test.ps1 True
Notice that now the job has one trigger. To get more detail on this trigger, type:
Get-ScheduledJob myJob | Get-JobTrigger
You will see output similar to this:
Id Frequency Time DaysOfWeek Enabled
-- --------- ---- ---------- -------
1 Daily 11/02/2012 10:00:00 True
Notice that the Trigger is attached to the Job. We can see this in Task Scheduler, just to be sure:
Finally, we can look at the settings for the Scheduled Job:
Type the following command:
Get-ScheduledJob myJob | Get-ScheduledJobOption
We will see something like this:
StartIfOnBatteries : False
StopIfGoingOnBatteries : True
WakeToRun : False
StartIfNotIdle : True
StopIfGoingOffIdle : False
RestartOnIdleResume : False
IdleDuration : 00:10:00
IdleTimeout : 01:00:00
ShowInTaskScheduler : True
RunElevated : False
RunWithoutNetwork : True
DoNotAllowDemandStart : False
MultipleInstancePolicy : IgnoreNew
JobDefinition : Microsoft.PowerShell.ScheduledJob.ScheduledJobDefinition
Back to Powershell V3 Tip & Tricks
