Listing your Applications
**Listing your Applications for Discovery in Microsoft Pinpoint (for Small Business Server, Windows Home Server and Windows Storage Server 2008 R2 Essentials) **
Overview
This step by step guide allows ISVs to quickly and accurately list their Windows Server 2008 R2 applications in Microsoft’s Pinpoint catalog for discovery by SMB customers and VARs worldwide and associate them with Windows Small Business Server, Windows Home Server and Windows Storage Server 2008 R2 Essentials.
Customers will be able to search and find your applications when you associate your Application with SBS 2011 Essentials, SBS 2011 Premium Add-on, Windows Storage Server 2008 R2 Essentials, and Windows Home Server 2011. These products contain links that direct user to the Microsoft Pinpoint page, if your applications are marked to “Works with” above products*.*
There is also a Find a Partner link from the Small Business Server page powered by Pinpoint. Following are the major links the customer will find:
Partners for Small Business Server 2011 Standard
Partners for Small Business Server 2011 Essentials
Partners for Windows Storage Server 2008 R2 Essentials
Partners for Windows Home Server
Listing Preparation
Before you can begin listing your applications you will need the following.
1) You must join the Microsoft Partner Network. Before you can begin listing your applications on Pinpoint, you must create an account with the Microsoft Partner Network (MPN) and create a descriptive overview for your company. It can take up to five business days for your new account to activate in Pinpoint after establishing your membership in the Microsoft Partner Network.
**2) ** Already a member? If so, then you can proceed to create your profile in Pinpoint. If you are already a partner but are not listed on Pinpoint and believe you should be, contact the Pinpoint team.
Starting the Listing Process
Once you have joined the Microsoft Partner Network, are able to login to Pinpoint, and have completed your Pinpoint Profile, you can begin to list your applications for discovery by customers worldwide. This process takes about 8 steps and you can save your work as you progress.
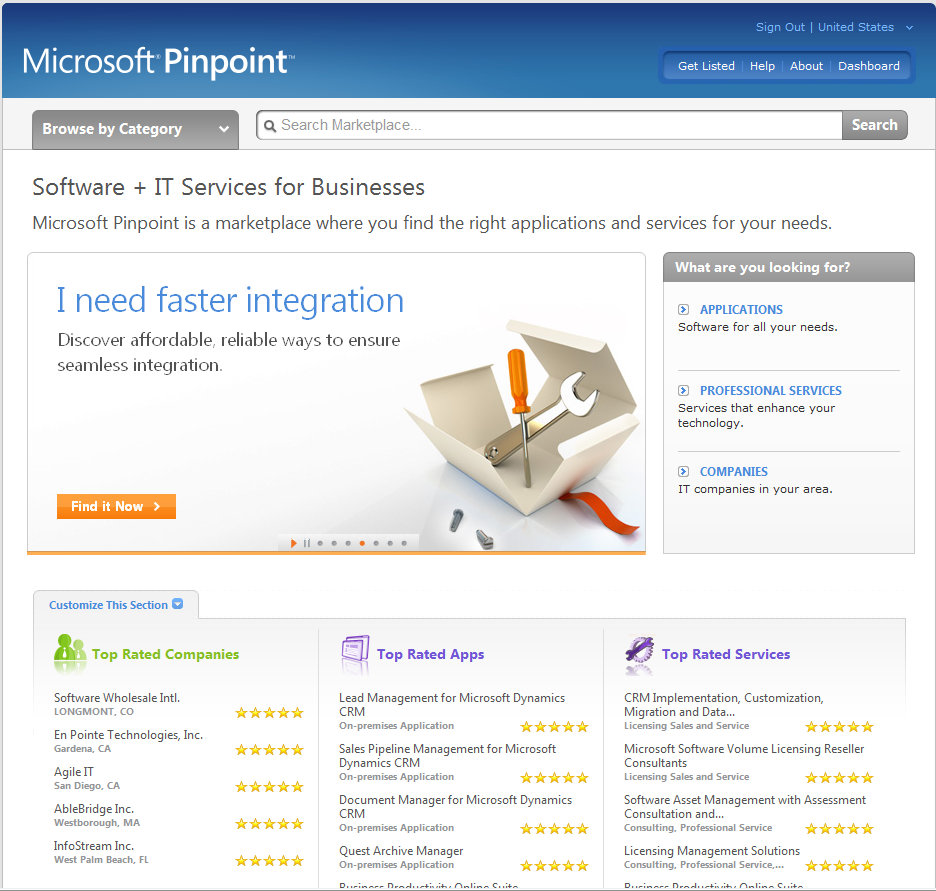
** 1. In Figure 1.0, start by clicking on the “Dashboard” tab in the upper right hand corner highlighted by the orange circle.**
**
**
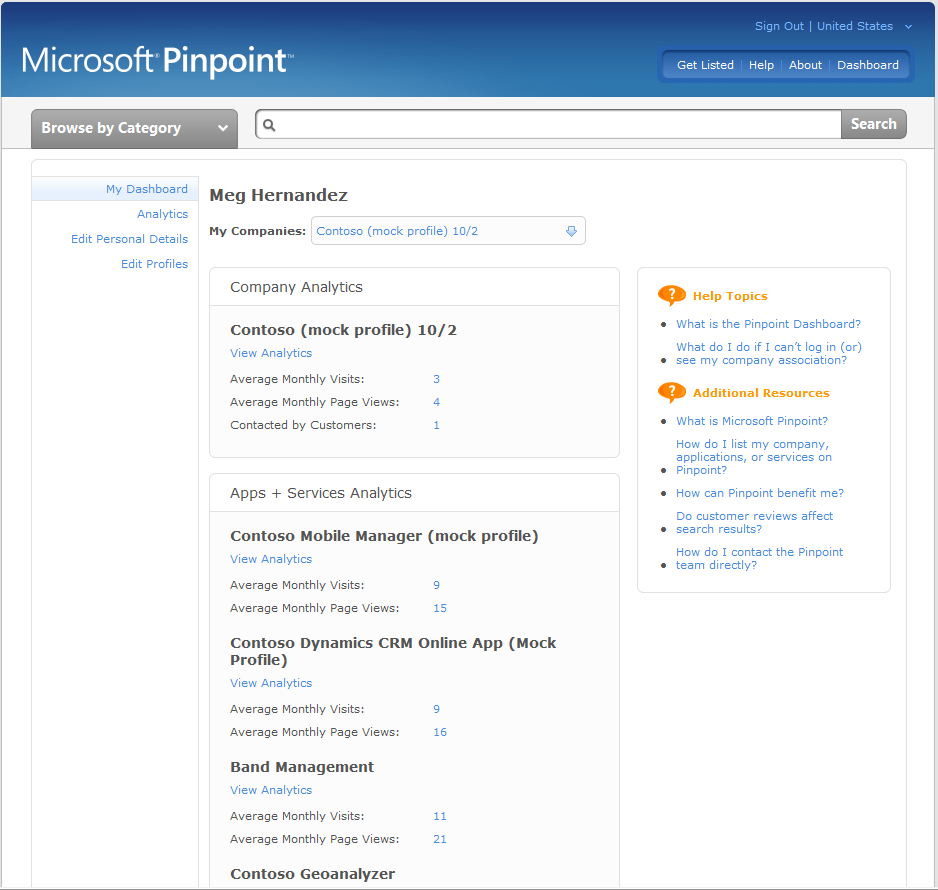
2. In Figure 2.0, click on the “Add or Edit Profiles” hyperlink in the upper left hand corner of the screen to move to the next screen.
**
**
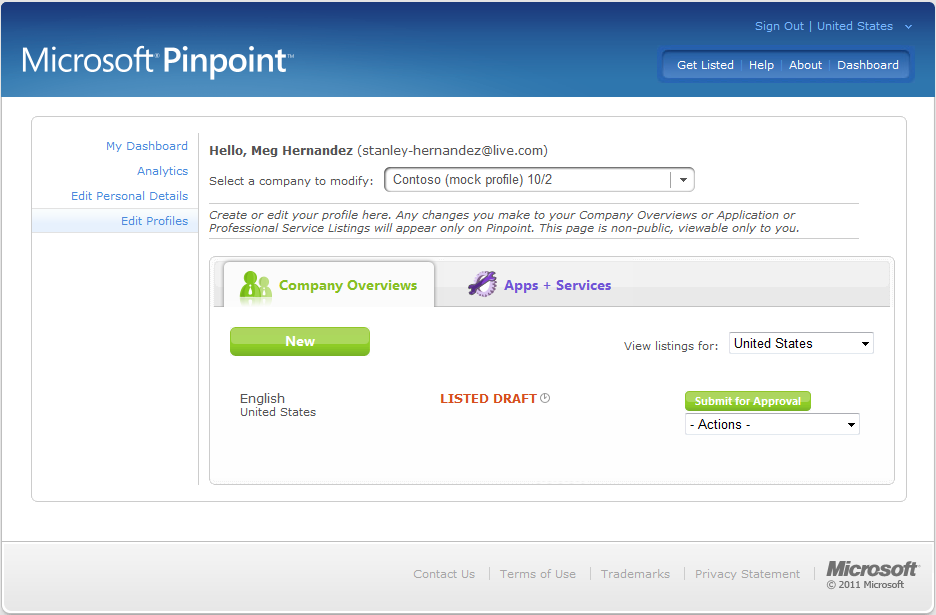
3. In Figure 3.0, click on the “Apps + Services” tab
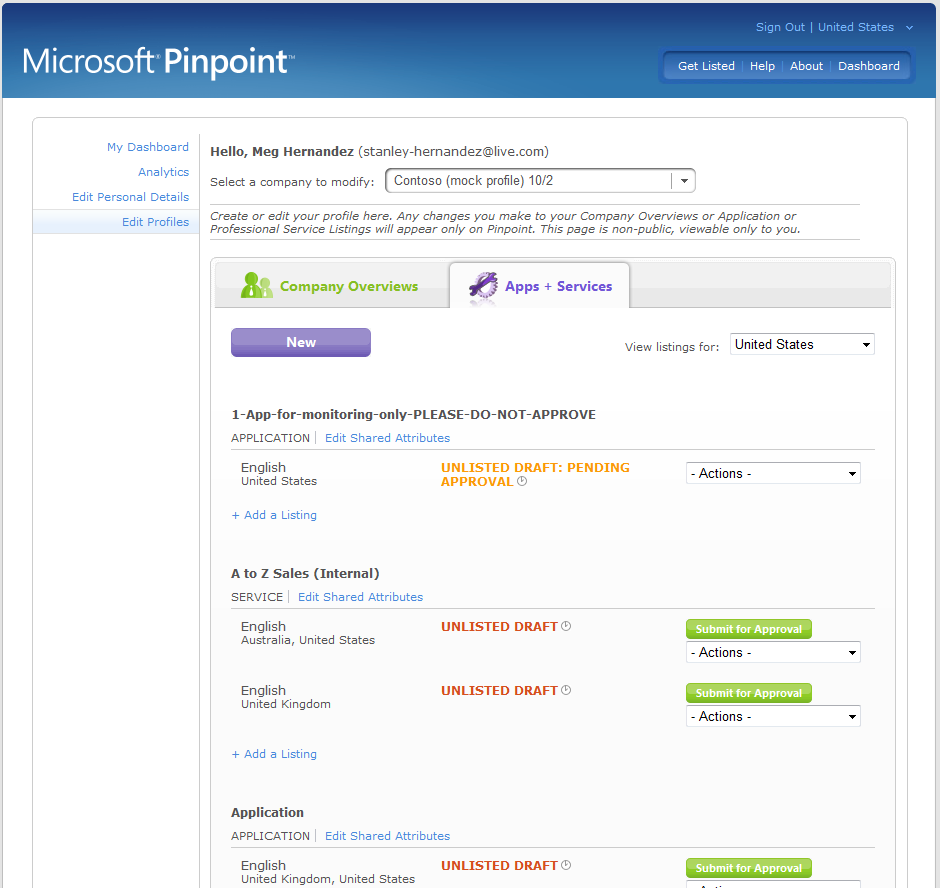
- In Figure 4.0, click on the “New” tab
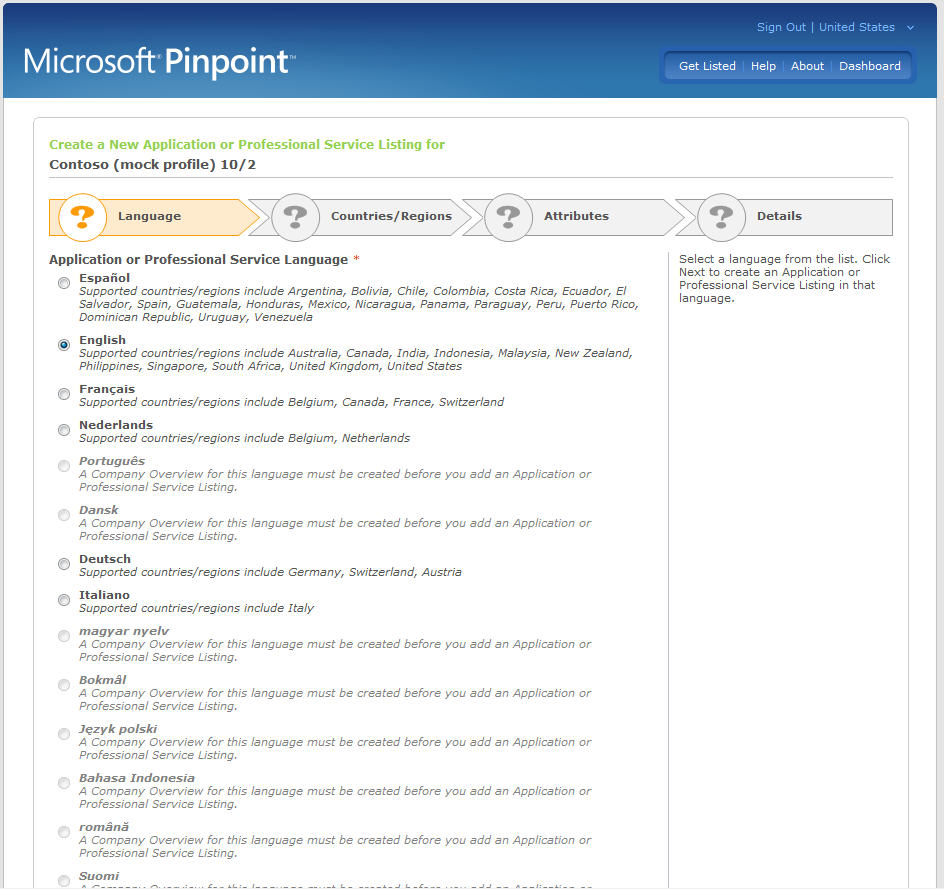
5.In Figure 5.0, click on a radio button to select a language. Clicking on “Next” button on the bottom of the page will begin the creation of an application.
Note, if you will be publishing your package in multiple languages, you will need to do this for each language. You’ll need to create multiple profiles to support multiple languages with the same product, the profiles will be written in the target language.
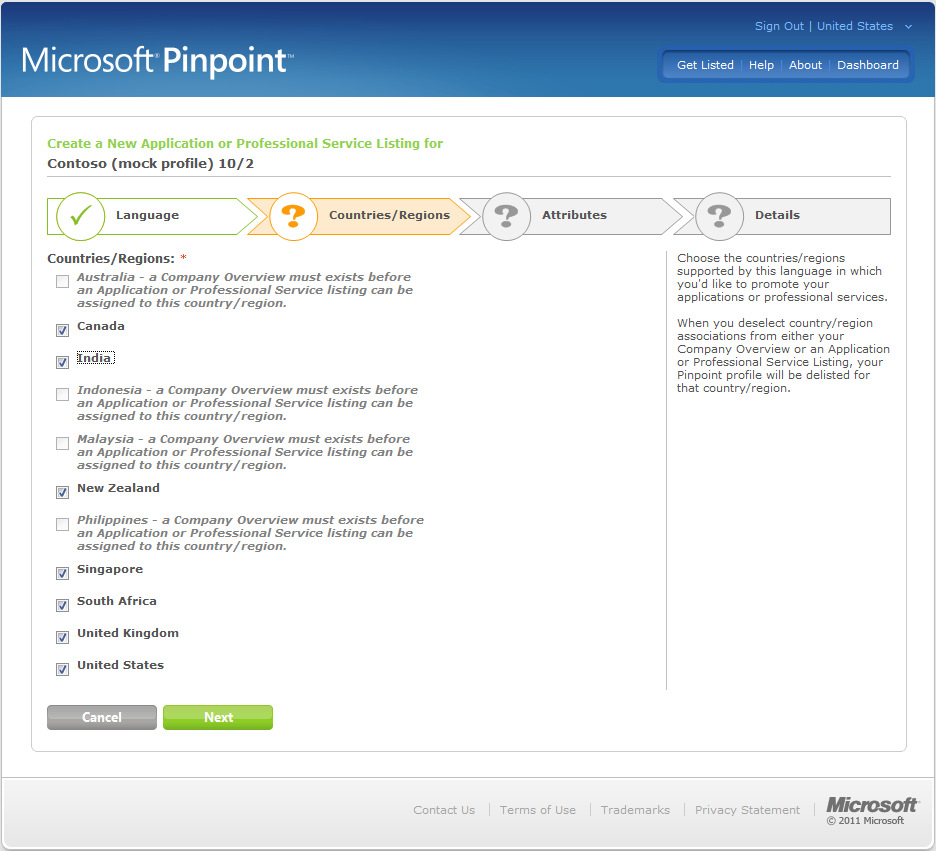
6. In Figure 6.0, click on all countries that support the language you wish to target that was selected in the previous screen. Click on the “Next” button when completed.
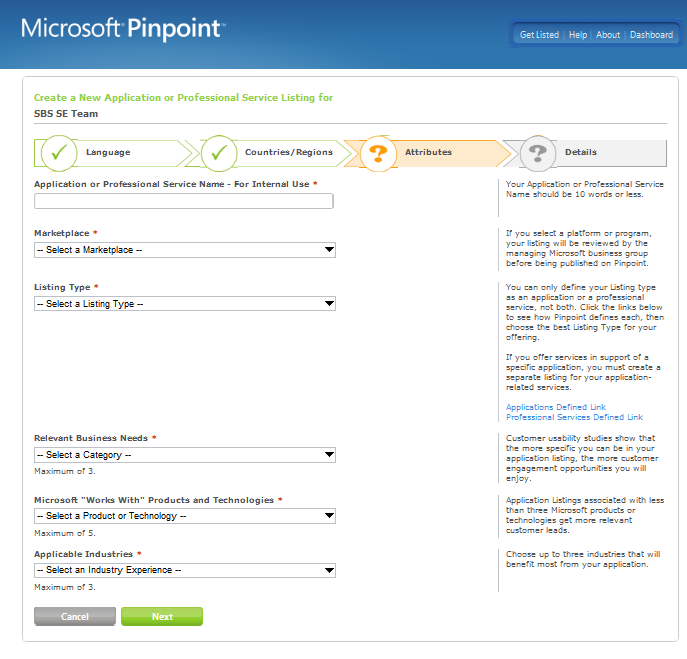
7. In Figure 7.0, you begin the process of actually naming your application(s) for discovery.
1) If your product name is available on multiple Microsoft technologies, then you will need to add your product multiple times to the catalog. The best way to have your product found for the SMB sector is to add “….. For Windows Small Business Server 2011” to the end of “Application ……Name – For Internal Use only” entry of your product name.
2) On the “Market Place” drop down box select “Microsoft Pinpoint”
3) For “Microsoft “Works with” Products and Technologies” drop down box, scroll down to “Windows Server Product Family”, select all the products that your application compatible with. For example, “Windows Small Business Server 2011 Essentials”, “Windows Small Business Server 2011 Premium Add-on”.
Note, if your application works with Windows Storage Server 2008 R2 Essentials, you need to select “Windows Storage Server”, if you application works with WHS 2011, you need to select “Windows Home Server”.
4) If in doubt for “Applicable Industries”, select *“General – Applicable to All”. * You can select a maximum of 3 industries
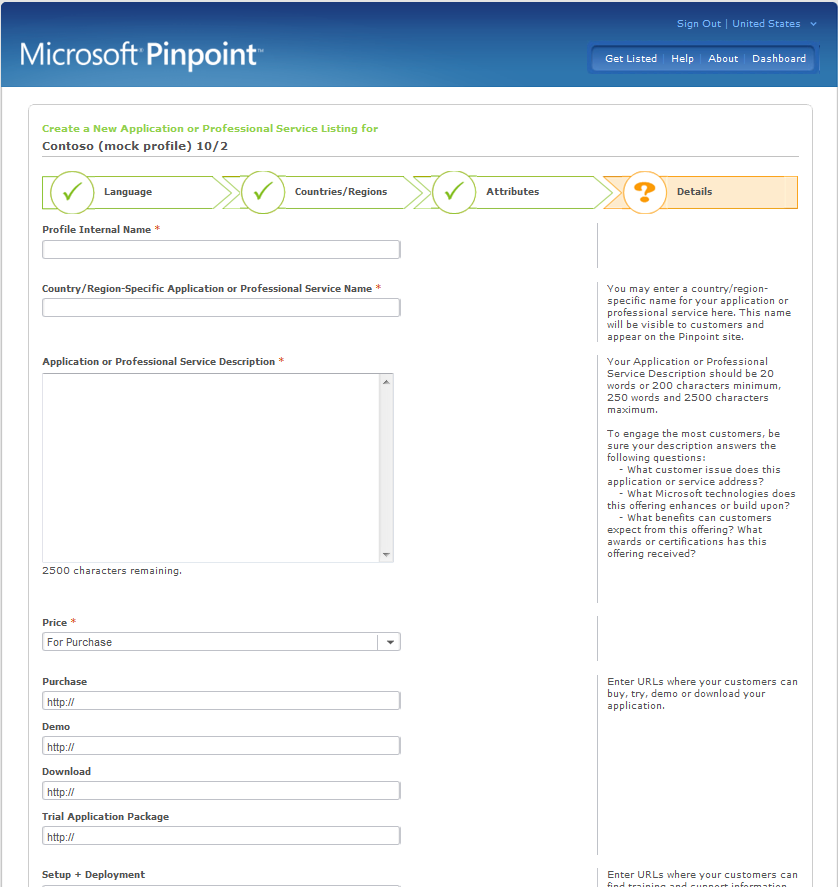
8. Figure 8.0 - You’re almost there! This is the final screen where you request approval to publish your application. Only the fields marked with “*” are required to complete this screen but plan to complete everything. This may take some time to complete, so go ahead and use the “Save Draft” button.
To return to editing your application profile, click on the “Dashboard” screen, then “Edit Profiles”, click on the “Apps & Services” button. Be sure that the “View Listings For” dropdown has one of the countries you selected from Figure 5. then move to the “Actions” button and select “Edit Details” and find your “Unlisted Draft” of your application for completion.
When this screen is completed, hit the “Submit for Approval” button.
