Power Apps: Using Timer to Control Auto Navigation between Screens
Introduction
Timer control in Power Apps offer some handy features which can be used in unison with various features to complete the business flow of the app. There can be situations where we need to change the property of a control based on the time elapsed after a specific activity, use the count down of the timer to wait for and trigger an action or even implement some cool looking marquee animations or fly out menus
In this article we will see how we can make use of a timer control to automatically navigate across screens.
Scenario
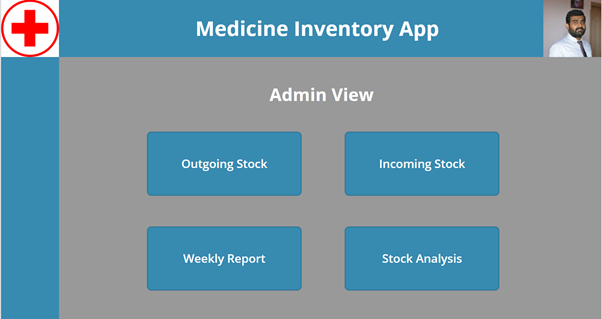
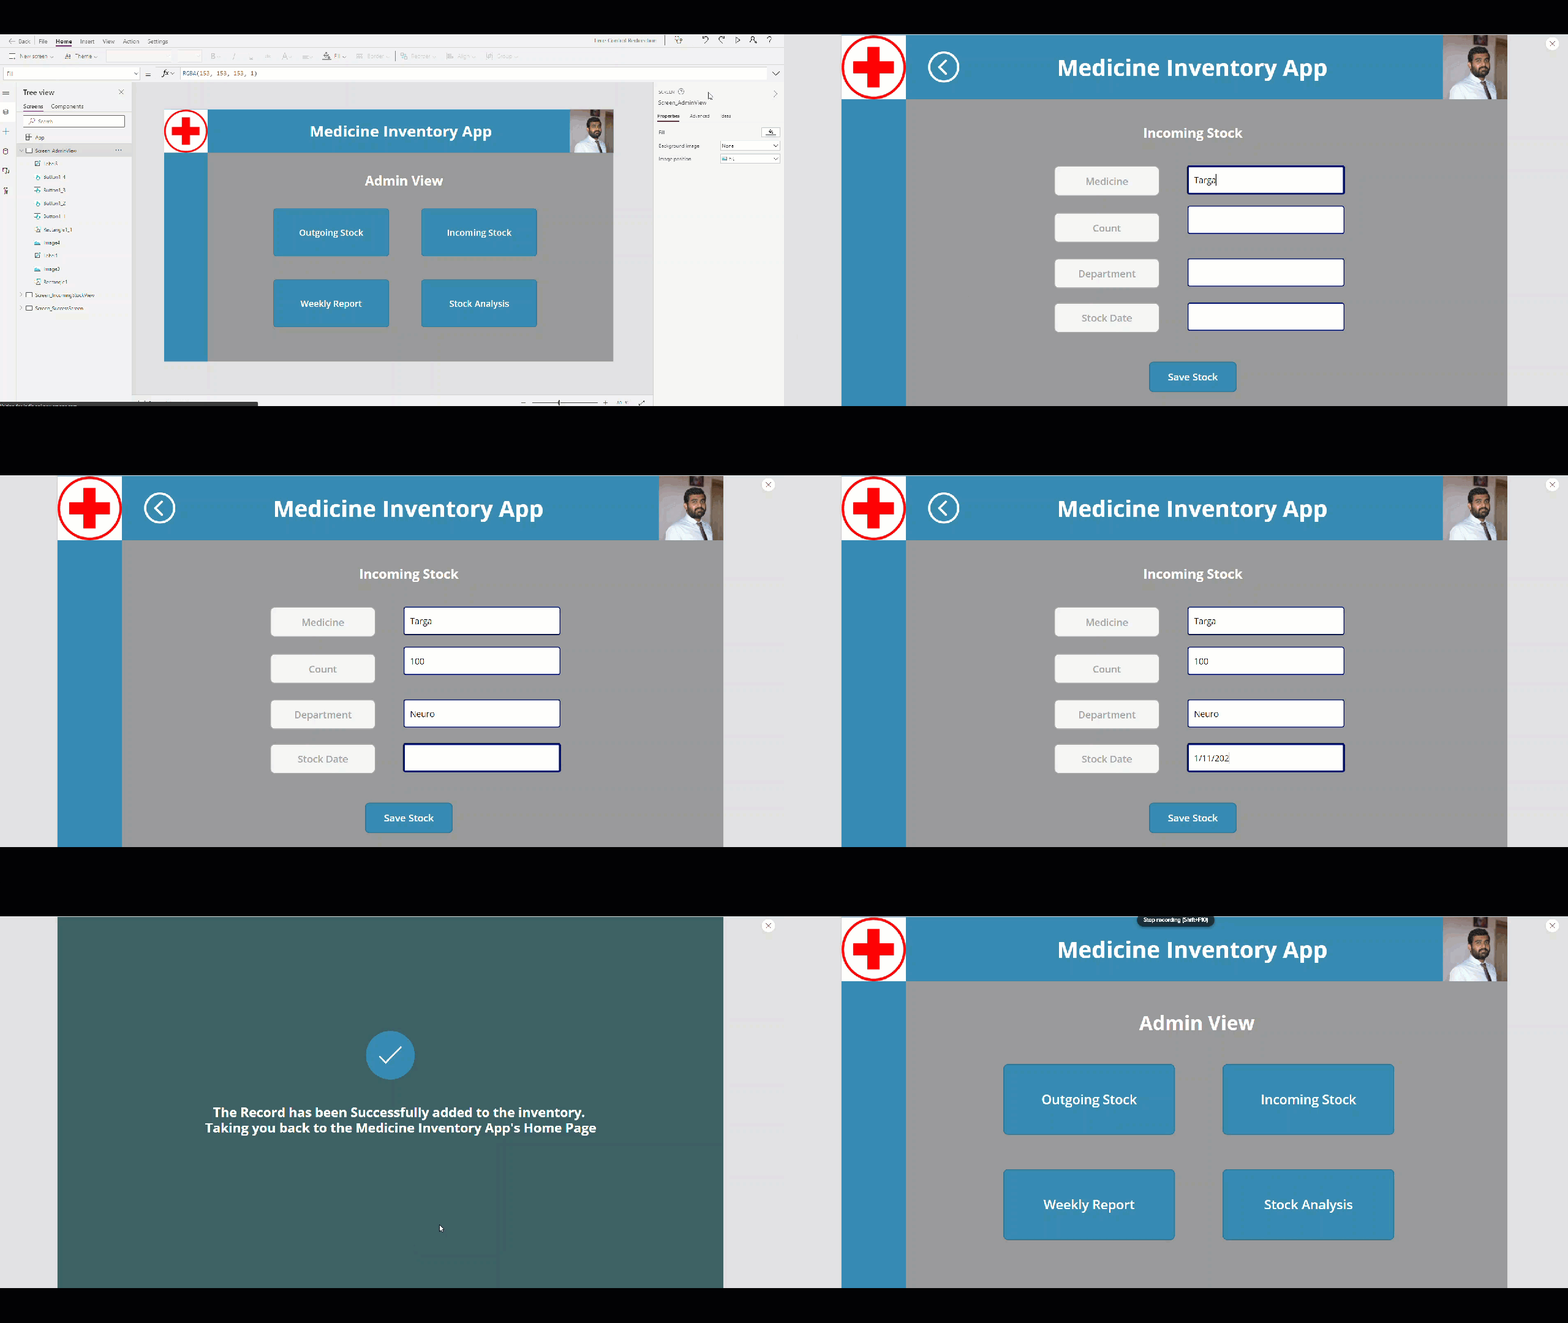
We have a requirement where we have a Home Screen that lists out few basic controls that lets us navigate to various screens.
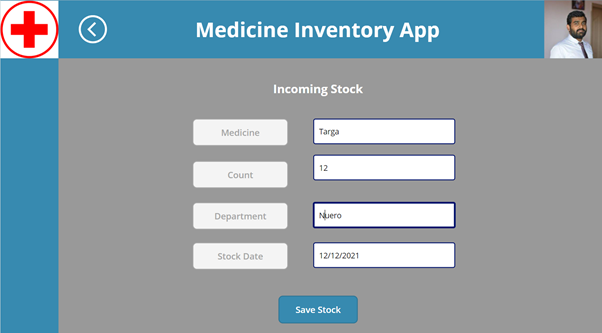
Clicking on of them will take us to the respective screens where we will perform some operations like adding of a new record.
Clicking on Save Stock will, show the success screen. Now once we are in the Success Screen, we have a requirement to automatically navigate back to the home screen after 5 seconds without any manual intervention of using a close button or pressing the back button.
Implementation
To achieve this, we have created the sample app with 3 screens.
- Home Screen with the basic screen navigation controls
- Incoming Stock Screen to update the stocks details and save it to SharePoint
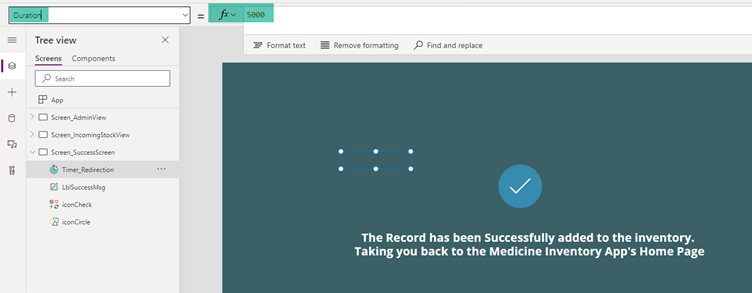
- Success Screen to show the success message to the users
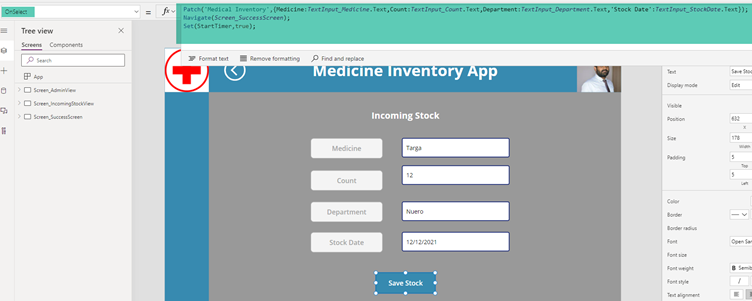
We will start with making change to the screen where we add the stock input. In the On Select of the Save Stock button. We will add the below expressions:
Patch('Medical Inventory',{Medicine:TextInput_Medicine.Text,Count:TextInput_Count.Text,Department:TextInput_Department.Text,'Stock Date':TextInput_StockDate.Text});
Navigate(Screen_SuccessScreen);
Set(StartTimer,true);
Here we have a normal patch function to save the details to SharePoint List. Followed by that, we will navigate to the Success screen and at the same time, declare and set a Global Variable StartTimer to true. We will use this value to define the start state of the timer we are going to use in the implementation.
Now we will move on to the Success Screen where we will add a timer control and set its Duration to 5000 which indicates 5000 milliseconds or 5 seconds. Its visibility is turned off as we don’t have to display it to the end user.
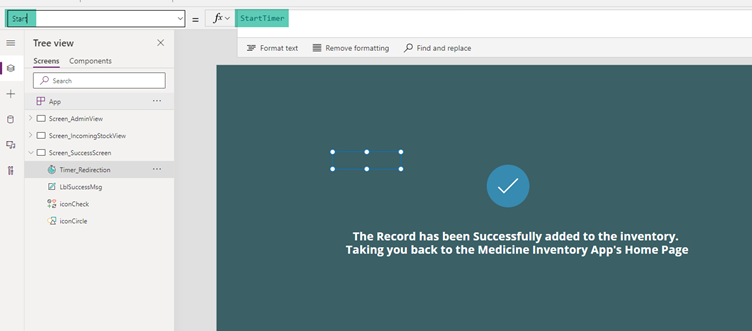
We will also set the Start property to the Boolean variable StartTimer which we had set in the previous screen. While navigating to this screen, we will set it to true from the previous screen, which will start the timer to run for the 5 Seconds duration which we have mentioned in the Timer property.
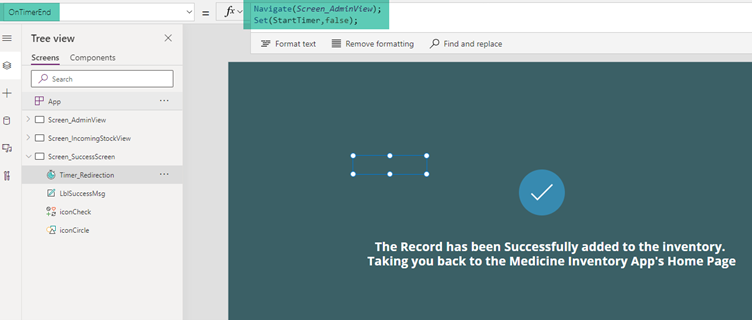
We will now define the redirection logic in the OnTimerEnd property of the timer by adding the Navigate function so that it navigates to the home screen. As we no longer need the timer running, we will set the Timer variable(StartTimer) to false
Test the Timer Control
Now let’s go ahead and test the Timer control is action. Clicking on the Save button in the input screen, will navigate the app to the Success screen. The timer starts running and on the completion of 5 Seconds, the app will be redirected to the home page.
Summary
Thus we saw how we can use a Timer Control to automatically navigate between screens, in our case , we navigated back from the Success screen to Home Screen after a 5 second delay.
