Power Virtual Agents: Send Proactive Message to Teams Chat
- Introduction
- Business Use Cases
- Implementation
- Add the Ticket Creation Flow
- Adding Proactive Message
- Proactive Message on Ticket Updation
- Test the Implementation
- Summary
Introduction
Once we have published your bot and made the bot available to end users in Microsoft Teams, we can notify users in Microsoft Teams with proactive messages and adaptive cards. Proactive messages use Power Automate flows to deliver the content. This feature enhances the interactive nature of a Power Virtual Agent implementation.
Business Use Cases
A scenario in which this becomes handy is when:
- You are creating a Ticket with the Support team via Power Virtual Agent and on creation of the ticket, a set of users (Resolvers) will be informed with a message about the created ticket
- On update of the ticket, the ticket creator will be informed with a message about the change
- At times, the ticket would need more information and we can send an adaptive card to the user, to fetch the missing details.
In this article we will see how we can send a proactive message to the user about the details of the created ticket, and we will also explore how we can inform the user about the changes made to an already created ticket with a message.
Implementation
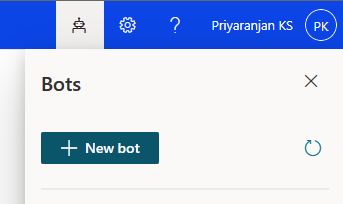
Let’s create a bot using which we can create a ticket/issue in SharePoint List.We will start the bot creation by selecting the bot option from the top right corner and select “New bot”. It will open up the window where we can specify the bot’s name and language.
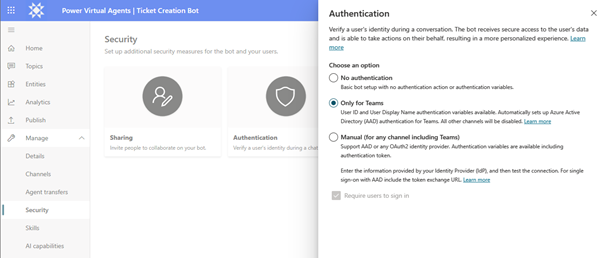
Once the bot is provisioned, lets head over to the Manage section in the left pane -> Authentication -> Select Only for Teams
When choosing this option, only the Teams channel will be available for publishing and sharing the bot. All other channels will be disabled, and a warning will be displayed. This configuration option is optimized for Teams channel usage. It automatically sets up Azure Active Directory (Azure AD) authentication for Teams without the need for any manual configuration. The following variables will be available in the authoring canvas after the Only for Teams option is selected:
- UserID
- UserDisplayName
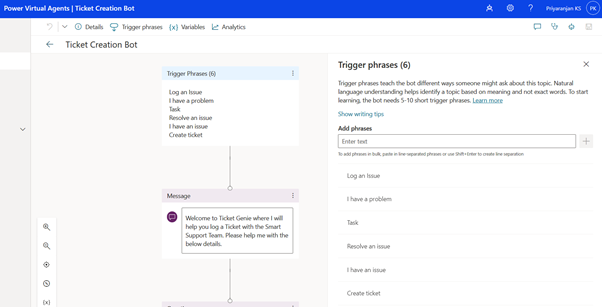
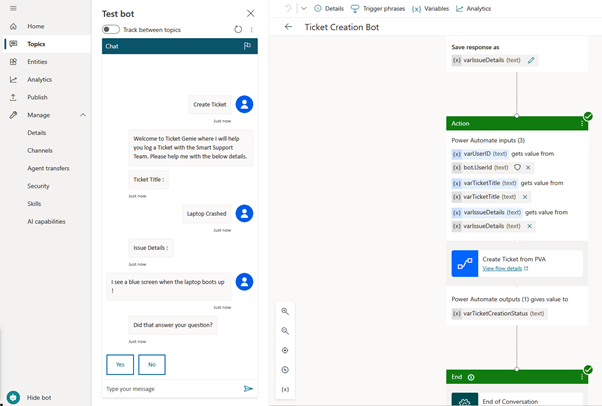
Now let’s create a new topic and select the trigger phrases to define the words that will invoke the conversation with the bot. The trigger phrases will help in defining the words and phrases that will start the conversation with the bot. We have defined 6 such phrases and the more different and related words we add to it, better the chances of bot understanding the trigger condition. We will also add a welcome message to greet the user.
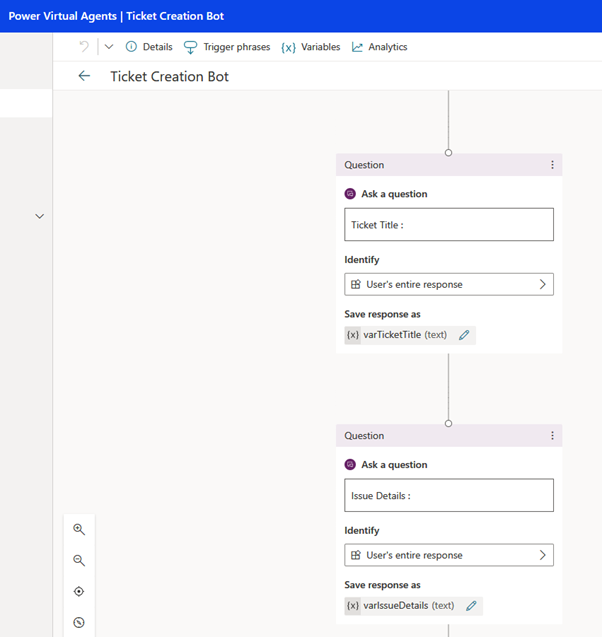
To accept the input from the user regarding the ticket title and description we will ask 2 separate questions and store the user input in the respective variables
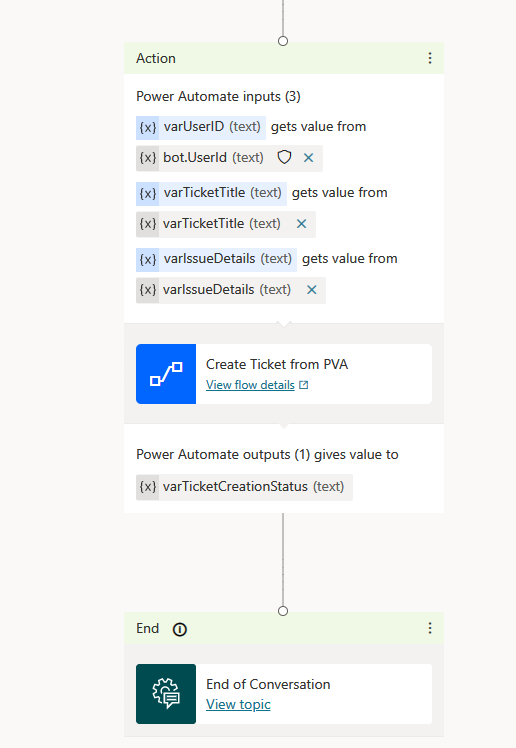
We will then call the Flow which we have created (described in the next section) to create the ticket and do further processing and end the chat with a survey to get the feedback from the user.
Add the Ticket Creation Flow
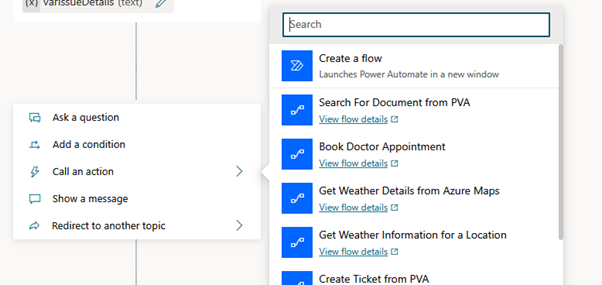
The ticket creation flow can be created from the Power Virtual Agent by Selecting Create a flow from the below node.
Within the flow, we will define 3 input variables to accept the UserID, Ticket Title and Ticket Detailers. As a follow up action, we will use the received User ID to pass it to the Get User Profile action to fetch the details like User Email.
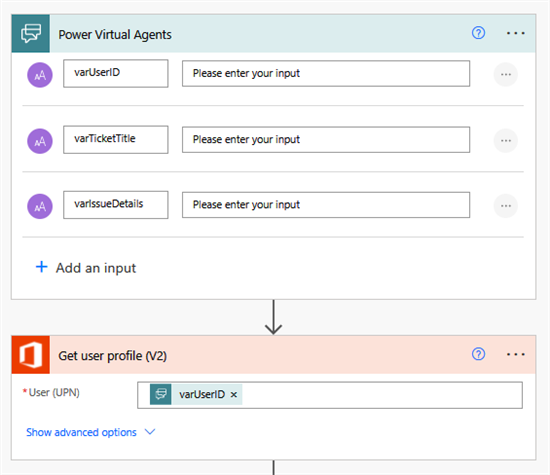
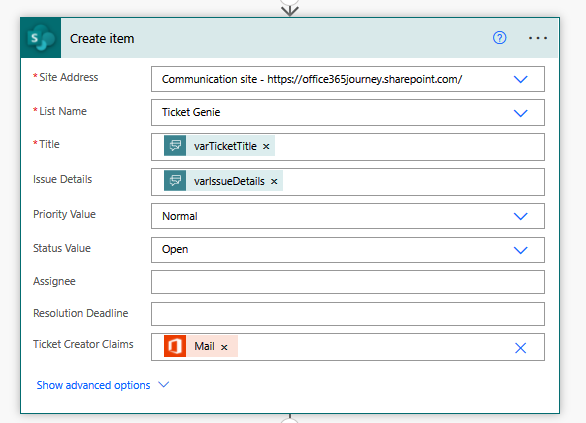
Followed by that, we will add the action to create the ticket/issue as a list item in SharePoint List and update the fields like Title, Issue Details and Ticket Creator Email ID.
Adding Proactive Message
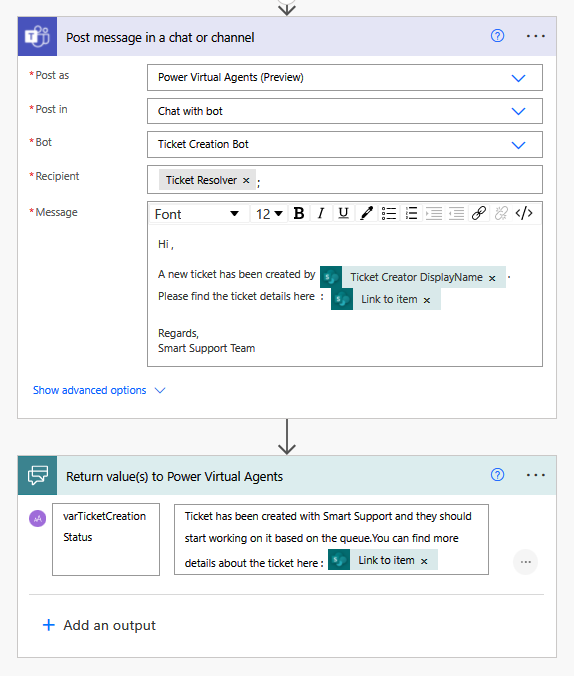
Once the ticket has been created, lets send out a Proactive message to the Ticket Resolver intimating him about the ticket creator and the link to the ticket so that he can start working on the ticket. The message will be posted into the Teams chat by the Power Virtual Agent.
Finally, we will send back the response about the ticket creation and the link to the item so that user can track it.
Thus, this completes the Power Virtual Agent Bot creation for creating the ticket by accepting input from the user.
Proactive Message on Ticket Updation
Now let’s see how we can create a standalone flow attached to the list where the ticket/issue resides that sends out proactive message to the ticket creator when an update to the ticket happens.
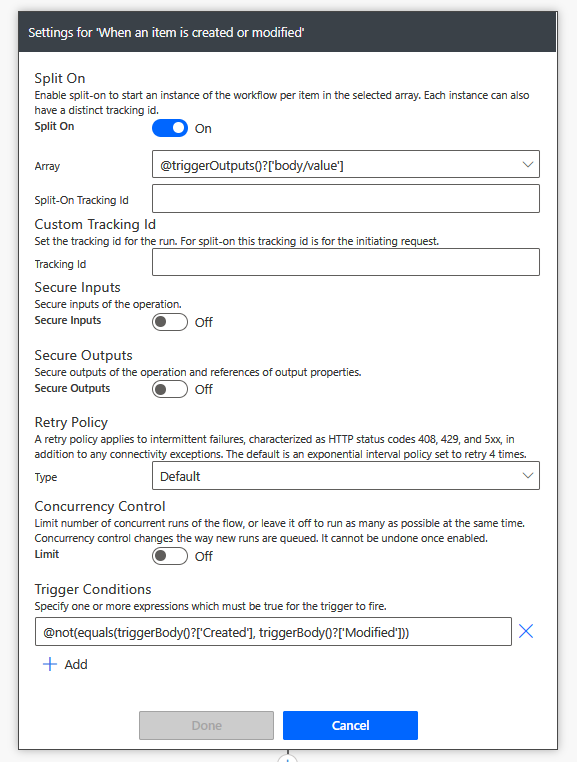
We will create an automated flow that, get triggered on item update.To ensure that the flow is triggered only update and not on created event, we will click on the 3 dots of the action->Settings and update the trigger condition with the expression that ensures Modified Time is not equal to Created time which is a good way to check the event is a modification trigger.
@not(equals(triggerBody()?\['Created'], triggerBody()?['Modified']))
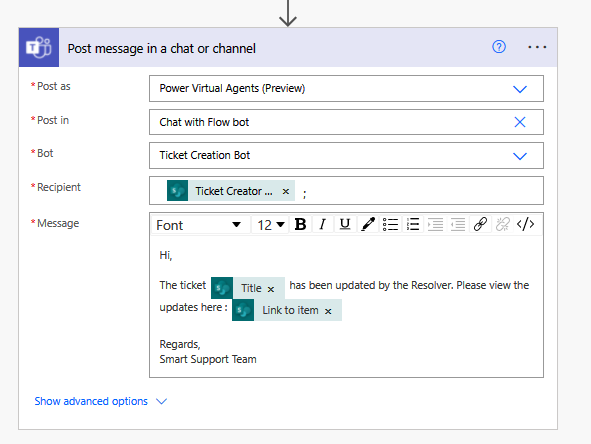
We will then add the action to post the proactive message to the Ticket Creator with the ticket details
Thus, the flow will intimate the user proactively via a message in the Teams which would appear as sent by the bot
Test the Implementation
To test the implementation, lets trigger the bot with the trigger word – Create Ticket and pass on the issue details. This will trigger the Power Automate for ticket creation.
By checking the Ticket Resolver’s Teams, we can see that, the ticket has been created and the ticket details as well as the ticket creator name has been sent as a proactive message by the Bot.
Same way, lets make an update to the created ticket and move it to In Progress
The stand-alone flow will be triggered, and the update will be shared as a proactive message to the ticket creator.
Summary
Thus, we saw how to provision a Ticket Creation Bot and sent out Proactive messages to the Ticket Resolver and at the same time send a Proactive message to the Ticket Creator on any updates. In the next blog, we will see how to send Adaptive cards proactively from the Bot to the User Chat.
