Power Virtual Agents: Build a Document Searcher Bot
- Introduction
- Business Use Case
- Implementation
- Test the bot
- Summary
Introduction
Power Virtual Agents helps us create intelligent conversational chat bots without any code implementation. With these bots we can engage with customers and employees in multiple languages across websites, mobile apps, Facebook, Microsoft Teams, or any channel supported by the Azure Bot Framework
In this article we will see how to create a basic bot that can be used to search for documents in SharePoint
Business Use Case
We have a requirement where SharePoint is used as a content repository and a single document library at times can have 1000s of documents. Rather than navigating to SharePoint and use the search option if we can setup a basic bot that can pick a document by name, it will be a productivity gain for the users.
Implementation
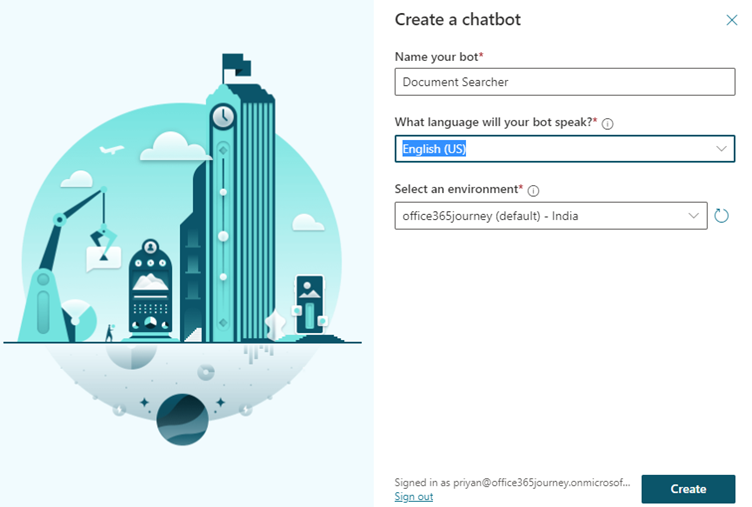
We will use the SharePoint Document library to store the documents and will build a bot that takes the input of the document name to be searched for. Let’s create the bot by selecting the bot option from the top right corner and select “New bot”. It will open up the window where we can specify the bot name and language. Once the bot is provisioned, we can create a new topic and select the trigger phrases to define the words that will invoke the conversation with the bot.
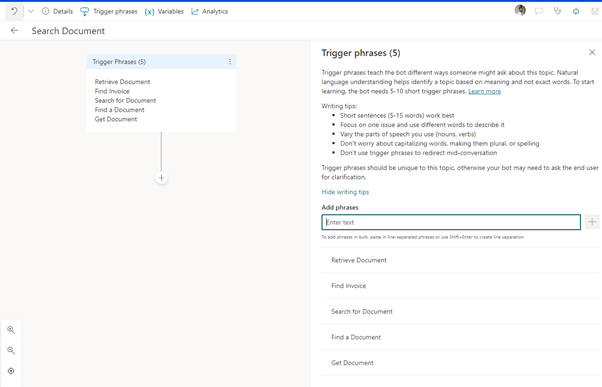
The trigger phrases will help in defining the words and phrases that will start the conversation with the bot. We have defined 5 such phrases and the more different and related words we add to it, better the chances of bot understanding the trigger condition.
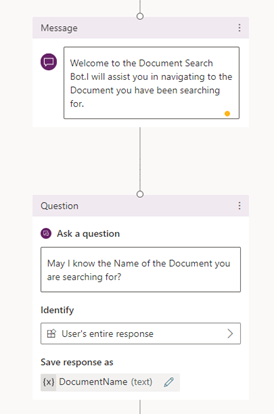
Let’s add a welcome message to the Authoring Canvas and followed by that we will add the node ask a question which will request for the document name the user want to search for. The input from the user will be saved in the variable DocumentName.
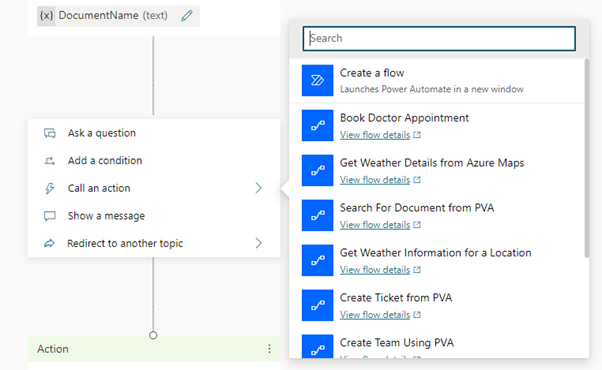
Next, we will create a Power Automate to which we will pass the Document Name to do a query in the SharePoint list. To do this click on the Plus Sign that show the nodes available to be added to the canvas and select, Call an action which will give us the option to create the flow.
Clicking on Create a flow will open the Power Automate window where we will define a text input by the name SearchText which will accept the input from PVA.
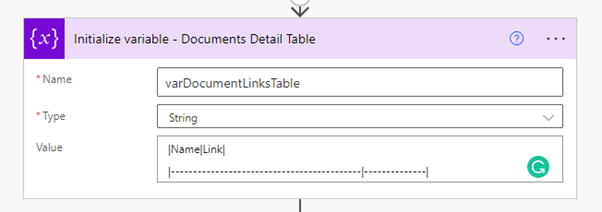
So as to display the weather details in the Power Virtual Agent as a table, we will be using mark down language and we will initialize a variable that will hold the header which is defined using the syntax:
|Name|Link|
|-------------------------------------------|--------------|
To add a table, we use three or more hyphens (---) to create each column’s header and use pipes (|) to separate each column. A detailed overview of mark down language can be seen here
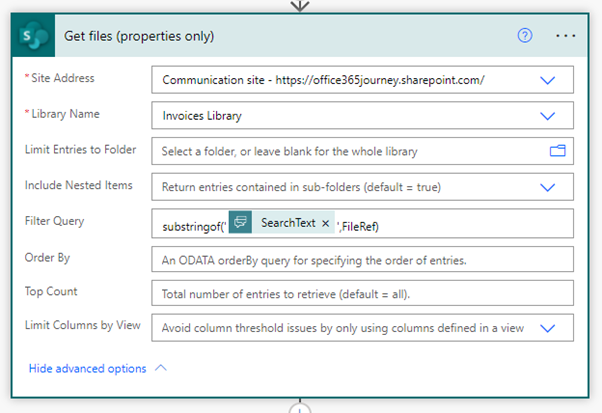
Next, we will add the Get files action which will be used to spot the files which contains the user inputted name in the file name. We will use the filter query that accepts OData syntax and we will use the syntax substringof('@{triggerBody()['text']}',FileRef) to see if the search keyword is present in the file name
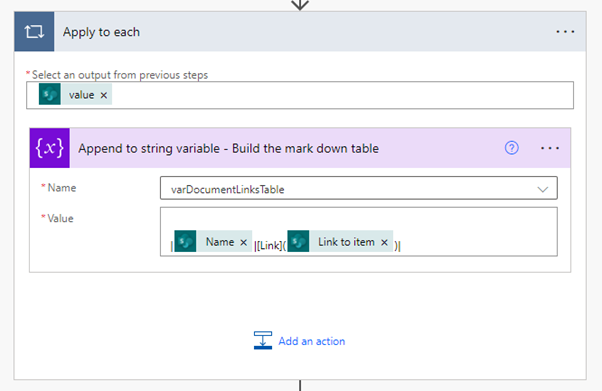
As there may be more than 1 file results returned, we will be using the Apply to each action to loop through the results to get the name and the link to file and build a mark down table by appending to the previously declared string variable. We will append the values within Pipe symbols so that they will show up as columns in the table. To display the link as a hyperlink we can use the syntax [Link](address to the location ) to format the hyperlinks.
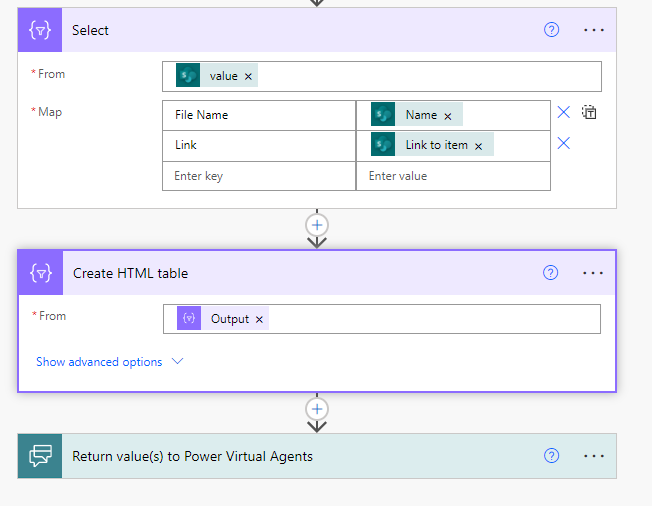
Eventually we will return the variable to PVA for displaying to the user.
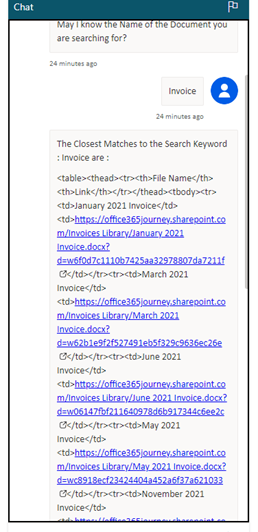
Note: PVA do not support HTML table display, hence if we decide to use the action Select followed by Create HTML table to format the output, the content will be displayed as plain text with html tags without rendering as HTML
The output would look distorted as below:
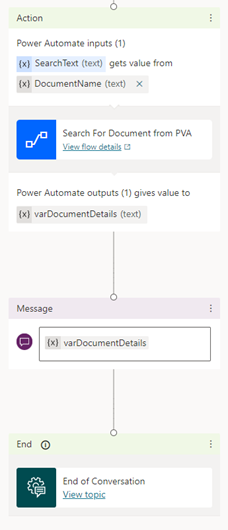
So, coming back to PVA, we will call the newly created Power Automate by passing the document name and the return output will be stored in the variable varDocumentDetails which we will show to the user using the message node.
Test the bot
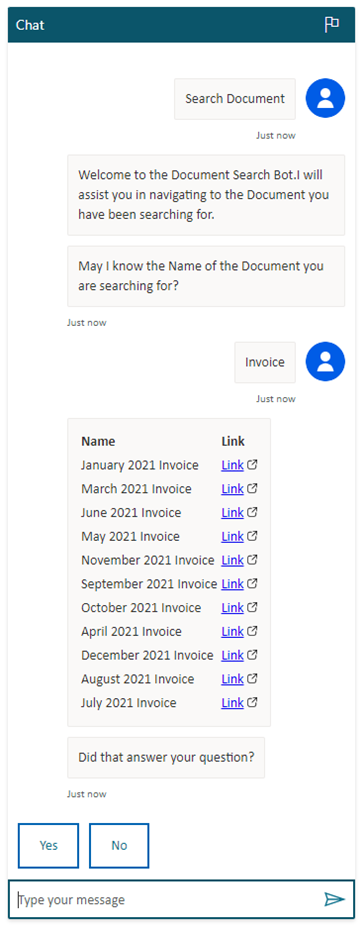
Now let’s test the bot using a trigger phrase – Search Document. It will trigger the conversation and ask for the document name key word. Using this input, the power automate will be called and SharePoint list is queries and the data is returned as a table using Markdown language and displayed back to the user.
Summary
Thus, we saw how we can use Power Virtual Agents to automate document search functionality in SharePoint and we can publish this across channels like Teams which will improve the productivity of users
