Graph API: Get Site Usage Data and LockDown least used sites with PnP PowerShell
Introduction
Microsoft Graph is the gateway to data and intelligence in Microsoft 365. It provides a unified programmability model that you can use to access the tremendous amount of data in Office 365, Windows 10, and Enterprise Mobility + Security. It offers a single endpoint, https://graph.microsoft.com, to provide access to rich, people-centric data and insights exposed as resources of Microsoft 365 services. Microsoft Graph exposes REST APIs and client libraries to access data on the following Microsoft 365 services:
- Office 365 services: Delve, Excel, Microsoft Bookings, Microsoft Teams, OneDrive, OneNote, Outlook/Exchange, Planner, and SharePoint
- Enterprise Mobility and Security services: Advanced Threat Analytics, Advanced Threat Protection, Azure Active Directory, Identity Manager, and Intune
- Windows 10 services: activities, devices, notifications
- Dynamics 365 Business Central
Business Use Case
Spinning up of SharePoint sites without any business justification is a common practice especially when the end users have the Create Site option available in the UI. As a best practice, it is advised to hide the Create Site option from the SharePoint Online UI and set up a Approval Process and an Automated Site Provisioning methodology to streamline SharePoint Online Site creation. Else over a period of time, numerous sites will be created and orphaned leading to unnecessary storage consumption and leading to Governance issues.
In this article we will see how we can identify Zero used and Least used sites in SharePoint Online so that Admins can lock it down and later move them as candidates for deletion after a grace period. We will make use of Powershell and leverage Graph API to get the site usage information and identify the below the below 2 categories of site and lock them down.
- Zero Activity sites which were not used since creation
- Least used sites which are not active in last 6 months
Implementation
As the first step, we will create the Azure App registration which will authenticate PowerShell against Graph API.
Create App Registration
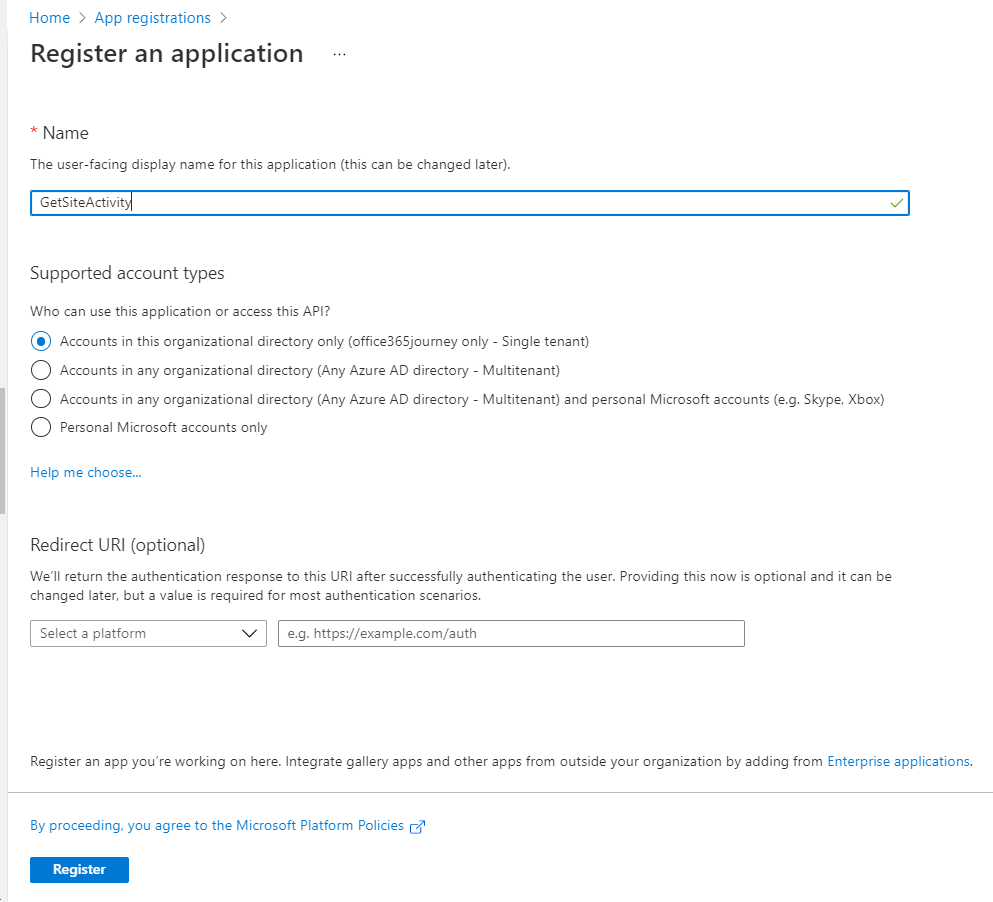
Lets head over to Azure Poral and search for App Registrations in the Search bar and click on New Registration
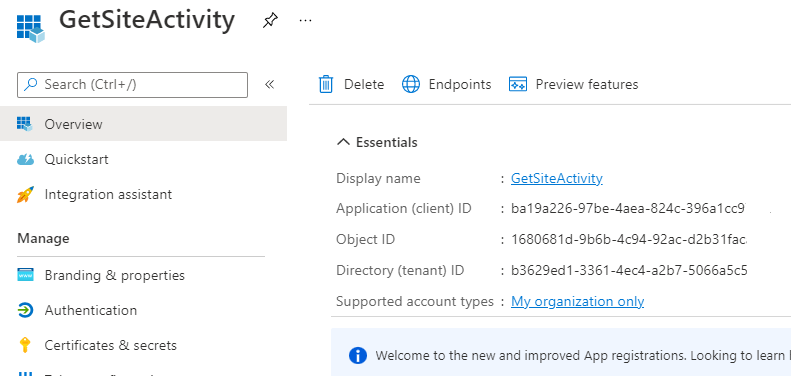
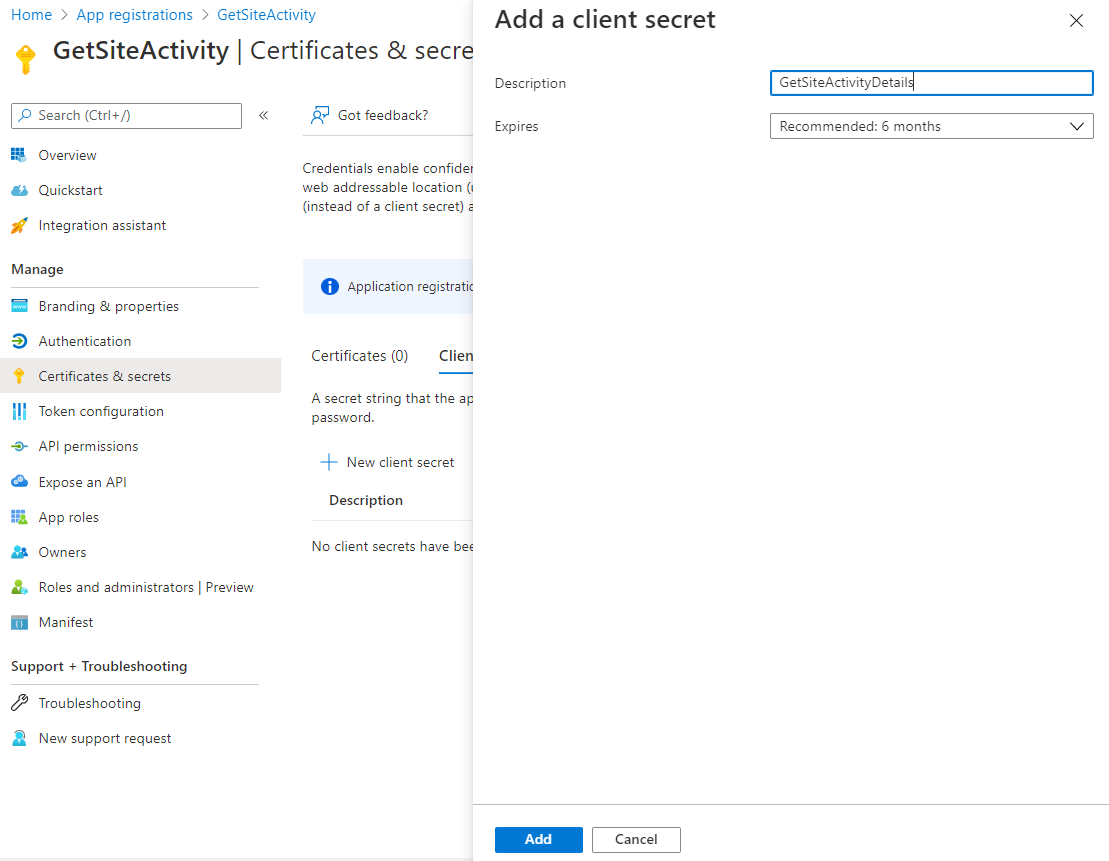
The Application has been created and we will note down the Application(client) ID and Directory(tenant) ID as it will be used later in initiating Graph Authentication. Click on New client secret which will open the right pane to specify the description and the expiry lifetime.
Create Client Secret
Next step is to generate the Client Secret from the Certificates & secrets section.
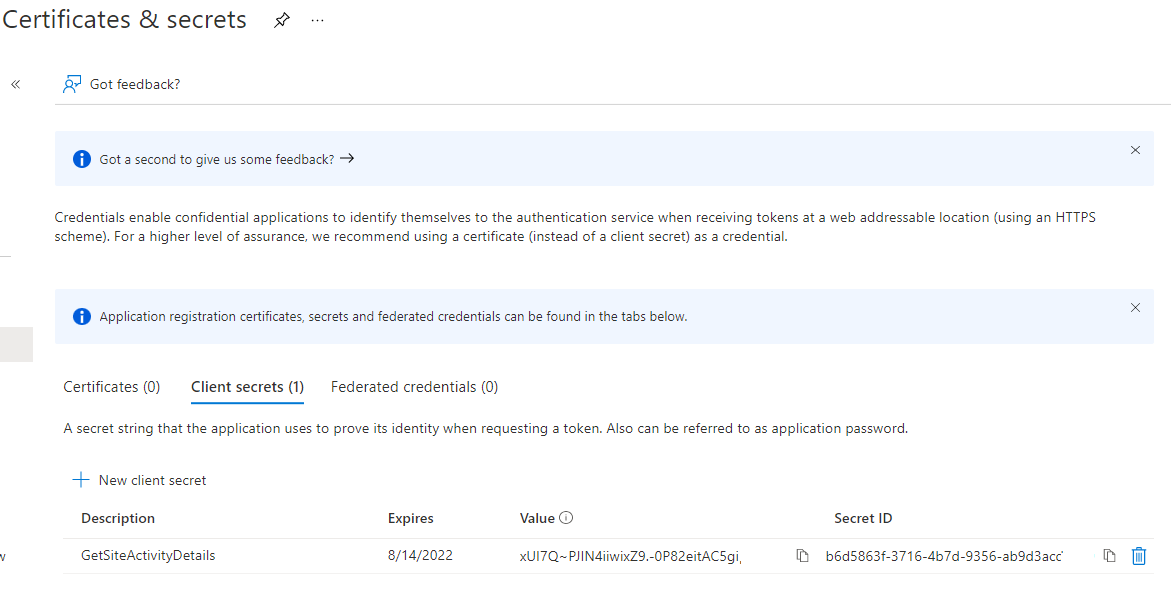
Clicking on Add will generate the secret and ensure that we note it down the string in the value column as it will be hashed if we try to view it later.
Assign API Permissions
Once we have added the secret to the application, the final step in registration is to define the permission scope which authorizes the graph API access to specific resource in Microsoft 365.In this example, we would want to access the Site Activity Reports and hence heading over to the Official Documentation , the Endpoints that we will provide us with the reports are :
GET /reports/getSharePointSiteUsageDetail(period='{period_value}')
GET /reports/getSharePointSiteUsageDetail(date={date_value})
The Period or Date Value in either of the variations would be filled as per the definition:
Parameter |
Type |
Description |
|---|---|---|
period |
string |
Specifies the length of time over which the report is aggregated. The supported values for {period_value} are: D7, D30, D90, and D180. These values follow the format Dn where n represents the number of days over which the report is aggregated. |
date |
Date |
Specifies the date for which you would like to view the users who performed any activity. {date_value} must have a format of YYYY-MM-DD. As this report is only available for the past 30 days, {date_value} should be a date from that range. |
So as to access the above Graph API, the resource over which we will need to define the access is “Reports” and we need to have either the delegated or application permission of Reports.Read.All. The permission names follow the syntax : resource.operation.constraint
Permission type |
Permissions (from least to most privileged) |
|---|---|
Delegated (work or school account) |
Reports.Read.All |
Delegated (personal Microsoft account) |
Not supported. |
Application |
Reports.Read.All |
Here, Reports.Read means that the permission is granted to read the resource - reports. The constraint element of the name determines the potential extent of access your app will have within the directory.
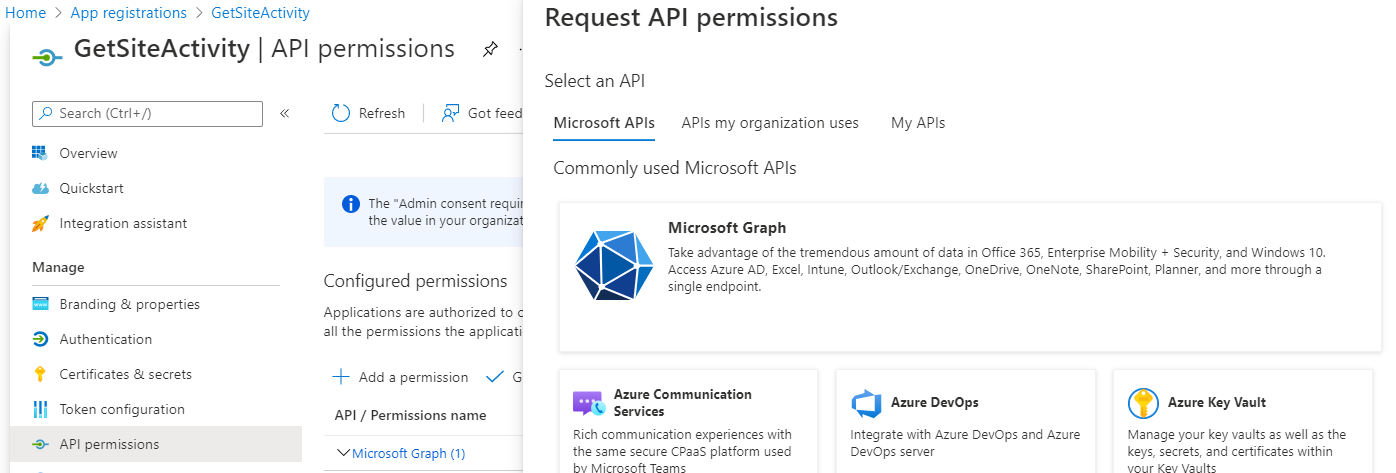
To define the permission, Select API permission and click on Add a permission which will open the right pane where we will select Microsoft Graph.
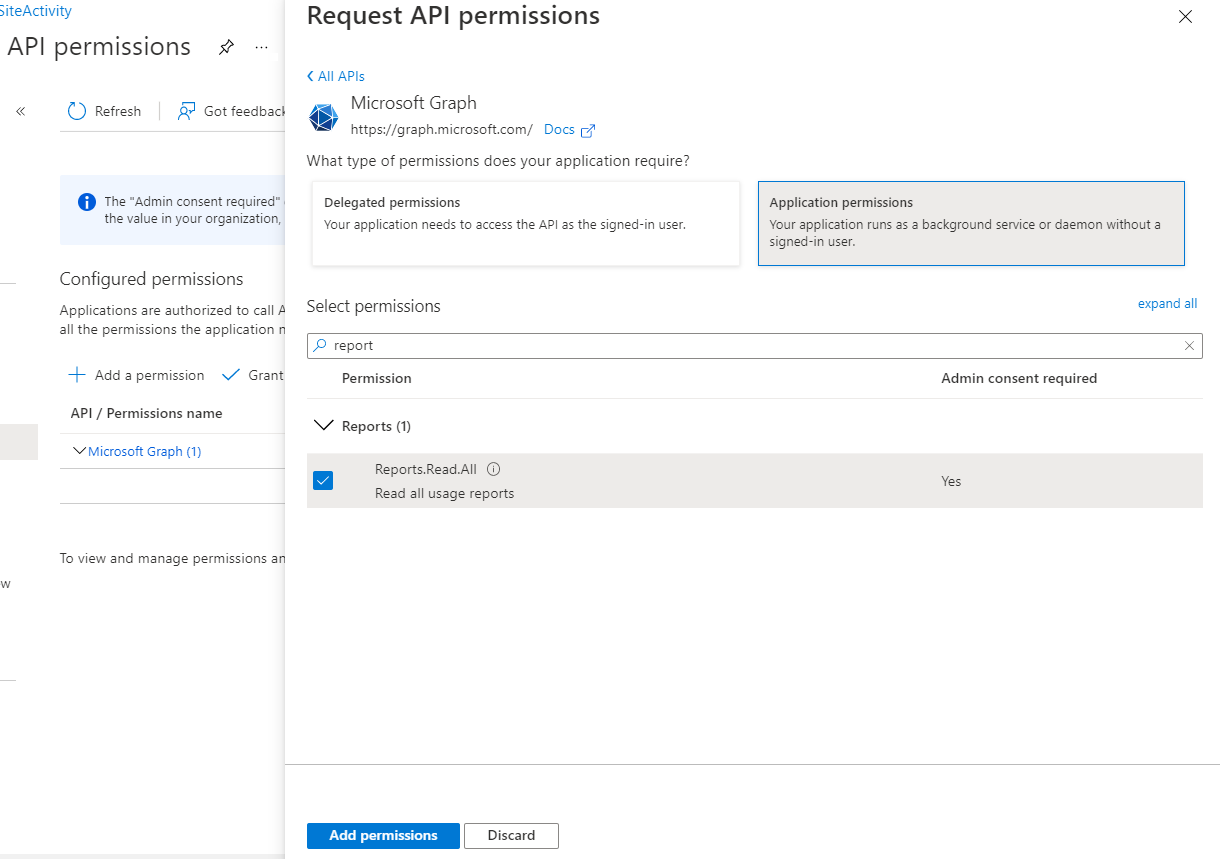
It will provide us the option to select either Delegated or Application Permission. In case the application needs to run in the context of a signed in user, we will go ahead with delegated else if the application has to be run without user context or sign in like an unattended console application, we will go with application permission.
We will search for Reports and select Reports.Read.All and click on Add permissions to add it to the application.
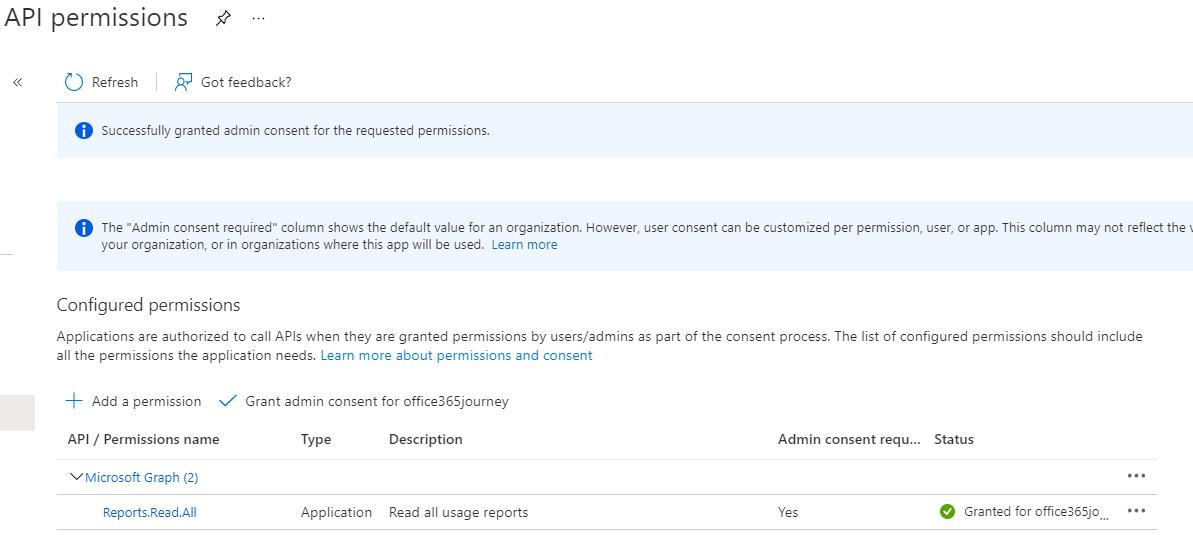
As we have configured Application permission, it entitles a higher permission which would run unattended and hence to ensure that the application has the privilege to use it , an additional admin consent has to be provided. Select the permission and click on Grant admin consent for <tenant> which will provide the admin consent for the application permission.
Thus we have completed the Azure Application Registration. Lets head over to the PowerShell module and configure the authentication section.
PowerShell Authentication
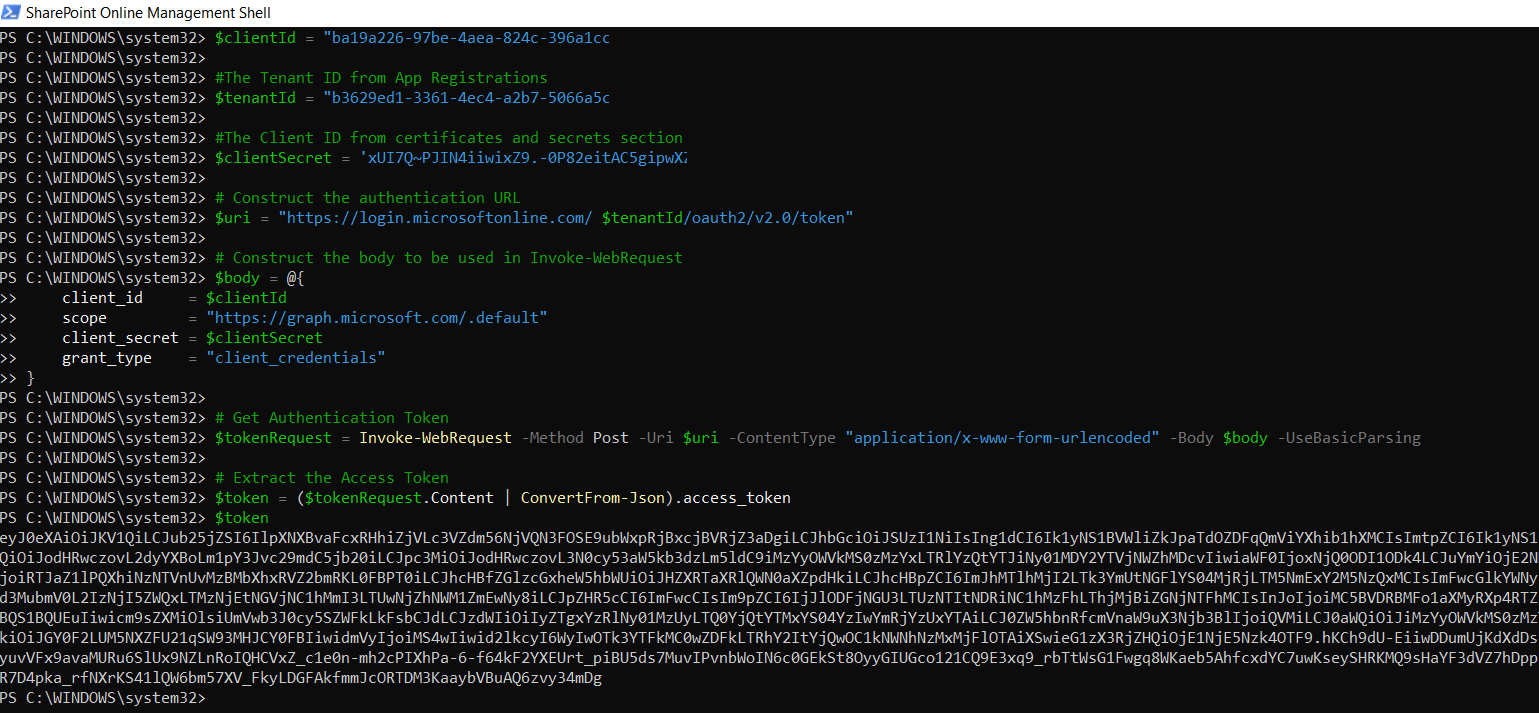
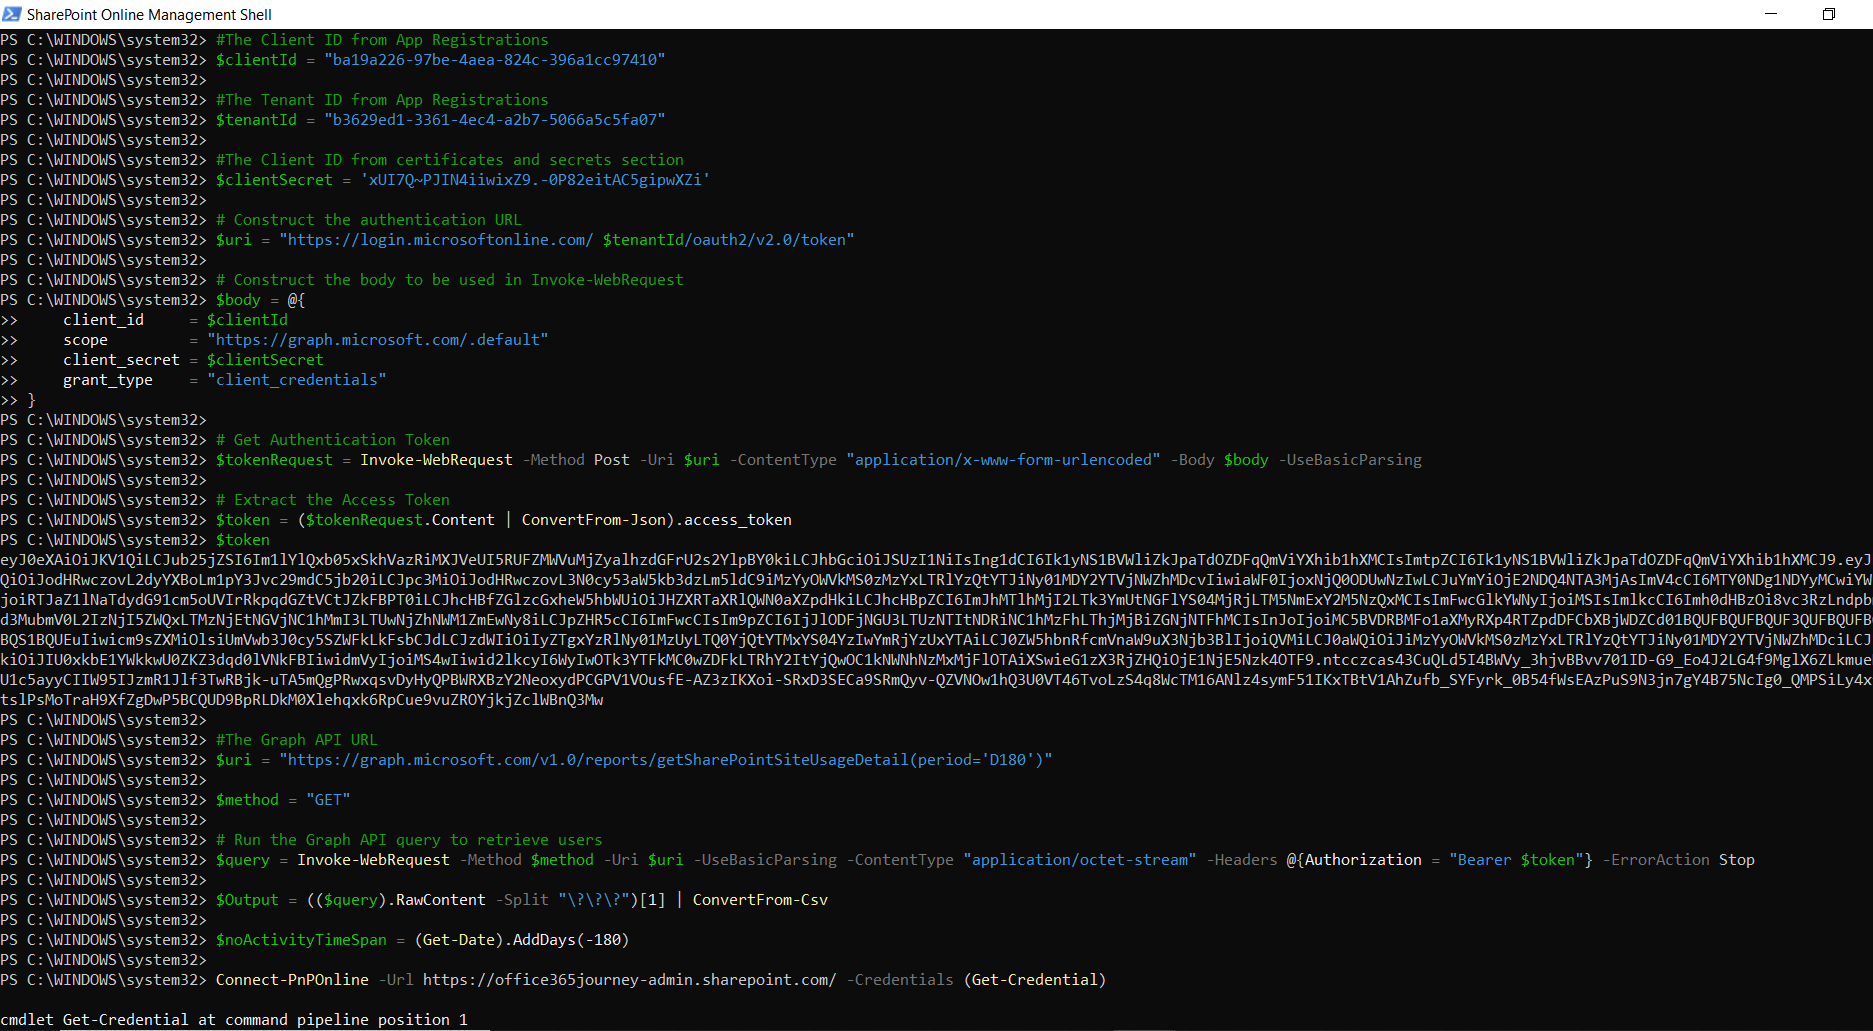
In order to work with Graph API we need to authenticate against the created Azure Application and retrieve the token which will be used for Authorizing against the Graph API. We follow the steps below in the script:
- Add the Client ID, Tenant ID and Secret in respective variables and create a body object
- Use the Invoke-WebRequest call to the authentication url and pass the body parameters declared previously
- We will extract the Token from the returned JSON data
- Next we will use this token to authorize the Graph API GET request to the URL -https://graph.microsoft.com/v1.0/reports/getSharePointSiteUsageDetail(period='D180')
- The returned data will contain the Site Usage Information with columns Site URL, Last Activity Date
- We declare the variable - $noActivityTimeSpan to define the 180 days window. We will compare the Last Activity Date against this variable to identify least used sites
- We then connect to PnP Online so that we can use the PnP Cmdlets to set the sites to No Access Lock State
- There will be 2 category of Least accessed sites
- Sites which is not used at all since creation : which will have its Last activity date as null. Identify them by checking for it from the returned Graph output and run the PnP Command Set-PnPTenantSite -Url "Site URL" -LockState NoAccess
- Sites which are least used, compare it against the 180 days window variable and run the PnP command to set is lock state to NoAccess.
Full Script
#The Client ID from App Registrations
$clientId = "ba19a226-97be-4aea-824c-396a1cc97410"

#The Tenant ID from App Registrations
$tenantId = "b3629ed1-3361-4ec4-a2b7-5066a5c5fa07"

#The Client ID from certificates and secrets section
$clientSecret = 'xUI7Q~PJIN4iiwixZ9.-0P82eitAC5gipwXZi'


# Construct the authentication URL
$uri = "https://login.microsoftonline.com/ $tenantId/oauth2/v2.0/token"


# Construct the body to be used in Invoke-WebRequest
$body = @{
    client_id     = $clientId
     scope         = "https://graph.microsoft.com/.default"
    client_secret = $clientSecret
    grant_type    = "client_credentials"
}

# Get Authentication Token
$tokenRequest = Invoke-WebRequest -Method Post -Uri $uri -ContentType "application/x-www-form-urlencoded" -Body $body -UseBasicParsing

# Extract the Access Token
 $token = ($tokenRequest.Content | ConvertFrom-Json).access_token
 $token

#The Graph API URL
$uri = "https://graph.microsoft.com/v1.0/reports/getSharePointSiteUsageDetail(period='D180')"

$method = "GET"
# Run the Graph API query to retrieve Site Usage Data

$query = Invoke-WebRequest -Method $method -Uri $uri -UseBasicParsing -ContentType "application/octet-stream" -Headers @{Authorization = "Bearer $token"} -ErrorAction Stop

$Output = (($query).RawContent -Split "\?\?\?")[1] | ConvertFrom-Csv


$noActivityTimeSpan = (Get-Date).AddDays(-180)


Connect-PnPOnline -Url https://office365journey-admin.sharepoint.com/ -Credentials (Get-Credential)

$SitesWithoutActivityDate = $Output |where {($_."Last Activity Date" -eq [String]::Empty) -or ($_."Last Activity Date" -eq $null)} |Select "Site URL","Last Activity Date"

$SitesWithActivityDate = $Output |where {($_."Last Activity Date" -ne [String]::Empty) -and ($_."Last Activity Date" -ne $null)} |Select "Site URL","Last Activity Date"

$LessActiveSites  = $SitesWithActivityDate |where {[DateTime]$_."Last Activity Date" -lt $noActivityTimeSpan } |Select "Site URL","Last Activity Date"


#Set Sites where there is Zero Activity into No Access State
$SitesWithoutActivityDate | ForEach-Object { Set-PnPTenantSite -Url $_."Site URL" -LockState NoAccess  }


#Set Sites where there is no activity in last 180 days into No Access State
$LessActiveSites | ForEach-Object {Set-PnPTenantSite -Url $_."Site URL" -LockState NoAccess }
Output
The runtime execution of the script is captured below :
Once the Graph API results are returned, we identify Zero Used and Least used sites.
Finally we apply the PnP Command to set its lock state to No Access.Picking one of the sites where we have ran the script shows that it is in a locked state in the admin center.
Summary
Thus we saw how to identify sites which are not used or least used using Graph API and Powershell and used PnP Powershell to set its lock state to No Access
