Send an Adaptive Card to Microsoft Teams using Power Automate
- Introduction
- Business Use Case
- Implementation
- Adaptive Card Designer
- Adaptive Card Structure
- Testing the flow
- Summary
Introduction
The Official Definition of an Adaptive Card goes like:
“Adaptive Cards are platform-agnostic snippets of UI, authored in JSON, that apps and services can openly exchange. When delivered to a specific app, the JSON is transformed into native UI that automatically adapts to its surroundings. It helps design and integrate light-weight UI for all major platforms and frameworks.”
The Card Authors can describe their content as a simple JSON object and use it to display data or take input from end users using the card. That content can then be rendered natively inside a Host Application like Microsoft Teams, Outlook etc:
In this article we will see how we can use the Adaptive card designer to create a basic Card and send it out from Power Automate to Microsoft Teams.
Business Use Case
We have a SharePoint Document Library that acts as a content repository for Procurement Invoices . Upon the upload of a new invoice, we would need to intimate the Finance Controller directly in this Teams Chat. To achieve this, we will use Power Automate and Send the Notification as an Adaptive Card to the User’s Team Chat.
Implementation
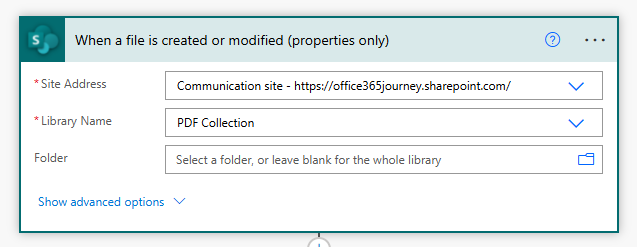
To start off with we will create a Power Automate that gets triggered when a new document is uploaded in the library.
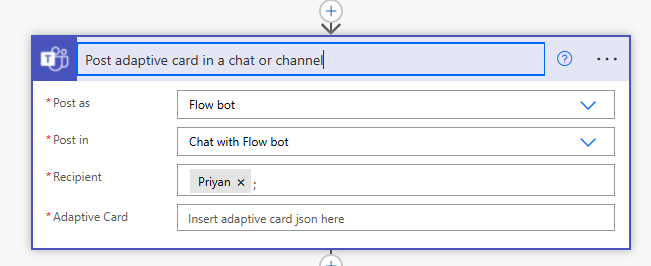
Now we will add the action “Post adaptive card in a chat or channel”
Adaptive Card Designer
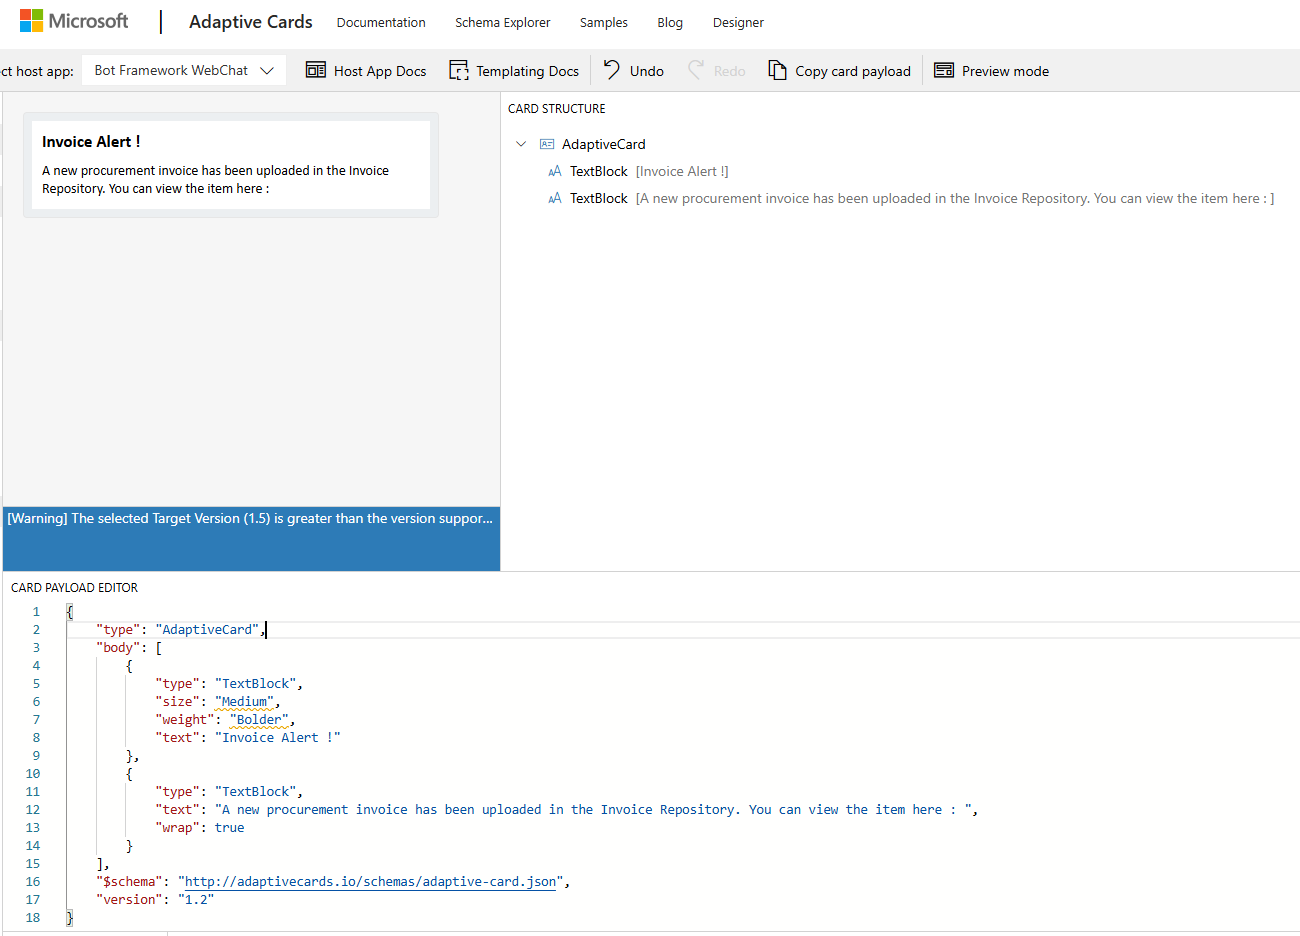
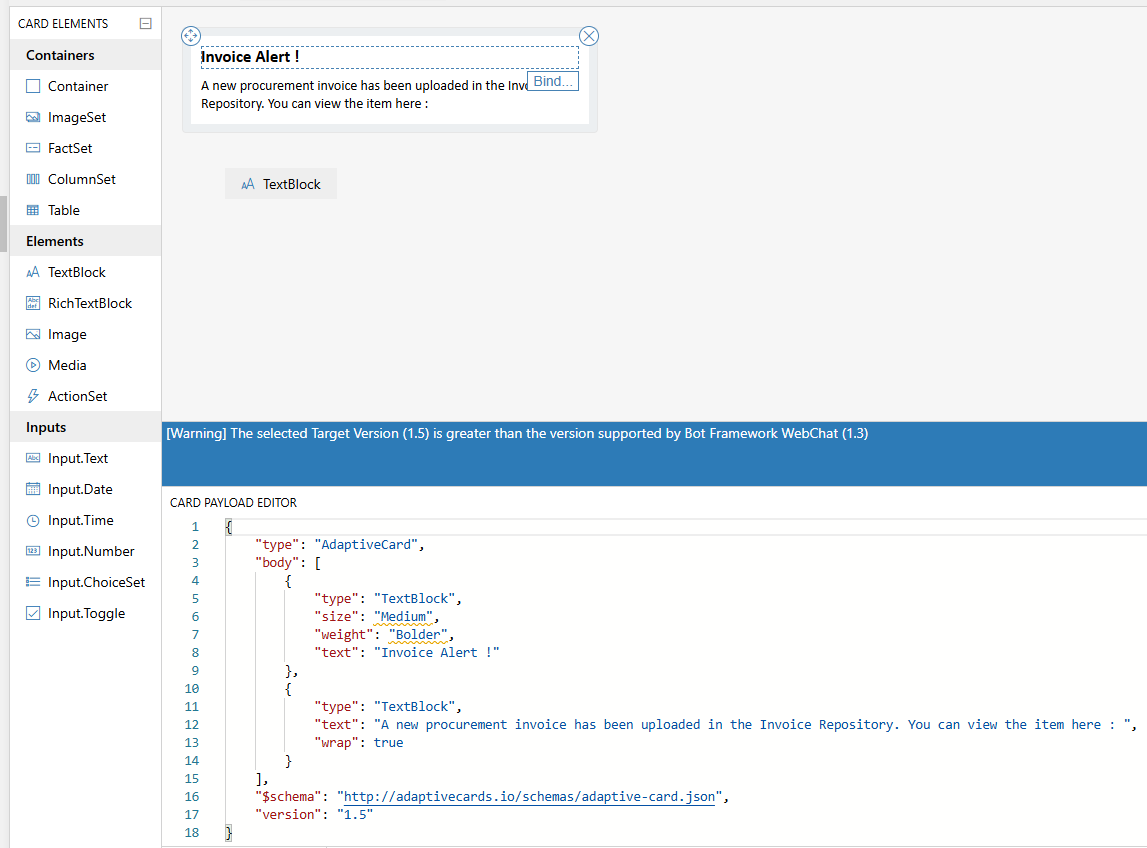
The content that needs to show up in the Adaptive card has to be written as JSON and added to the Adaptive card field in the above action. We can make use of the Adaptative Card Designer which is an interactive visualized that help us to build the json schema.
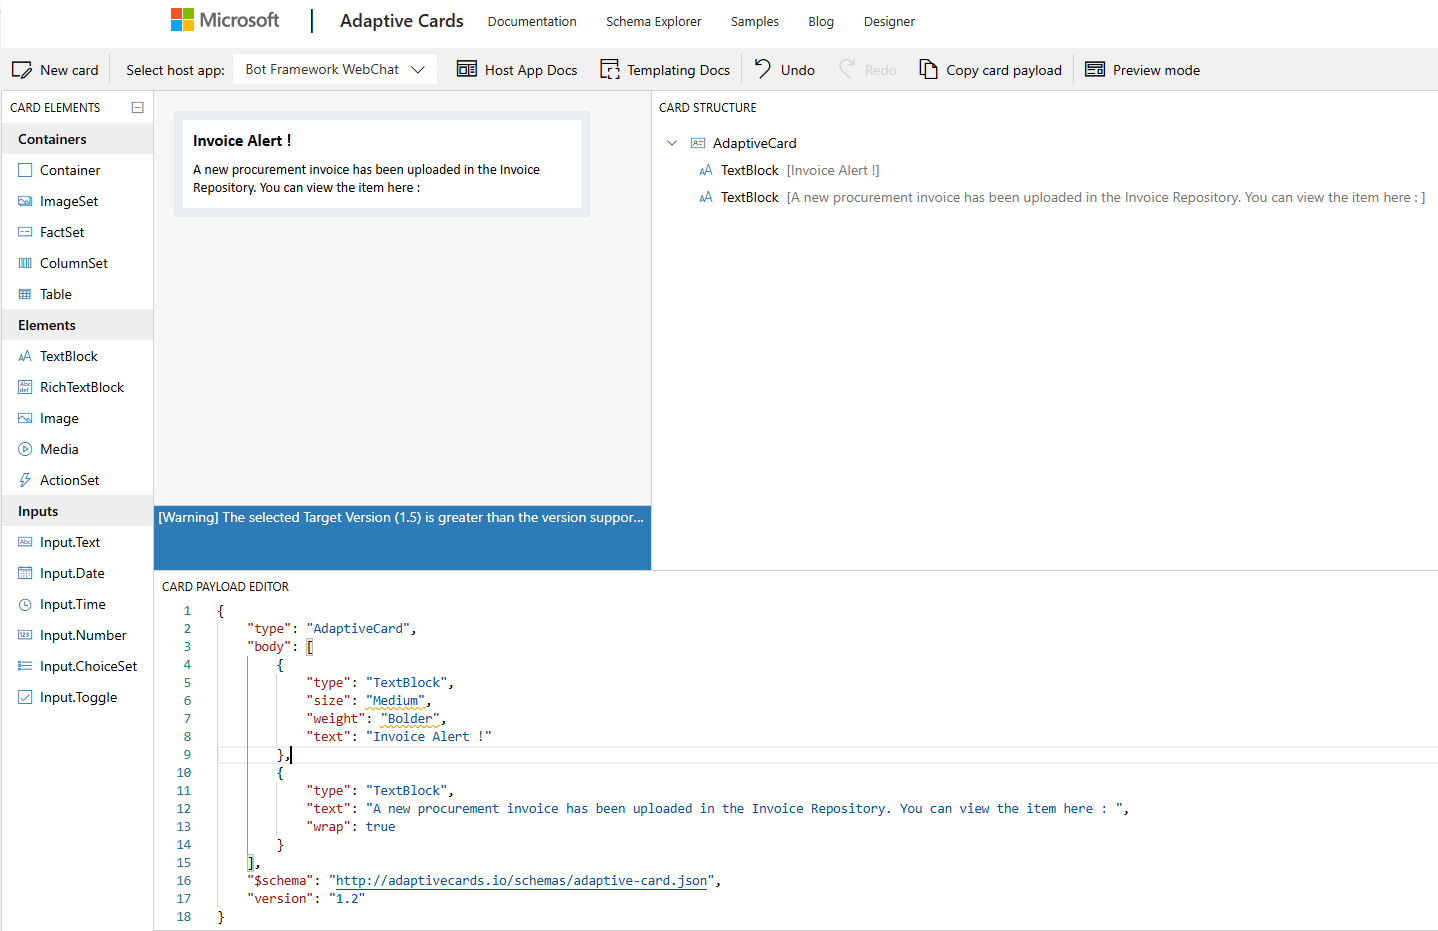
As we can see we have the screen divided into multiple layouts with the card controls listed out in the left pane followed by a middle section where the actual card is displayed. In the right pane we have the card structure that shows the hierarchy of elements and the way the controls are nested. To the bottom we have the JSON schema of the card which is where we can add the text details that need to show up in the card as well as style and format the card.
We can drag and drop the elements from the left pane to the card directly and this will create corresponding JSON structure elements in the bottom pane. We can edit the content and style of the created element in the bottom pane.
Note : By default the Version is set to 1.5 , ensure to change it to 1.2 so that it works with Microsoft Teams.
Adaptive Card Structure
The basic structure of a card is as follows:
- AdaptiveCard - The root object describes the AdaptiveCard itself.
- body - The body of the card is made up of building-blocks known as elements. Elements represent the objects listed in the left pane in the designer which are controls that would together dictate the functionality of the card. In this example we have 2 Text blocks which is used to display the text content in the card. We are also using properties like Size , wrap and Weight to format the style of the control
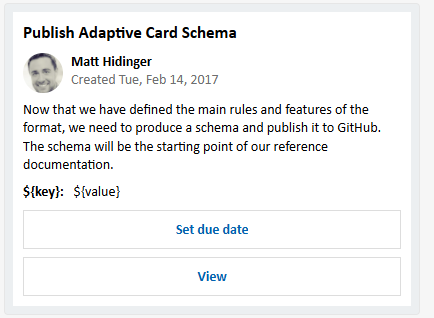
- actions - Many cards have a set of actions a user may take on it. This property describes those actions which typically get rendered in an "action bar" at the bottom. We have not added any actions in this example but the below sample shows Set due date and View buttons added ot the action bar.
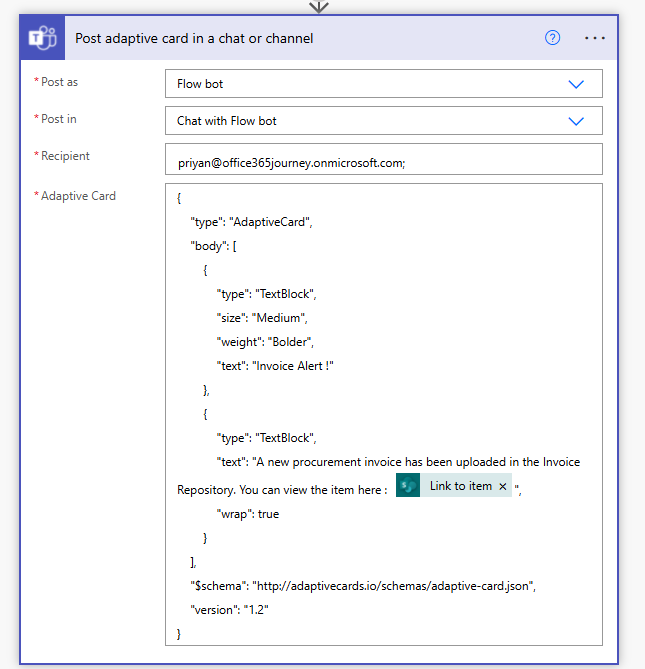
So we will copy over the json from the designer and paste it in the Flow action as :
We will add the dynamic content “Link to item” to the JSON so that the adaptive card will have the link to the uploaded document.
Testing the flow
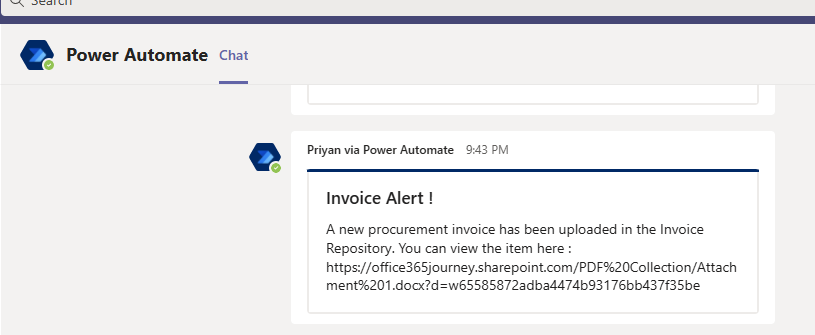
Lets upload a document to the Document library which will kickstart the flow and it will post the adaptive card to the teams as shown below:
Summary
Thus we saw how we can push an adaptive card to Microsoft Teams via Power Automate to display information to the end user.

