Azure Linux VM : Using several apps to remote connect
In this post, I will present the apps (including Azure Console) that we can use to connect to an Azure Linux VM. There are several apps in the market, but in this post, I will present only the free solutions we can easily find in the net. The below has the most well-known apps (including Azure Serial Console).
Before start...
Before choosing the app to connect to the Azure Linux VM, there is one important step we need to keep in the back of our head. This step is about the SSH key pair. Before starting with the Azure Linux VM deployment, we must download the private key.
Let us see now how we can configure each client to connect remotely.
Bitvise Client
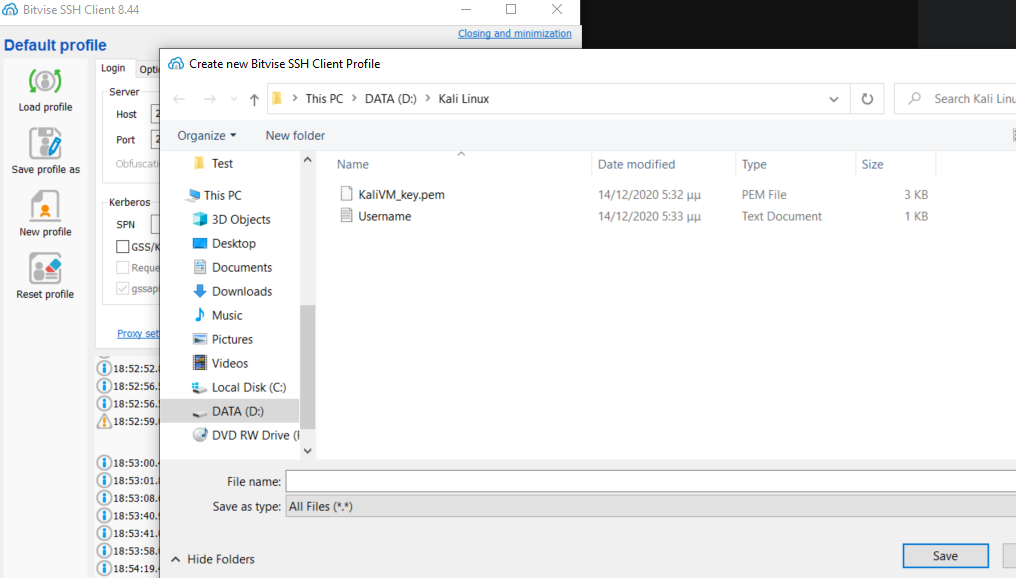
Create new Bitvise SSH Client ProfileRemoveElement
After Bitvise installation, we have to create a new Bitvise SSH client profile. To begin with, in the left-hand menu, click on New profile, and select the KaliVM_key.pem file we downloaded in a previous step and click Save.
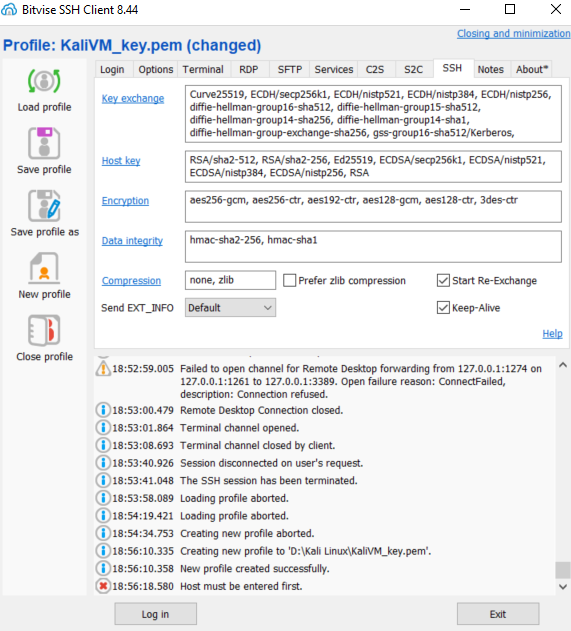
In the tab Login, we fill in the Host, Port and username fields and then select to log in.
Since we logged in we have access to the Kali Linux VM
and we can start typing commands, e.g. pwd.
Putty Client
The second application we try to connect to the Azure Linux VM is Putty.
Generate a key pair
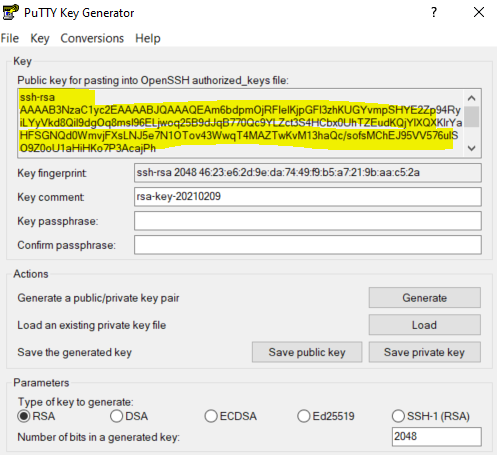
To begin with, we generate a new key using the PuTTy Key Generator. Click the button Generate to generate a new key.
Once the key generated, save the public, private key and copy the key as the image below shows.
Reset the Azure Linux VM SSH Public key
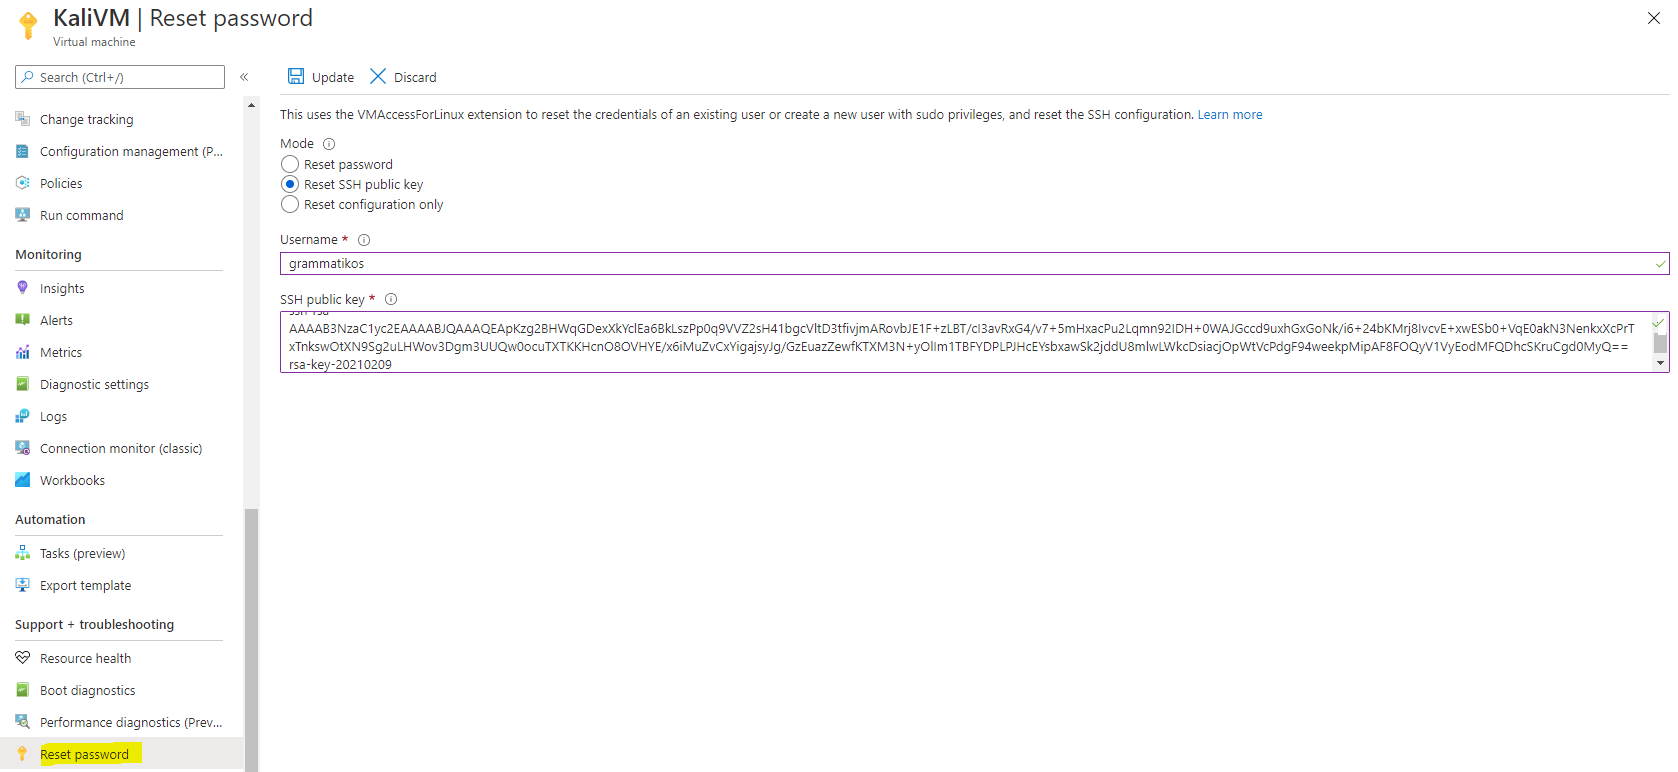
Open the Azure Portal move to the Virtual machine and, select Support-troubleshooting - Reset password, type the username and paste the SSH public key we copied in the step above and click the button Update.
https://cloudopszone.com/wp-content/uploads/2020/12/ResetPassword.png
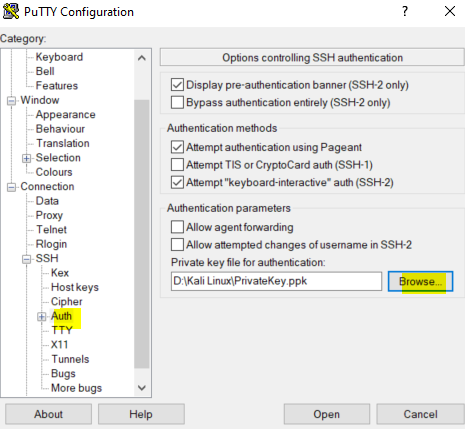
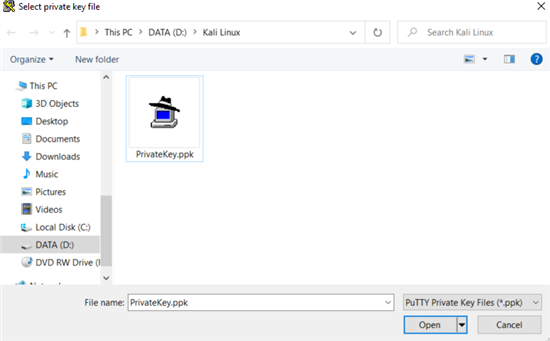
The final step is to configure the PuTTy client to connect to the Azure Linux VM. On the left-hand side select Connection - SSH - Auth and click Browse, then select the PrivateKey.ppk we saved earlier and click Open.
Now, select Session and type the Azure Linux VM public IP and click Open.
Type the username and hit Enter.
Azure Serial Console
The last tool we talk about now is the Azure Serial Console. In my opinion, this is the best option.
Enable Azure Linux VM Boot diagnostics
In a case boot diagnostics are disabled in the VM then we need to enable. From the left-hand side menu, select Support + troubleshooting - Serial console, and then click on the Info message (check the image below),
Select to Enable the Boot diagnostics and click Update.
Now, select from the Support + troubleshooting - Reset password, and type the username and a password, and click Update.
At the final step, we need to select Support + troubleshooting - Serial console type the username and the password. That's it we can start executing commands into the Azure Linux VM.

