Azure Active Directory: How to create and Configure a custom domain
Introduction
Learn how to Microsoft Azure Active Directory Domain Services (Azure AD DS) provides lots of services including protocols. There are managed domain services, domain join, group policy, lightweight directory access protocol (LDAP), and Kerberos/NTLM verification that is perfect for Windows Server Active Directory.
It integrates with your current Azure AD tenant, which makes it workable for clients to sign in utilizing their current certifications. You can likewise utilize existing groups and client accounts to secure access to assets, which gives a smoother lift and move of on-premises assets to Azure.
Create an Azure Active Directory Domain Services
Sign in to the Azure portal.
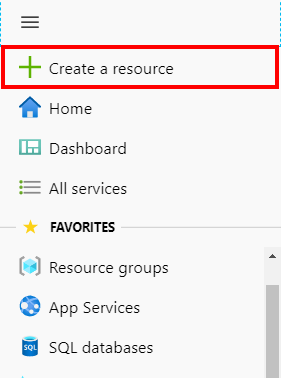
Then click on the Azure portal menu.
Select Create a resource.
Enter Azure Active Directory Domain Services into the search bar, then choose Azure AD Domain Services.
After that, open the Azure AD Domain Services page, then click the create button.
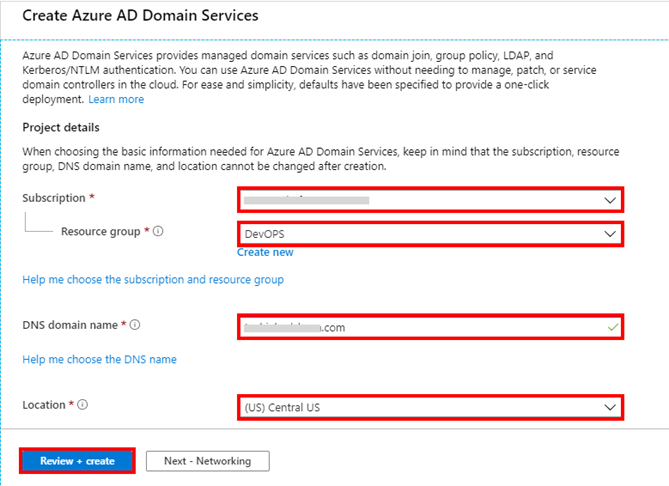
After that, Create Azure AD Domain Services, so select the Azure Subscription to create the managed domain.
And Select the Resource group to manage. Choose to Create new or select an existing resource group.
Then enter the DNS domain name and select the location.
After that, fill the information, click to Review + Create button.
Summary of the information, it’s okay, then Create.
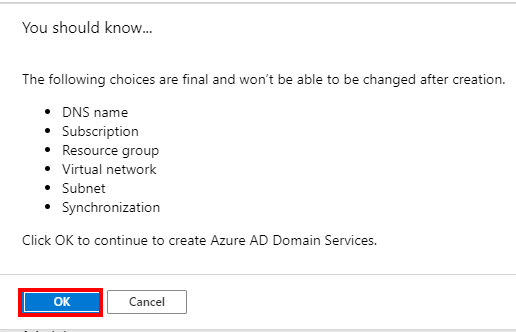
And, Very important, list of some headings here. Won’t be able to be changed after creation. As all the information correct, click on the OK button.
After that, Complete the Deployment process, then click go to resource button.
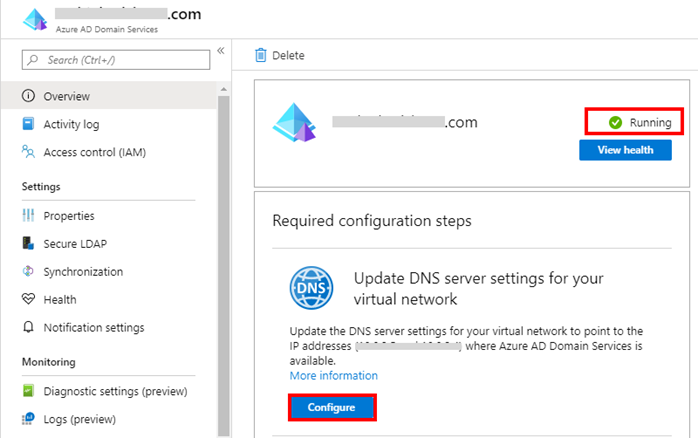
Select your resource group, Azure AD DS from the resource group. Then click the Overview, information about the Azure AD Domain Services. Then click to the Deploying button because Azure AD Domain Services must deploy.
Its going to deploying process view.
After that, Completed the Deploying process. Change to the Deploying to Running. Then second option Update DNS server settings for your virtual network, so click to Configure button. The DNS server settings automatically configured for your virtual network.
Saving virtual network processing view.
Enable the user account, for security reasons, Azure AD DS needs a password. That's suitable for NT LAN Manager and Kerberos authentication. So, authenticate users will manage the domain.
Summary:
In this article, Learn How to Create and Configure an Azure Active Directory Domain Services (Azure AD DS) in my next article, I will cover the next step of this series Configure virtual network.


