Generating Client Code from OData Metadata
Sometimes when we need to call APIs, we are just given the information about the entities in the form of OData metadata. Now when we are not aware about possible methods and their parameters which are exposed for use, it becomes very cumbersome and time consuming to call even a single method.
Till some extent, we can still manage our life for GET methods as they are easy to guess using entity names, but when it comes to PUT/POST/PATCH, things are not straight forward.
And here comes the need to generate classes with given metadata. Let’s have a look, on how we can generate these client-side proxy classes.
Install the required Visual Studio Extension
I’m using Visual Studio 2019 but the equivalent features are available in other versions too. Navigate to Manage Extensions dialog and search for OData Connected Service as shown below and install it.
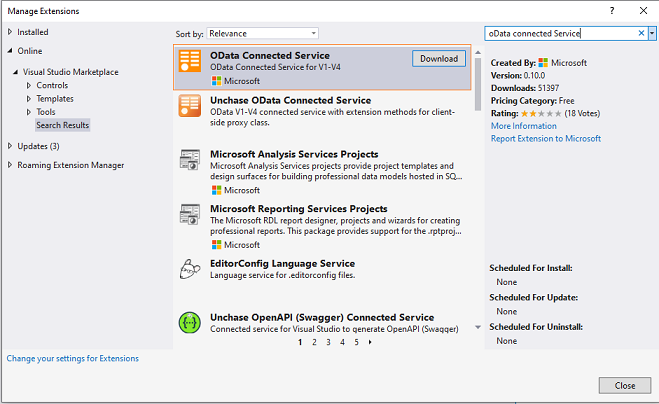
Using this tool, one can easily generate classes for all the entities and complex types which are mentioned in the metadata.
Generating Proxy Classes
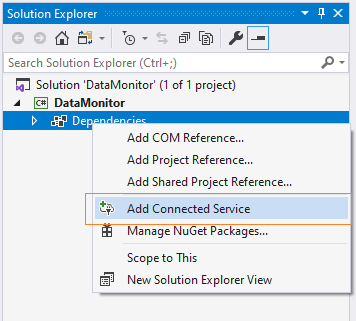
Next is to open the project in Visual Studio, inside which proxy classes have to be generated. Once the OData Connected Service extension is installed successfully, right click on the project and selected Add Connected Service as shown below:
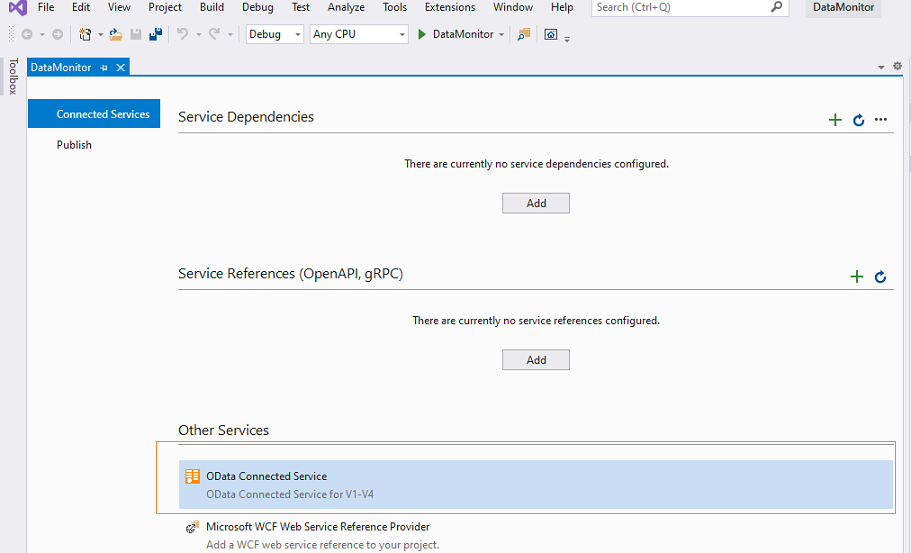
Next is to select OData Connected Service as shown below:
Next is to configure the endpoints, but before that, get ready with metadata in the form of an XML file. Here is the gist of how metadata looks like:

Let’s browse the metadata file as shown below:
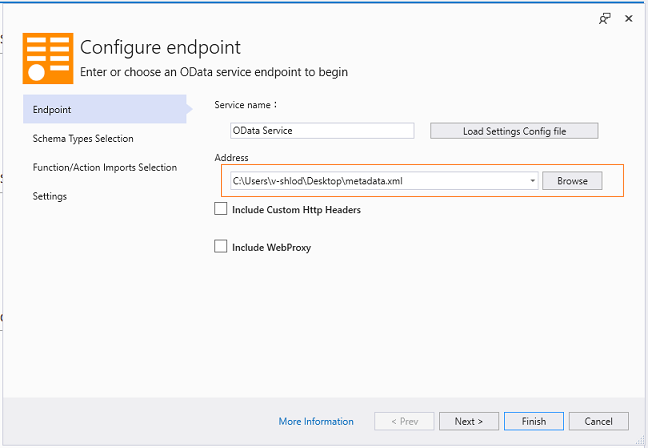
Click on Next and select all the required entities for which schema is to be generated as shown:
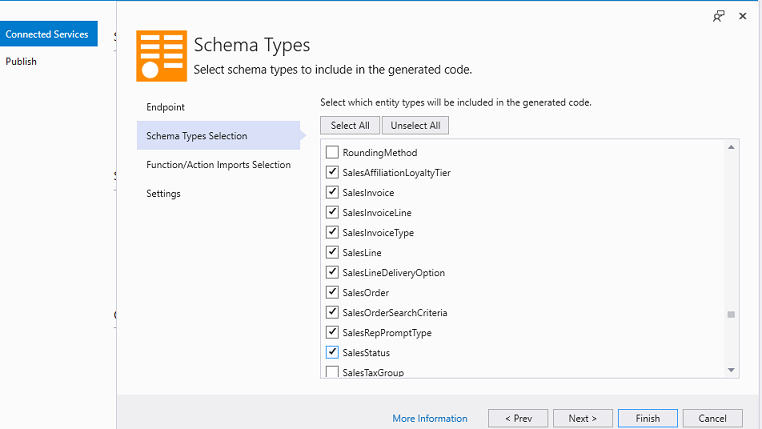
Click on Next and select all the required* Function/Action* which needs to be imported as shown below:

Clicking on next will take you to next screen wherein you can mention the class file name, in which all the generated code would be saved. Here I am taking the class name as RetailReference as shown below:

Now if you wish to place all the generated code in respective separate-separate files, rather than pushing everything into the single file, then this setting can be done by clicking on the Advanced Settings link as shown in the above screenshot, which will open up below options:
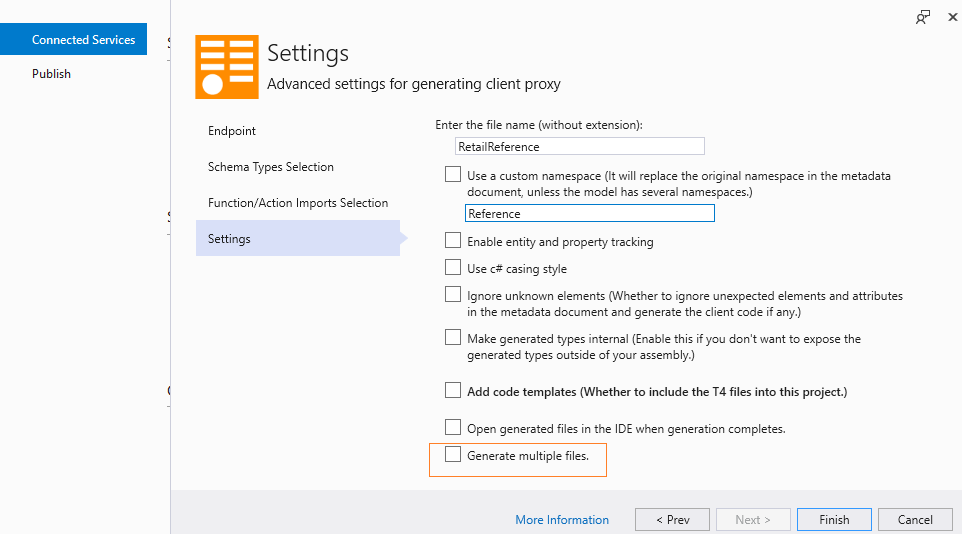
There are a few more options under Advanced Settings, which can be utilized based on our coding guidelines.
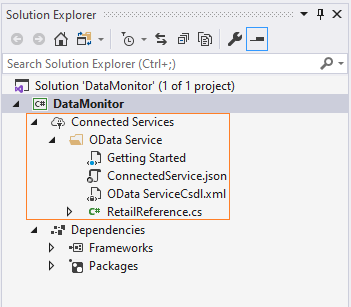
Click on Finish and you will notice that all the entities are added to solution explorer as shown below:
We are all set to utilize our classes. Happy learning!
