SharePoint Online: Analysis on modern PnP search web part
Introduction
On 30th of January 2020, Microsoft has released a upgraded version of solution “Creating custom search results pages in SharePoint Online” using the PnP modern search web part. In this article, we will learn how to work with a custom search result page in SharePoint online using the PnP modern search solution.
A brief summary of the PnP modern search solution web part
This solution allows you to build user-friendly SharePoint search experiences using SPFx in the modern interface. The main features include:
- A fully customizable SharePoint search query like the good old Content Search Web Part.
- It can either use a static query or be connected to a search box component using SPFx dynamic data.
- Live templating system with Handlebar to meet your requirements in terms of UI + built-in layouts. It can also use a template from an external file.
- Search results including previews for Office documents and Office 365 videos.
- Customizable refiners supporting multilingual values for taxonomy-based filters.
- Sortable results (unique field).
- Refiners Web Part.
- SharePoint best bets support.
- Search query enhancement with NLP tools (like Microsoft LUIS).
- Extensibility model allowing to write your own components.
Prerequisites to deploy this web part
Before going to configure this web part, we must have the below prerequisites:
- An app catalog site collection
- A team site only for a custom search page
- Out of the box search box in the office 365 suite bar
Prerequisites – setup (Create a result page)
Step 1: Create the result page in the dedicated search team site.
Browse your dedicated search site.
Click on the “+ New” dropdown menu.
Click on the Page.

We will be landing in the templates selection page.
Select the default “Blank” template.

Enter the page name – here we have given as “Results”.
Enter some texts about the page – here we have given as “Search Results”.
Click on the “Save as draft” button from the left top corner.
Finally, click on the “Publish” button from the right top corner.
Note:
Here, we could see “Republish” button instead of “Publish” because we have already published this page, now editing again.

Once we click on the “Publish” button first time, we will get the below screen to copy the page address.

Let’s note down my result page URL:
https://globalsharepoint2020.sharepoint.com/sites/CustomSearchRND/SitePages/Results.aspx
Now, we have the result page ready.
Step 2: Search functionality with the out of the box search page
This is the search box by default is enabled in any of the tenants.

We need to replace the above search box with the office 365 suite bar search box. Let’s look at the below screenshot.

To configure the office 365 suite search box, refer to my previous article – Configure SharePoint search box in office 365 suite bar step by step

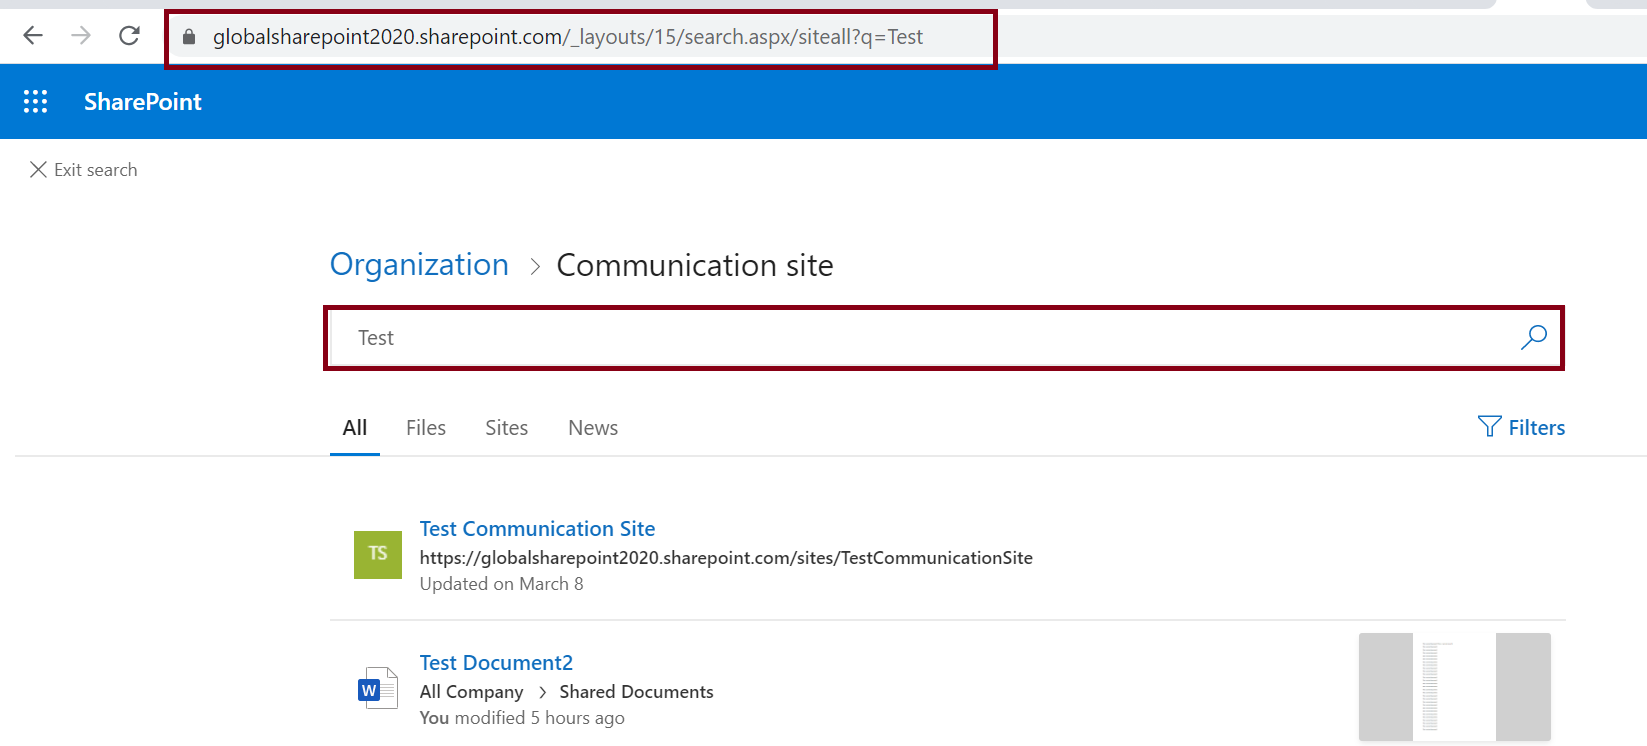
Once the office 365 suite search box is enabled, type something in the search box – which will take us to the below “_layouts/15/search.aspx” page.
https://globalsharepoint2020.sharepoint.com/_layouts/15/search.aspx/siteall?q=Test
In this tutorial, our purpose is to replace the below page ,
https://globalsharepoint2020.sharepoint.com/_layouts/15/search.aspx
with the below custom search result page.
https://globalsharepoint2020.sharepoint.com/sites/CustomSearchRND/SitePages/Results.aspx
Step3: Change the default search result page query setting
Go to the search setting page by following the below navigation:
Click on the gear icon -> Site settings -> Click on the Search settings from the Site Collection Administration section.
Direct URL to the setting page is:
Syntax:
https://yoursitename.sharepoint.com/_layouts/15/settings.aspx
Example:
https://globalsharepoint2020.sharepoint.com/_layouts/15/settings.aspx
Go to the search section, then click on the “Search Settings” link.

Then we will get into the search settings configuration page.
Enter the below data.
Enter a search center URL – in the search center URL box, enter the custom result page URL.
https://globalsharepoint2020.sharepoint.com/sites/CustomSearchRND/SitePages/Results.aspx
Which search results page should queries be sent to?
By default “Use the same results page settings as my parent.” checkbox will be selected, uncheck this.
Select the radio button – Send queries to a custom results page URL.
Enter the custom search result page in the “Result Page URL” box.
https://globalsharepoint2020.sharepoint.com/sites/CustomSearchRND/SitePages/Results.aspx
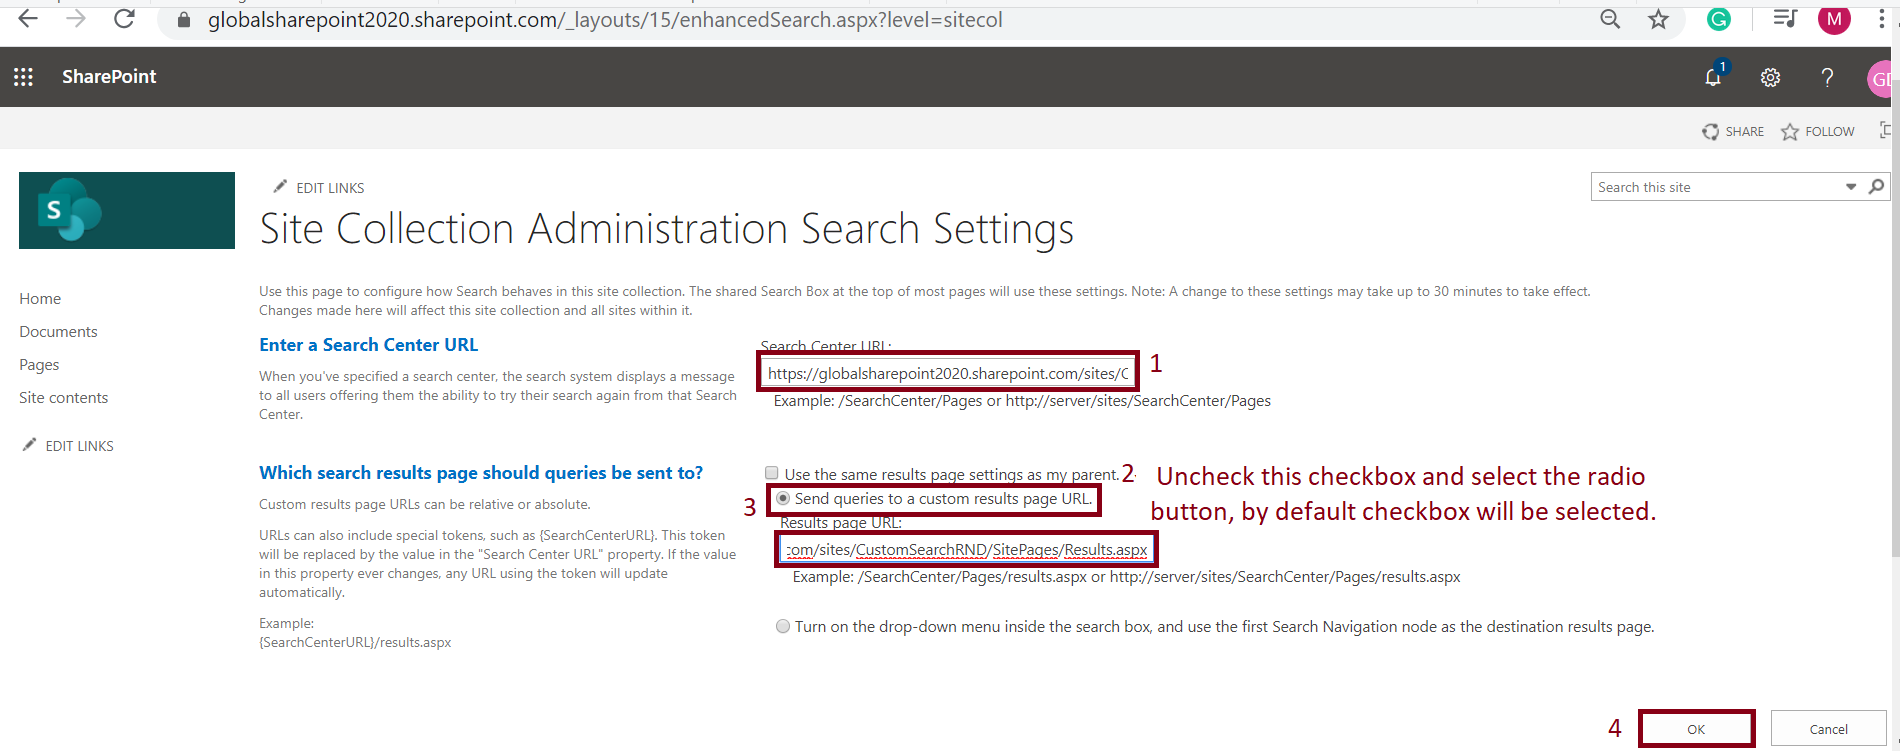
Click on the OK button – then wait for a minute to get the changes affected.
The above setting can be updated using the below PnP command as well:
Set-PnPSearchSettings -SearchPageUrl "https://globalsharepoint2020.sharepoint.com/sites/CustomSearchRND/SitePages/Results.aspx"
Now, type something in the top search box and hit enter – we have typed “Test” word.

In the next page, we could see that the out of the box “/_layouts/15/search.aspx” page has been replaced with the custom result page which is hosted in the different site collection:
https://globalsharepoint2020.sharepoint.com/sites/CustomSearchRND/SitePages/Results.aspx
And in the middle of the page, we could see the search result has been displayed for the keyword “Test” and at the right side we can see the custom refiner web part. These two web parts are custom SPFx PnP modern search web part.

By now, we have seen the modern search result is working as expected – now we will see how to configure this modern search web part.
How to configure the modern PnP search result page?
There are majorly two sections on this:
- App Deployment
- App Configuration
Step 1: App Deployment
Download the PnP modern search package file (click on the file name) “pnp-modern-search-parts.sppkg“.
GitHub location – https://github.com/microsoft-search/pnp-modern-search/releases/tag/3.11.1
Log in to your tenant app catalog site collection.
https://globalsharepoint2020.sharepoint.com/sites/GlobalSharePointDiaryAppCatalog
This is the app catalog site collection – similarly, we can navigate to your app catalog site collection.
Click on the “Apps for SharePoint” document library.
Now, drag and drop or upload the file “pnp-modern-search-parts.sppkg” which you have downloaded just before.
Note: The user must be an app catalog site collection administrator otherwise we cannot upload it, even though the user has the global administrator role, refer to my supporting troubleshooting article for this – Can not upload ShortPoint App to SharePoint App Catalog
On the successful upload, we will get a pop-up dialog “Do you trust PnP Modern Search – Search Web Parts?” that has the below messages:
"The client-side solution you are about to deploy contains full trust client side code. The components in the solution can, and usually do, run in full trust, and no resource usage restrictions are placed on them.

This client side solution will get content from the following domains:

SharePoint Online

Make this solution available to all sites in the organization

If you clear this setting, users won't be able to add the web part to pages. The web part will continue to work if it was already added to pages."
Here we need to click on the “Make this solution available to all sites in the organization” checkbox otherwise for each site this solution has to be deployed separately.
Click on the “Deploy” button.

We need to wait for a minute.
Step 2: App Configuration
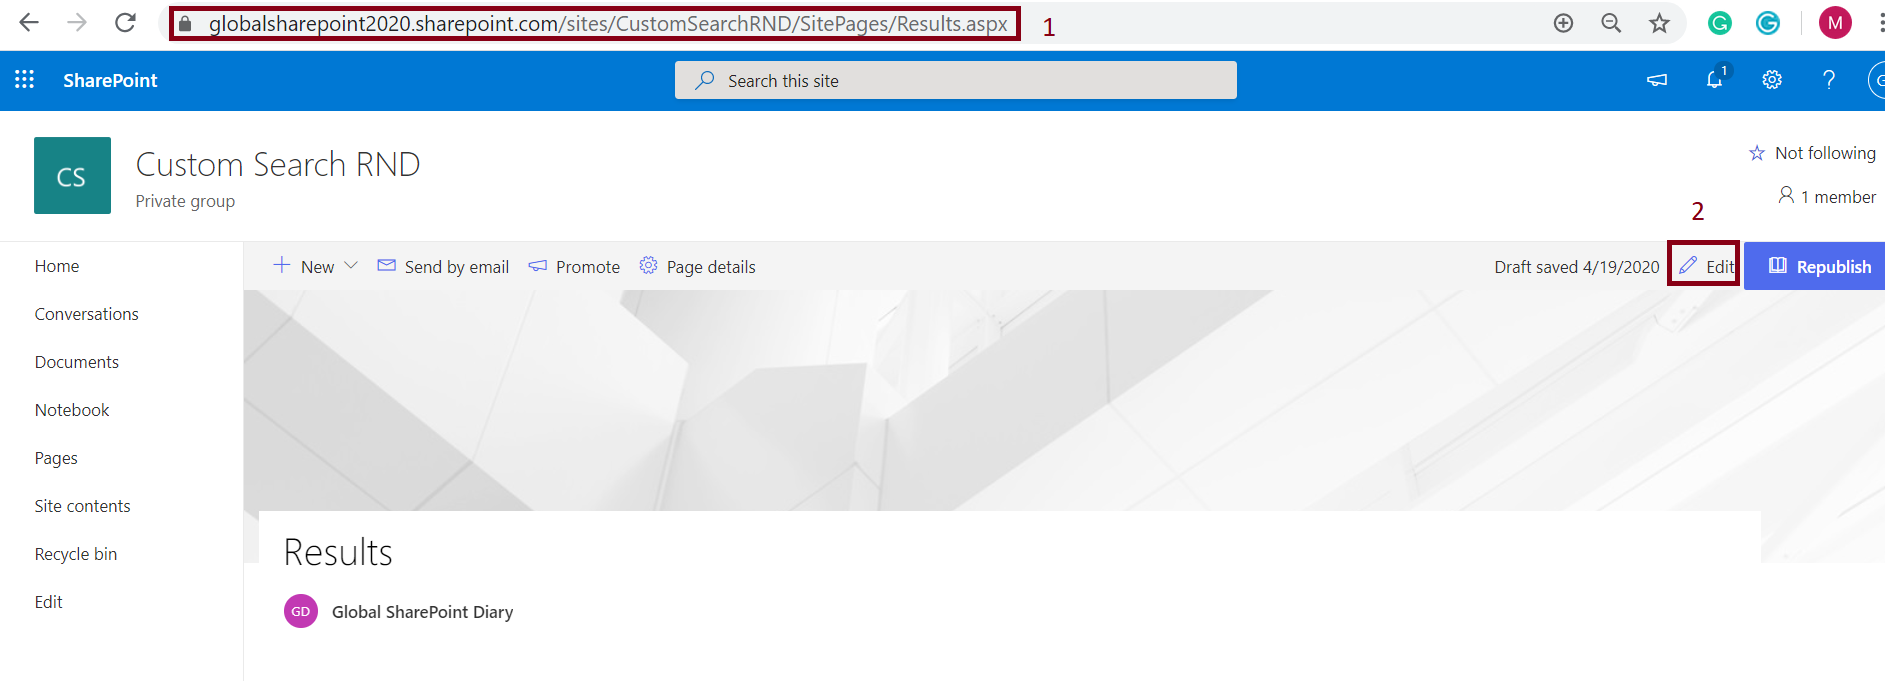
Navigate to your custom result page what you have created, like below:
https://globalsharepoint2020.sharepoint.com/sites/CustomSearchRND/SitePages/Results.aspx
Click on the page Edit link like below:
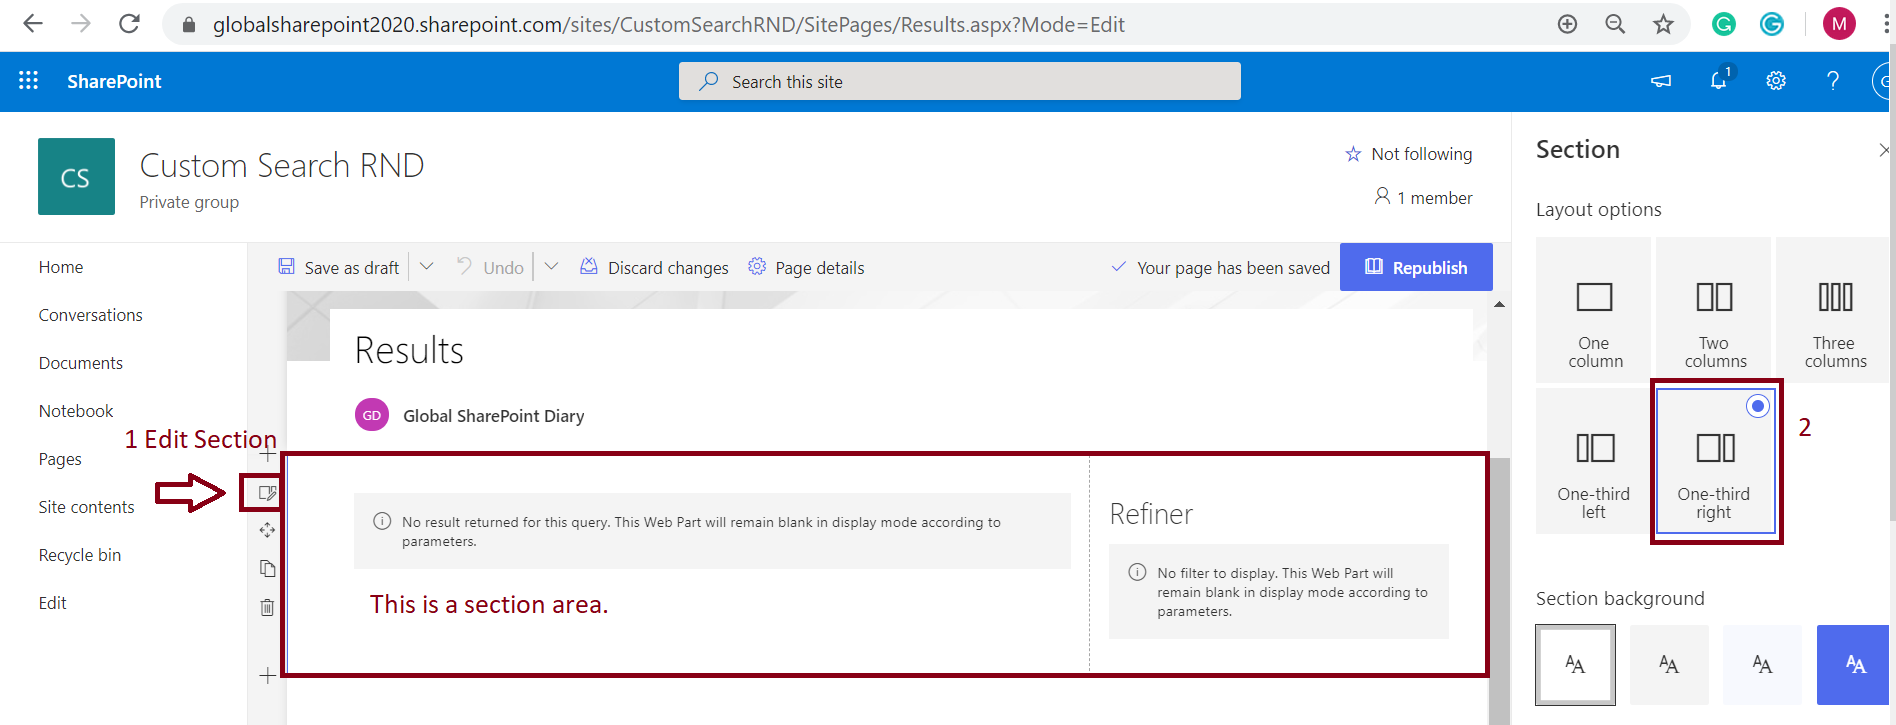
Configure the section layout
We need to have two web parts for our purpose:
- Search result web part at the center
- Refiner web part at the right side
So, accordingly – we need to set up the layout.
Click on the section edit button, then from the right side layout options, select “One-third right”
Add custom search results web part
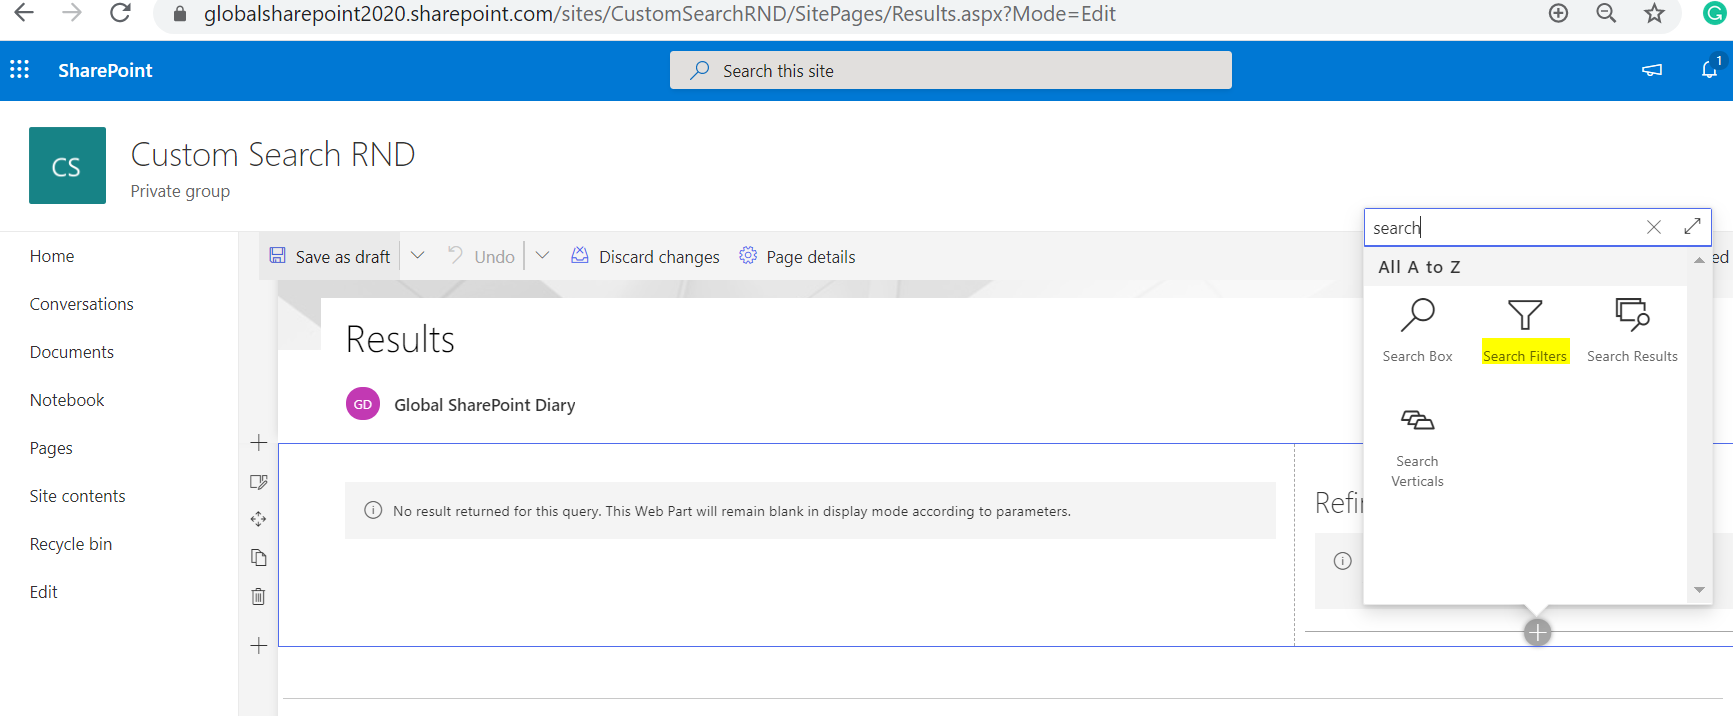
Click on the add web part plus “+” button, then in the web part search – type “search” text because there will be multiples web parts, manual searching will be time consuming.
Now, we can see, there are four web parts with “Search” text because this SPFx solution is bundled with four web parts.
- Search Box
- Search Filters
- Search Results
- Search Verticals
The scope of this tutorial is to configure the “Search Filters” and “Search Results” web part, so I will focus on these two web parts.
Select the “Search Results” web part.

Similar way, add the “Search Filters” web part for the search refinement – in the right section.
Refiner web part or search filters web part configuration in the custom modern page
Click on the “Search Filters” web part edit button.
From the configuration pane:
For “Connect to search results web part”, select “Search Results”.
Web part title, let’s name as “Refiner”
There are two filters layout:
- Vertical and
- Panel
The default selection is “Vertical” let’s go with that.

Edit Refiners Configuration
By default in the refiner web part only three manage property columns is displayed:
- Created Date
- Size of the File
- Taxonomy Terms (Exceptional – if the search result returns any manage metadata columns, then only this is displayed otherwise not).
So, if you want to add any additional columns apart from the above, how we can?
Click on the “Edit Refiners” link from the refiner settings pane.
Then in the “Edit refiners” configuration page – we can the additional manage property column.

Search results web part configuration
Similar way, configure the search result web part.
Click on the search result web part edit button.
Now, the web part configuration page will be opened in the right pane.
The “search results” web part is three steps configurations.
- Search Query configuration
- Search Settings configuration and
- Styling Options configuration
Search Query configuration (1/3):
In the search query configuration, select the below:
Search query keywords
- Connect to source: Page environment
- Page environment’s properties: Search
- Search: Search Query
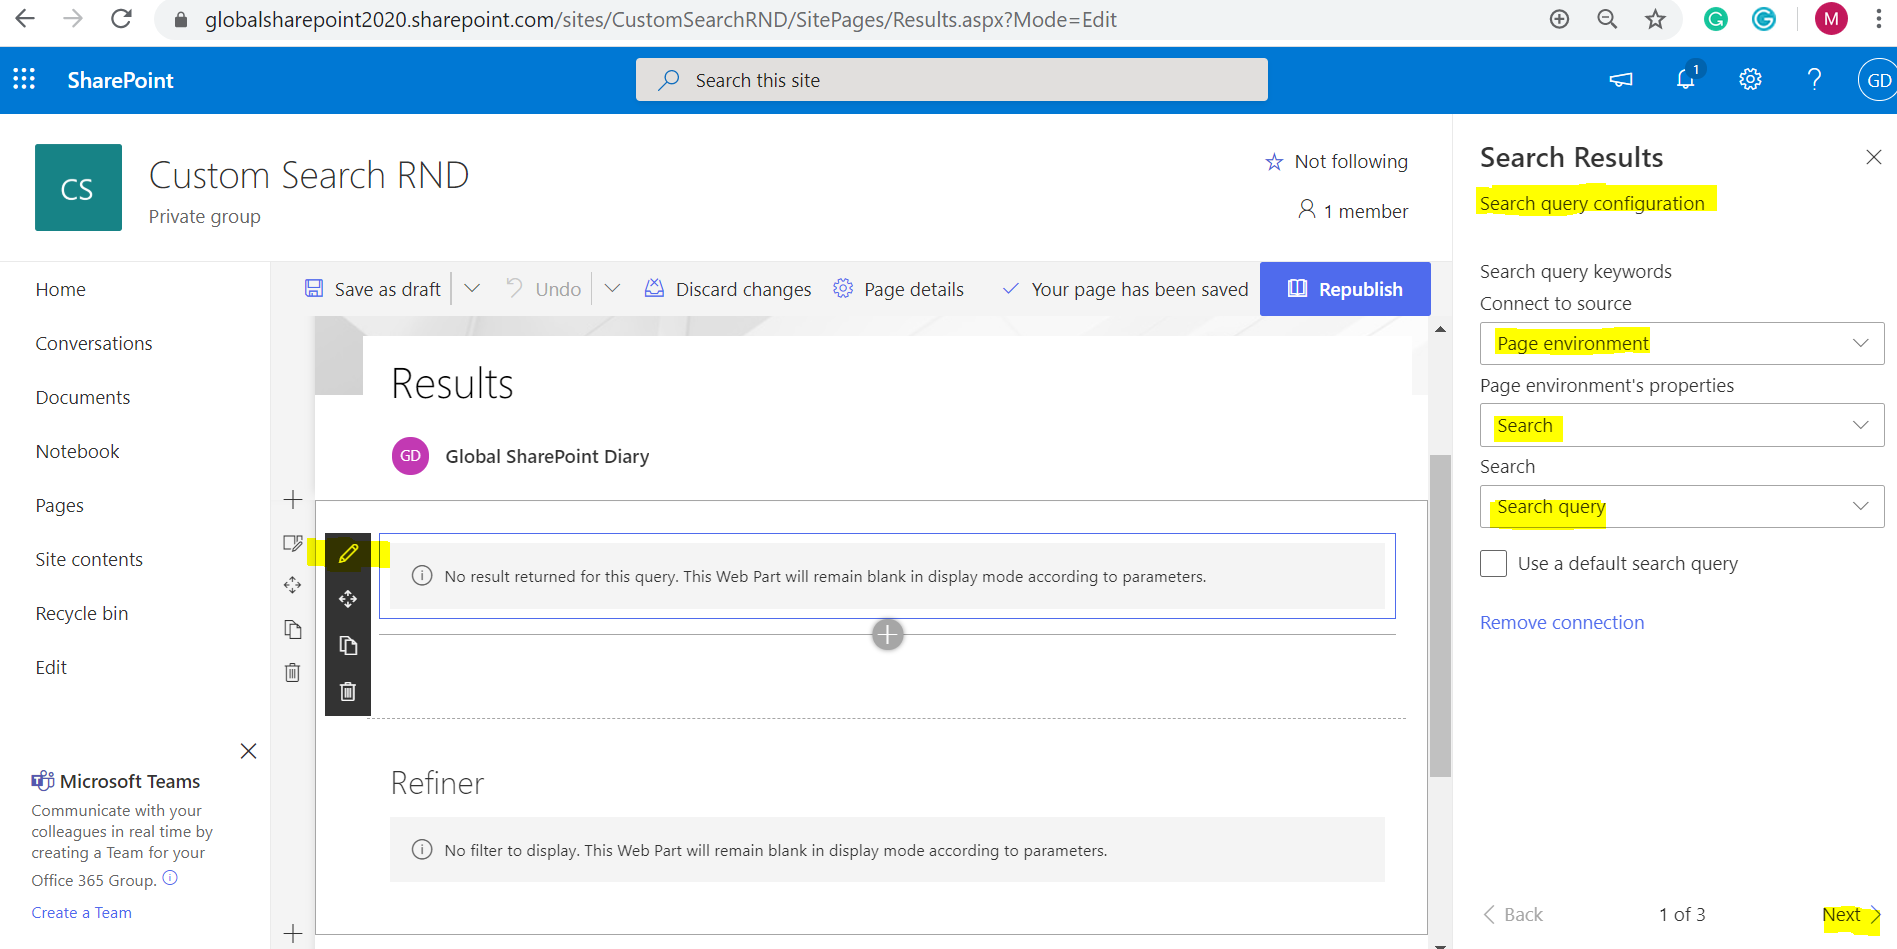
Search Results web part configuration in the custom modern page:
Click on the “Next >” link.
Search Settings configuration (2/3):
In the search settings configuration, configure the below:
Query template: {searchTerms}
Connect to a search refiners Web Part: On
Note: This is very important otherwise search refiner will not work.
Use refiners from this component: Select “Refiner” web part
Rest all configurations keep as default.

Click on the “Next >” link.
Styling Options configuration (3/3);
There are various layout selection options:
- Simple list
- Details list
- Tiles
- Carousel
- People
- Debug
- Custom
Each template has a different look, feel and purpose.
In this demo, we have selected the “Detail list” layout that will look like a list view web part. And the beauty of this layout is, we can show or hide as many columns we want through the manage columns configuration.

Manage columns configuration in the “Details List” layout:
Click on the “Manage columns” link from the “Template Options” header.
By default, the below three columns will be configured:
- Title
- Created
- Summary
Now, here – we can configure as many columns we want through the:
- Column display name – it could be any valid text, relevant to the actual column display name.
- Column value: Need to select the managed property from the drop-down list or need to use the “Use Handlebars expression“.
Note:
The easiest way to use the managed property value than the “Use Handlebars expression“.

Finally, the custom modern search result web part and refiner web part looks like below:

Note:
In the above demo, we have shown the configuration from my already configured web part – so while you will refer this tutorial for the configuration – you might see a little different.
Generic configuration of “Search Results Web Part” or “Search Filters web part”.
We need to click on the web part “Configure” button, in the right configuration pane, we can see three dots”…” , please click on this.
Then finally click on the “Connect to source” link. This is an entry point for the configuration – rest all same as the above demo.

Download:
The PnP modern search solution web part source code can be downloaded from here:
Summary: what we had here?
Thus, in this article, we have learned about what is PnP modern search web part and how to work with this web part in modern SharePoint Online.