Typescript: Getting Started - SPFx Development (Part 6)
We saw how to use the basic types in the Part 5 of this series. Now lets see how to work with project files and compiler options.
Type Assertions
At times the developer would be in a position to determine what the data type for a variable would be in case of a dynamic assignment scenario. Type assertions are a way to tell the compiler that we know what the data type is going to be, hence we will be type casting that to the desired data type.
We can do type assertion using two syntaxes :
- Using Angle Bracket and specifying the data type inside it
- let info: any = "Hello Word !";
- let infoLength: number = (<string> info).length;
Here we are asserting the info variable as string and getting the length of the string.
- Using as Syntax
- let info: any = "Hello Word !";
- let infoLength: number = ( info as string).length;
Type Annotations
As Javascript is not a typed language we wont be able to specify the type of a variable as string or number. This bring in more confusions as we develop the code and start writing more functions. However with Typescript we can can specify the type of variable or parameters by using <: Type> after the variable or parameter.This annotation helps the compiler to understand the type of variable or parameter that is being used.
A simple example of type annotation with variable is :
var Score: number = 100; //This tells the compiler that score is a number variable
Type Annotations with Functions
In plane Javascript the function can be written as
- function Greetings(salutation, name)
- {
- console.log(salutation+” ”+ name);
- }
- Greetings(“Hello”, "Priyaranjan");
Here the salutation and name parameter in the Greetings function can take any type and just based on the signature we cannot tell what type the function returns. However reading the code within the function we can understand that it returns a string type. This is not an intuitive way of programming.
To make things intuitive and easy for the compiler to do type checking we can include Type Annotations within the function and the above function can be modified as :
- function Greetings(salutation : string , name ? : string) : string
- {
- return(salutation+' '+ name);
- }
- Greetings('Hello', "Priyaranjan");

Here we have annotated the parameters with their types as well as annotated the return type of the function so that by just looking at the signature we get to understand what kind of data can be passed to the function and what we can expect back out of it.
The Question mark following the name parameter specifies that the parameter is optional and we may or may not pass the information for this parameter while calling the function.
Using the --noImplicitAny
In case we do not define a type for the parameter, compiler by default assigns the Any type to the parameter. However to avoid such situation and the accidental errors of type mismatches, we can use the –noimplictAny compiler option which we can set in the config file. If we have set this option, even if no type is specified for the parameter, it wont assign the Any type rather it will throw error stating that “Parameter Impilicitly has an any Type”
Default Initialized Parameters
In unison with Type Annotations we can assign default values to parameters as well. Lets take the below function
- function Greetings(salutation : string , name : string=”Priyaranjan”) : string
- {
- console.log(salutation+” ”+ name);
- }
In this function, the name parameter takes in a default value “Priyaranjan” which in effect makes it an optional parameter. In case while calling the function, no value is passed in to the name parameter, it will take the default assigned value. However if some other value is passed to the calling function it will get assigned to the name parameter and will supersede the default value.
Arrow Functions
Fat arrow notations are used for anonymous functions. They are also referred to as Lambda functions. The general syntax is as shown below :
- (param1, param2, ..., paramN) => expression
Using the Arrow notation we can skip the usage of the function keyword. Parameters are passed in the angular brackets <>, and the function expression is enclosed within the curly brackets {}. Lets look at the below example where we have defined the arrow function for calculating the area. Here AreaofSquare is an arrow function. (side:number) denotes the parameter types, :void specifies the return type. The fat arrow => separates the function parameters and the function body. The right side of => can contain one or more code statements.

We can also have parameter less arrow function as shown below :

Interfaces
Interfaces can be used to create custom types in Typescript. It is a syntactical contract that an object should conform to. Interfaces define properties, methods, and events, which are the members of the interface. Interfaces contain only the declaration of the members. It is the responsibility of the deriving class to define the members.Thus it helps in defining a standard for the deriving classes to follow.
Interfaces are defined with the keyword interface followed by the interface name. Lets look at the below example of interface declaration:
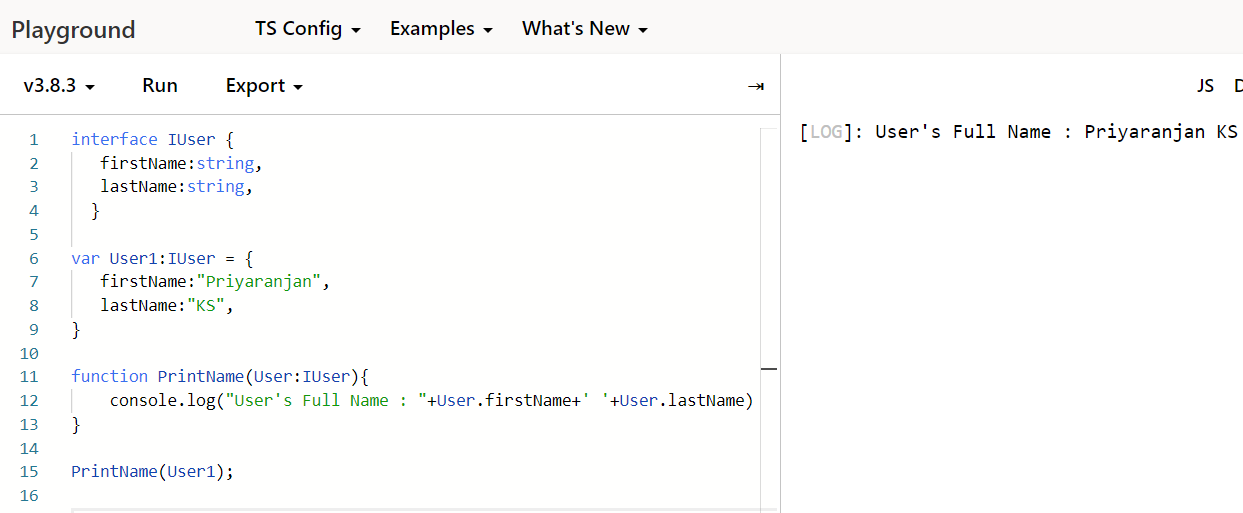
- interface IUser {
- firstName:string,
- lastName:string,
- }
- var User1:IUser = {
- firstName:"Priyaranjan",
- lastName:"KS",
- }
- function PrintName(User:IUser){
- console.log("User's Full Name : "+User.firstName+' '+User.lastName)
- }
- PrintName(User1);
Inheritance of Interface
An interface can inherit from other interface’s as well. In addition to that, Typescript allows the interface to inherit from multiple interfaces by using the ‘extends’ keyword . A sample of Interface inheritance is shown below :
- interface IUser {
- firstName:string,
- lastName:string
- }
- function PrintName_Department(User:IEmployee){
- console.log("User's details : "+User.firstName+' - '+User.department)
- }
- interface IEmployee extends IUser{
- employeeNumber:string,
- department:string
- }
- var User1:IEmployee = {
- firstName:"Priyaranjan",
- lastName:"KS",
- employeeNumber:"Emp25",
- department:"Electrical"
- }
- PrintName_Department(User1);

Multiple Interface Inheritance
If we want to use the members/properties from multiple interfaces it is possible using the below syntax
Interface childInterface extends parentInterface1,parentInterface2{<Signature>}
An example is as shown below :
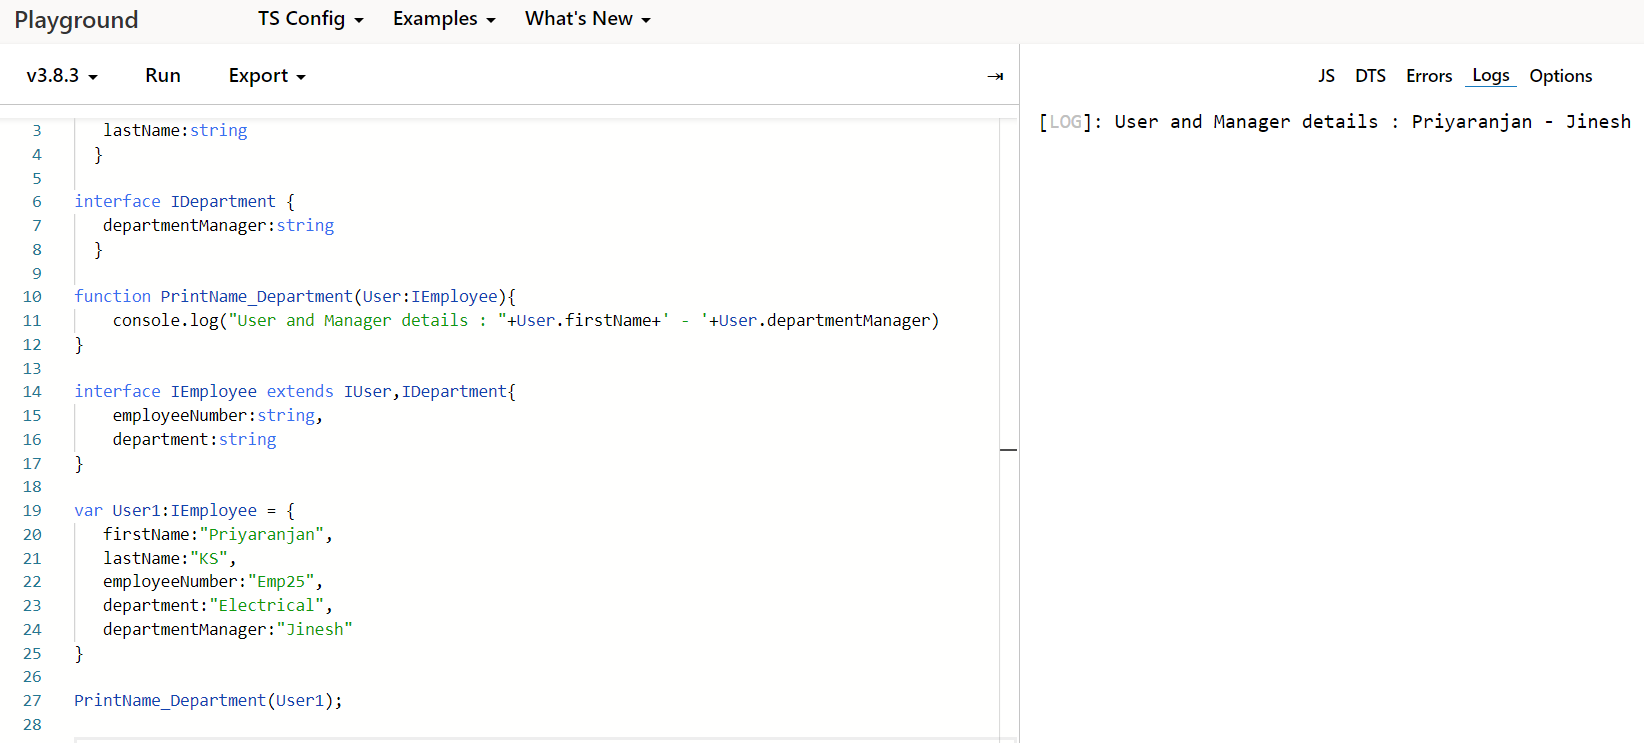
- interface IUser {
- firstName:string,
- lastName:string
- }
- interface IDepartment {
- departmentManager:string
- }
- function PrintName_Department(User:IEmployee){
- console.log("User and Manager details : "+User.firstName+' - '+User.departmentManager)
- }
- interface IEmployee extends IUser,IDepartment{
- employeeNumber:string,
- department:string
- }
- var User1:IEmployee = {
- firstName:"Priyaranjan",
- lastName:"KS",
- employeeNumber:"Emp25",
- department:"Electrical",
- departmentManager:"Jinesh"
- }
- PrintName_Department(User1);
Classes
In Object oriented programming a class is defined as a blueprint for an object which serves true for Typescript as well. We can create classes in Typescript using the class keyword. The syntax is as shown below :
Class className{
//Member and Functions
}
Lets look at the example below :
- class Employee {
- //field
- Name:string;
- //define constructor
- constructor(Name:string) {
- this.Name = Name
- }
- //function definition
- WelcomeEmployee():void {
- console.log("Welcome to Contoso !");
- }
- }
- var empObject = new Employee("Priyaranjan KS")
- //accessing the field
- console.log("The new employee name is : "+empObject.Name)
- empObject.WelcomeEmployee();

Here we are decalring a class named employee which has a field named “Name”. We are declaring it without using the var keyord. We are also decalring a constructor for the class. The constructor is a special function of the class which is responsible for initializing the variables of the class. We will be defining the constructor using the “constructor” keyword
ShowEmployeeName is a function that displays the greeting message which is defined without using the function keyword.
To create an instance of the class, use the new keyword followed by the class name. Here we have instantiated the employee class as below. Since we have a parametrized contructor we are passing the parameter as well so that it can be used for initializing class variable “Name”
Var empObject = new Employee(“Priyaranjan KS”)
The class’s attributes and functions can be accessed through the object using the dot(.) notation like
empObject.Name
Class Inheritance
Just like Interface Inheritance , Classe’s has the ability to create new classes from an existing class. The class that is extended to create newer classes is called the parent class/super class and the newly created classes are called the child/sub classes.
We can use the Extends key word to define the inheritance as shown below. Here the Greetings class inherits from the Employee class which has the field name declared. When an object of Greetings is instantiated, it can still access the Employee class attributes and functions.
