Visual Studio: How to use Python Azure IoT SDK
Introduction
Recently, Microsoft has released the new version of Python Azure IoT SDK (V2.0) (refer to this page on IoT blog: New version of the Python SDK released). According to the release announcement, we should upgrade SDK from V1 to V2 since the v2 SDK aims to provide a simplified, more natural experience for developers. It’s designed in native Python. In addition, Visual Studio is a kind of widely used integrated development environment (IDE) for Internet of Things. In this tutorial, we use Visual Studio Community and Windows 10 to demonstrate how it is easy to use Python Azure IoT SDK V2.0 for IoT applications.
Prerequisites
In this tutorial, we use Windows 10 and Visual Studio Community 2019. Please make sure that “Python development” workload is selected and installed as in Fig. 1.
Fig. 1 “Python development” workload
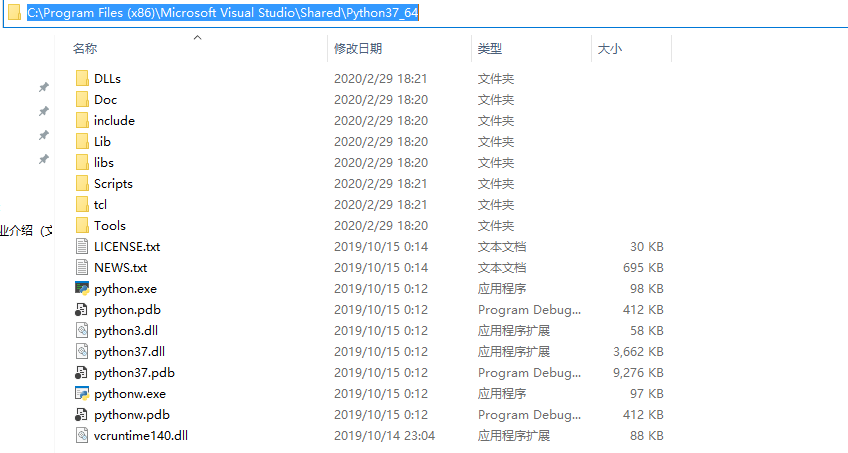
The default version of Python is 3.7.5. And the default path will be “C:\Program Files (x86)\Microsoft Visual Studio\Shared\Python37_64”, which is shown in Fig. 2.
Fig. 2 The default path of the Python
Now, in order to use pip in Windows Command Line, we should add the "pip" to the system Environment Variables. In System Properties-Environment Variables-System Variables, choose “Path” and click “edit” as follows.
Fig.3 Edit environment variable
Cilck New and enter “C:\Program Files (x86)\Microsoft Visual Studio\Shared\Python37_64\Scripts” to the form as in Fig. 4
Fig. 4 Add pip to the system environment variable
Install Python Azure IoT SDK
Use the following command to install Python Azure IoT SDK 2.0:
pip install azure-iot-device --user
Just wait a while and the installation will be done quickly. The output is as follows.
Fig. 5 Install Python Azure IoT SDK
Create Device using Device Explore
Download Device Explorer from Github: https://github.com/Azure/azure-iot-sdks/releases. Install and run. On management tab, click create button to create new device as follows.
Fig. 6 Create new Device
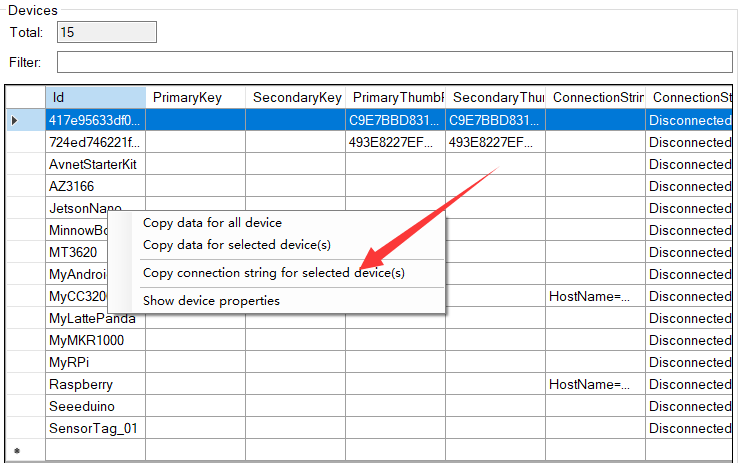
Then, right click on the device that just created, choose “copy connection string for select device” as shown in Fig. 7.
Fig.7 Copy connection string
Please save this string in a txt or other file. We will use this later.
Create and Debug Python Project with Visual Studio
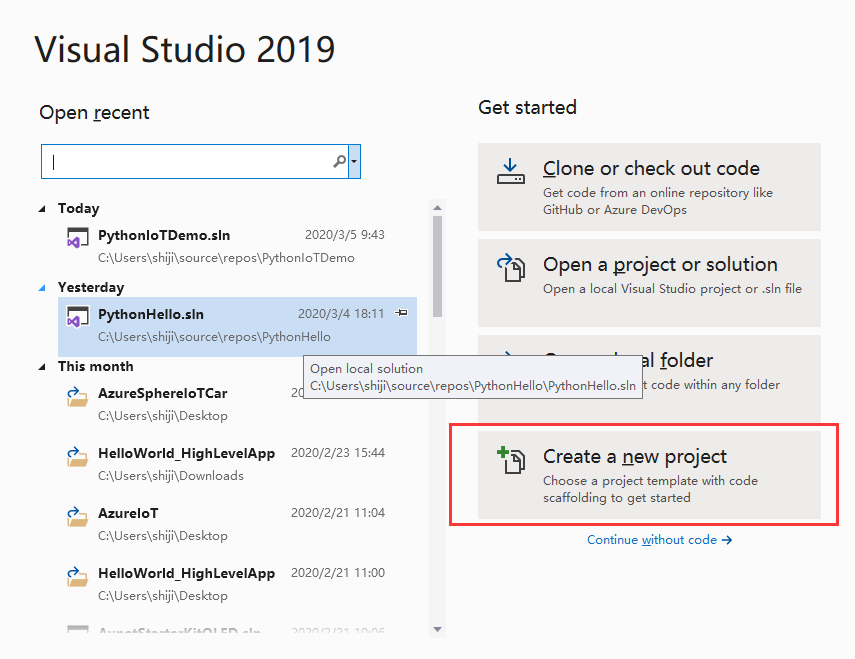
Open Visual Studio Community, choose “create a new project” as shown in Fig. 8
Fig. 8 Create a new project
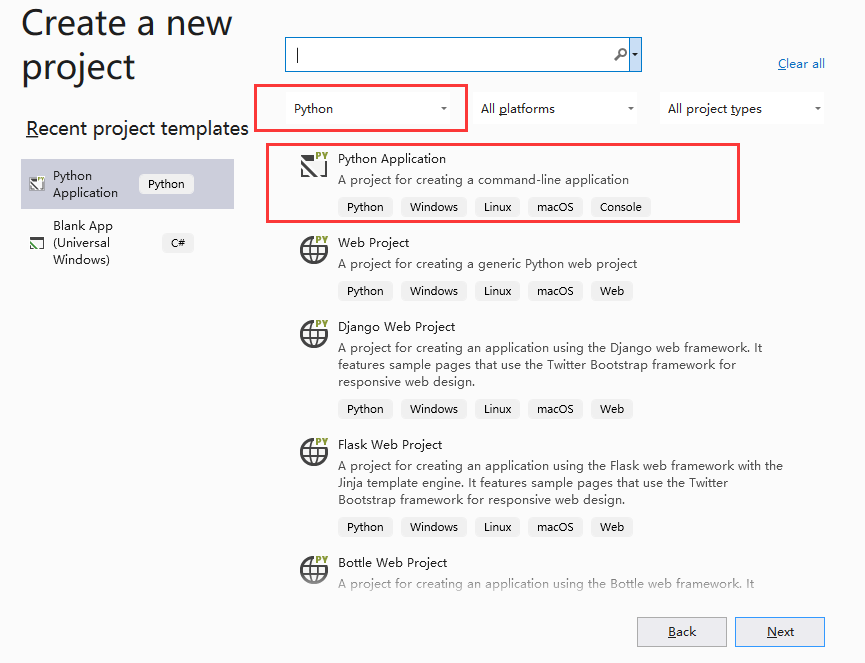
We choose “Python” in language and you will find “Python Application” project temple as shown in Fig. 9. Then click next.
Fig. 9 Create Python Project
Input a project name, for example, “PythonIoTDemo” here. And click create. Then, Visual Studio will create the project.
Copy and paste the following code to “PythonIoTDemo.py”
# -------------------------------------------------------------------------
# Copyright (c) Microsoft Corporation. All rights reserved.
# Licensed under the MIT License. See License.txt in the project root for
# license information.
# --------------------------------------------------------------------------

import os
import asyncio
import uuid
from azure.iot.device.aio import IoTHubDeviceClient
from azure.iot.device import Message

messages_to_send =  10


async def  main():
    # The connection string for a device should never be stored in code. For the sake of simplicity we're using an environment variable here.
    conn_str =  "HostName=*****.azure-devices.net;DeviceId=***;SharedAccessKey=***"

    # The client object is used to interact with your Azure IoT hub.
    device_client =  IoTHubDeviceClient.create_from_connection_string(conn_str)

    # Connect the client.
    await device_client.connect()

    async def  send_test_message(i):
        print("sending message #" +  str(i))
        msg =  Message("test wind speed "  + str(i))
        msg.message_id =  uuid.uuid4()
        msg.correlation_id =  "correlation-1234"
        msg.custom_properties["tornado-warning"] =  "yes"
        await device_client.send_message(msg)
        print("done sending message #" +  str(i))

    # send `messages_to_send` messages in parallel
    await asyncio.gather(*[send_test_message(i) for  i in  range(1, messages_to_send +  1)])

    # finally, disconnect
    await device_client.disconnect()


if __name__ == "__main__":
    asyncio.run(main())

    # If using Python 3.6 or below, use the following code instead of asyncio.run(main()):
    # loop = asyncio.get_event_loop()
    # loop.run_until_complete(main())
    # loop.close()
Please do substitute the connection string with yours that created in section “Create Device using Device Explore”. Then, press F5 to start debug. You will see the output as shown in Fig. 10.
Fig. 10 Output for project debug.
Monitor the message with Device Explorer
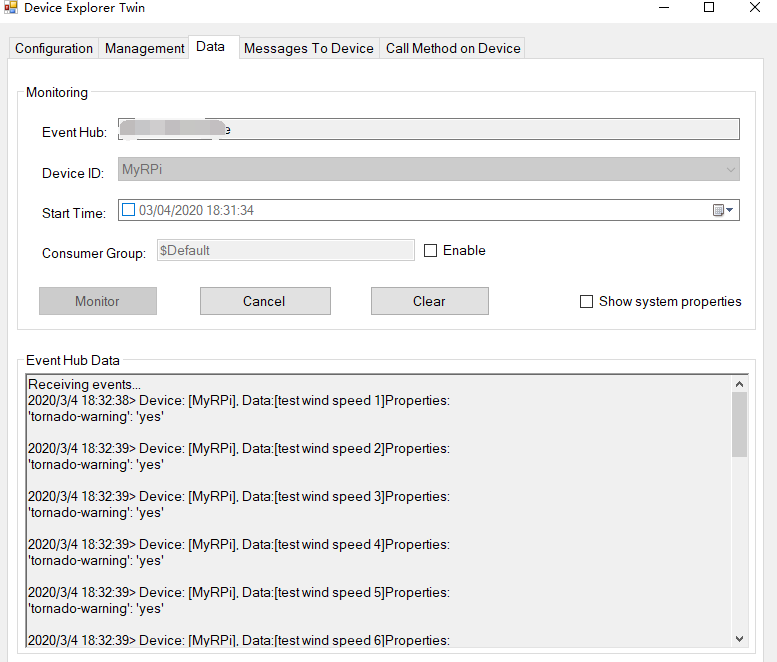
Please make sure that you do this before running the Python application, since we have to use Device Explorer to receive the message. Open Device Explorer, on Data tab, choose the device that you created. And then click monitor. We will see the data as soon as the Python application send out the message. It is shown in Fig. 11.
Fig. 11 Data monitor by Device Explorer
Summary
In this tutorial, we have presented the process to use Python Azure IoT SDK with Visual Studio Community and Windows 10, including “Install of Python Azure IoT SDK”, “Create Device using Device Explore”, “Create and Debug Python Project with Visual Studio” and “Monitor the message with Device Explorer”.
Resources
- IoT Blog: New version of the Python SDK released
- Device Explorer: https://github.com/Azure/azure-iot-sdks/releases
- azure-iot-sdk-python: https://github.com/Azure/azure-iot-sdk-python/tree/master/azure-iot-device/samples
- My Projects on Hackster: Jiong Shi
- Azure IoT Docs: Azure IoTHub
See Also
- Build a Azure Sphere IoT Car with Remote Control
- How to receive direct methods from IoT Hub with Python Azure IoT SDK
- Python Azure IoT SDK: How to use device twins in IoT Hub
- Python Azure IoT SDK: How to use device provision service with symmetric keys
- Python Azure IoT SDK: How to send and receive C2D messages

