Azure Networking: Deep Dive In VNet Subnets
Introduction
In this topic, we will talk about network subnet in an Azure VNet. We try to understand what Class or Size of the network we need to select and how we configure it using the Azure Portal or PowerShell.
What is a Subnet?
A subnet is an IP network in which addresses point to on the same group, and it is a part of a larger network which is divided into smaller subnets.
Private Networks
Private is a Network that uses a private space of addresses. These addresses are used ONLY in Local Area Networks (LAN).
Network Classes
There are three classes of networks that can we use to create private subnets, and these are A,B, and C.
At the table below we can see the defined RFC 1918 address spaces.
| Range of IP addresses | Class of Networks | Number of Networks |
| 10.0.0.0 - 10.255.255.255 | A | 1 |
| 172.16.0.0 - 172.31.255.255 | B | 16 |
| 192.168.0.0 - 192.168.255.255 | C | 256 |
The next table shows the Networks, Hosts, and the default Network Masks for Private Networks (A,B, and C)
| Class of Address | Size of Network Part(bits) | Size of Host Part(bits) | Default Network Mask For Each Class |
| A | 8 | 24 | 255.0.0.0 |
| B | 16 | 16 | 255.255.0.0 |
| C | 24 | 8 | 255.255.255.0 |
Note
It is very important to understand CIDR (Classless Inter-Domain Routing) notation. This is the number of the subnet mask bits. For example, 192.168.1.0/24 means that the three first octets are part of the network and the remaining are for the hosts.
Subnetting
Subnetting is the procedure of dividing a network into smaller networks (subnets) or smaller groups of IP addresses.
To understand subnetting we must be familiar with binary math, and more specific with the procedure to convert binary to decimal and vice versa.
The table below is the AND logic table and it can help us with the subnetting process.
| LOGIC TABLE | |
| 0 AND 0 = 0 | |
| 0 AND 1 = 0 | |
| 1 AND 0 = 0 | |
| 1 AND 1 = 1 |
Example
Note
The following example refers to general guidelines for subnetting.
CIDR (Classless Inter-Domain Routing)
In this part of the post will try to discover the CIDR notation for a C Class IP Address.
For example
- IP Address: 192.168.1.15
- Subnet Mask: 255.255.255.0
**Convert Decimal to Binary **
We can read how to convert Decimal to Binary in this link.
**Subnet Mask **
| Decimal | Binary |
| 255.255.255.0 | 11111111.11111111.11111111.00000000 |
The last octet is 00000000, that means that the Mask Bits are 24, which means that the CIDR is ( /24 ) 192.168.1.0/24.
In this example the host address range will be 192.168.1.1 - 192.168.1.254, with broadcast IP address 192.168.1.255.
Azure VNet Subnet Demo
Before we move on to the demo, it's good to read the following MS document about Azure VNet's.
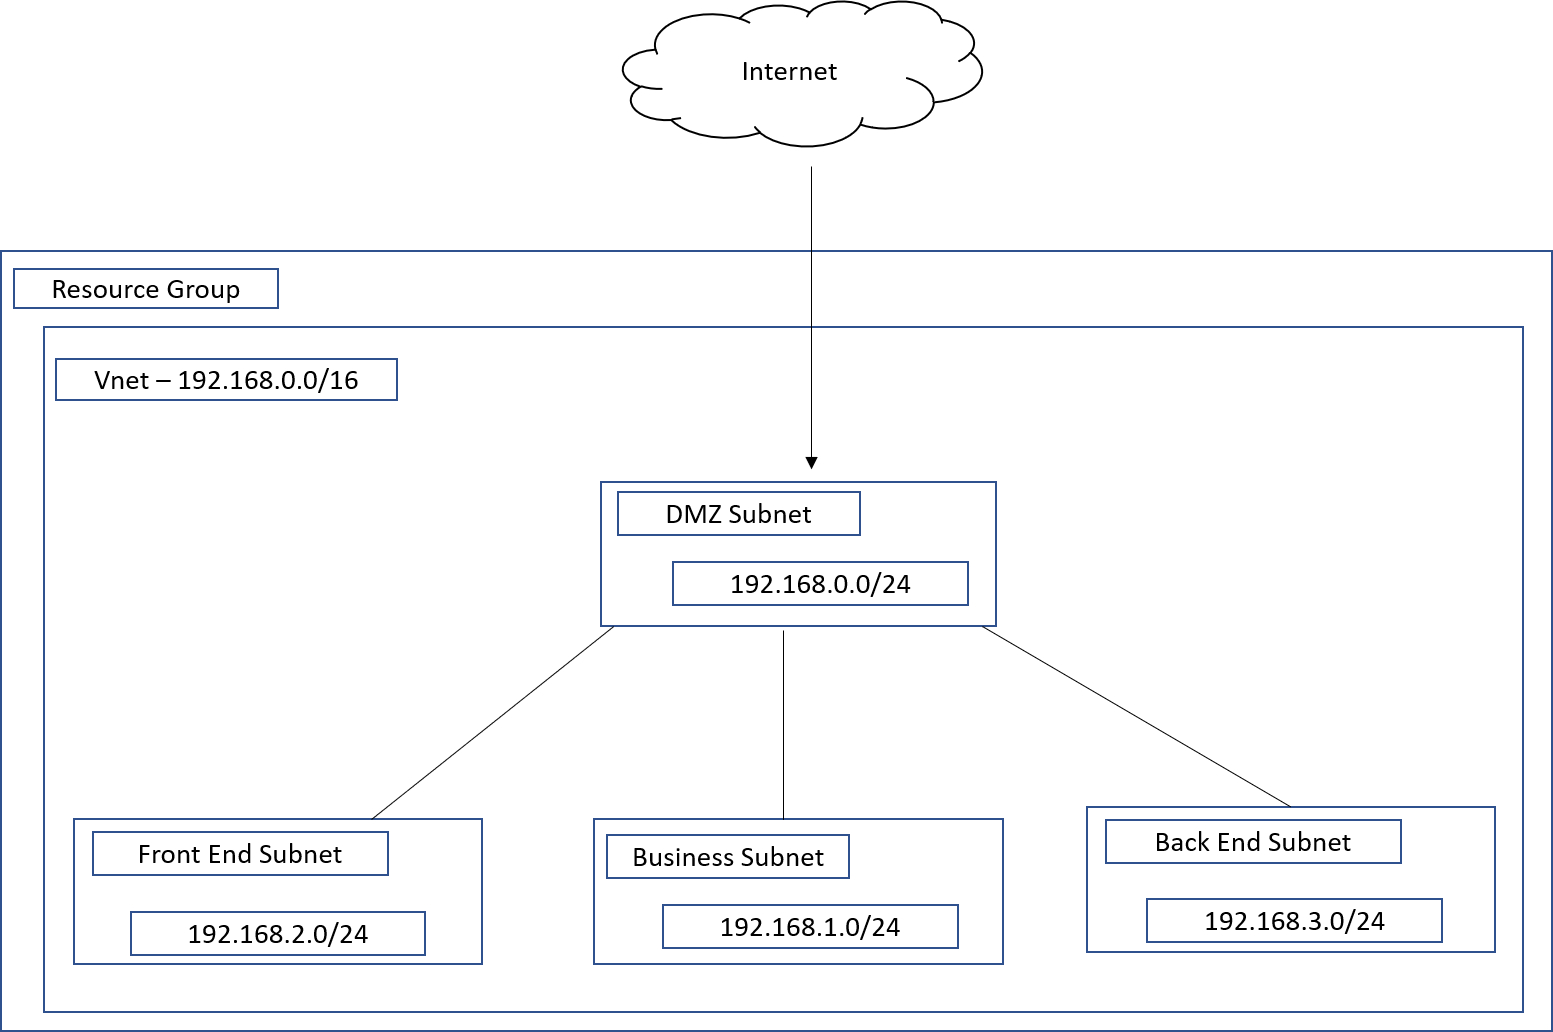
For the demo purposes we suppose that we want to create 4 subnets, these are:
- DMZ (Virtual Network Appliance)
- Front End (Web Server)
- Business (Application Server)
- Back End (Database Server)
Deployment Steps
At the following steps we will see how easily deploy the previous image architecture.
Create Resource Group
From the Azure Portal left main pane select Resource Groups and click + Add
In the new pane fill in the necessary fields and click the button Review + Create
| Setting | Value |
| Resource group | Type a valid name for the Resource group |
| Region | Select a region to create the Resource group |
Review the Resource group settings and click Create, as the image below shows.
Create Virtual Network
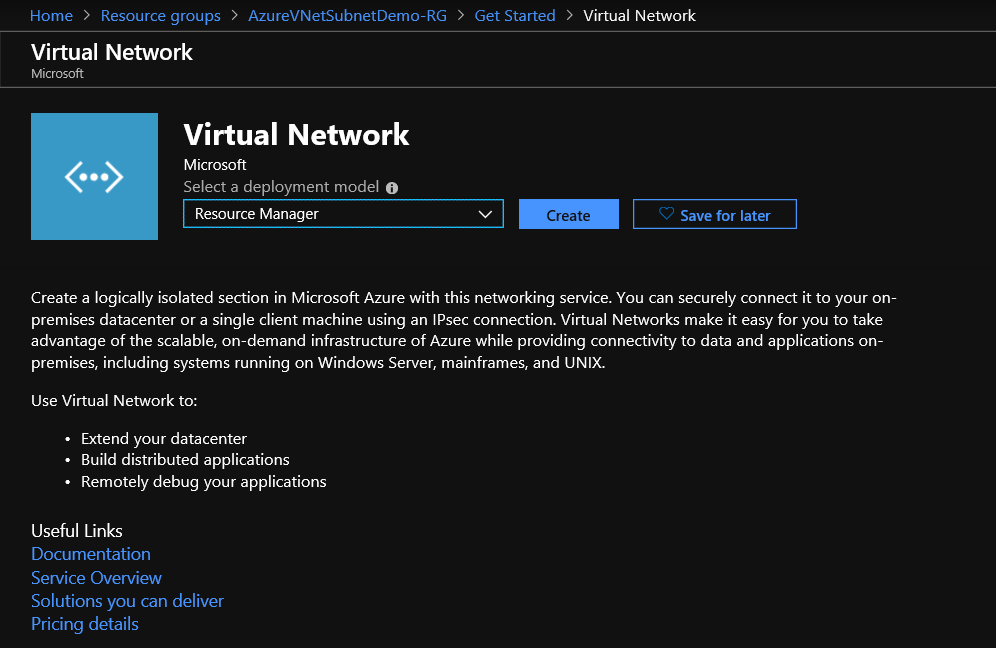
Step 1: Create Virtual Network
In the first step in the Create virtual network deployment blade, we must fill up the required fields.
| Setting | Value |
| Name | Type a name for the VNet |
| Address space | Type a valid address range in CIDR notation |
| Subscription | Select a valid subscription |
| Resource group | Select Create new, or an existing Resource Group |
| Location | Select the location where the VNet will be created |
| Subnet | |
| Name | Type a subnet name |
| Address range | Type a valid address range for the subnet* |
| DDos protection | Azure DDoS basic protection is integrated into the Azure platform by default and at no additional cost. |
| Service endpoints | Enable one or more service endpoints for this subnet |
| Firewall | Azure Firewall is a managed cloud-based network security service that protects your Azure Virtual Network resources |
Note
*The subnet's address range in CIDR notation (e.g. 192.168.1.0/24). It must be contained by the address space of the virtual network. The address range of a subnet which is in use can't be edited.
Step 2: Create Virtual Network Subnets
At the second step we will create the other 3 subnets, Front-End, Business, and Back-End subnets.
Note
The next step should be repeated for each subnet
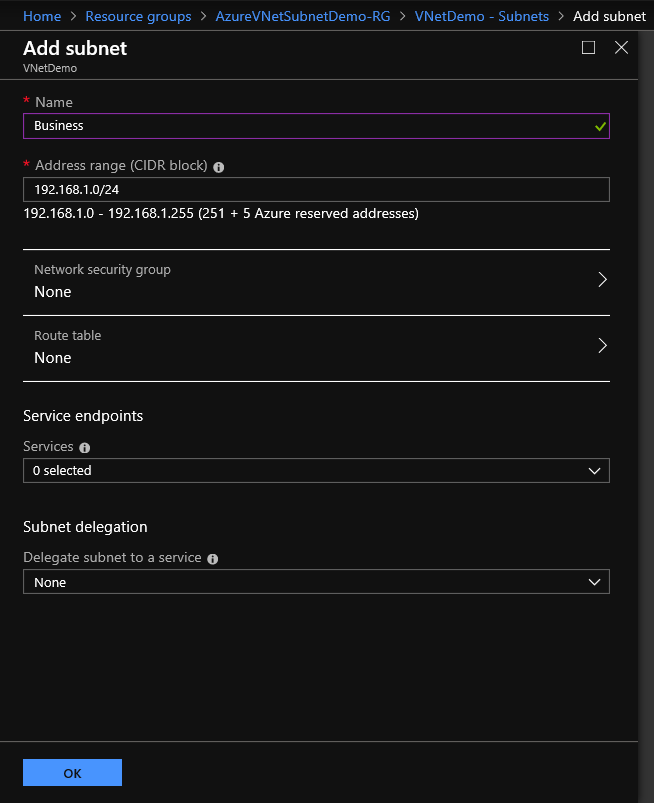
From the Virtual Network left main blade, select Settings - Subnet, and click + Subnet.
Type a valid subnet Name, a valid Address range and click OK.
At the end of the Step 2, we are able to see 4 subnets into the VNet (See the image below).
Network Diagram
We can also see the Network Diagram.
From the left Virtual Network main blade, select Monitoring - Diagram, and then we are able to see the Network Diagram of the virtual network, as the image below shows.

Conclusion
In this post, we have talked about Subnets, Subnetting, Azure Virtual Network, VNet Subnet and we deploy to Azure a common scenario for an On-Premise infrastructure.
See Also
- Plan virtual networks
- Implement a DMZ between Azure and the Internet
- Designing networking for Microsoft Azure IaaS
- Implement a DMZ between Azure and your on-premises datacenter
- Azure Virtual Network frequently asked questions (FAQ)
- Guest post: Quick Azure VNet Subnet Guide by George Grammatikos
- Azure Virtual Network frequently asked questions (FAQ)
- Subnet Calculator


