Windows Server: Installing roles and features in different ways
Introduction
There's a lot of roles and features for Windows Server, but there are also many different ways of installing these.
It's good to know the different ways of installing these roles or features, because if you're using an operating system without a Graphical User Interface (GUI) there will be no Server Manager to perform the simple "next-next-next" installation.
Sometimes even the Server Manager GUI might be giving errors for various reasons, then these other ways of installing the Windows Server roles or features might come in handy.
Windows Server platform support
There are five (5) different ways of installing Windows Server roles and features, three (3) of them are from the command line or PowerShell.
With GUI
- Server Manager
- Windows Admin Center (WAC)
Without GUI
- Install-WindowsFeature (replaces Add-WindowsFeature)
- Enable-WindowsOptionalFeature
- DISM
| Server 2008 R2 | Server 2012 | Server 2012 R2 | Server 2016 | Server 2019 | Server Nano | Source | |
| Enable-WindowsOptionalFeature | ✔ | ✔ | ✔ | DISM Module | |||
| Install-WindowsFeature | ✔ | ✔ | ✔ | Server Manager Module | |||
| DISM.exe | ✔ | ✔ | ✔ | ✔ | ✔ | ✔ | %SystemRoot%\System32 |
The PowerShell cmdlets
Let's take a look at the different PowerShell cmdlets for installing Windows Server roles and features:
Enable-WindowsOptionalFeature
Install-WindowsFeature
What are the differences between these different methods of installing the Windows Server roles and features?
| Install Method | Remote Support |
| Enable-WindowsOptionalFeature | ✔ |
| Install-WindowsFeature | ✔ |
| DISM.exe | ✖ |
The Server Manager PowerShell cmdlets, Enable-WindowsOptionalFeature and Install-WindowsFeature can both work against remote computers, while DISM only works locally.
Installing a Windows Role/Feature with Server Manager
To install a Windows Server role or feature by using a Graphical User Interface (GUI), we can achieve this with the builtin Server Manager.
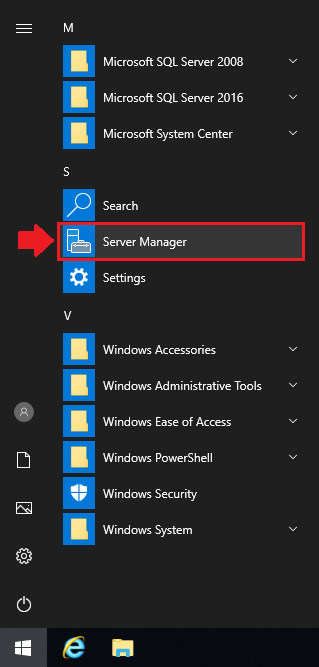
1. Open the Server Manager on the Windows Server.
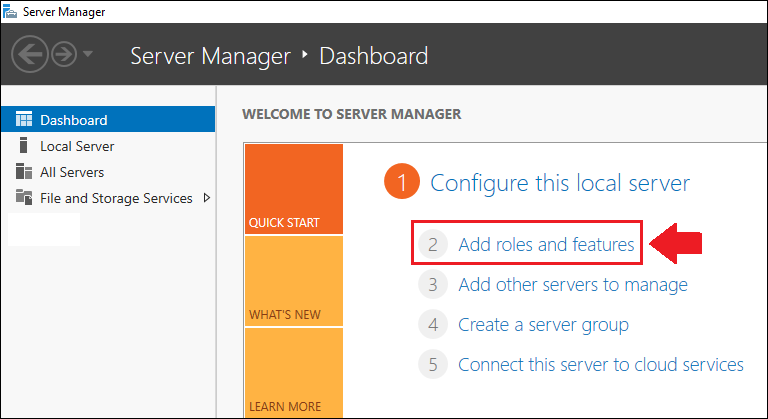
2. Click on Add roles and features which can be found in the center of Server Manager.
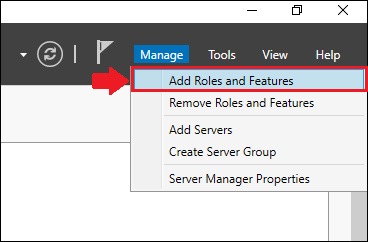
Another way is to go to Manage which can be found in the upper right corner, then click on Add Roles and Features.
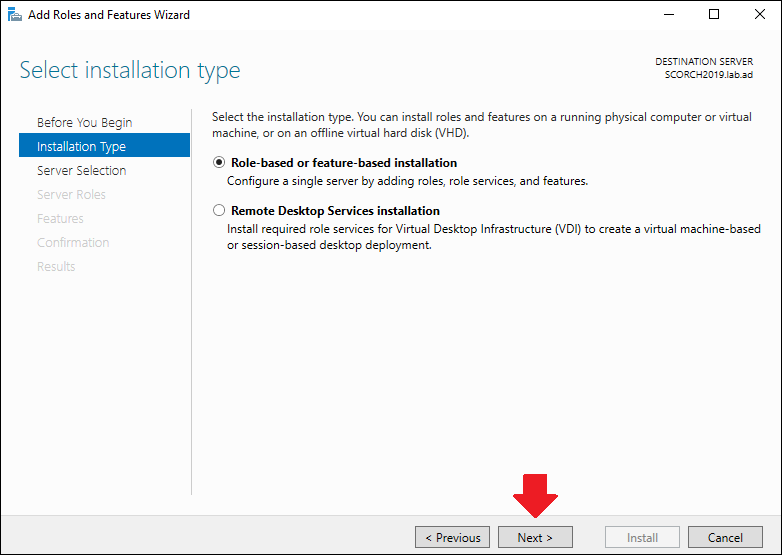
3. In the Add Roles and Features Wizard, leave the check mark on the Role-based or feature-based installation and click Next.
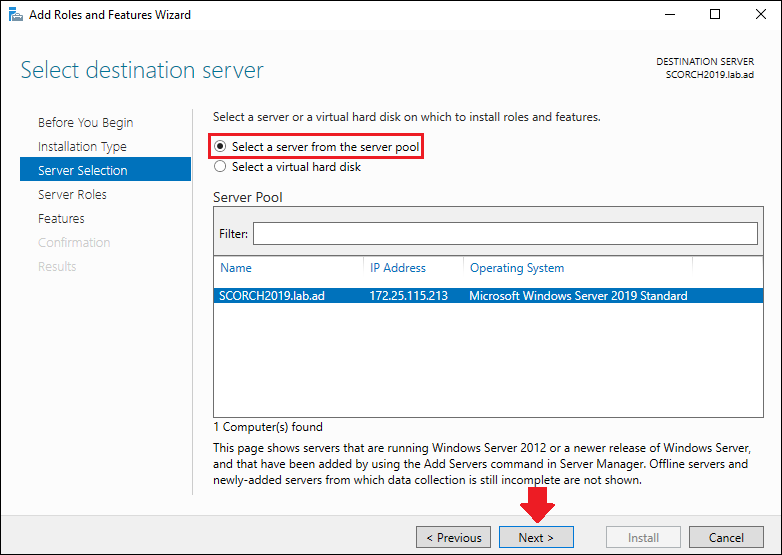
4. Leave the check mark on the **Select a server from the server pool **and then click Next.
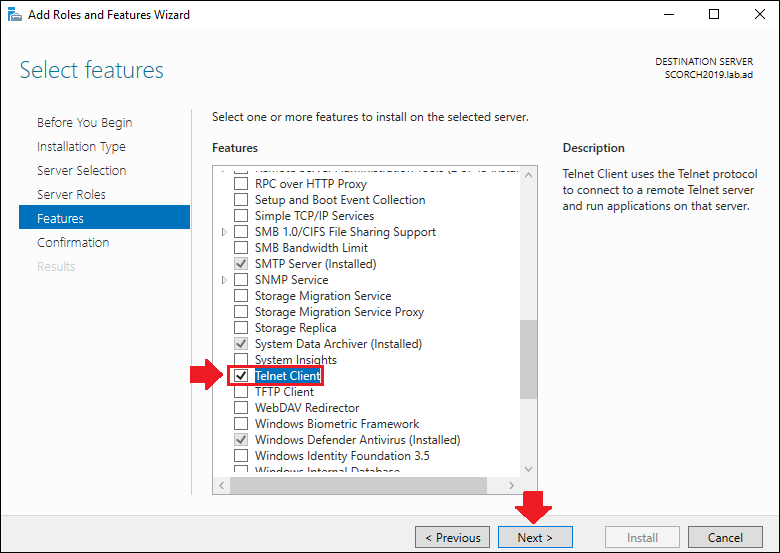
5. Select a **role **from the Server Roles pane, or a **feature **from the Features pane that we want to install, by checking the check box next to the role/feature, then click Next.
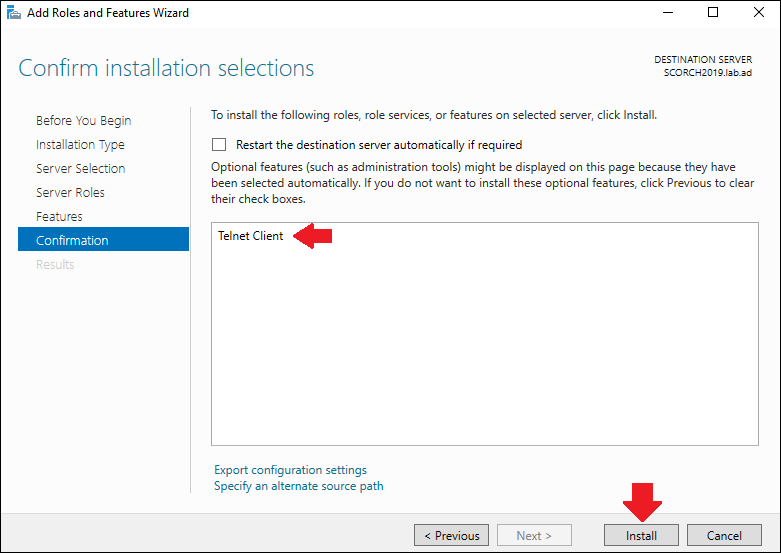
6. In the Confirmation step, we will see which roles / features we have selected to be installed. Click **Install **to start installing the role / feature.
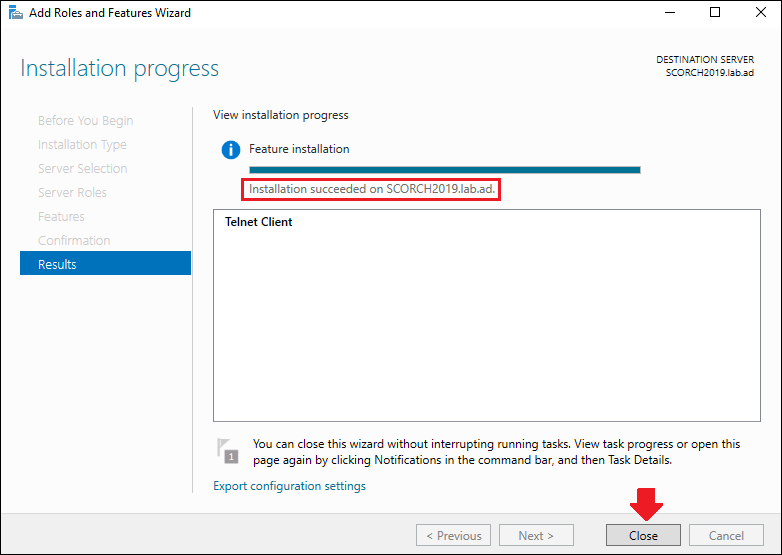
7. Once the role / feature has been installed, we should see a Installation succeeded message at the top, click **Close to close the **Add Roles and Features Wizard.
Installing a Windows Role/Feature with Windows Admin Center
Windows Admin Center (WAC) is the new management tool for Windows Server, it is a very efficient tool that basically eliminates the need of having many different management consoles. Installing Windows roles/features with WAC is very easy, we will go through the steps below.
Windows Admin Center can be downloaded from here.
1. Open a browser on the computer where Windows Admin Center is installed.
2. We should now see all the computers that we have added in WAC, click on the computer to connect to it.
Note: If there are no computers added, we can add them by clicking on the + Add button in the upper left corner.
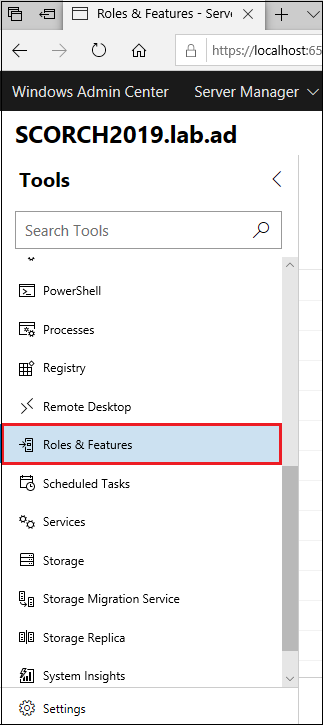
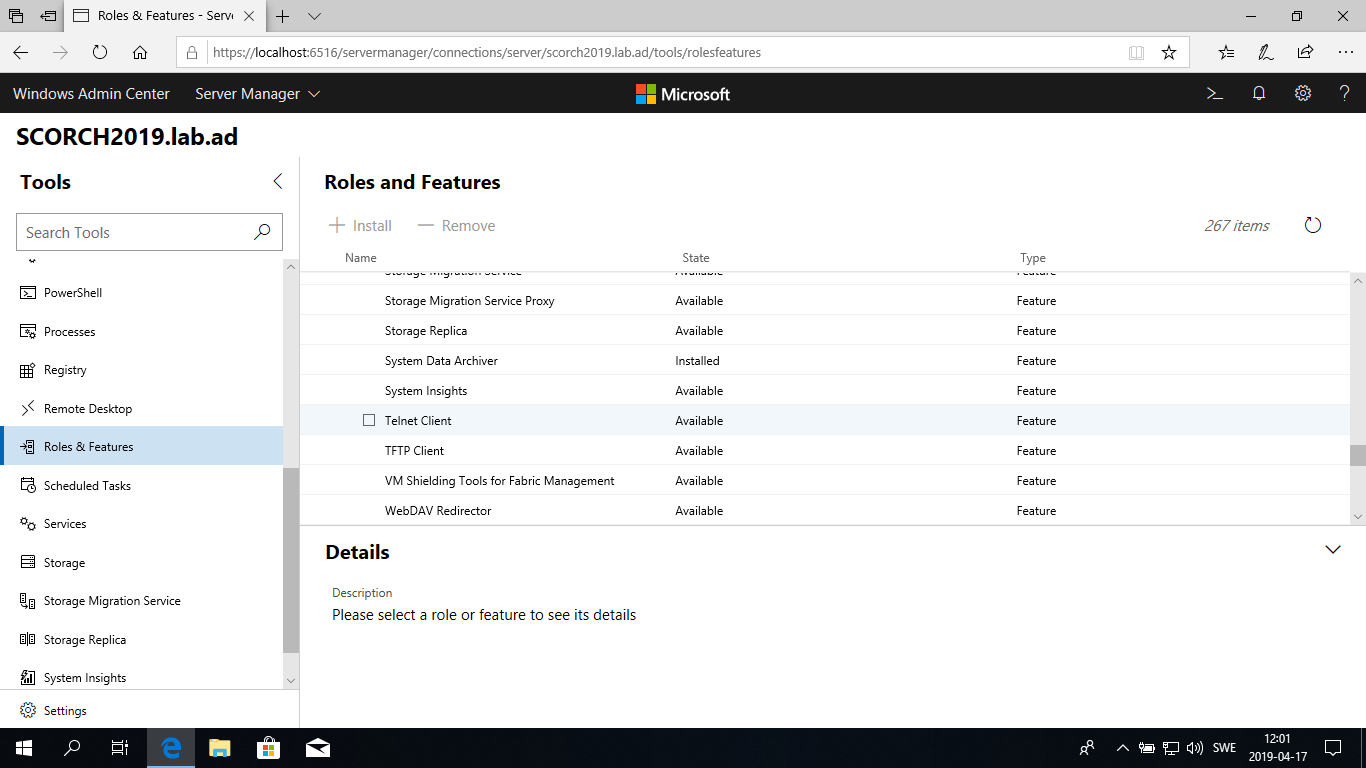
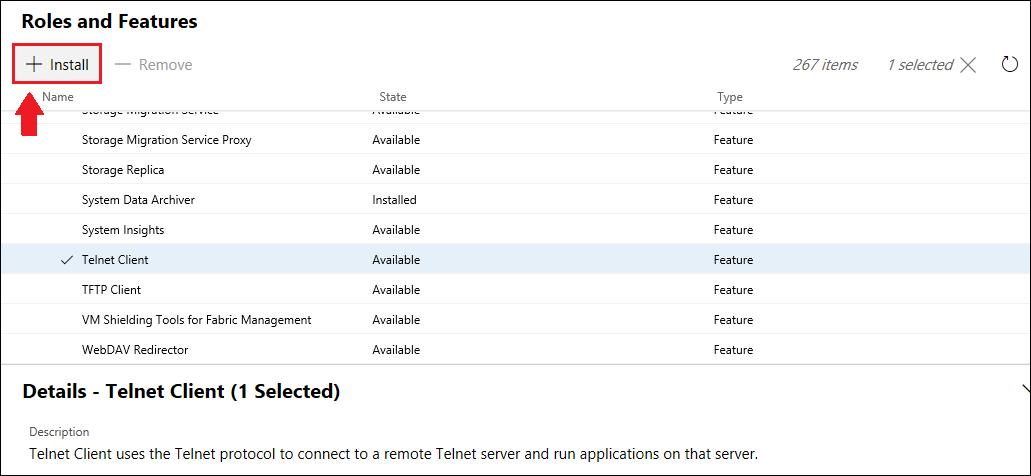
3. Once we are connected to the computer, under the Tools pane, go to Roles & Features by clicking on it.
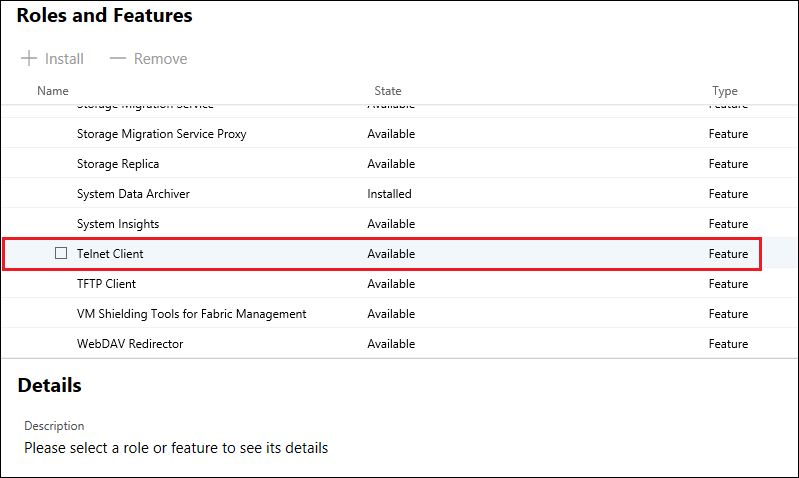
4. Locate the role/feature that we want to install.
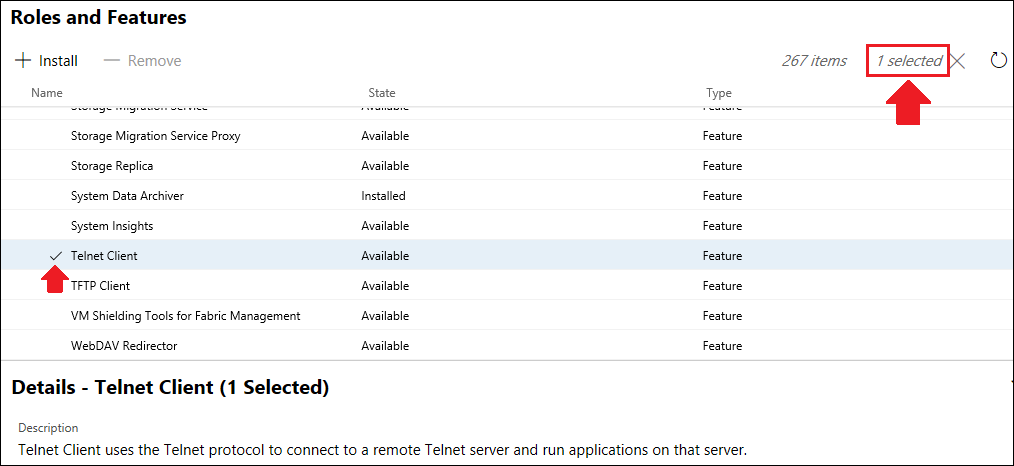
5. As we mouse hoover over the role/feature, we notice a check box appearing next to the name of the role/feature, click the check box next to the role/feature name to select the role/feature that we want to install.
6. Once the role/feature is selected we can see a check mark next to the name of the role/feature, we can also see the selected items in the upper right corner.
7. To install the role/feature, click on the + Install button at the top.
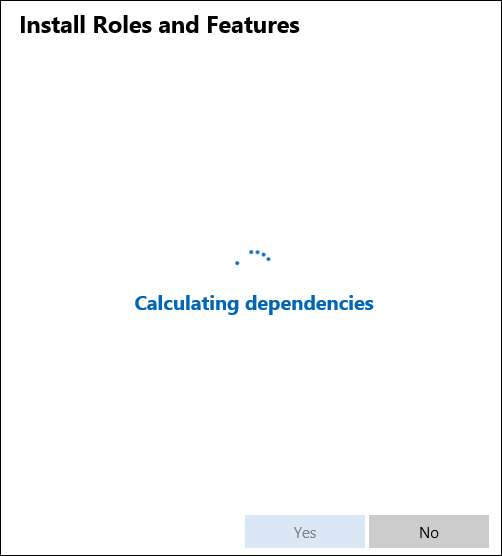
8. Windows Admin Center will now start calculating the dependencies of the role/feature.
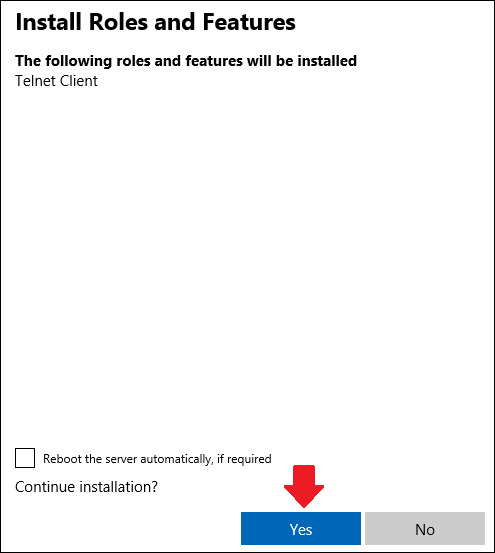
9. Once the calculation is done, click Yes to start installing the role/feature.
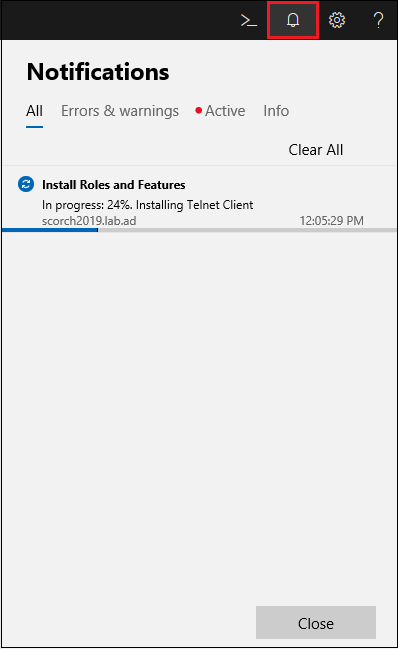
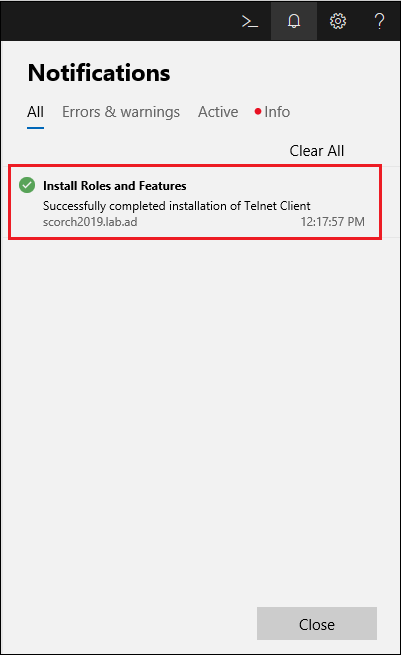
10. We can view the progress of the installation in Windows Admin Center by clicking on the bell at the upper right corner.
11. Once the role/feature has been installed, we should see the following:
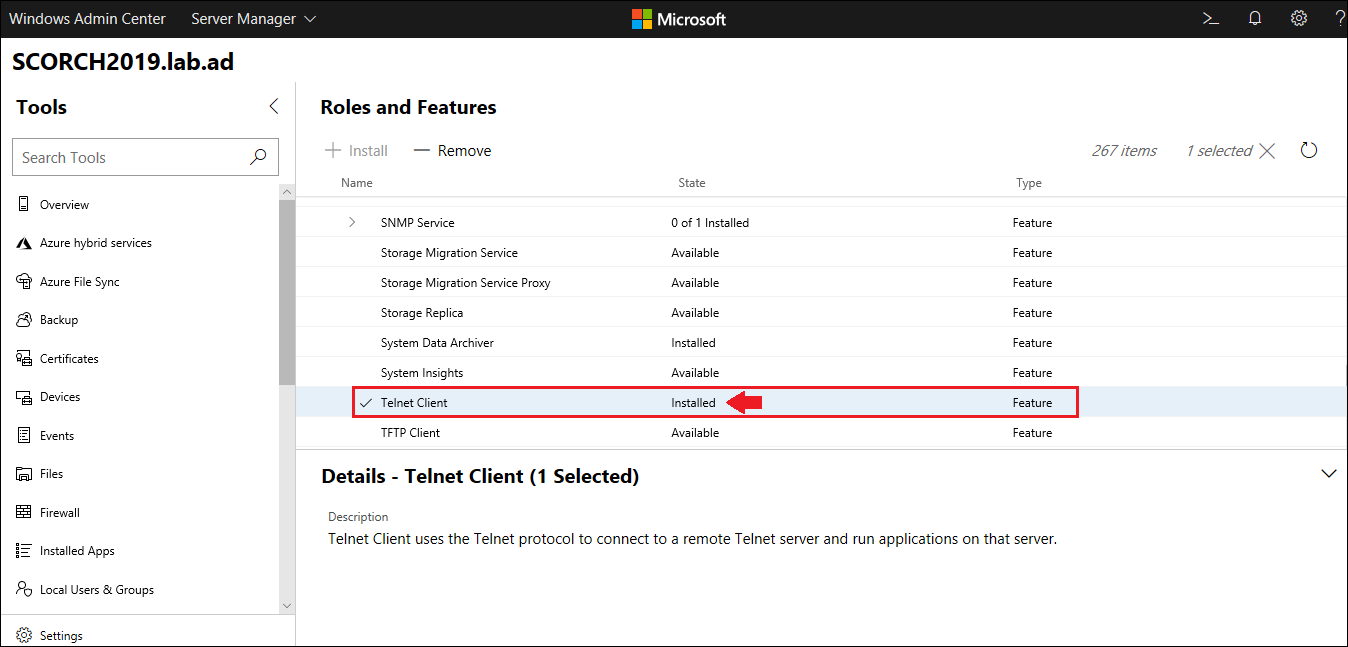
12. We should now also see in under the Roles and Features that the role/feature has the state marked as Installed.
Installing a Windows Feature with PowerShell
Installing Windows Server features with PowerShell is very quick and efficient, this can also be automated with scripts.
Method 1 - Install-WindowsFeature
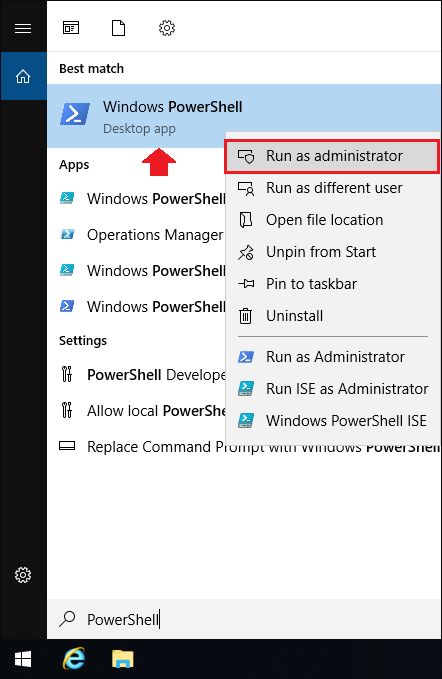
1. Go to **Start **and search for "PowerShell", right-click Windows PowerShell and choose Run as administrator.
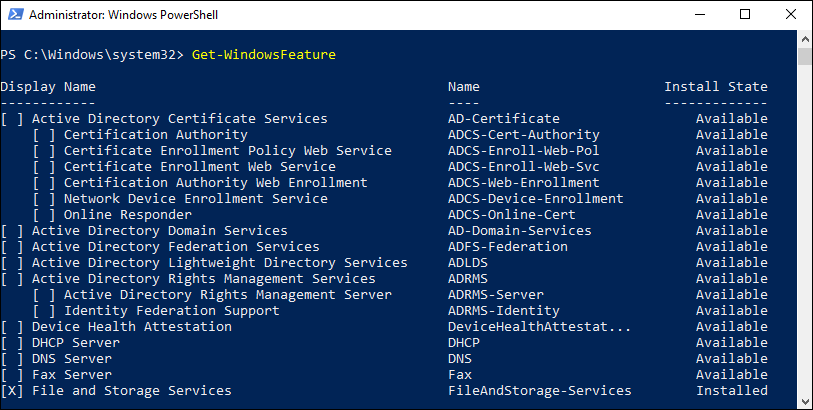
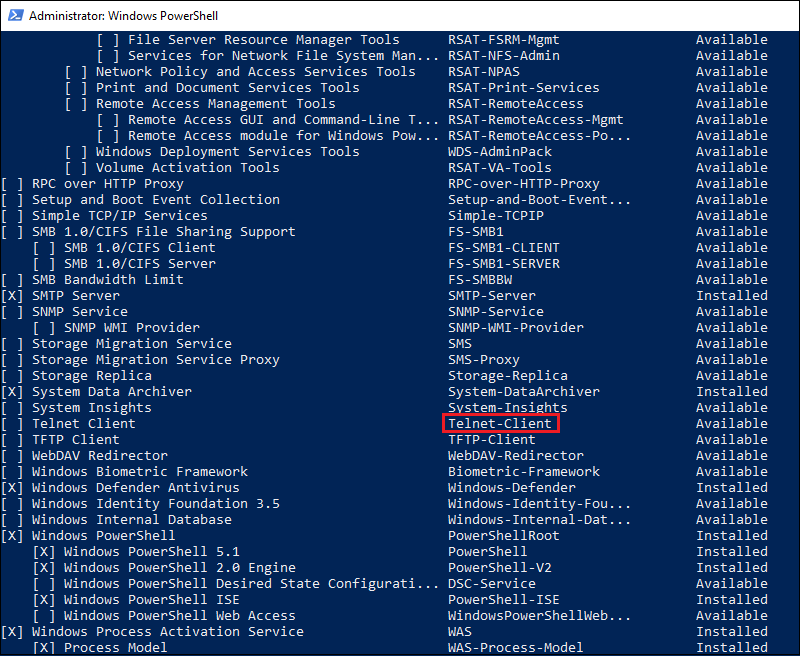
2. Type the PowerShell command below to get all the available roles and features:
Get-WindowsFeature
If we don't know the entire name of the role/feature, we can simply use wildcards to search for them:
Get-WindowsFeature -Name Telnet*
3. Take note of the **Name **field, this is what we need to install the role / feature, select the role or feature by copying the name of it.
4. Now type the command below to install the role / feature:
Install-WindowsFeature -Name Telnet-Client
5. Once the role/feature installation has completed, we should see the following:
6. To verify that the role/feature got installed, we can run the command below:
Get-WindowsFeature -Name Telnet*
Method 2 - Enable-WindowsOptionalFeature
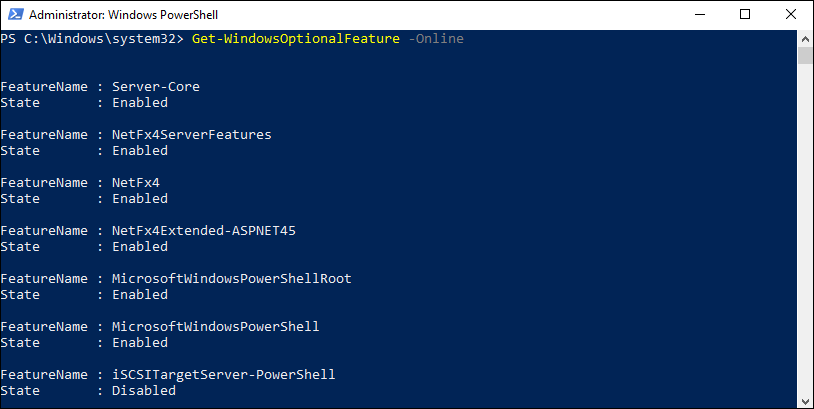
1. In the elevated PowerShell window, type the command below to retrieve the available optional Windows features:
Get-WindowsOptionalFeature -Online
This list is very long and it's difficult to find the feature that we want, so we can use wildcards to easily find the feature that we want.
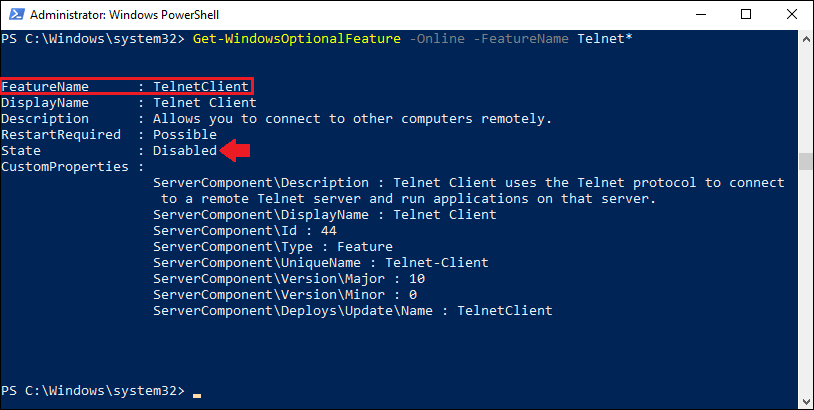
Get-WindowsOptionalFeature -Online -FeatureName Telnet*
Note: The state of the Windows feature is marked as Disabled.
2. Now that we know the name of the feature that we want to install, we can run the command below to enable the Windows feature:
Enable-WindowsOptionalFeature -Online -FeatureName TelnetClient
3. Once the Windows feature has been enabled, we should see the following:
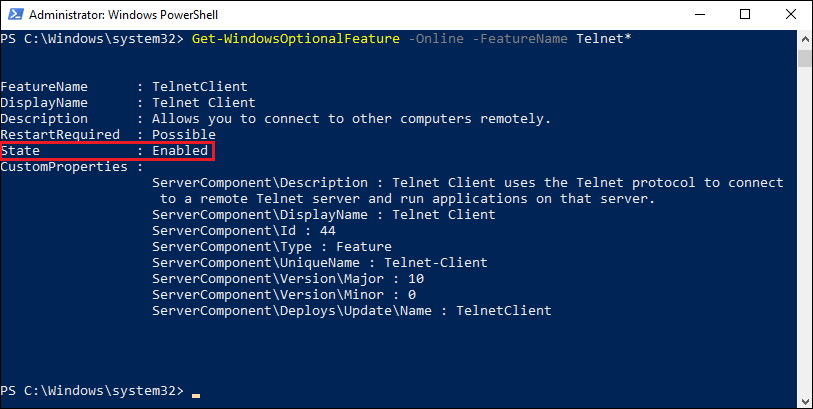
4. To verify that the feature is enabled, we can run the command below again:
Get-WindowsOptionalFeature -Online -FeatureName Telnet*
The Windows feature state is now marked as Enabled.
Installing a Windows Feature with DISM
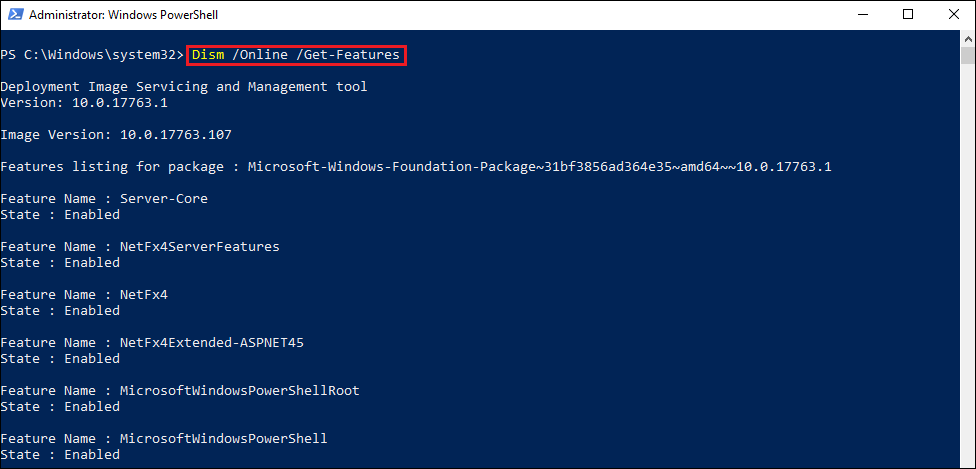
1. In the elevated PowerShell window, type the command below to retrieve the list of all available Windows features:
Dism /Online /Get-Features
2. Locate the Windows feature that we want to install:
The list is very long and it might be time consuming to find the feature that we want to install.
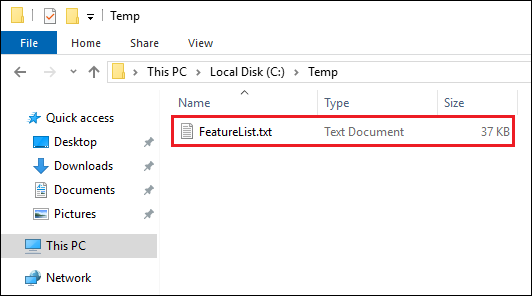
If we want to do this in another way we can print out the list of roles and features to a text file by using the > C:\Temp\FeatureList.txt at the end of the command, then simply perform a search for the role in the text file to identify the exact name of the Windows feature.
Dism /Online /Get-Features > C:\Temp\FeatureList.txt
The FeatureList.txt file has now been created under C:\Temp.
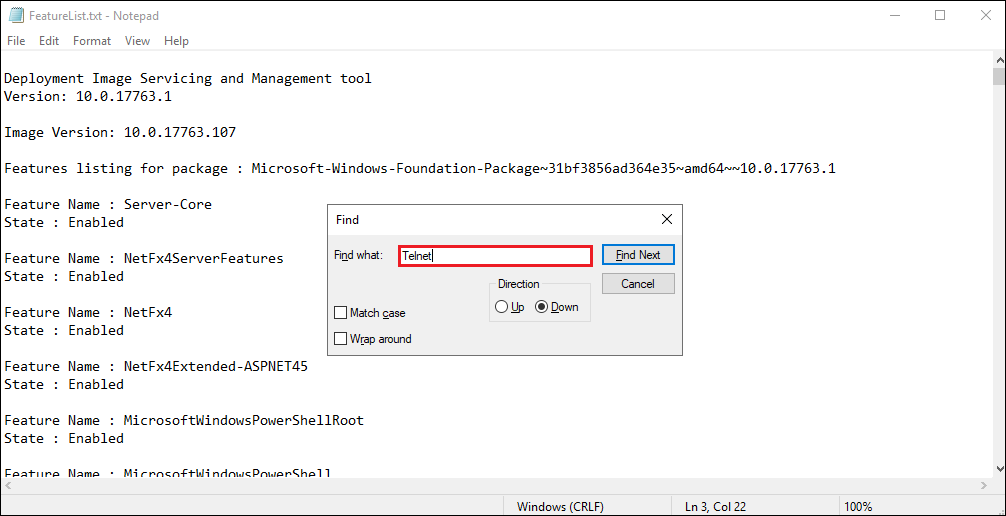
Open the FeatureList.txt file and search for the feature that we want to install.
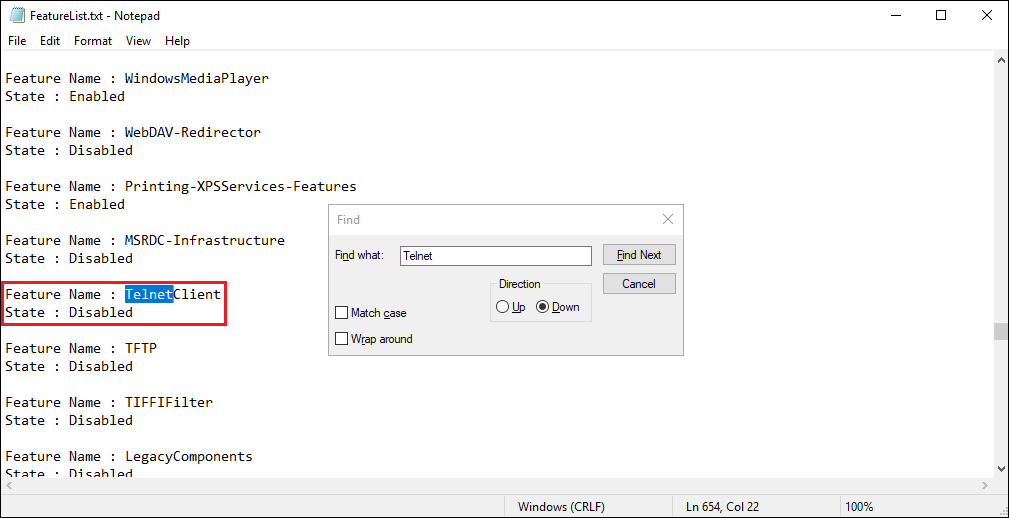
We should then find the feature, make note of the Feature name:
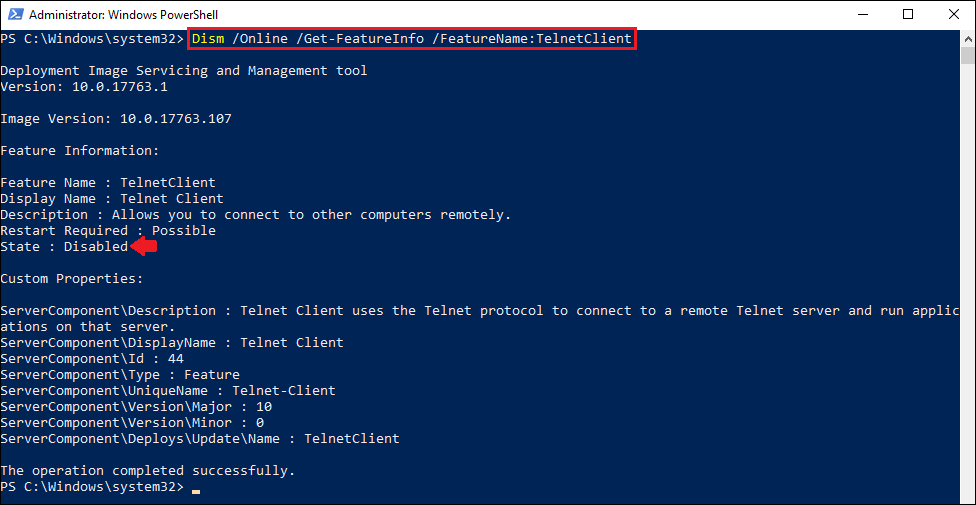
3. Now that we know the name of the feature that we want to install, we can run the command below to get more information about it:
Dism /Online /Get-FeatureInfo /FeatureName:TelnetClient
Note: The state of the feature is marked as Disabled.
3. Type the command below to enable the Windows feature:
Dism /Online /Enable-Feature /FeatureName:TelnetClient
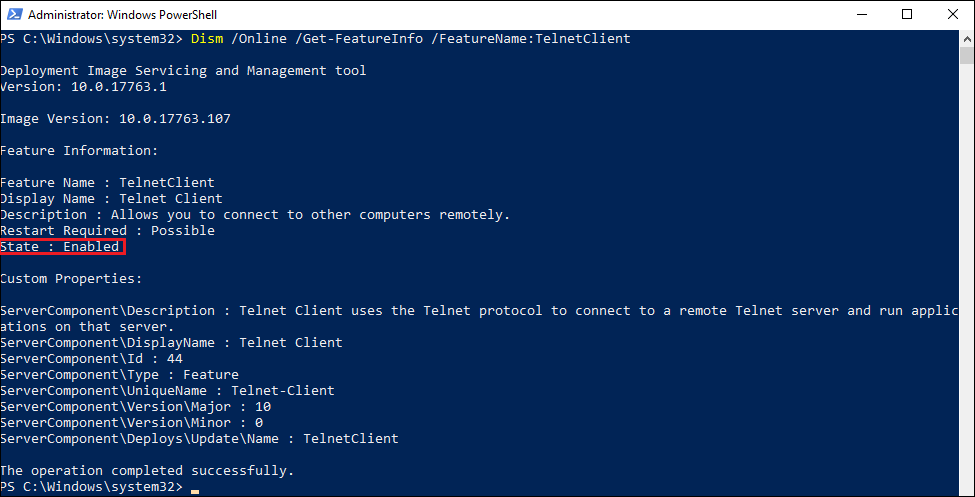
4. Let's verify that the Windows feature has been enabled by running the command below once more:
Dism /Online /Get-FeatureInfo /FeatureName:TelnetClient


