Upgrading to Orchestrator 2019 Step-by-Step
Applies to
This guide applies to System Center Orchestrator 2016, 1801, 1807
Introduction
In this Wiki article we will go into step-by-step detail on how to accomplish an upgrade to System Center Orchestrator 2019.
Orchestrator is a great tool for automation, it can help simplifying administrative tasks for IT administrators. Orchestrator 2019 has some long, you can read more about the new features over here.
Orchestrator 2019 upgrade paths
The diagram below shows the currently supported upgrade paths for Orchestrator 2019.
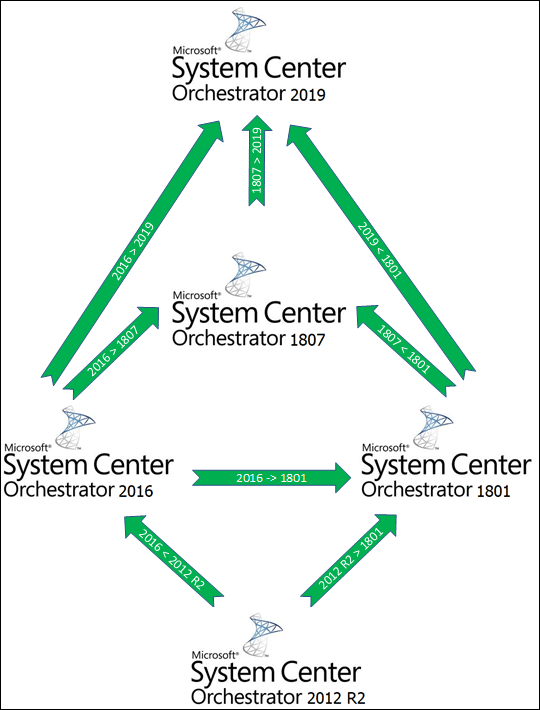
Direct in-place upgrade to SCORCH 2019
- SCORCH 2016 -> SCORCH 2019

- SCORCH 1801 -> SCORCH 2019
- SCORCH 1807 -> SCORCH 2019
Indirect upgrade to SCORCH 2019
- SCORCH 2012 R2 -> SCORCH 2016 -> SCORCH 2019
- SCORCH 2012 R2 -> SCORCH 1801 -> SCORCH 2019
Requirements
For the system requirements for System Center Orchestrator 2019, please refer to the Microsoft documentation on the following link:
/en-us/system-center/orchestrator/system-requirements-orch?view=sc-orch-2019
Pre-upgrade tasks
Before performing the upgrade, there are a couple of tasks that we will do before performing the upgrade itself.
High Level overview of the pre-upgrade tasks
- If you are running Orchestrator 2016, ensure that Update Rollup 6 is installed.
- Backup the Orchestrator database.
Detailed overview of the pre-upgrade tasks
**1. **If Orchestrator 2016 is installed, we need to ensure that the latest (as of 3 April 2019) Update Rollup 6 is installed.
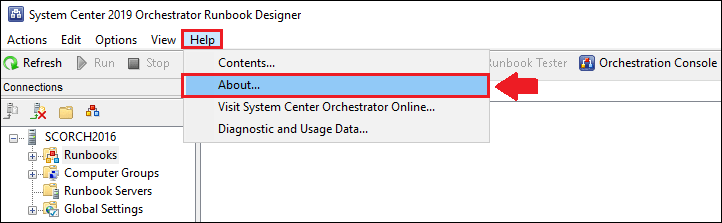
Open the Runbook Designer console, in the upper toolbar click on **Help **and then click on About.
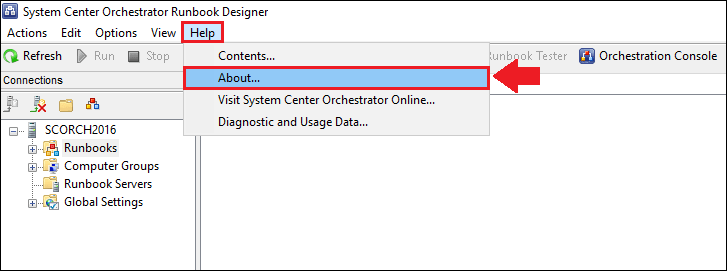
1.1. We should now see the version information of our Orchestrator 2016, if the version is 7.3.285.0 it means that we have Update Rollup 6 intalled.

For all the current Orchestrator 2016 versions, check the table below, if Update Rollup 6 is not installed, it can be downloaded from the KB link in the table below.
| Build Number | KB Article | Release Date | Description |
| 6.0.5000 | - | 2016 October 12 | Orchestrator 2016 RTM |
| 7.3.377 | KB3209598 | 2017 January 24 | Update Rollup 2 - SPF for Orchestrator 2016 |
| 7.3.185.0 | KB4047355 | 2017 October 26 | Update Rollup 4 for Orchestrator 2016 |
| 7.3.273.0 | KB4094928 | 2018 April 25 | Update Rollup 5 for Orchestrator 2016 |
| 7.3.285.0 | KB4465567 | 2018 April 25 | Update Rollup 6 for Orchestrator 2016 |
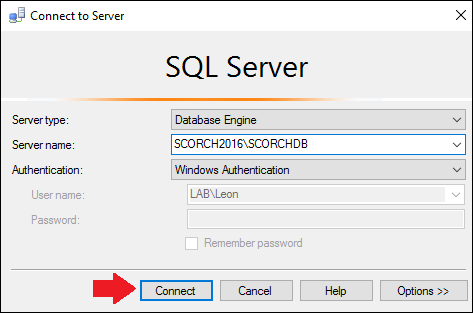
**2. **Open up the SQL Server Management Studio either on a remote computer or locally on the Orchestrator database server, and then **connect **to the Orchestrator 2016 SQL instance.

2.1. In the SQL Server Management Studio, expand the Databases, then select the Orchestrator database, right-click it and go to **Tasks **> and choose Back Up…

2.2. Now click on the **Add **button.

**2.3. **Now click on the radio button [ … ].
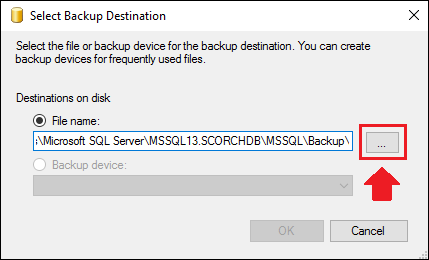
2.4. Provide a **name **for the Orchestrator database backup, then choose a **location **where to store the backup or go with the default location, click **OK **once done.

2.5. Make sure that the Orchestrator database is selected and that the backup type is set to Full, click **OK **to start the backup process.

2.6. Once the backup process has completed, click **OK **to close window.

Upgrade to Orchestrator 2019
The upgrade to Orchestrator 2019 will actually require us to uninstall the previous Orchestrator version and then re-install Orchestrator with version 2019, but before that we will need to perform a few tasks.
Stop all the Orchestrator runbooks
1. Now it’s time to stop the Orchestrator runbooks, the easiest way to stop all the runbooks is by performing an SQL query in the Orchestrator database.
Open up the SQL Server Management Studio either on a remote computer or locally on the Orchestrator database server, and then **connect **to the Orchestrator 2016 SQL instance.
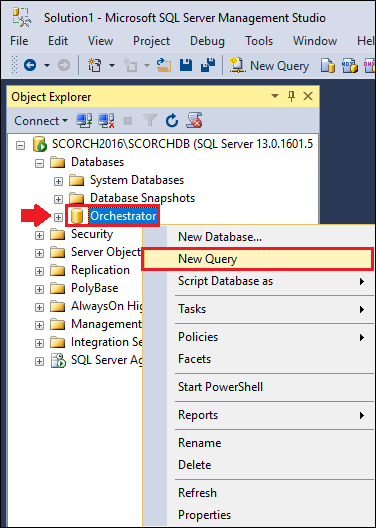
2. Expand Databases, then right-click the Orchestrator database and select New Query.
3. First run the SQL query below to find all the currently running runbooks:
SELECT
J.[RunbookId],
P.[Name],
A.[Computer]
FROM
[Orchestrator].[Microsoft.SystemCenter.Orchestrator.Runtime.Internal].[Jobs] J
INNER JOIN [dbo].POLICIES P ON  J.RunbookId = P.UniqueID
INNER JOIN [dbo].[ACTIONSERVERS] A ON  J.RunbookServerId = A.UniqueID
WHERE
J.[StatusId] = 1
ORDER BY
P.[Name] DESC
4. We should now get all the currently running runbooks in our Orchestrator 2016 environment.

5. We can also check that these runbooks are running by going to the Runbook Designer console.

Note: Make sure to write these down, so that we know which runbooks to start after the upgrade has been successfully performed.
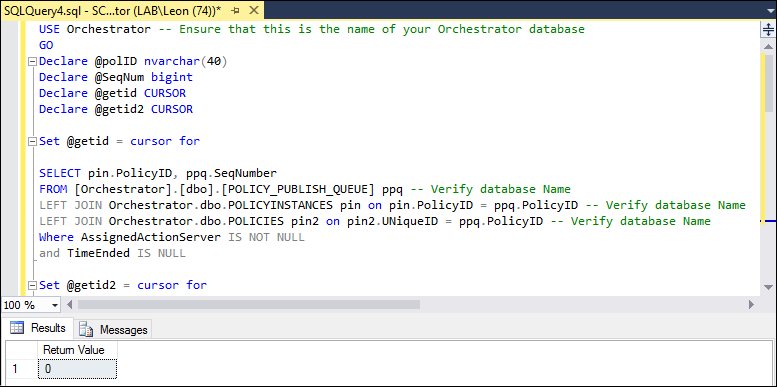
6. To stop all the currently running runbooks, execute the SQL query below:
USE Orchestrator -- Ensure that this is the name of your Orchestrator database
GO
Declare @polID nvarchar(40)
Declare @SeqNum bigint
Declare @getid CURSOR
Declare @getid2 CURSOR

Set @getid = cursor for

SELECT pin.PolicyID, ppq.SeqNumber
FROM [Orchestrator].[dbo].[POLICY_PUBLISH_QUEUE] ppq  -- Verify database Name
LEFT JOIN Orchestrator.dbo.POLICYINSTANCES pin on  pin.PolicyID = ppq.PolicyID -- Verify database Name
LEFT JOIN Orchestrator.dbo.POLICIES pin2 on  pin2.UNiqueID = ppq.PolicyID -- Verify database Name
Where AssignedActionServer IS NOT NULL
and TimeEnded IS NULL

Set @getid2 = cursor for
SELECT pin.PolicyID, ppq.SeqNumber
FROM [Orchestrator].[dbo].[POLICY_PUBLISH_QUEUE] ppq  -- Verify database Name
LEFT JOIN Orchestrator.dbo.POLICYINSTANCES pin on  pin.PolicyID = ppq.PolicyID -- Verify database Name
LEFT JOIN Orchestrator.dbo.POLICIES pin2 on  pin2.UNiqueID = ppq.PolicyID -- Verify database Name
Where AssignedActionServer IS NOT NULL
and TimeEnded IS NULL

OPEN @getid
Fetch next
From @getid into @PolID, @SeqNum
WHile @@FETCH_STATUS = 0
Begin
EXEC [dbo].[sp_UnpublishPolicyRequest] @PolID, @SeqNum
Fetch next
From @getid into @PolID, @SeqNum
End

DECLARE @return_value int EXEC  @return_value = [Microsoft.SystemCenter.Orchestrator.Runtime.Internal].[ClearOrphanedRunbookInstances] SELECT  'Return Value' = @return_value

Close @getid
Deallocate @getid

OPEN @getid2

Fetch Next
From @getid2 into @PolID, @SeqNum
While @@FETCH_STATUS = 0
Begin
EXEC [dbo].[sp_PublishPolicy] @PolID
Fetch next
From @getid2 into @PolID, @SeqNum
End
Close @getid2
Deallocate @getid2
(The author of the SQL query above is Scott Criscillis, the source can be found on the TechNet Wiki article here).
7. Once the SQL query to stop the runbooks has successfully run, we should see the following result:
8. To verify this, we can check the Runbook Designer console that the runbooks did actually stop.
Uninstall the Orchestrator features
1. Connect to the Orchestrator management server either by using the console or Remote Desktop.
2. Go to Start and search for “Control Panel” and then hit Enter to open it.
3. Under Programs, click on Uninstall a program.

4. Look for the System Center Orchestrator Management Server, then right-click it and click on Uninstall.

5. A window will appear, telling us that the Orchestrator Remoting Service needs to be closed before uninstalling the management server, select Automatically close applications and attempt to restart them after setup is complete, then click OK.

6. Now right-click the System Center Orchestrator Runbook Server and select Uninstall.

7. Now right-click the System Center Orchestrator Web Features and select Uninstall.

8. And finally right-click the System Center Orchestrator Runbook Designer and select Uninstall.

9. If the Orchestrator environment consists of multiple Runbook servers, make sure to uninstall the two (2) components mentioned below from all Runbook servers:
- System Center Orchestrator Runbook Server
- System Center Orchestrator Runbook Designer
Mount and extract the Orchestrator 2019 installation files
1. Mount the Orchestrator 2019 ISO image to the Orchestrator management server.

2. Run the SCO_2019 executable file (Run as administrator) to start the extraction wizard for the Orchestrator 2019 installation files.

3. A System Center Data Orchestrator 2019 extraction wizard will open up, click Next to continue.

4. Check the I accept the agreement and then click Next.

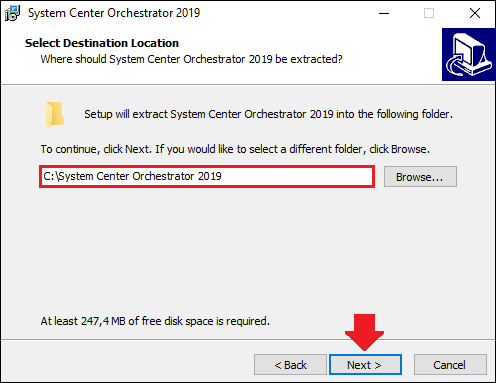
5. Specify the location where the Orchestrator 2019 installation files will be extracted to (For example: C:\System Center Orchestrator 2019), and then click Next.
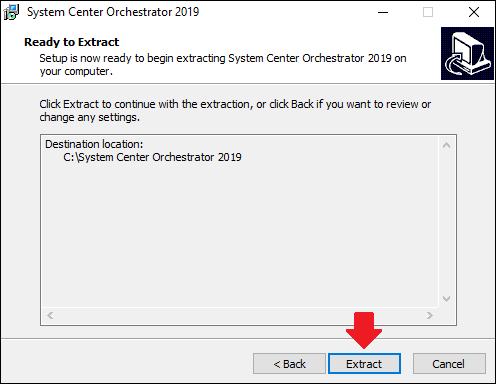
6. Click on Extract to start extracting the Orchestrator 2019 installation files to the location we’ve specified in the previous step.
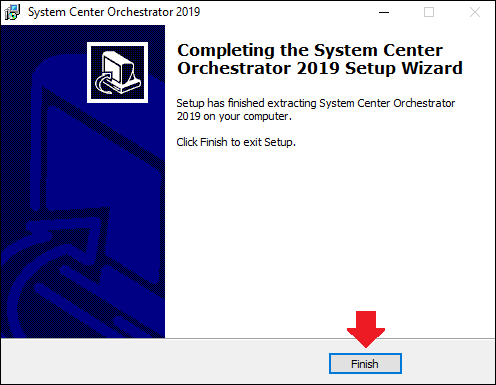
7. Once the extraction is complete, click Finish.
Install Orchestrator 2019
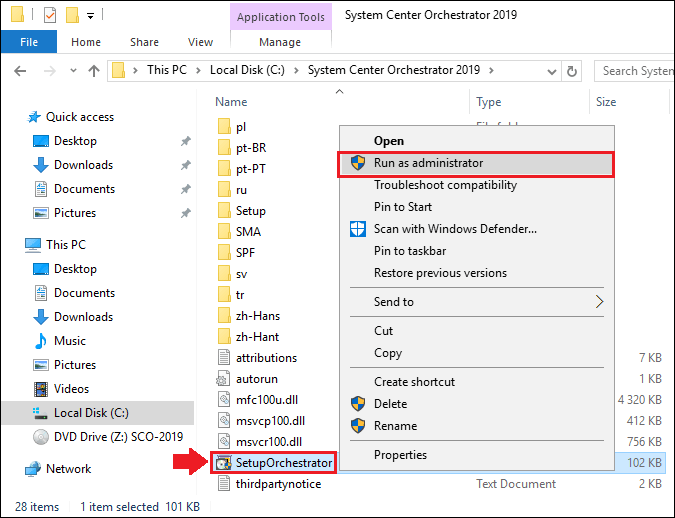
1. Head to the location where we chose to extract the Orchestrator 2019 installation files.

2. Right-click the SetupOrchestrator executable file and choose Run as administrator.
3. A Microsoft System Center Orchestrator 2019 setup menu will now appear.

4. Click on Install to start installing Orchestrator 2019.

5. The Microsoft System Center 2019 Orchestrator Setup wizard will now appear, enter the name, organization and the product key then click Next.

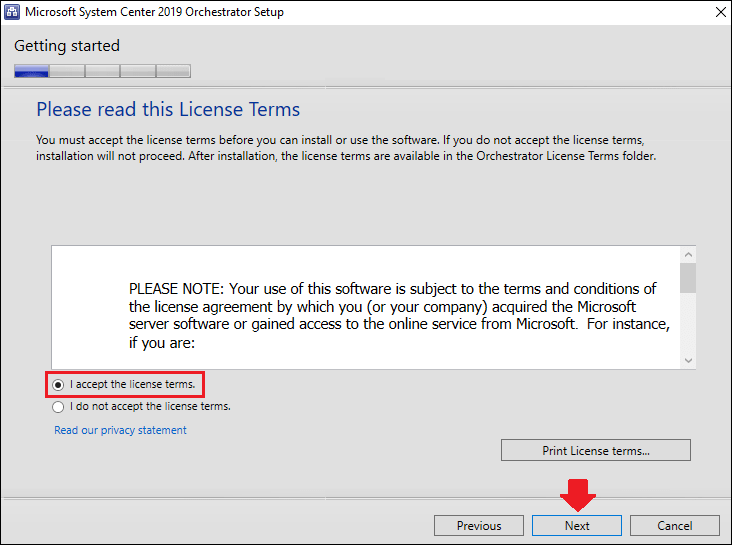
6. Check the I accept the license terms. and click Next.
7. Again click Next to continue.

8. Select all the Orchestrator features to install, then click Next.

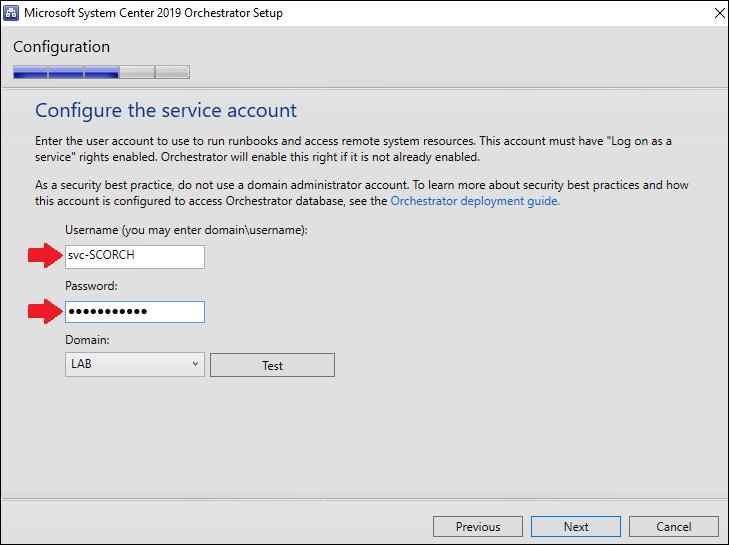
9. Provide the username and password of a service account that will be used by the Orchestrator service.
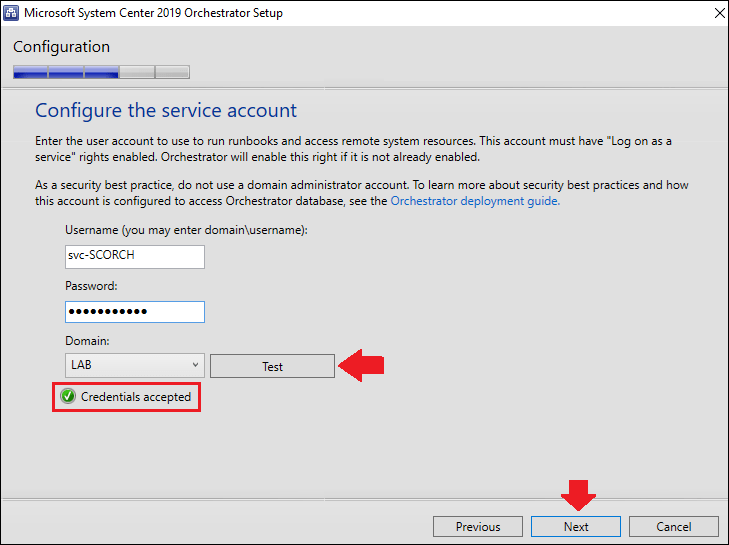
10. Click on Test to verify that the credentials provided is accepted, if it’s accepted click Next to continue.
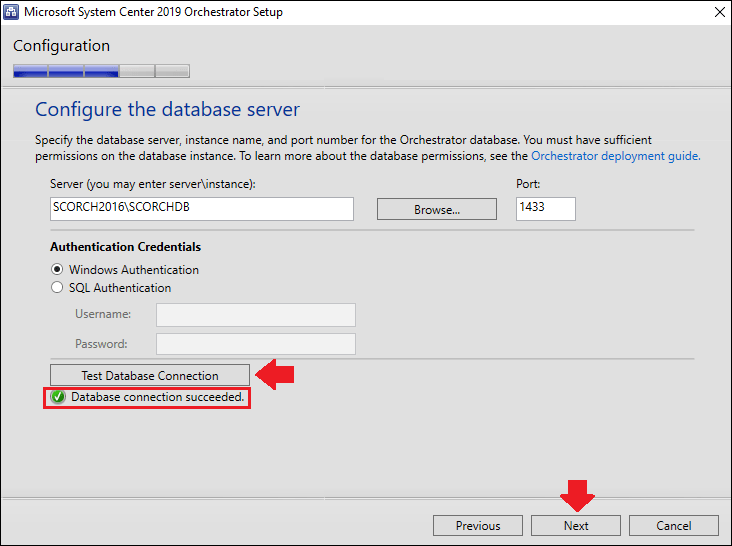
11. Next up, provide the server name and the instance name of where the Orchestrator 2016 database is located, if a different port is configured make sure to change it to the correct port as well.

12. Click Test Database Connection to verify that the connection to the database works, if the connection is successful click Next to continue.
13. Select Existing database and choose the existing Orchestrator database from the drop down list, click Next to continue.

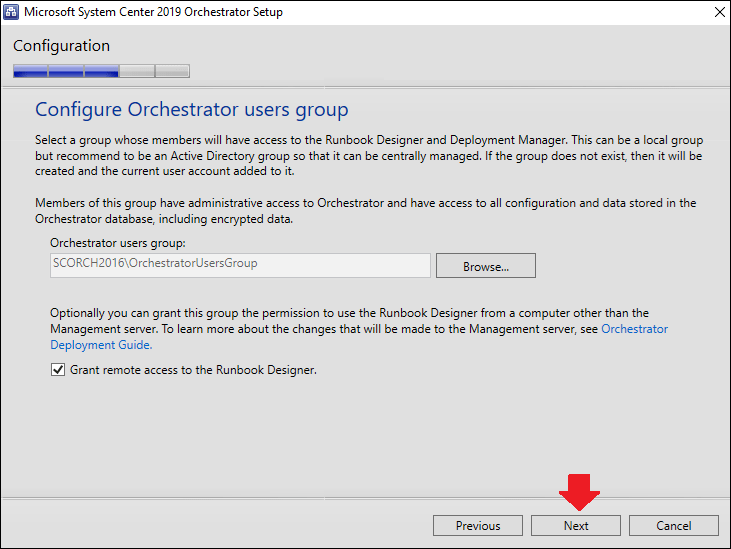
14. Configure the group which will have access to the Runbook Designer & Deployment Manager, or leave it as default, once done click Next.
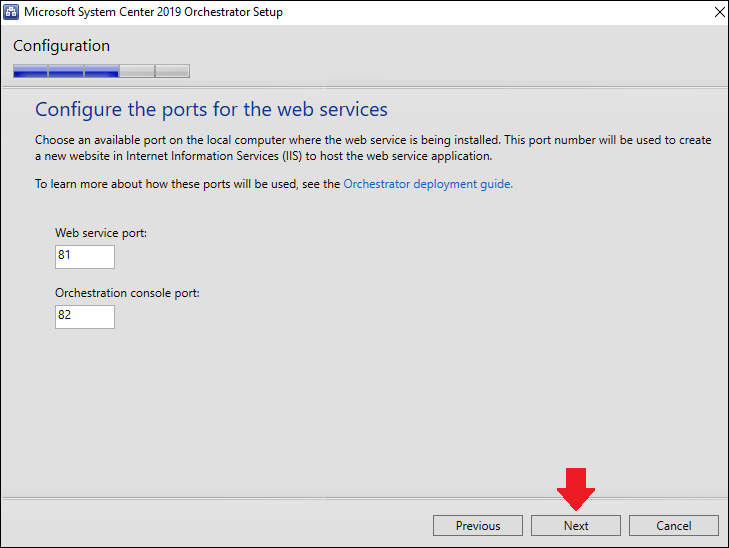
15. Configure the ports that will be used by the Orchestrator Web Console and Orchestrator Web Service, or leave them as default, click Next once done.
16. Provide an installation location for Orchestrator 2019, or leave it as default (C:\Program Files (X86)\Microsoft System Center\Orchestrator), click Next to continue.

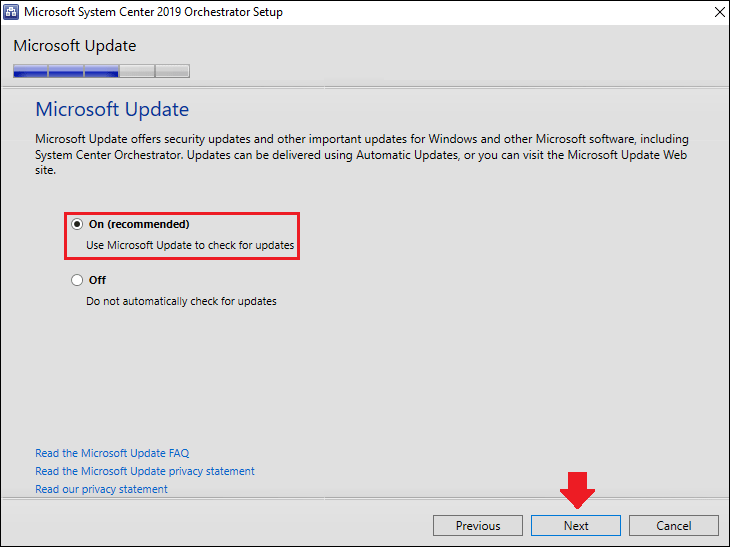
17. Select whether Microsoft Update should offer security/important updates for Orchestrator 2019 or not, then click Next.
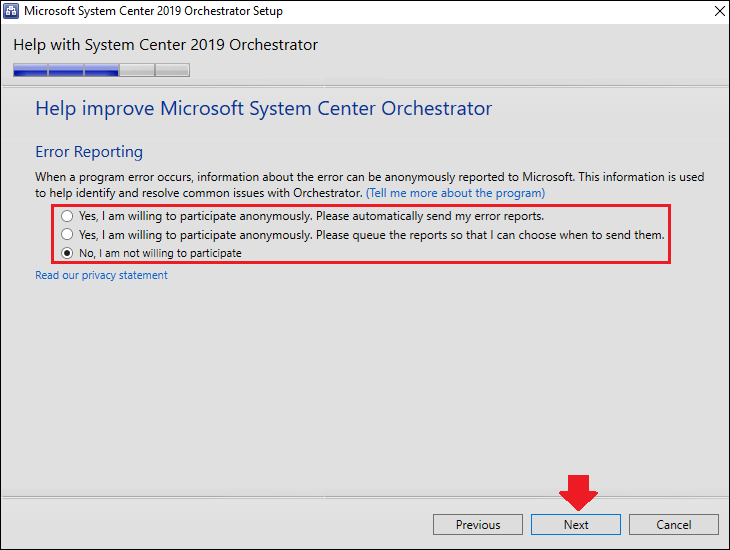
18. Select one of the options whether we want to participate in error reporting or not, click Next to continue.
19. Finally click on Install to start installing Orchestrator 2019.

20. Once the installation has finished, click on Close.

Verify the installation of Orchestrator 2019
1. Open the Runbook Designer.

2. In the upper toolbar and click on Help and then click on About.
3. We should now see that we have Orchestrator 2019 (RTM) installed, which is version 10.19.40.0.

Post-upgrade tasks
1. If the Orchestrator environment consists of multiple Runbook servers, make sure to at least install the System Center Orchestrator Runbook Server feature on the servers.
2. Open the Runbook Designer and manually start all the runbooks that were running prior to uninstalling Orchestrator 2016.
3. Install the latest System Center 2019 integration packs for Orchestrator 2019, they can be downloaded from here.
We have now successfully upgraded to System Center Orchestrator 2019!