Microsoft Graph Beginner's Guide
1. Introduction
As the number of services and the amount of data is growing rapidly in Microsoft Cloud, Microsoft Graph has become essential in accessing the data while building applications and experiences around it more effectively. This article gives an overview of what Microsoft Graph is, what we can access with it, how we can consume Graph API, etc. We will go through a few utilities provided by Microsoft to make ourselves familiar with Graph API which helps us to get started.
2. Prerequisites
- Understanding on Azure AD
- Basics of OAuth 2.0
- Understanding on REST API
3. What is Microsoft 365?
We all know about Microsoft’s various product offerings like Office 365, Windows 10 and Enterprise Mobility and Security. These products/suites have been bundled together as a single offering called Microsoft 365. This enables everyone to work collaboratively, securely and productively.

4. What is Microsoft Graph?
Now that we have an idea on Microsoft 365, let us understand how Microsoft Graph is related to Microsoft 365. Microsoft Graph provides a unified way of accessing data and intelligence in Microsoft Cloud (Microsoft 365). Microsoft Graph provides a unified development model with SDKs for almost all development platforms to access data from Microsoft Cloud. In fact, any application which can make a REST API call can consume Microsoft Graph API.
5. Before and after the Microsoft Graph API
Prior to the introduction of Graph API, when we built applications to access data from any product under the Microsoft 365 umbrella, we had to call each product's API individually.

As seen above, when an application that consumes data from SharePoint, Azure AD, OneDrive and Outlook was built, the application had to call each of these APIs individually. This necessitates getting an access token and managing token lifecycle for each of these APIs. In addition to that, if the developer wants to use SDK related to the platform (E.g. .NET), he/she has to download SDKs for SharePoint, Azure AD etc. and use them as per their respective documentation.
Now with the help of Microsoft Graph, an application can interact with data pertaining to all the services in Microsoft 365 using a single endpoint called graph.microsoft.com as shown below.
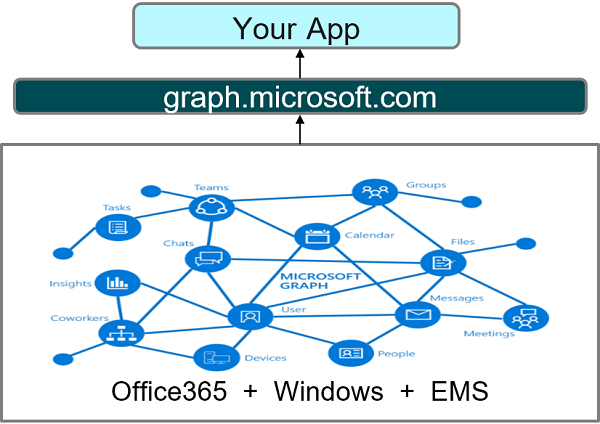
In a nutshell, with Microsoft Graph we have a single endpoint(graph.microsoft.com), one SDK (unlike multiple SDK e.g. SharePoint SDK, Azure AD SDK etc) and one access token to allow both organization users (@yourorganization.com) and consumers (@outlook.com) to access data across Microsoft 365.

6. The Process of consuming Graph API
As Microsoft Graph API is secured by Azure AD, an application must get access token from Azure AD (for the user context or the application context) and attach it to each Graph API request.
Below is the abstract view of fetching the access token and making a call to Graph API.
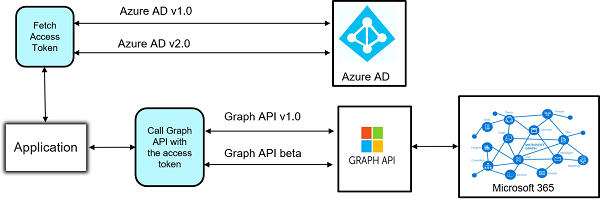
As we discussed earlier, an application must get access token from Azure AD to call Graph API.
Azure AD exposes two versions (v1.0 and v2.0) of endpoint currently to get access token.
Below are the high-level steps to get access token.
- Register the application in Active Directory using Azure portal under App Registrations (if we want to use Azure AD v1.0 endpoint) or App Registrations (Preview) (if we want to use Azure AD v2.0 endpoint)
- NOTE: Currently applications are registered at https://apps.dev.microsoft.com for v2.0 endpoint. Microsoft plans to move this to Azure Portal (Which is already in preview) eventually.
- Assign a set of permissions that the application can perform using Graph API.
- Call Azure AD authorization and/or token endpoints (v1.0/v2.0) depending on OAuth 2.0 flow to acquire an access token.
Once we have the access token, we can build an HTTP request to Graph API, add the access token in Authorization header and make a call to perform the required operations. Graph API is exposed in two versions namely v1.0 and beta in which operations provided by v1.0 are production ready and beta version contains experimental operations which are in the preview.
7. Graph API format
Graph API request should conform to the below API format
**https://graph.microsoft.com/{version}/{resource}?\[query-parameters\] **
**version: ** Represents the endpoint version which is v1.0 or beta
resource: Represents the resource type available through Graph API e.g. users, sites, files etc.
query-parameters: Represents parameters used to do additional operations on the datasets such as $filter, $select, $expand etc.
8. How to get started with Graph API
Below are a few tools/references to understand and implement Graph API in our projects.
8.1 Graph Explorer
This is an online tool provided by Microsoft to make API calls to various resources exposed by the Microsoft Graph. We can make REST API calls to various services across Microsoft 365 and familiarize ourselves about Graph API. Even before implementing Graph API in our projects we can make related calls in Graph Explorer and validate request and response. Visit graph.microsoft.com to navigate to Microsoft Graph web page where you can find a link to Graph Explorer in the top navigation. Click on the link to go the Graph Explorer.

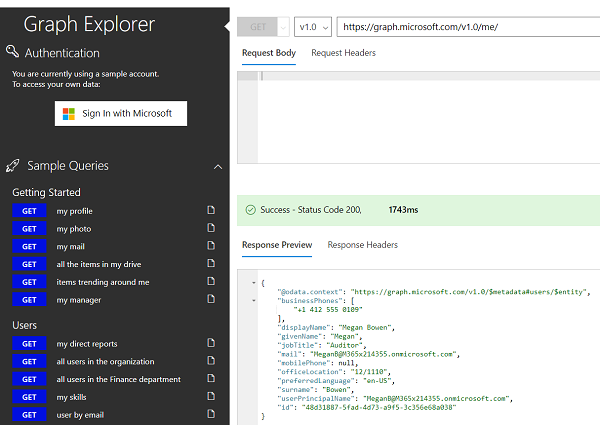
By default, Microsoft provides sample data to interact with the API without logging in. This is limited to GET requests only. If we want to experiment with POST, PUT, DELETE and PATCH requests, we must log in with our Office 365/Azure AD account.
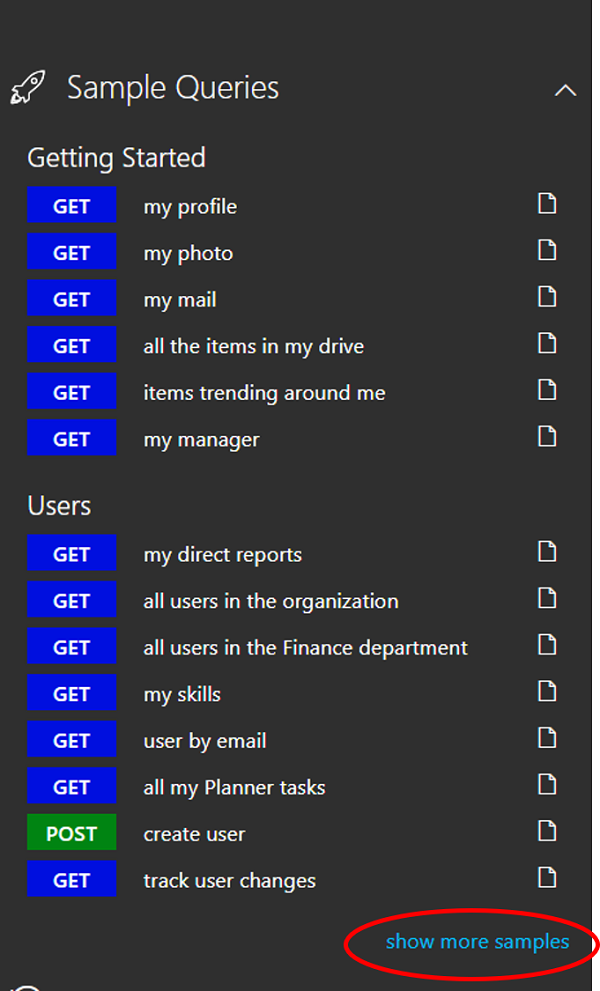
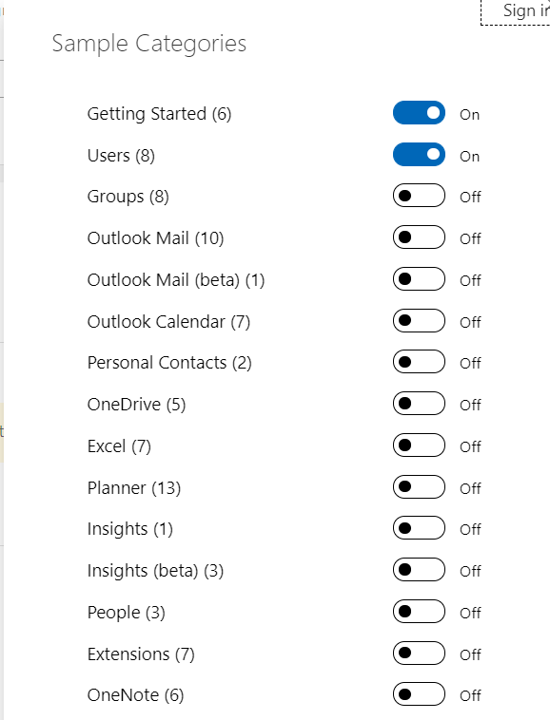
If you would like to explore Graph API calls to any other Microsoft 365 resources, you can click on show more samples link in the left pane and choose the required services to get a few sample requests.
We can even send the Graph API request by entering the request URL and body directly in the request section.
8.2 Quick Start Wizard
To understand how Graph API can be used in an application, Microsoft provides a working solution at https://developer.microsoft.com/en-us/graph/quick-start that can be downloaded depending on the platform you choose. Once the solution is downloaded you can go through it and understand how Graph API is integrated into it and get some implementation ideas to use Graph API in your own projects.
9. Exploring the sample project from QuickStart
So far, we have an overview of the Microsoft Graph API and how the basic flow of using Graph API works. Let us now explore how we can download the ready-made solution from Quick Start and walk through the code to find out how Graph API is used in it. We will be exploring a solution built on ASP.NET. Feel free to download a solution related to any platform of your interest.
9.1 Download a working solution using the Quick Start Wizard
Please follow the below steps to download the working solution with Graph API implemented in it.
1) Navigate to https://developer.microsoft.com/en-us/graph/quick-start
2 )Select the platform that you want to download the solution for. Depending on the platform you have chosen, corresponding Graph SDK is used in the solution.

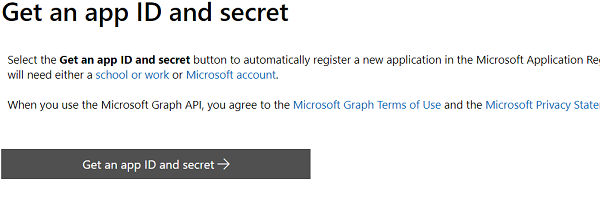
3) Click on Get an app ID and secret button, this will navigate to https://apps.dev.microsoft.com to register the application. You will be asked to log in to https://apps.dev.microsoft.com using your organization account (Microsoft 365 account) or consumer account (Outlook/Hotmail/Windows Live). Ultimately this process registers the application, generates AppId and AppSecret and configures Redirect URL to send the token.
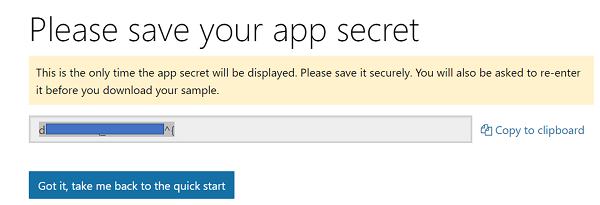
4) Copy the generated AppSecret, this will be used in the next step. Once you click on Got it, take me back to the quick start you will be taken back to the Quickstart Wizard.
5) You need to enter the AppSecret that you copied in the previous step in the App Secret text box shown below.

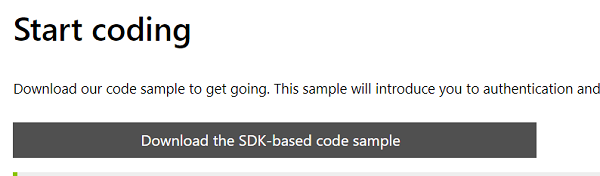
6) As a final step, you can download the working solution with a few Graph Operations.
9.2 Code Walk-through
Let us walk through a few important pieces of code in the downloaded solution to understand how Graph API is being used there.
9.2.1 Middleware to get access token
In the downloaded solution, open Startup.Auth.cs under the App_Start folder, the below code is seen. The Request pipeline is configured with OpenIdConnectAuthentication middleware. This causes every request to the application to go through the authentication process. The user is redirected to Azure AD v2.0 authorization endpoint to authenticate and give consent to a set of permissions. An authorization code is then sent back to the application.
// Load configuration settings from PrivateSettings.config
private static  string appId = ConfigurationManager.AppSettings["ida:AppId"];
private static  string appSecret = ConfigurationManager.AppSettings["ida:AppSecret"];
private static  string redirectUri = ConfigurationManager.AppSettings["ida:RedirectUri"];
private static  string graphScopes = ConfigurationManager.AppSettings["ida:AppScopes"];

public void  ConfigureAuth(IAppBuilder app)
{
 app.SetDefaultSignInAsAuthenticationType(CookieAuthenticationDefaults.AuthenticationType);

 app.UseCookieAuthentication(new CookieAuthenticationOptions());

 app.UseOpenIdConnectAuthentication(
 new OpenIdConnectAuthenticationOptions
 {
  ClientId = appId,
  Authority = "https://login.microsoftonline.com/common/v2.0",
  Scope = $"openid email profile offline_access {graphScopes}",
  RedirectUri = redirectUri,
  PostLogoutRedirectUri = redirectUri,
  TokenValidationParameters = new  TokenValidationParameters
  {
  // For demo purposes only, see below
  ValidateIssuer = false

  // In a real multitenant app, you would add logic to determine whether the
  // issuer was from an authorized tenant
  //ValidateIssuer = true,
  //IssuerValidator = (issuer, token, tvp) =>
  //{
  //  if (MyCustomTenantValidation(issuer))
  //  {
  //  return issuer;
  //  }
  //  else
  //  {
  //  throw new SecurityTokenInvalidIssuerException("Invalid issuer");
  //  }
  //}
  },
  Notifications = new  OpenIdConnectAuthenticationNotifications
  {
  AuthenticationFailed = OnAuthenticationFailedAsync,
  AuthorizationCodeReceived = OnAuthorizationCodeReceivedAsync
  }
 }
 );
}
9.2.2 Getting an access token from Authorization code
Once the application receives an authorization code from Azure AD, a pre-configured event handler will be called. This handler will exchange the authorization code with Azure AD for access token using AcquireTokenByAuthorizationCodeAsync method of ConfidentialClientApplication class and caches the access token and refresh token along with the user details.
private async Task OnAuthorizationCodeReceivedAsync(AuthorizationCodeReceivedNotification notification)
{
  // Get the signed in user's id and create a token cache
  string signedInUserId = notification.AuthenticationTicket.Identity.FindFirst(ClaimTypes.NameIdentifier).Value;
  SessionTokenStore tokenStore = new  SessionTokenStore(signedInUserId,
  notification.OwinContext.Environment["System.Web.HttpContextBase"] as  HttpContextBase);

  var idClient = new  ConfidentialClientApplication(
  appId, redirectUri, new  ClientCredential(appSecret), tokenStore.GetMsalCacheInstance(), null);

  try
  {
  string[] scopes = graphScopes.Split(' ');

  var result = await idClient.AcquireTokenByAuthorizationCodeAsync(
   notification.Code, scopes);

  var userDetails = await GraphHelper.GetUserDetailsAsync(result.AccessToken);

  var cachedUser = new  CachedUser()
  {
   DisplayName = userDetails.DisplayName,
   Email = string.IsNullOrEmpty(userDetails.Mail) ?
   userDetails.UserPrincipalName : userDetails.Mail,
   Avatar = string.Empty
  };

  tokenStore.SaveUserDetails(cachedUser);
  }
  catch (MsalException ex)
  {
  string message = "AcquireTokenByAuthorizationCodeAsync threw an exception";
  notification.HandleResponse();
  notification.Response.Redirect($"/Home/Error?message={message}&debug={ex.Message}");
  }
  catch(Microsoft.Graph.ServiceException ex)
  {
  string message = "GetUserDetailsAsync threw an exception";
  notification.HandleResponse();
  notification.Response.Redirect($"/Home/Error?message={message}&debug={ex.Message}");
  }
}
9.2.3 Building GraphServiceClient with the access token
Before accessing any Graph API resource, GraphServiceClient should be built by configuring it to attach access token to Authorization header in HTTP request. This acts like an authenticated Graph client.
private static  GraphServiceClient GetAuthenticatedClient()
{
  return new  GraphServiceClient(
  new DelegateAuthenticationProvider(
   async (requestMessage) =>
   {
   // Get the signed in user's id and create a token cache
   string signedInUserId = ClaimsPrincipal.Current.FindFirst(ClaimTypes.NameIdentifier).Value;
   SessionTokenStore tokenStore = new  SessionTokenStore(signedInUserId,
    new HttpContextWrapper(HttpContext.Current));

   var idClient = new  ConfidentialClientApplication(
    appId, redirectUri, new  ClientCredential(appSecret),
    tokenStore.GetMsalCacheInstance(), null);

   var accounts = await idClient.GetAccountsAsync();

   // By calling this here, the token can be refreshed
   // if it's expired right before the Graph call is made
   var result = await idClient.AcquireTokenSilentAsync(
    graphScopes.Split(' '), accounts.FirstOrDefault());

   requestMessage.Headers.Authorization =
    new AuthenticationHeaderValue("Bearer", result.AccessToken);
   }));
}
9.2.4 Finally making a request to Graph API
Once we have the authenticated Graph client, the application can access the resources exposed by Graph API depending on the permissions granted to the application. In the below piece of code all the events related to the logged in user are being retrieved
public static  async Task<IEnumerable<Event>> GetEventsAsync()
{
  var graphClient = GetAuthenticatedClient();

  var events = await graphClient.Me.Events.Request()
  .Select("subject,organizer,start,end")
  .OrderBy("createdDateTime DESC")
  .GetAsync();

  return events.CurrentPage;
}
10 Graph API Permission Reference
Before using the Graph API, the application should be created in Azure AD and permissions should be assigned to access the Graph API operations in the application.
Example 1: If you want to enable an application to read items from a SharePoint List, Sites.Read.All permission should be assigned to the application in Azure AD.
Example 2: If you want to enable an application to read and write items to a SharePoint List, Sites.ReadWrite.All permission should be assigned to the application in Azure AD.
You can read about permissions that are required to perform other such operations at /en-gb/graph/permissions-reference.
11 Summary
Thus, we understood what the Microsoft Graph API is and how it simplifies the process of accessing data from Microsoft 365. We touched upon a few concepts of getting access token in order to consume Graph API. We went through tools like Graph Explorer and Quick Start Wizard to familiarize ourselves with Graph API and its implementation in applications. Try building the solution downloaded using the Quick Start Wizard to restore all the references and run it to experience the flow of authentication and data retrieval using Graph API.
12. References
- https://developer.microsoft.com/en-us/graph
- /en-us/azure/active-directory/develop/v2-oauth2-auth-code-flow