Visual Studio 2019 RC: Getting Started ASP.NET Core (Part 2)
Introduction
In our previous article, we have seen how to download and install the Visual Studio 2019 RC and also explained how to started working with Visual Studio 2019 RC. In this part, we will see in more detail what project templates are available and see more details on what’s new in Visual Studio 2019. We will also see how to work with ASP.NET Core Model View Control with a simple Login using SQL Server.
Working with New Project Templates
Hope you all have installed the Visual Studio 2019 RC version or if the present month is crossed, on April 2nd, 2019, you might have upgraded or installed Visual Studio 2019. If not, then read our previous article which explained in detail how to download and install Visual Studio 2019 on your computer.
In this article, we will start with creating our new Project on Visual Studio 2019.
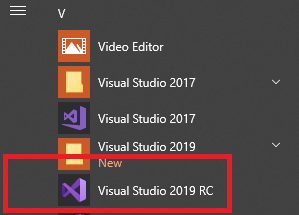
To start Visual Studio 2019, click Windows Start and search for Visual Studio 2019, You can see the Visual Studio 2019 RC or Visual Studio 2019, click on that.
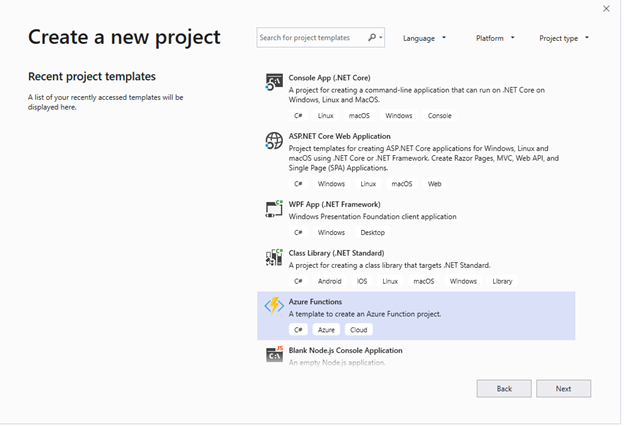
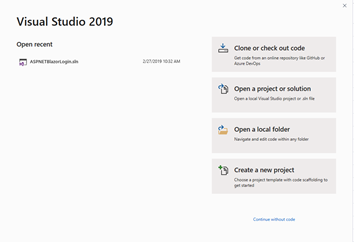
You can see Visual Studio 2019 RC will be opened like the image below, you can see on the left side as recently opened project list will be displayed. To create a new Project, we click on create a new project.
We can see a list of installed projects for working with Visual Studio 2019.
Here, the new Project window has a new design than our previous Visual Studio 2017.
Language Combobox at the Top
We can see a new Language Combobox at the top center of the New Project window.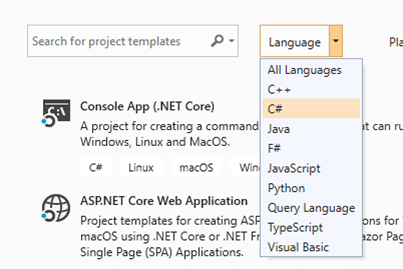
We can see the Language Combobox has the options given below:
- All Languages
- C++
- C#
- Java
- F#
- JavaScript
- Python
- Query Language
- TypeScript
- Visual Basic
By default, All Languages has been selected and if the user selects C#, all the project templates related to C# will be displayed and users can select their project kind and start developing. Here, when we select C#, we can see the Filter by option has been set as C# and list of projects related to C# has been loaded.
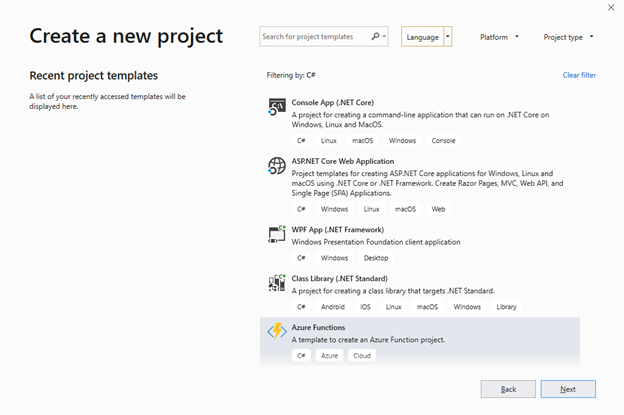
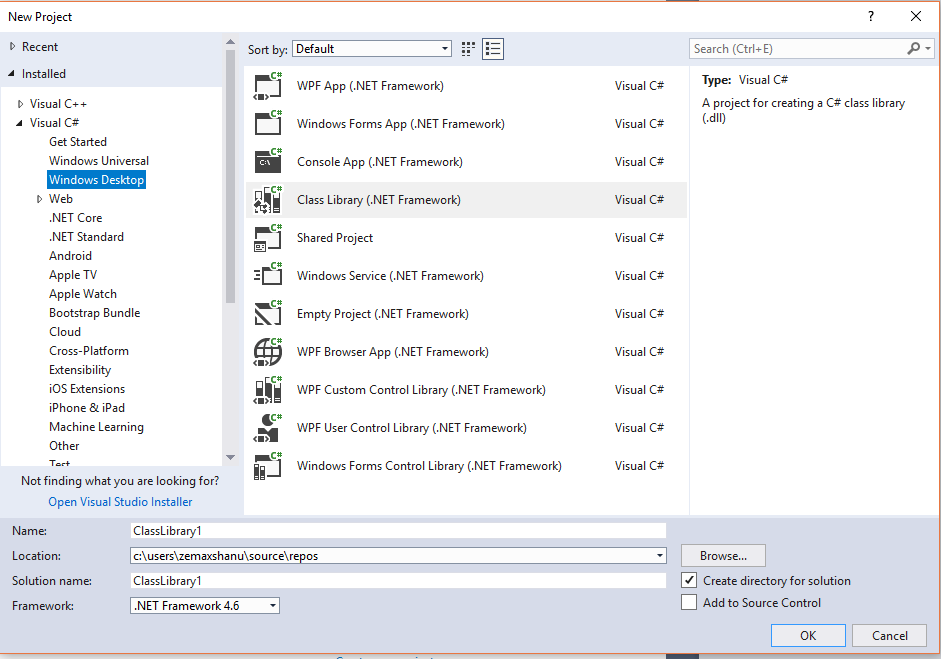
In our previous versions like Visual Studio 2017, all the projects will be loaded under the language as treeview on the left side like the below images.
The below image is a new project creation window of VS 2017. For the differences between 2017 and 2019, I have added the below image:
Platform Combobox
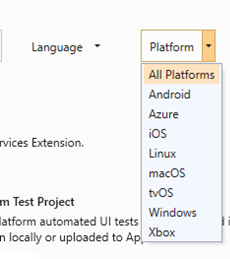
We can see a new feature called Platform selection has been added in Visual Studio 2019. We can filter the available projects by platform, if we select Android as Platform, we can see all the list of available projects to work with Android application using Visual Studio 2019.
Project Type Combobox
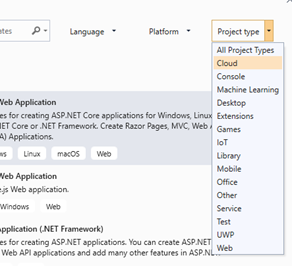
We can see new feature as Project Type selection has been added in Visual Studio 2019. We can filter the available projects by Project Type, if we select Android as Platform, we can see all the list of available projects to work with Android application using Visual Studio 2019.
Working with VS 2019 Web Application
First, we start working with creating a Web Applications in Visual Studio 2019.
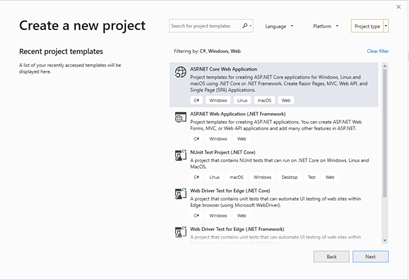
Here, we have selected the Language as C#, Platform as Windows and Project Type as Web from the top selection, you can see in Filtering by: C#, Windows, Web in the below image.
We can see ASP.NET Core Web Application with Windows as the supported platform, Linux and Mac OS to creating MVC, Web API and SPA applications. And one more web project which used to create ASP.NET Web Application for .NET Framework, also we can create other NUnit test Project for .NET Core.
Working with Web Application
Here, we will see how to work with ASP.NET Core Web application in Visual Studio 2019.
From the project template, we select the ASP.NET Core Web Application and Click on Next.
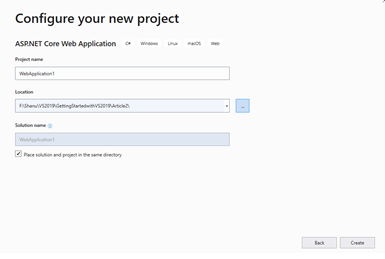
Here, we select our project solution location path and click create to create a new ASP.NET Core Project.
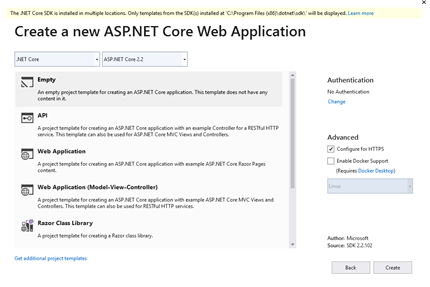
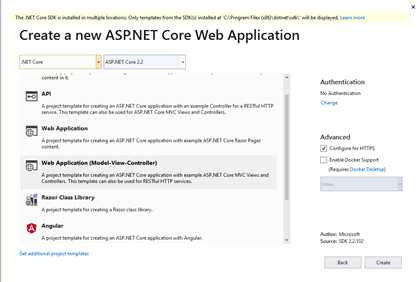
On the next page, we can select our .NET Core versions, also we can see the list of available project templates for ASP.NET Core as:
- Empty: For creating empty Template for ASP.NET Core application
- API: For working with ASP.NET Core WEB API.
- Web Application: To create ASP.NET Core web application using Razor pages
- Web Application (Model-View-Controller): To work with ASP.NET Core MVC View Controller and WEB API
- Razor Class Library: To work with Razor class library
- Angular: To create a web application using ASP.NET Core and Angular
- React.js: To create a web application using ASP.NET Core and React.js
- React.js and Redux: To create a web application using ASP.NET Core and React.js and Redux
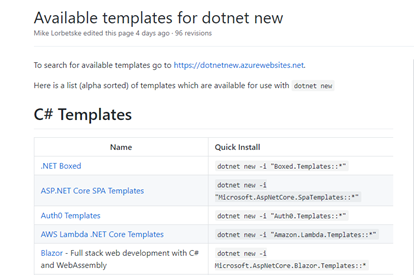
Apart from this, if we need more project template for working with ASP.NET Core, then we can also install from the link below by clicking on the “Get additional Projects” link. When we click on the link, we can see a new web page opened and display all available templates for Dotnet.
In our next article, we will see in depth about Installing and working with ASP.NET Core Blazor using .NET Core 3.0 in Visual Studio 2019.
Now we will create our simple ASP.NET Core web Application using the Model, View, and Controller with User Login.
Creating Our First ASP.NET Core Web Application
Select Web Application (Model-View-Controller):
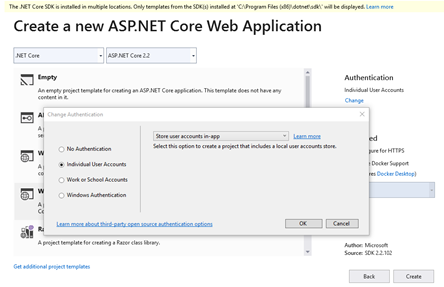
Click Change near Authentication and select Individual User Account and click on Ok.
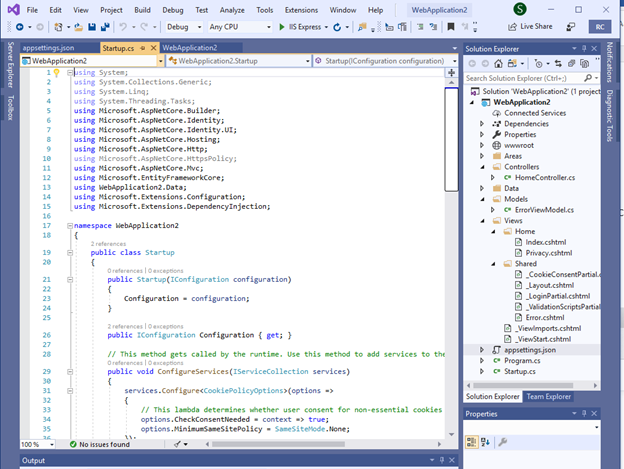
Click Create to create your web project. We can see that our first ASP.NET Core MVC web project has been created successfully using Visual Studio 2019.
We can see LoginPartial.cshtml page under Views/Shared folder for new members Register and Login.
Changing Connection String
Here, we will be using our SQL Server to store the ASP.NET Identity user registration to store the values in the SQL database. For this, we open the appsettings.json file and add the connection string.
Change the SQL Server name to your SQL server name and change the UID and password to your local SQL Server.
"ConnectionStrings": {
    "DefaultConnection": "Server=YourSQLSERVERNAME;Database=aspnetVS2019;
     Trusted_Connection=True;MultipleActiveResultSets=true;User Id=YOUR SQL UID;
     password=YOURSQLPASSWORD"
  },
When we run the application, we can see the output with user Login and registration link.
Once everything is fine till this place, then we are good to start building our own web site using ASP.NET Core MVC and WEB API.
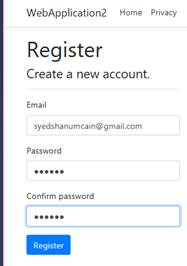
First, we can register a new user by clicking on Register link at the top.
When we click on Register for the first time, the website will be asked to migrate like the below screen:
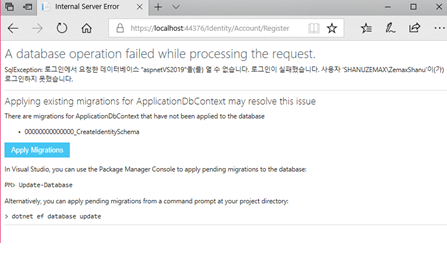
Once we click on Apply Migration, we can see new database has been created in our SQL server with ASP.NET Identity tables.
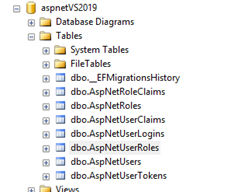
Now again, we can click on the register link and register a new user. From now onwards, all the registered users details will be stored in the above database.
We can click on the Login link and login with our new user registered id and password. We can see the screen below with the user logged into the web site.
In our upcoming articles, we will see in more detail about working with ASP.NET Core MVC web application.
More New Features of Visual Studio 2019
Now we will see a few new interesting features available in Visual Studio 2019.
Advance Search
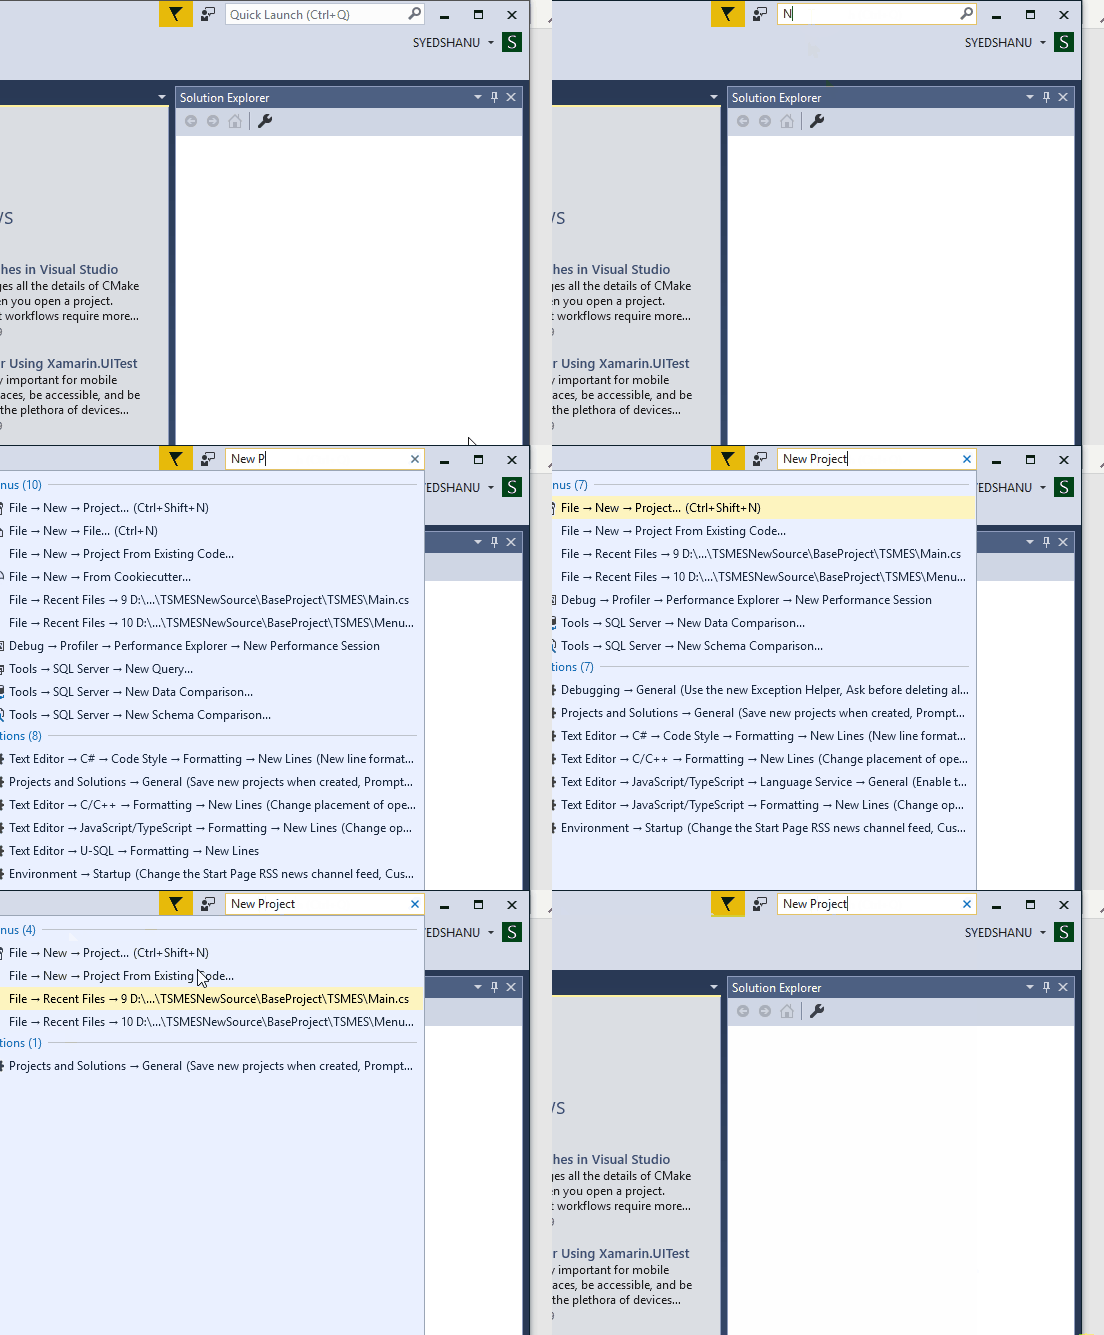
New Visual Studio 2019 has a better search facility than the previous versions. In VS 2019, the Search result is dynamic and whenever we type something on VS 2019, the dynamic search will be displayed immediately.

When we click on the Search text box, we can see Try with sample as “New Project”,” Theme”, etc. Now here, we will test by typing “New Project”. We can see from the below image as the search results displaying dynamically also with filter tab as All//Menus/Components and Templates.
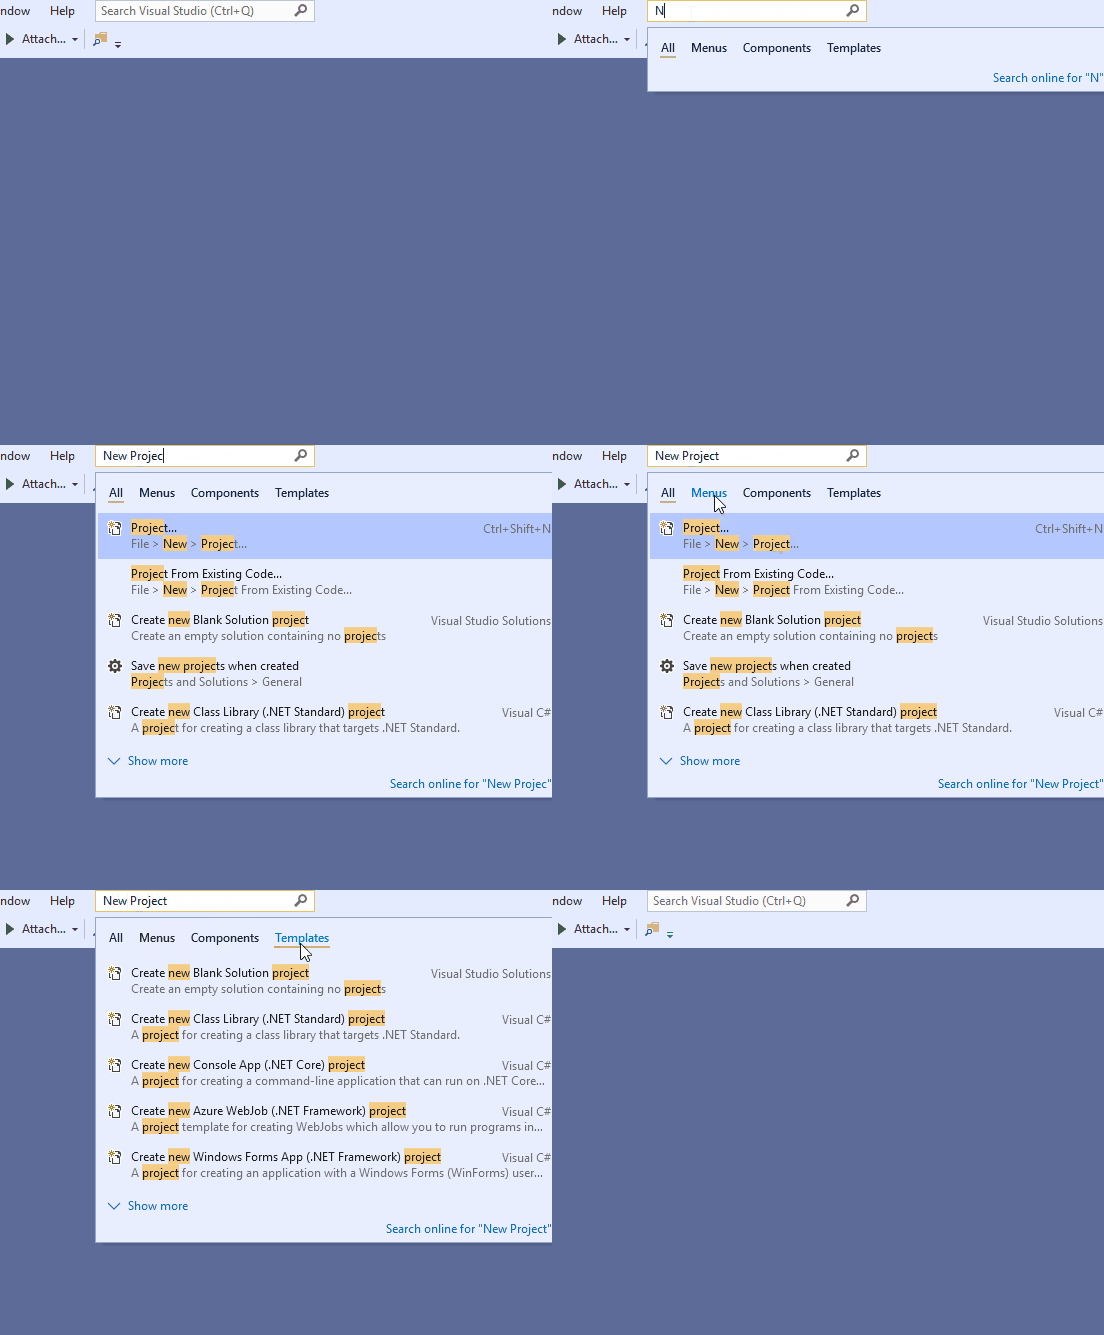
In Visual Studio 2017, we can’t see this same feature in search. In VS 2017, the search is very simple as very normal. Here, we have displayed the same search functionality in VS 2017.
Easy to work with Projects
** **We have already seen as now it’s much simpler and easier to start with an existing project or Clone or start a new Project with more filter functionality.
Easy to Clone Projects
** **Now it's easier to clone and check out projects from our GitHub repository or from Azure DevOps.
Start or Join Live Session Sharing
Now you can share your code live with Team, Customer or friends to work together or to edit the code with all other suggestions. This is a simple and good cool option to work with projects in team works.
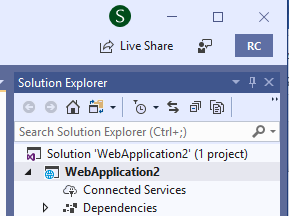
We can see Live Share button on top right side of the Visual Studio 2019 IDE.
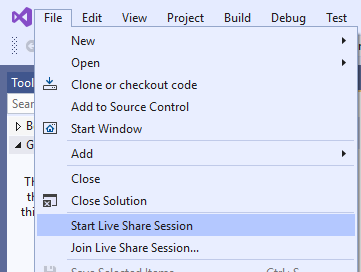
We can also Start Live Sharing or join the Live Sharing from the File Menu.
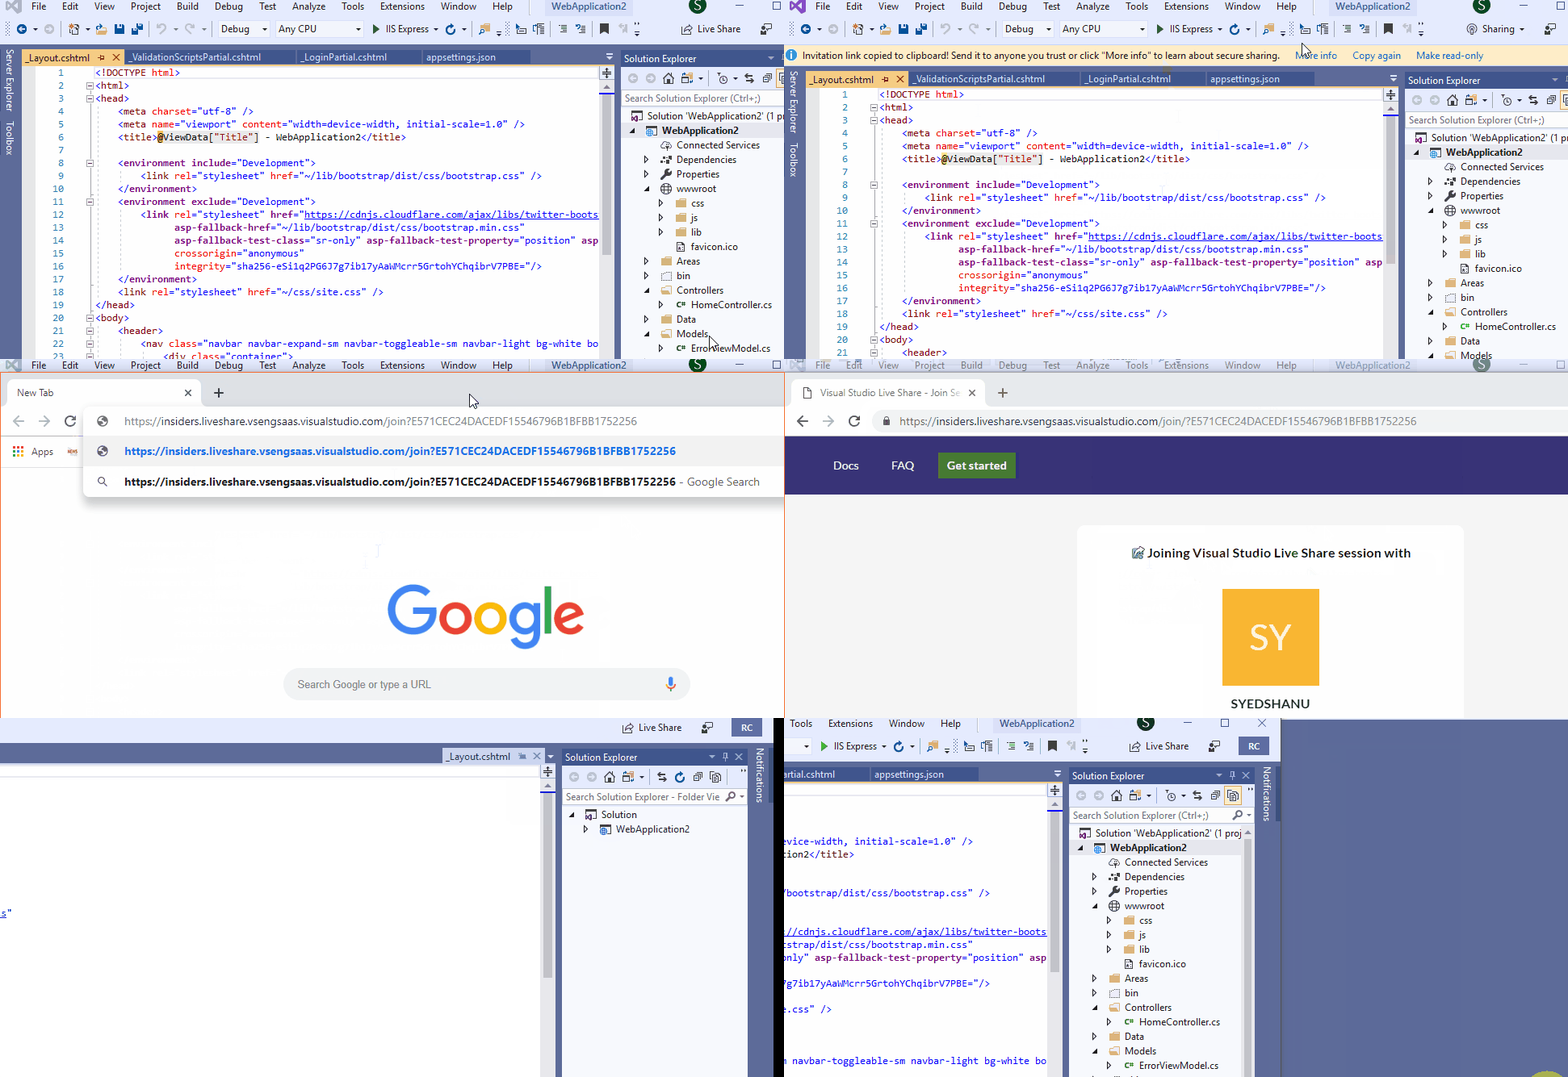
When we click on Live Share, we can see that as our Live sharing is started with link. We can send the link to our Team or friends to join our Live code session to work with. Team members or Friends can join the live stream and work together with us to edit the project and also Teams or Friends can leave the Live Sharing Session and also, we can end the Live Stream Session any time. The below image clearly explains the entire process in detail.
Download
Getting Started with Visual Studio 2019 RC Part 2
Conclusion
In this article, we reviewed how to download and install the Visual Studio 2019 RC on our computer and getting started with VS 2019 RC project templates. In our next article we will see in deeper on what are all the project templates available and getting started with few important project templates like ASP.NET Core Web Application and etc. also we will see on what’s new in Visual Studio 2019 RC in our next article.
