Bot Framework: Help Desk System implementation using Cognitive Sentiment Analysis with SharePoint Online
Introduction
In this article, we will see how to set up a minimal Help Desk system using Bot framework and SharePoint as the back end. We will also integrate the bot with the available channels like Microsoft Teams, Skype, Slack, and Facebook. In addition to this, we will also have the Cognitive Sentiment analysis feature embedded into the bot and based on its output we will implement KPI/Emoji conversion within SharePoint using Column formatting.
Technologies & Platforms used
- Microsoft Bot Framework
- SharePoint Online
- Cognitive Text Sentiment Analysis
- Flow
- Microsoft Teams
- Skype
- Slack
Bot Framework
The bot framework helps us build, connect, deploy and manage intelligent bots to interact with users across various channels like Microsoft Team, Slack, Skype, Facebook Messenger and so on. The Bot builder SDK is an open source SDK hosted on GitHub. We can create a Bot using Visual Studio and deploy it online or we can get started with the development directly on Azure and get the downloadable code package upon which we can get started with the further development.
Create the Bot using Form Template
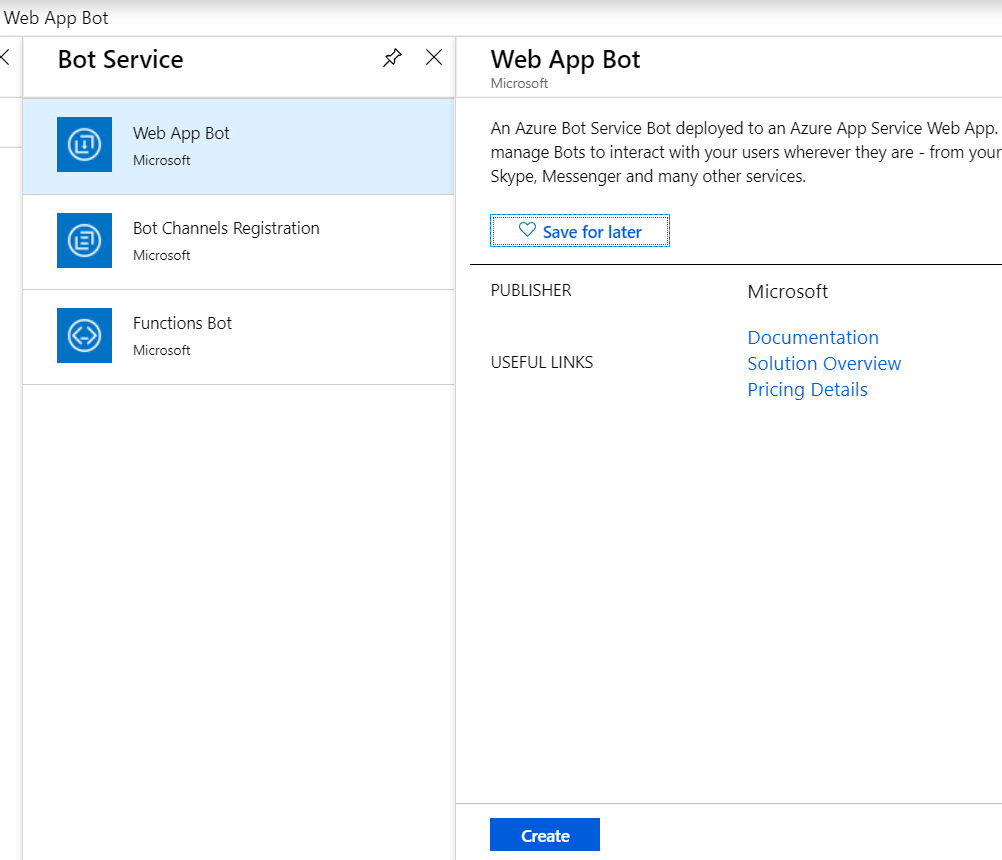
In this demo, we will create a sample bot using Form Template from Azure, see how it works online, download the solution and add the custom logic to it. Head over to the Azure portal Bot Services. Click on Add button to get started with your Bot Provisioning.
Select Web App Bot and click on Create.
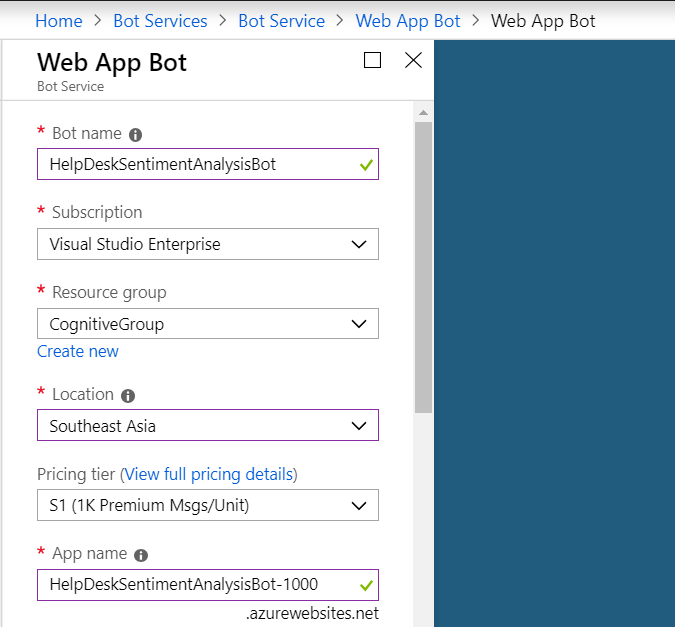
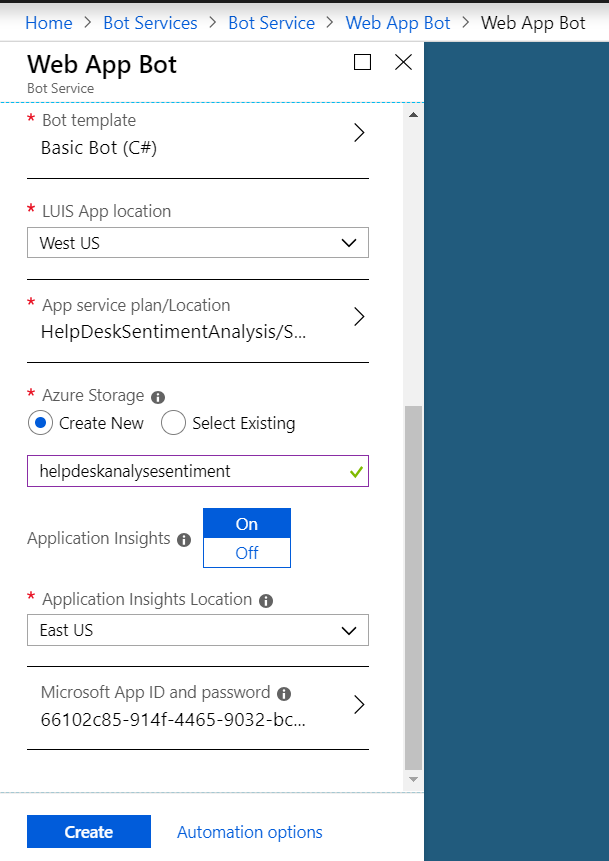
Input the values for the below fields which will determine the resource group, pricing plan, App name of the bot service.
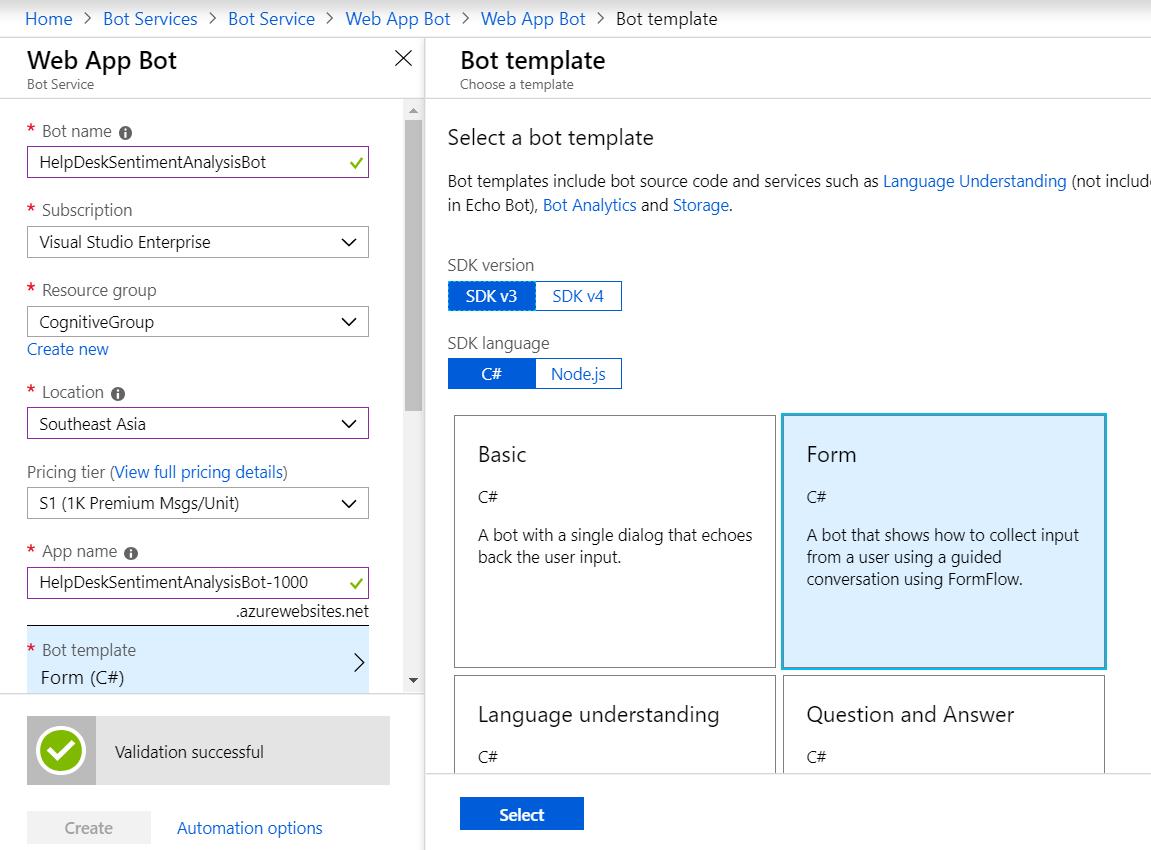
In the Bot template section, Choose SDKv3 and select C# as the language of choice and Form as the template type. Form Flow helps in handling a guided conversation in an easier manner. Though it may sacrifice the flexibility of creating and managing one’s own dialog, it helps in designing a guided conversation in lesser time.
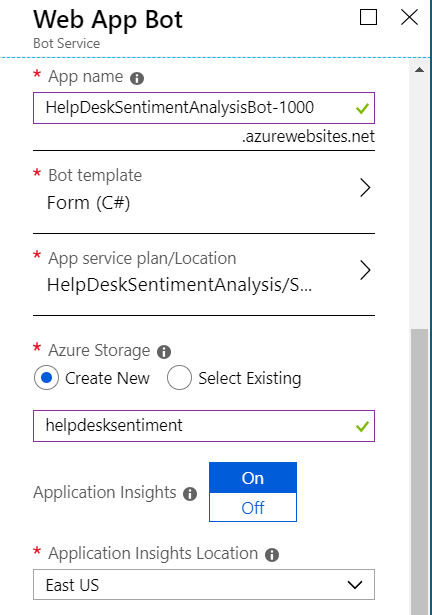
You can either create a new Azure Storage or use an existing one for storing the Bot data.
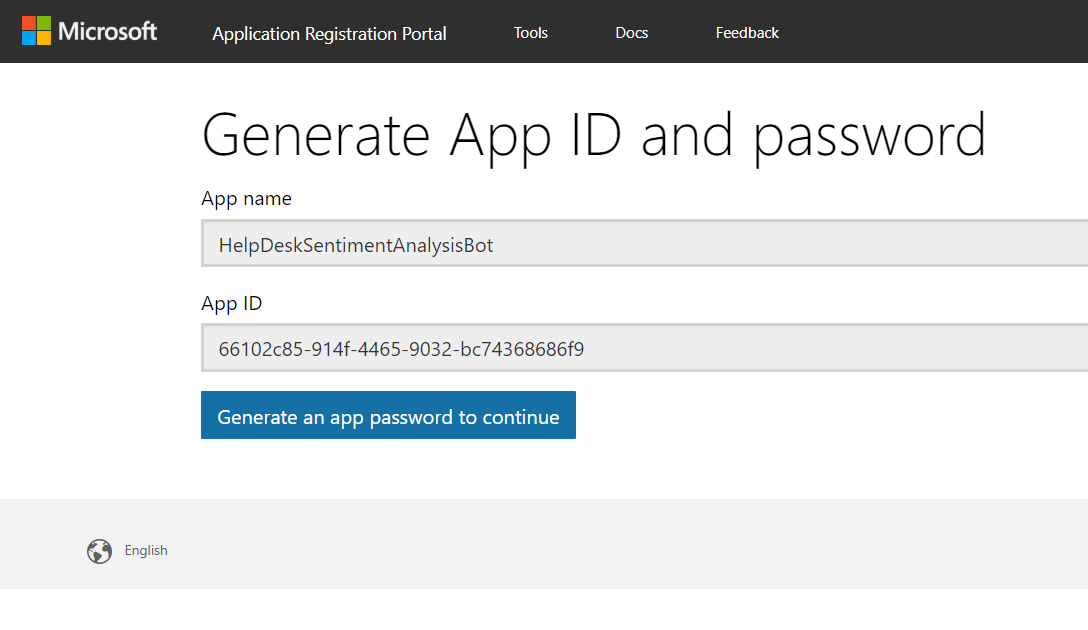
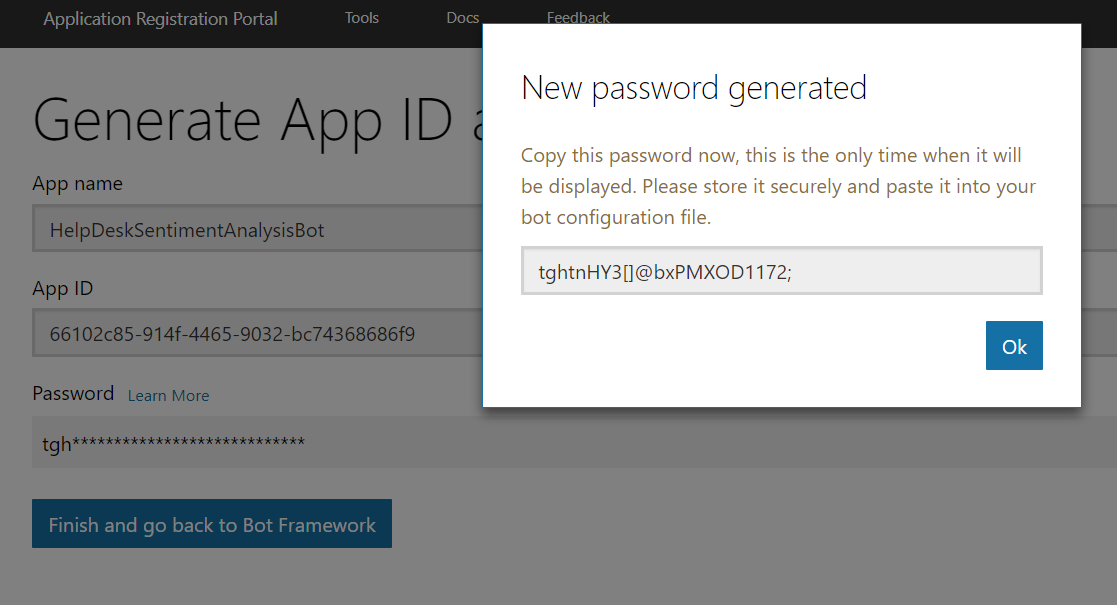
Select Microsoft App ID and Password to generate a new ID- Password combination.
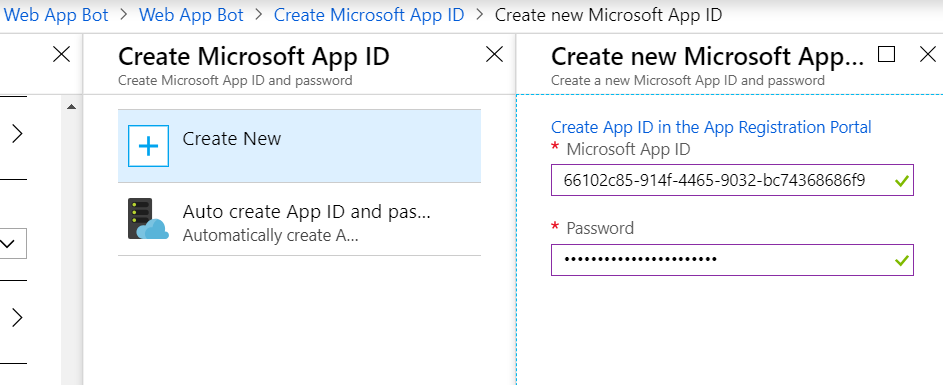
Store the password and ID so that we can add it to the bot creation page.
Add them to the Bot creation page as shown below.
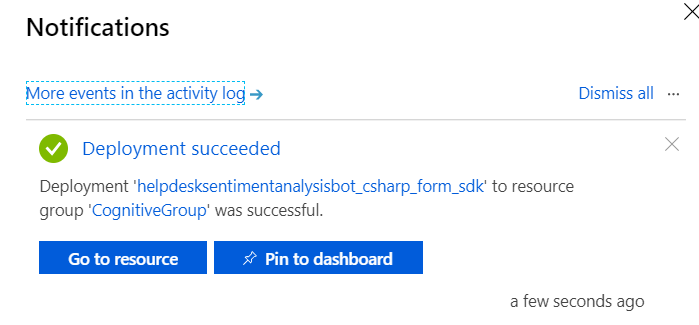
Click on Create to provision the bot and deploy it to the resource group.
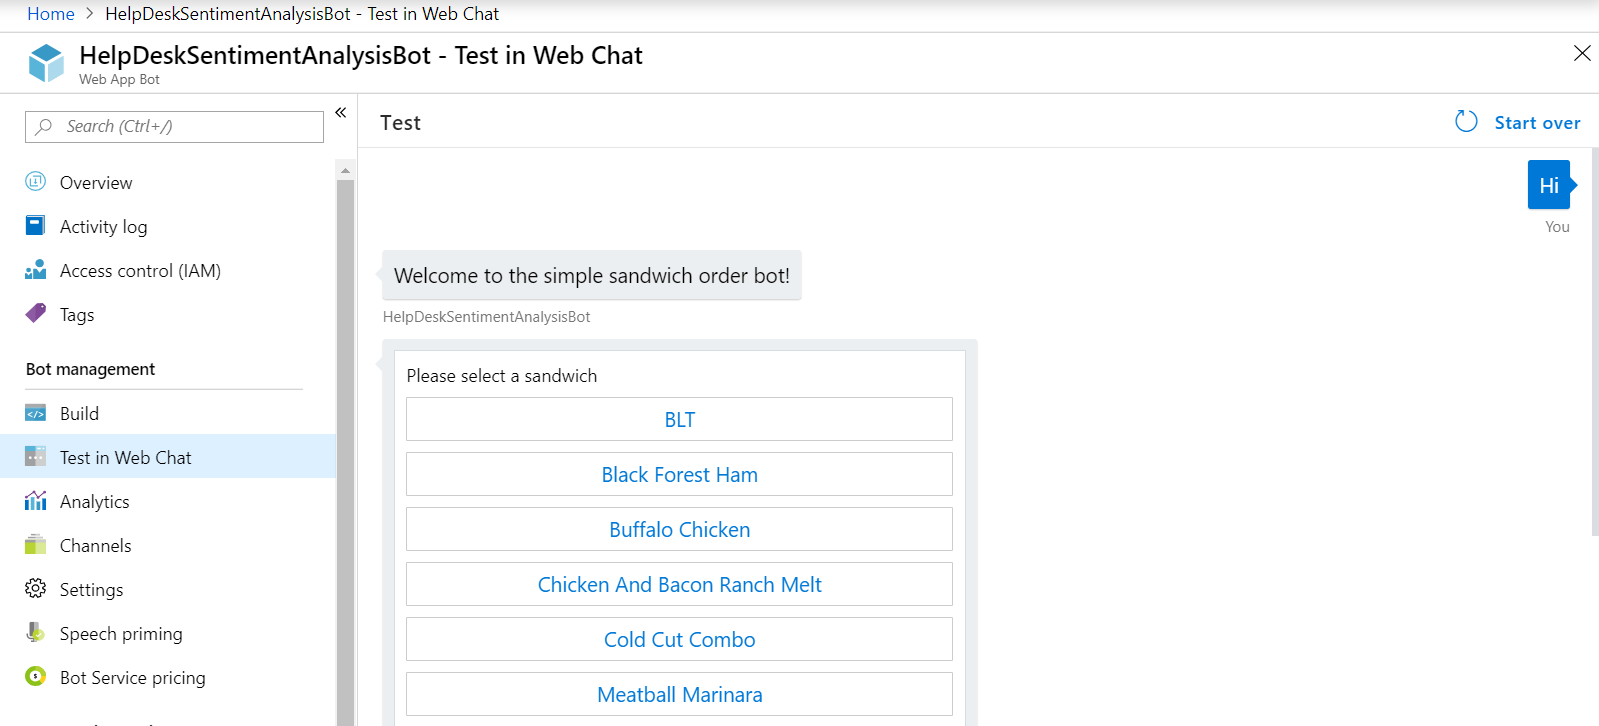
We can head over to the recently created Bot by selecting “Go to resource”
Get the Code
Once we have seen the bot in action, let's download the bot source code and make the required changes to it.
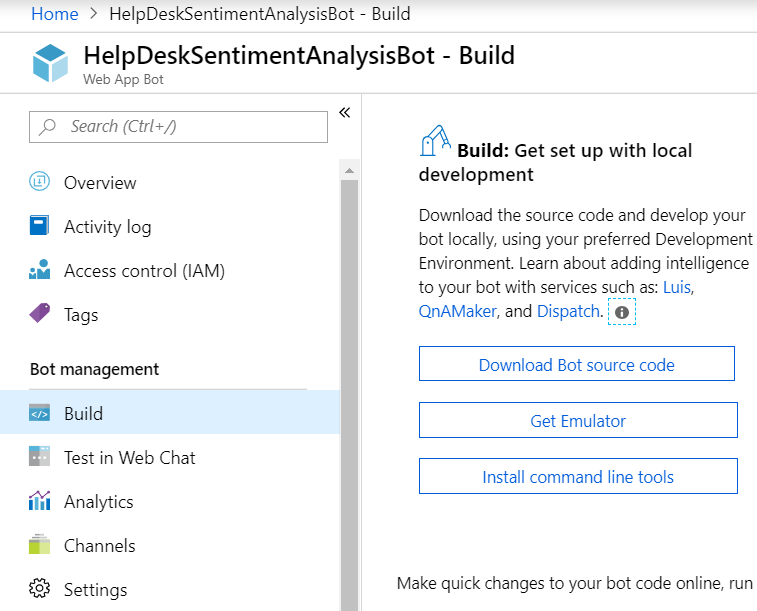
Select Download Bot Source Code to get the Zip package for starting the download.
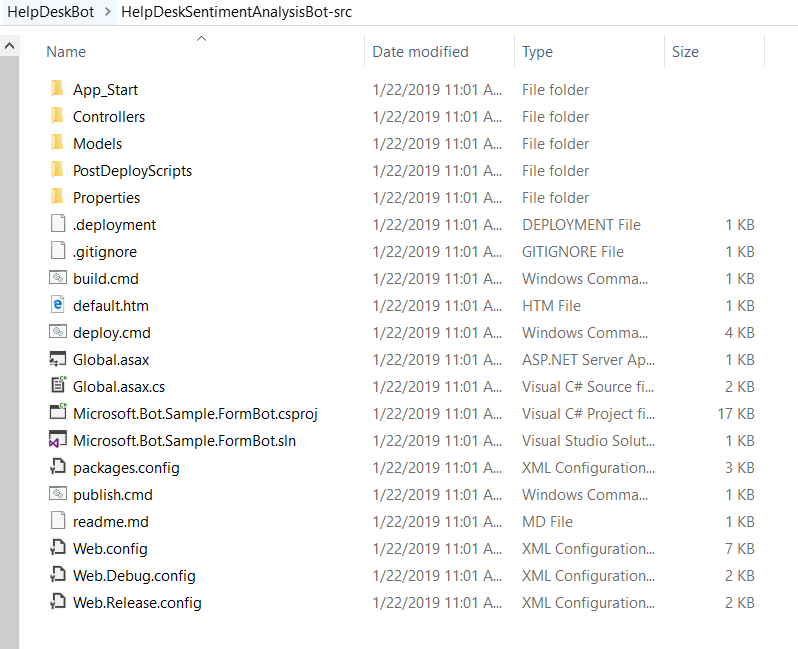
Once the package is ready, download the bot source code and unzip it.
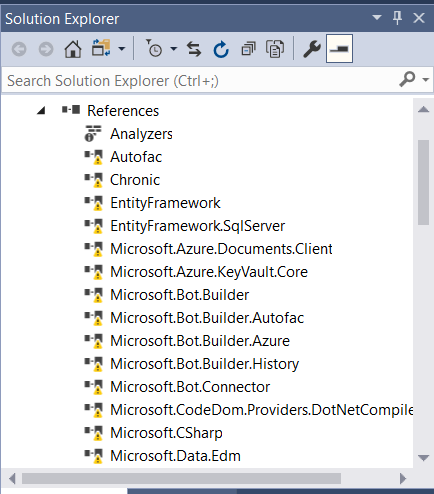
.sln file will get you started with the project in Visual Studio. For obvious reasons, we would have to update the DLL references.
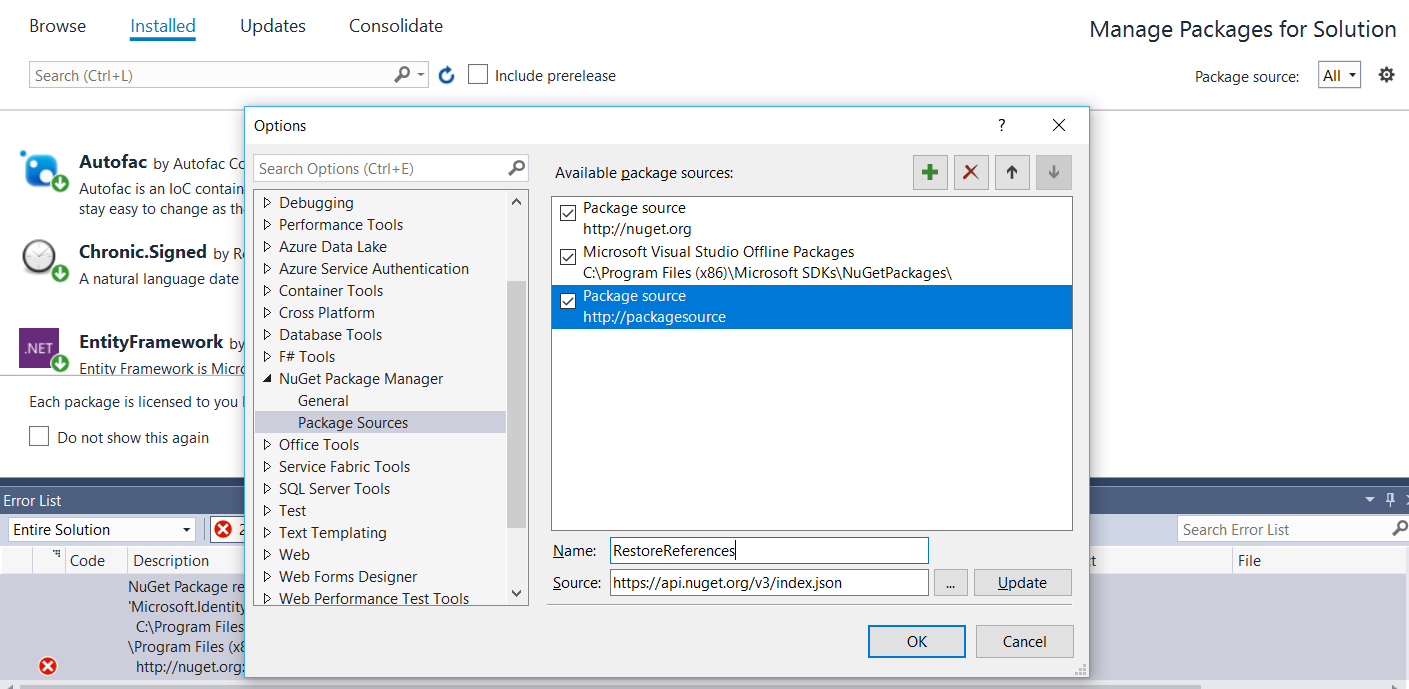
We can do that by heading over to the NuGet Package manager settings and adding the DLL source from which we can get the latest reference. I have added the source as “https://api.nuget.org/v3/index.json”
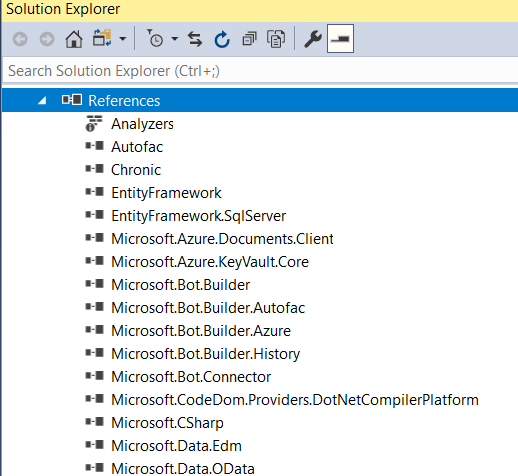
Clicking on restore button would add the latest reference to the missing DLLs
Setup Azure Cognitive Service API
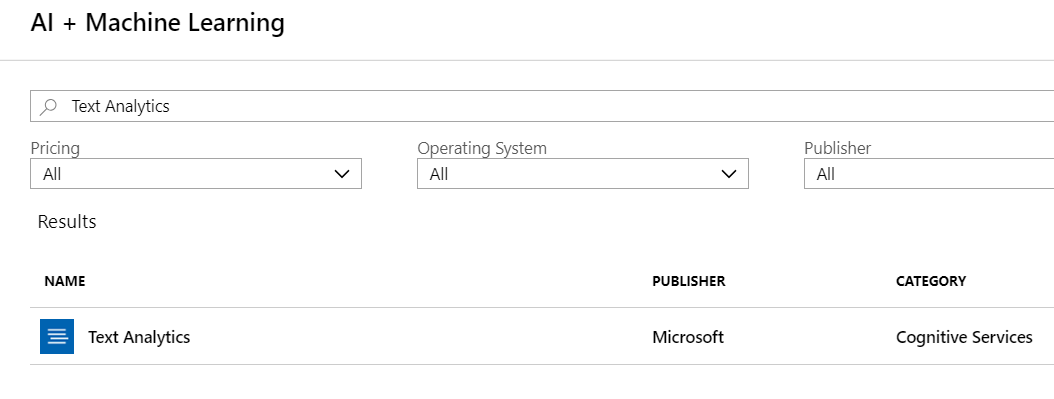
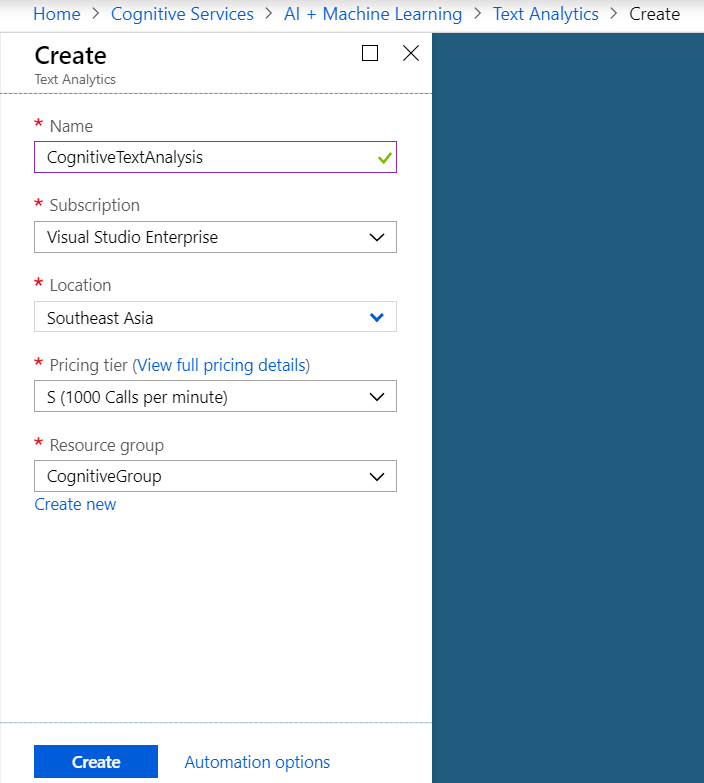
Before we can use the Cognitive Service API, we should create a cognitive service account using the Text Analysis API. We will get a key that is generated during the signup which would be used along with the API URL for connecting to the Cognitive service. From AI + Machine Learning Choose Text Analysis
Specify the required fields that would determine the name, location and the resource group of the Cognitive Service Account.
Clicking on create would provision the account and we can get the Endpoint URL from the Overview section.
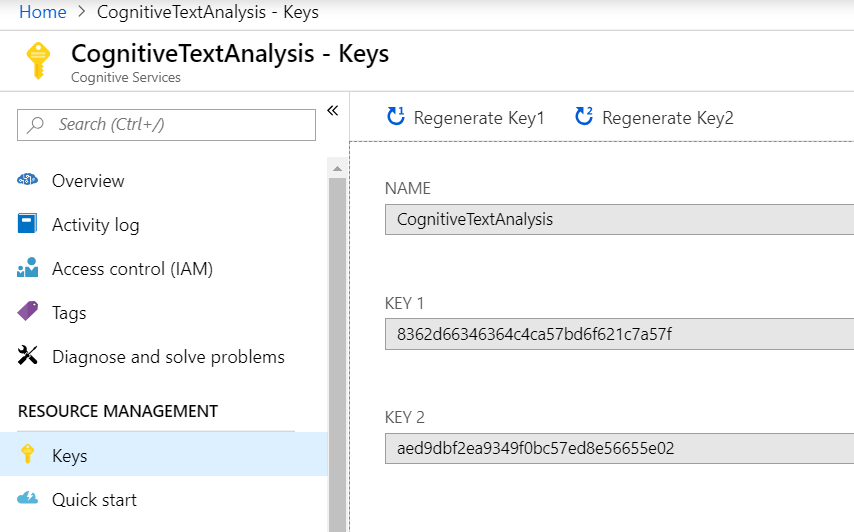
Keys which we will use in the code can be obtained from the Keys section.
Working with the Code
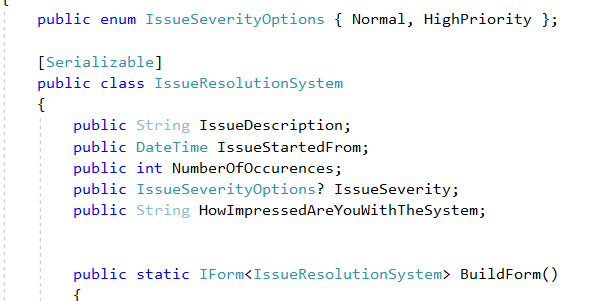
We will have the below variables that would determine the process of the issue resolution system
Bot Variables |
Usage |
Data Type |
IssueDescription |
Defines the User issue |
String |
IssueStartedFrom |
Defines the start date of the issue |
DateTime |
NumberOfOccurences |
Defines the number of times the issue occurred |
int |
IssueSeverity |
Determines the priority |
Enum IssueSeverityOptions { Normal, HighPriority } |
HowImpressedAreYouWithTheSystem |
User Input about the system which will be used for Cognitive Analysis |
String |
score |
Hold the Sentiment Analysis score |
var |
So as to design a bot using FormFlow, we must specify the data that the bot needs have to collect from the user who is at the other end. In our case, since we are creating a Help Desk Assistant then we must define a form that contains fields for getting the above table information from a user. To achieve that we will define the form by creating a C# class that contains the above fields defined as public properties to represent the specific question that the bot will ask the user.
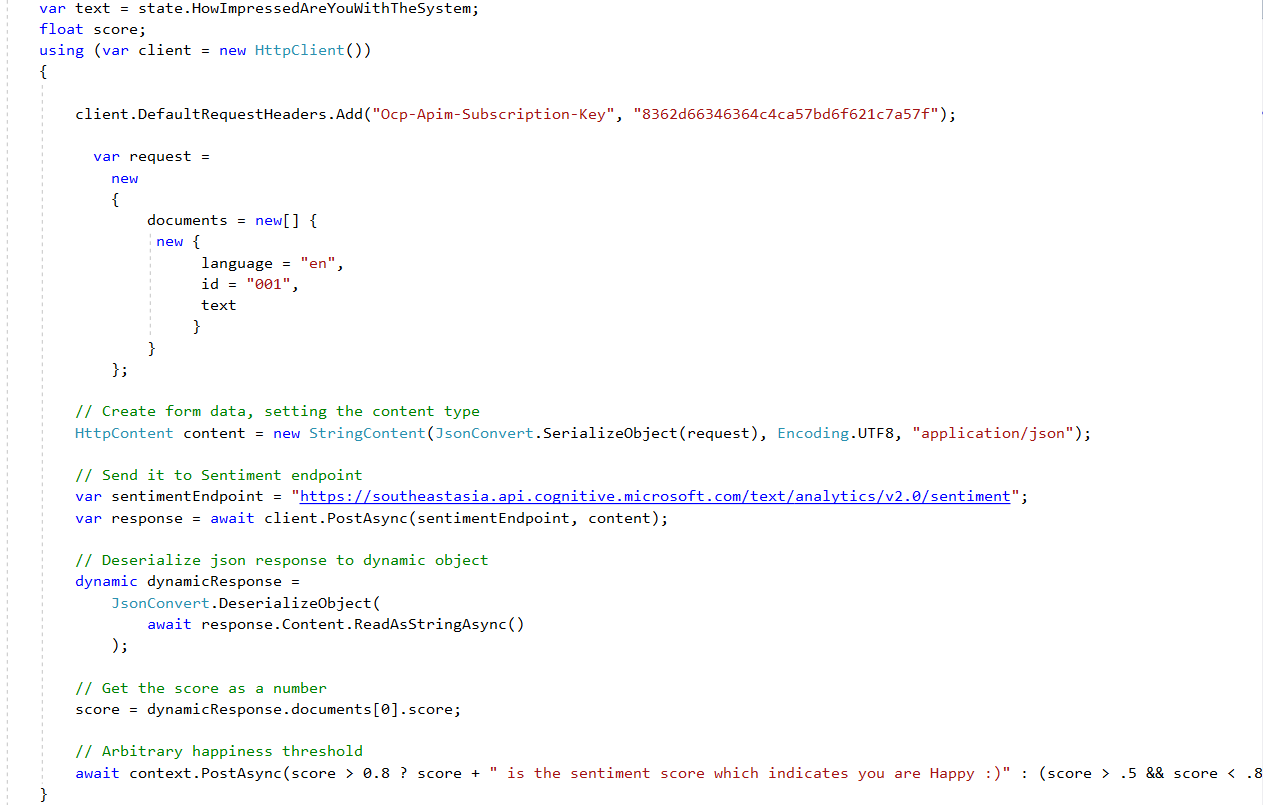
The IssueResolutionSystem class defines the form, the public properties define the questions and the enumeration defines the options for the questions. The class also includes the static BuildForm method that uses FormBuilder to create the form, call the Cognitive Service API endpoint, get the score, save the User Inputs as well as the sentiment score to the SharePoint Online Back end which will trigger Microsoft Flow.
Calling the Cognitive Service Endpoint
The Cognitive Sentiment Analysis API performs an algorithmic evaluation of the user text input and returns a sentiment score ranging from 0 to 1. This helps in identifying the positive/negative sentiment in forums, discussions, feedbacks and social media. As of now, Sentiment Analysis supports English, German, Spanish, and French while the full list of languages which are in preview can be found here
In order to call the service endpoint, we must pass the text to be analyzed as a JSON document in the format: id, text, language.
{
"documents": [
{
"language": "en",
"id": "1",
"text": "I love this sentiment analysis feature. Let me integrate this with my help desk assistant"
}
]
}
Once we have the JSON document structured, get the Authorization Key which we had noted down while creating the text analysis account in Azure and follow the below steps :
- Create a POST request
- Set the HTTP endpoint for sentiment analysis. You can get the Endpoint URL from the Azure Portal. Ensure to add /sentiment to the URL
- Set the client.defaultrequestheader to include the access key for Text Analytics operations
The return value of the POST request call would be the sentiment score which can be utilized to identify the user sentiment.
Save the Data to Back End SharePoint
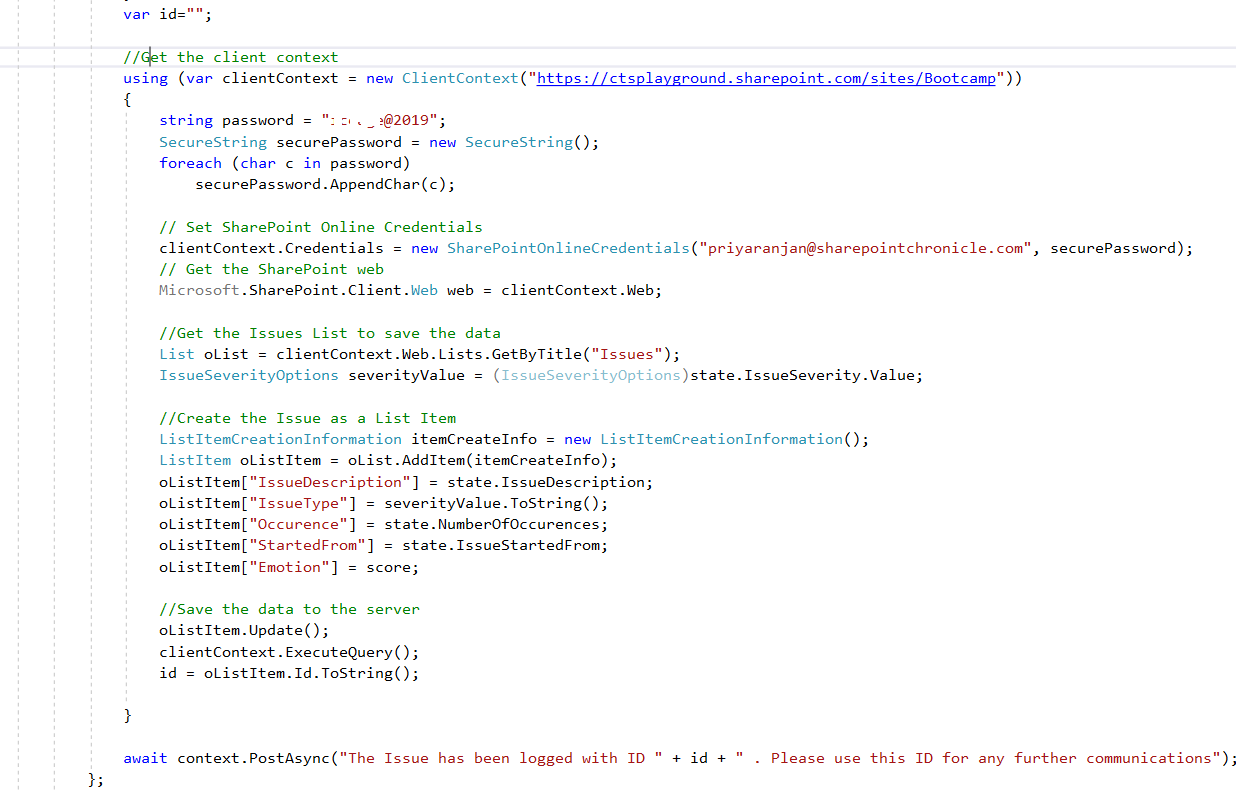
In order to do further processing of the user input and to kick start the Business process using Microsoft Flow, we have implemented the code to perform the saving of the data by leveraging the Microsoft.SharePoint.Client.dll. The below code saves the user input to SharePoint Online List as an Item.
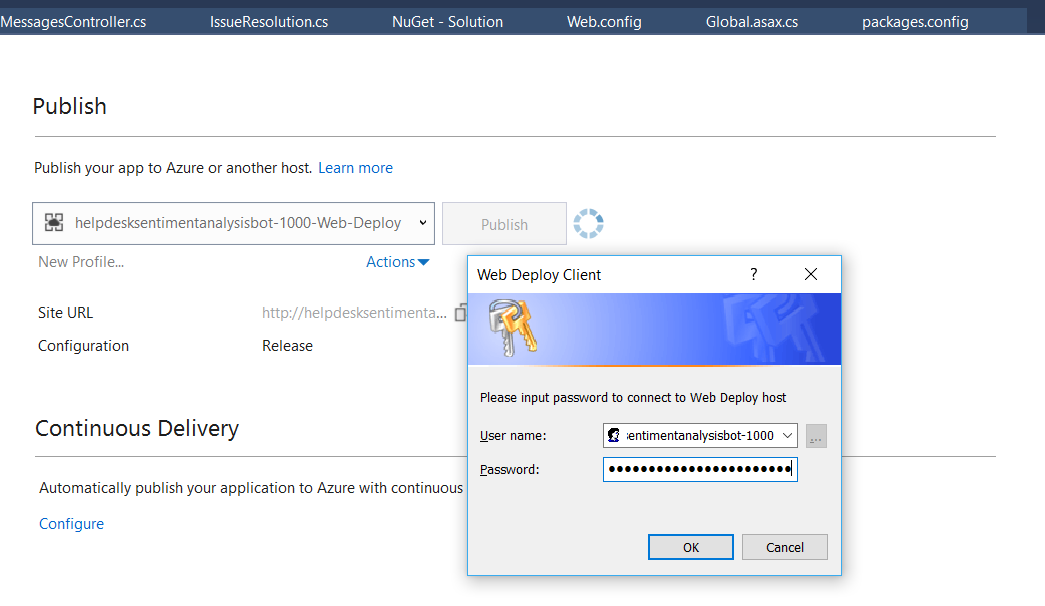
Now that we have the code in place, let's build and publish the bot to Azure.
We can test the Bot directly using the Web channel.
SharePoint Online List Formatting
We will add additional functionality to our SharePoint List back end so that whenever an issue is created as an Item in the List, We will check the value of the sentiment score returned by the cognitive analysis API and convert the value into an emoji as well as a do cell highlighting. The sentiment score would be saved in the “Emotion” column.
We will use the column formatting option in SharePoint that would read the value and customize how it is rendered. To do this, we will construct a JSON object that will describe the elements that are displayed when a field is included in a list view, and the styles to be applied to those elements.
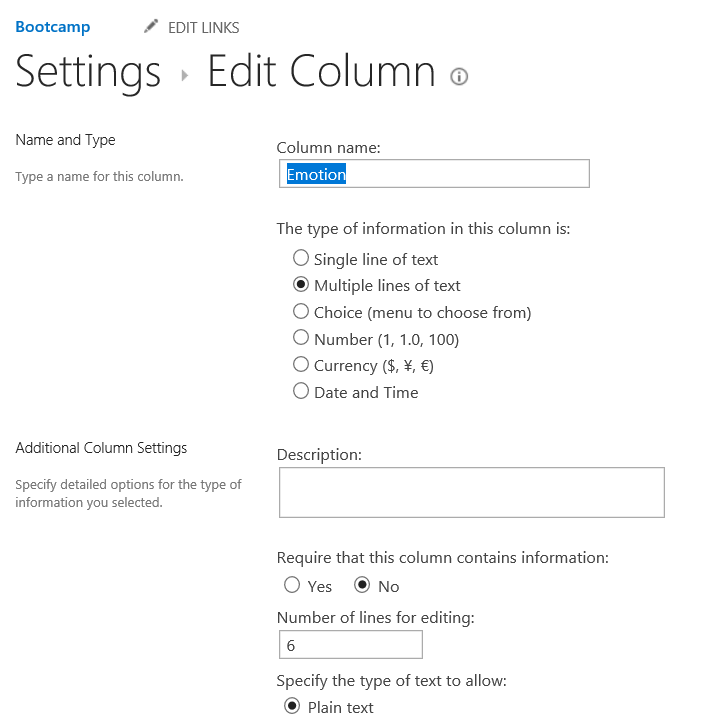
So let’s head over to the List Settings -> column “Emotion”
Add Emoji to the Cell
Add the JSON object that would read the cell value and conditionally convert it to an emoji based on the field value. In the Children Attribute node, We will be assigning “Happy” Emoji if the sentiment score is above .8, Neutral emoji if the sentiment score is between .5 & .8 , “Sad” emoji is the value is < .5 .
Update the Cell color
So as to highlight the cell color, we will update the Parent Attribute node to highlight the cell with 'sp-field-severity--good' if value is above .8, ,'sp-field-severity--warning' if value is between .5 & .8, 'sp-field-severity--severeWarning' if value is < .5
Setting up Microsoft Flow
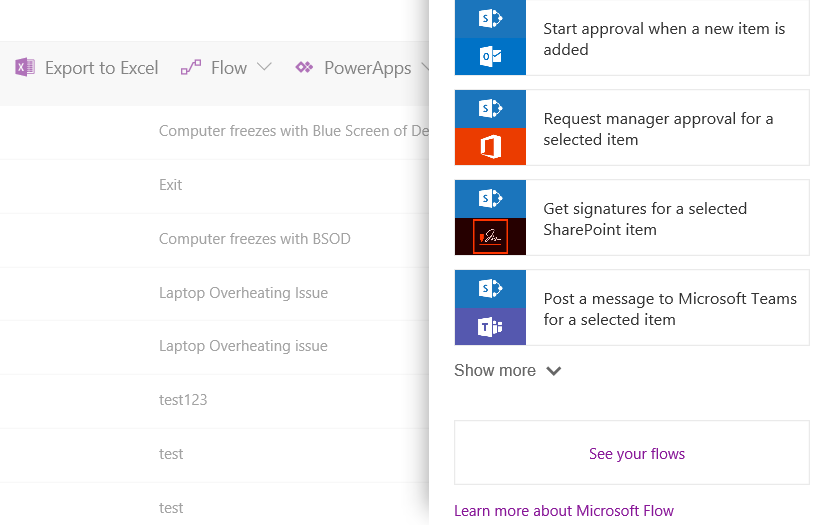
Before testing the Bot, we have to ensure that the Microsoft Flow that gets triggered in response to the Issue creation as SharePoint List Item is in place. Let’s head over to the Office 365 Workspace and go to SharePoint List. Here we can see the Flow tab, select “See your flows” to open the Flow portal where we can create the Microsoft Flow.
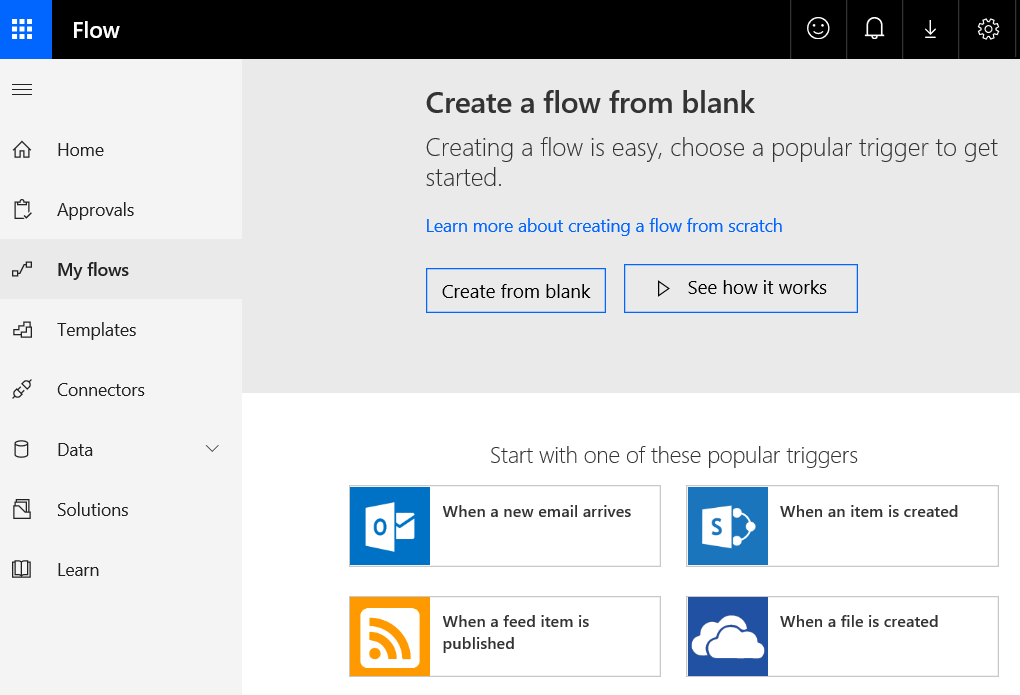
Select the “When an Item is Created” template to get started with the Flow creation.
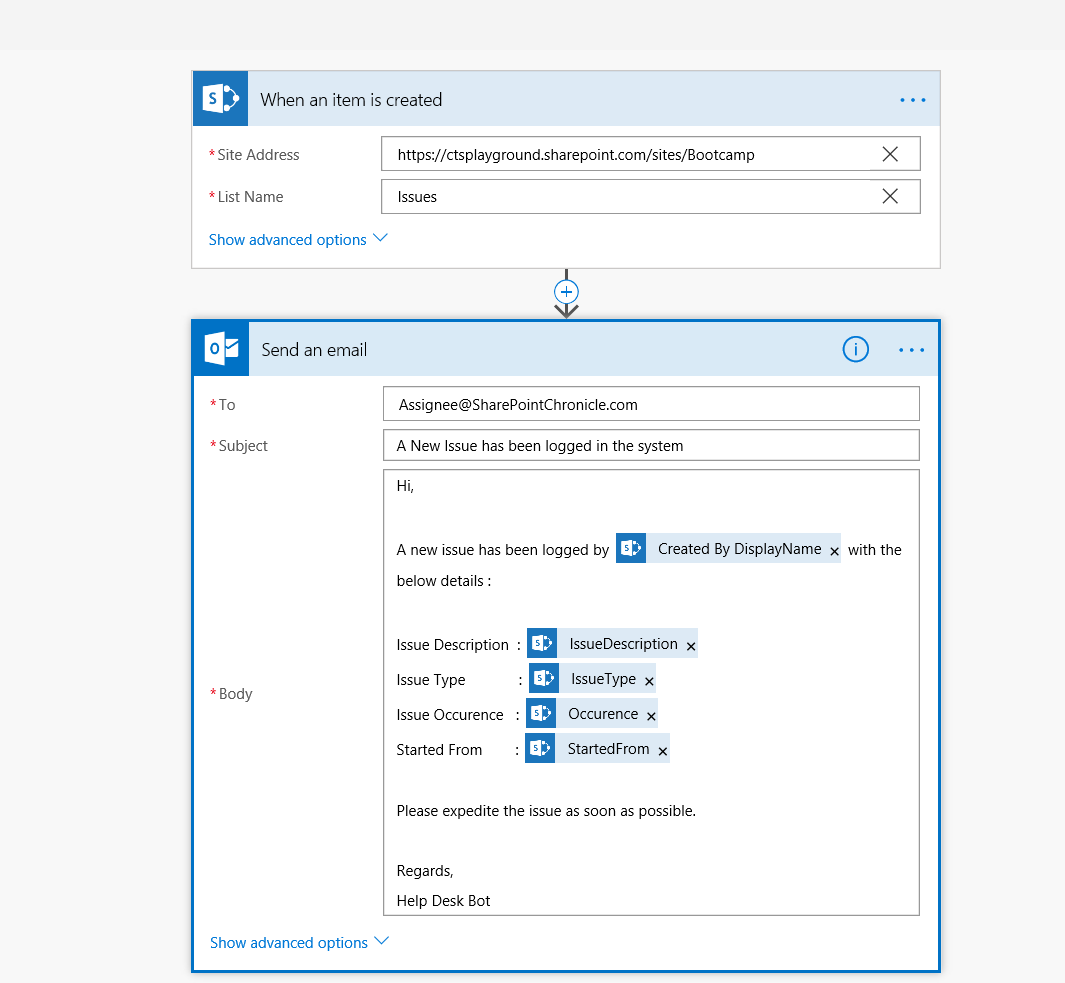
Specify the SharePoint Online Site Address and the List Name which will act as our backend. Add the Send an Email action and populate the To field with the Issue resolver’s mail Address, Subject, and Mail Body.
Save the flow. This would ensure that the Flow is triggered whenever an item is created in the SharePoint Online List via the Bot.
Add the bot to Message Channel
However, to integrate this for community use, we will see how to add the below channels as well :
- Microsoft Teams
- Skype
- Slack
Microsoft Teams Integration
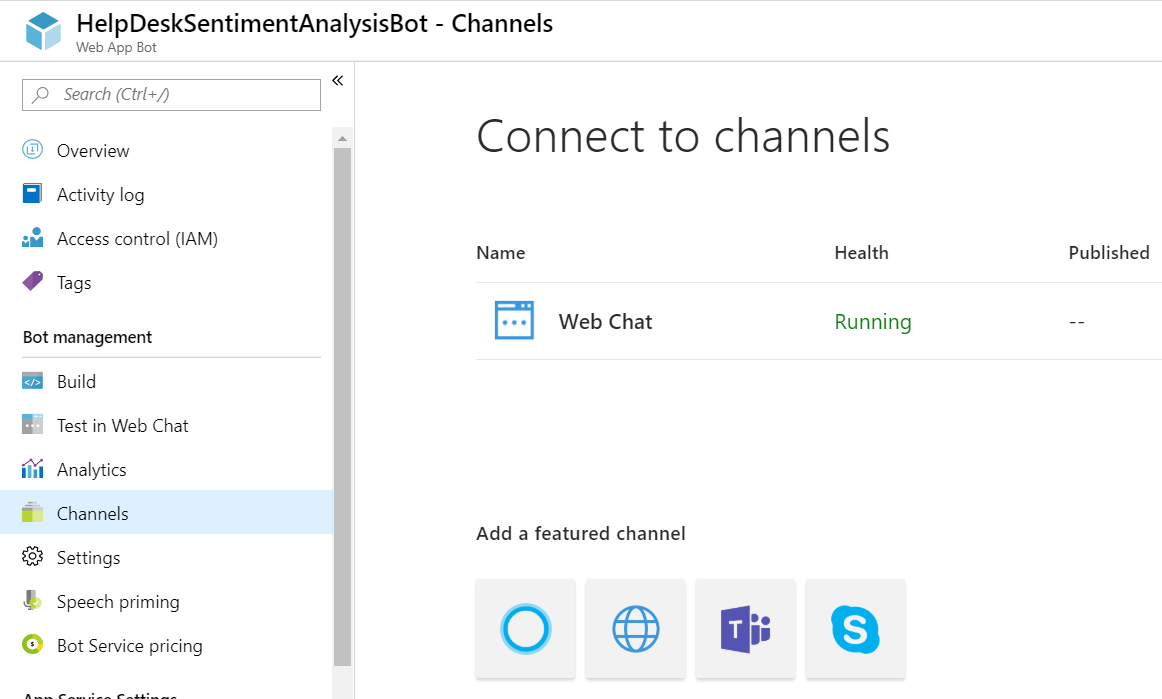
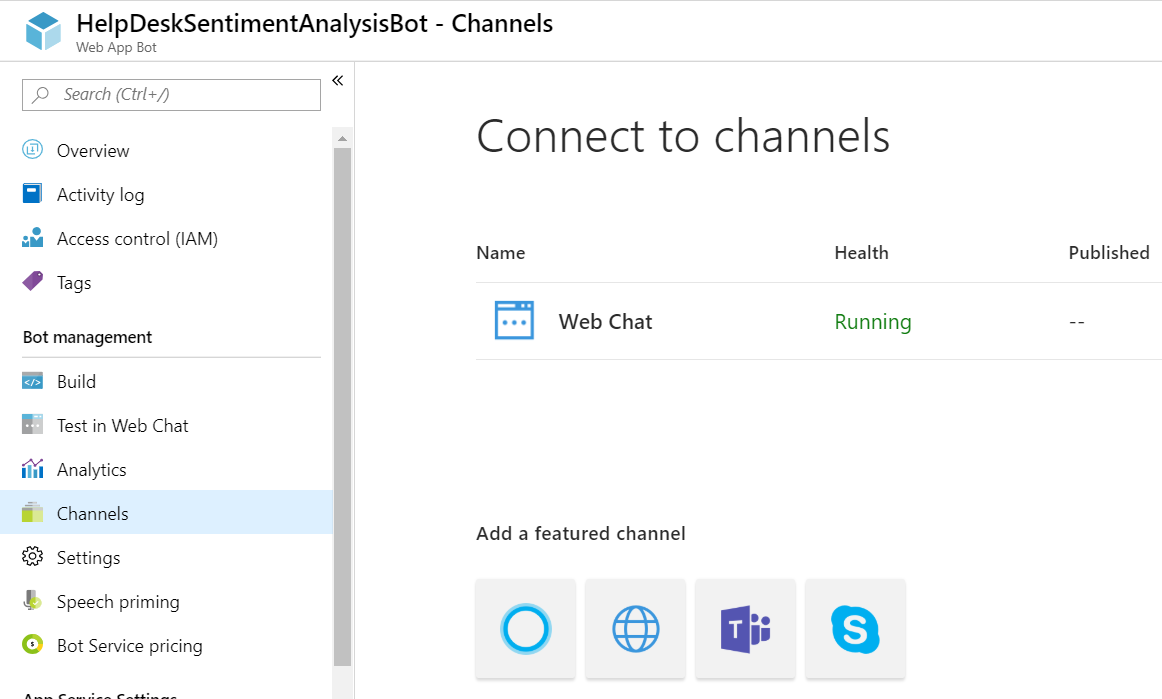
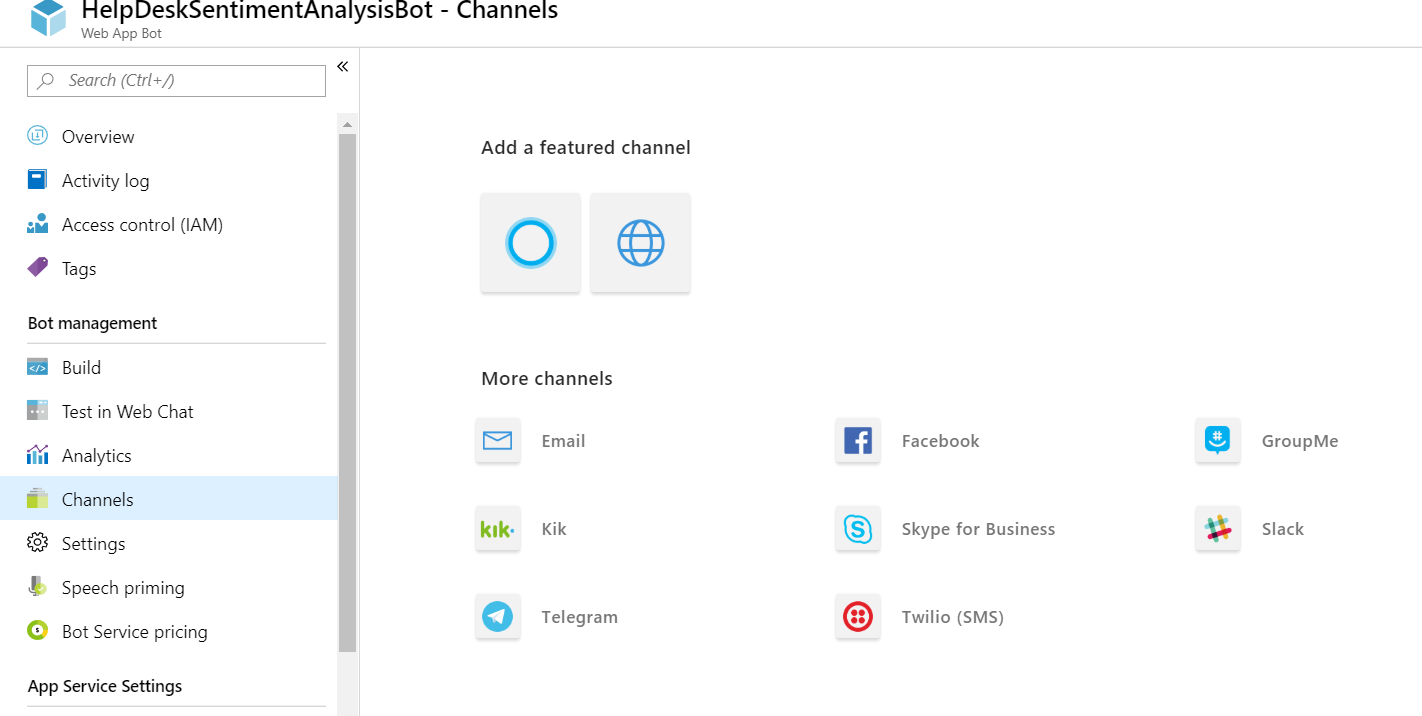
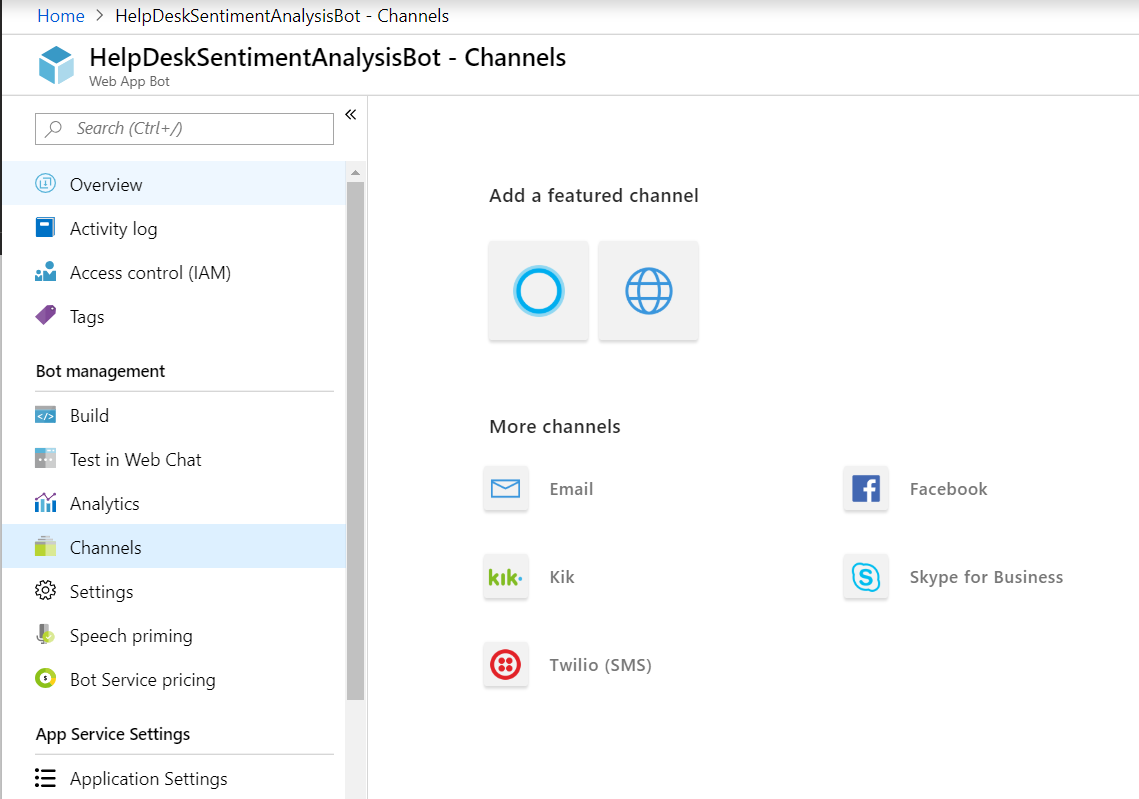
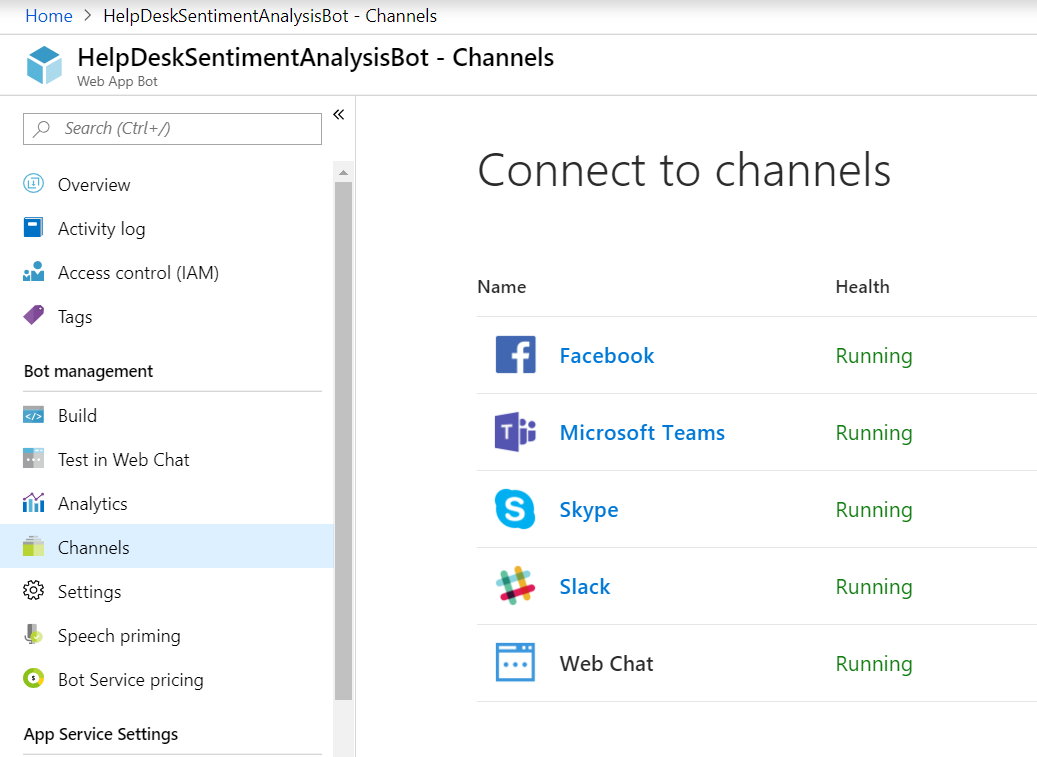
In order to Integrate Teams, head over to the Channels section in the Bot Service and Select Teams Logo.
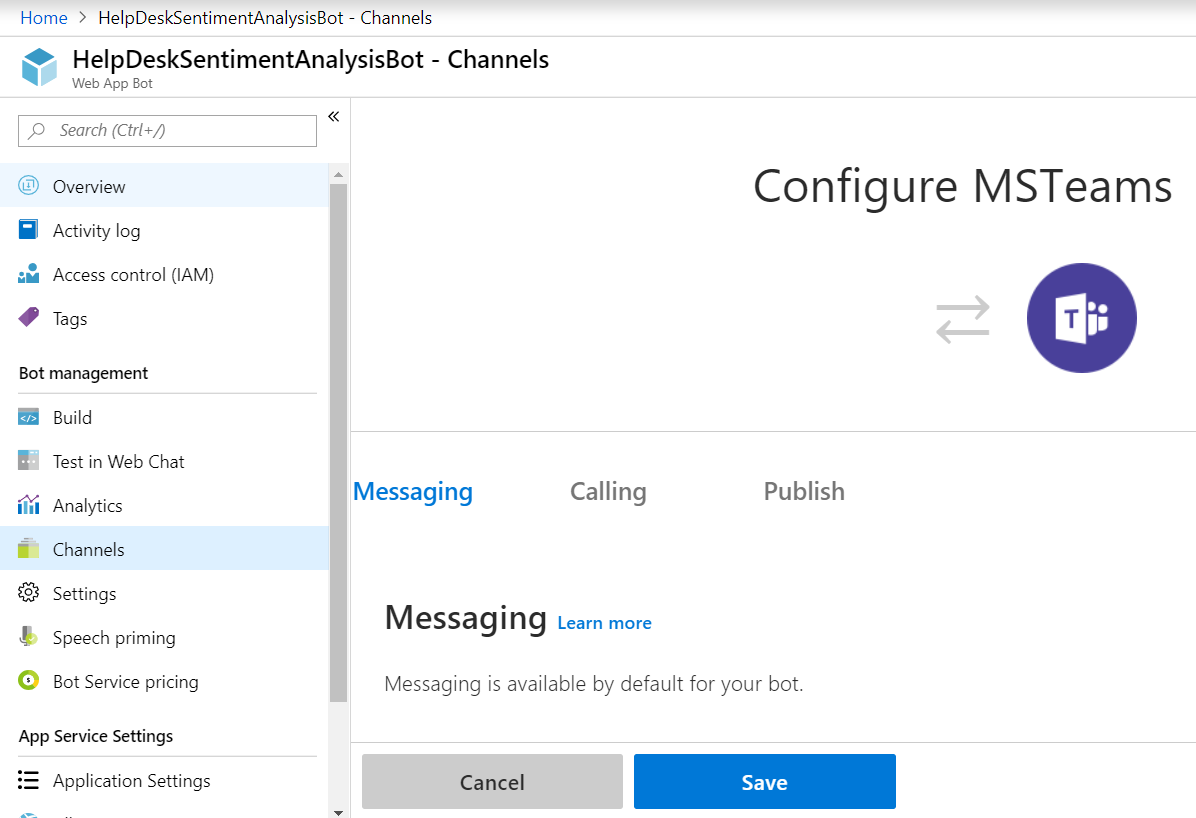
It will open the MSTeams configuration page. Click on Save to create the connection with Teams.
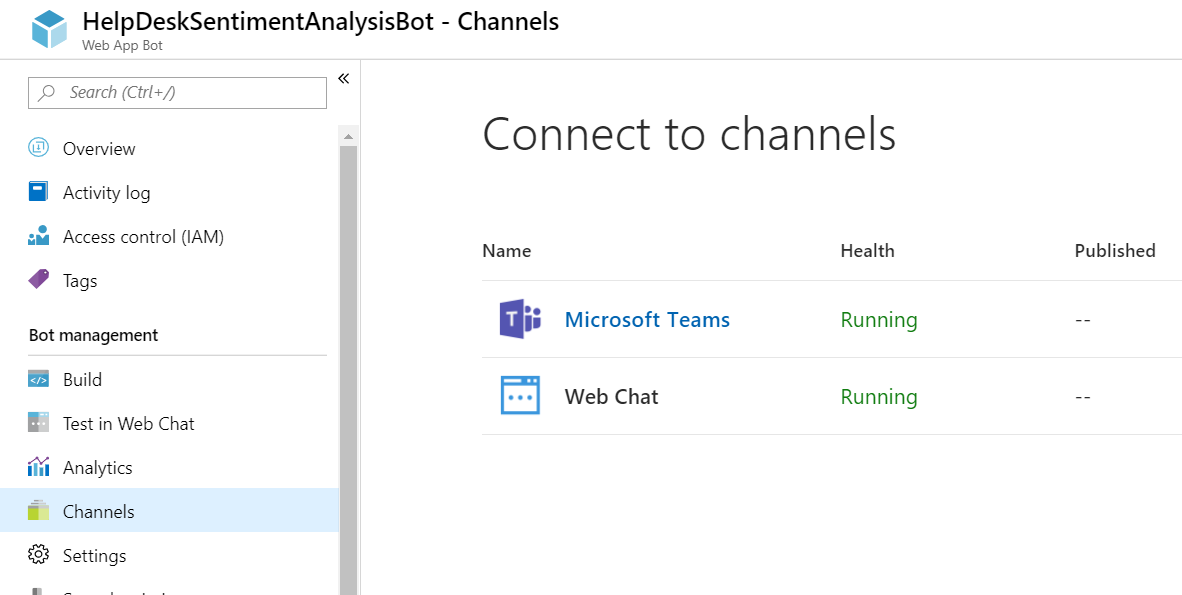
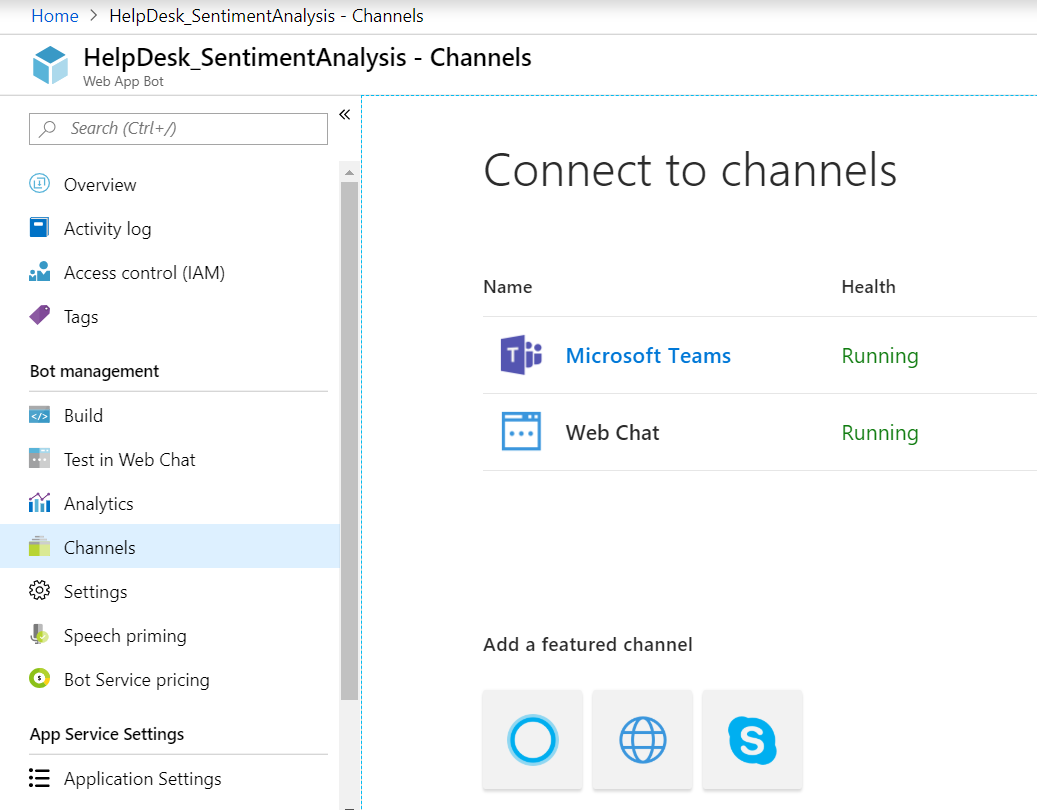
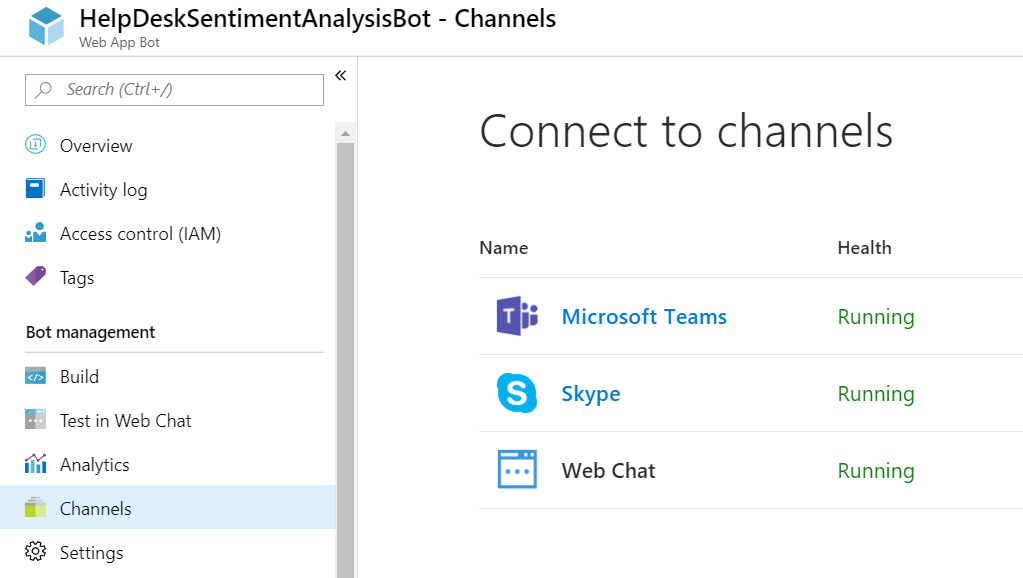
Now if we head back to the channels tab, we should see Team Channel up and running.
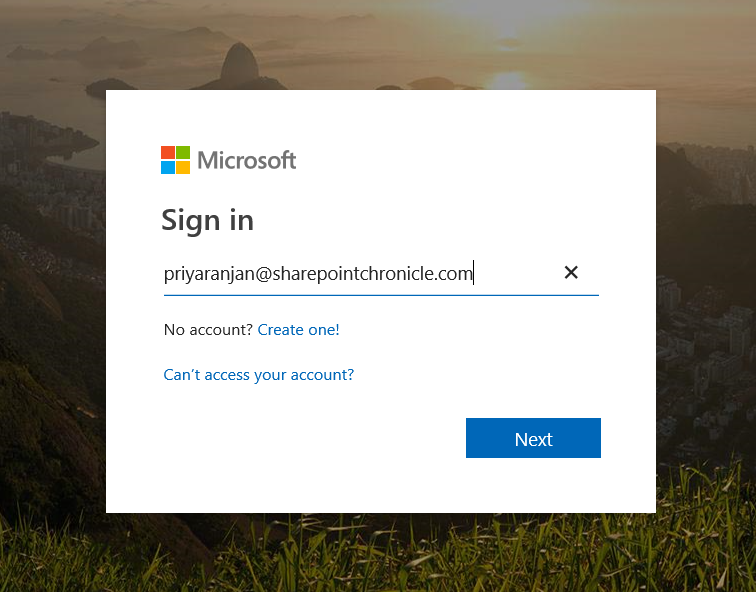
Clicking on Teams would open the dialog box where we can give the credentials to login.
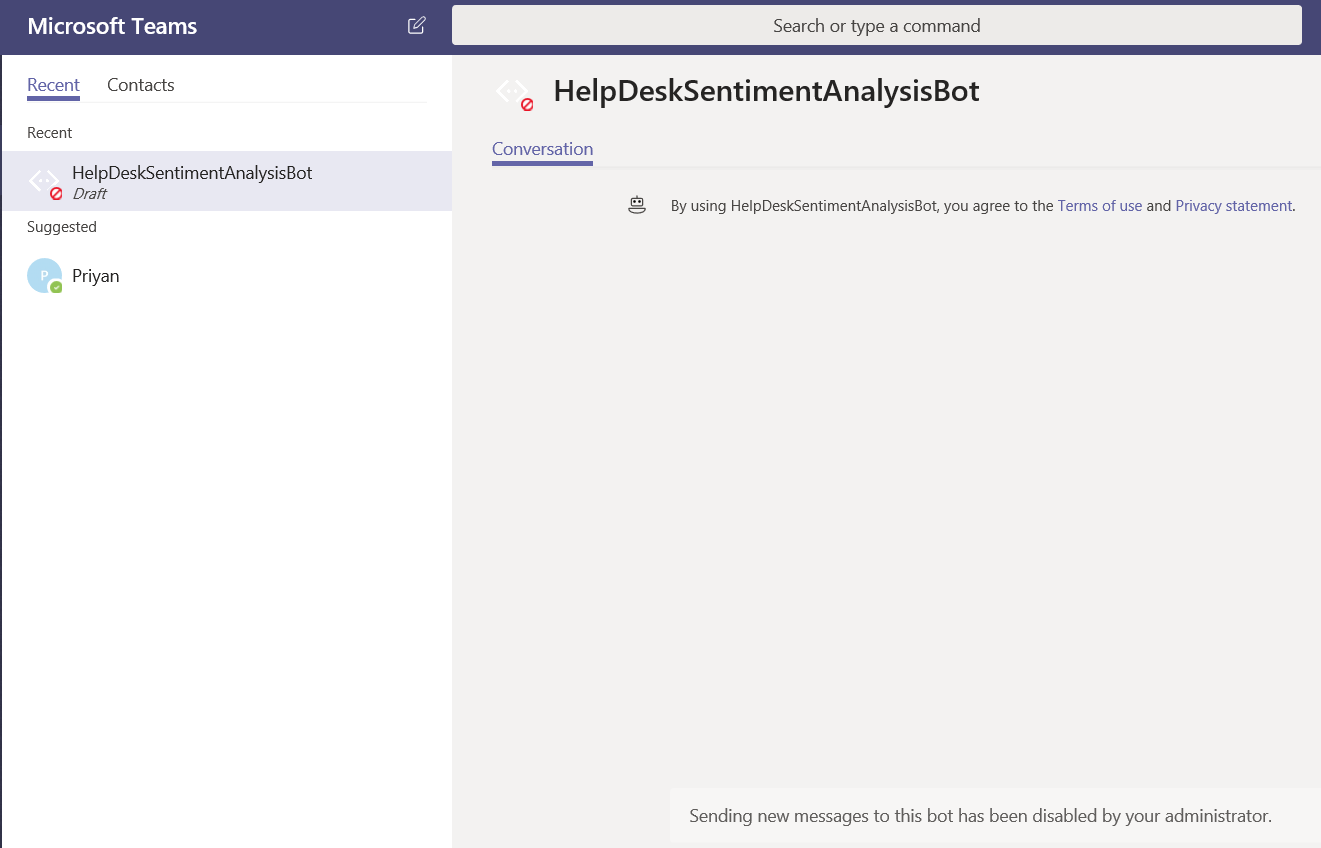
Thus we can see that the newly created Bot has been added as a contact to Teams. However, by default sending messages are disabled. This is because sideloading of apps has to be enabled from the Office 365 Admin center.
](resources/6406.29.PNG)
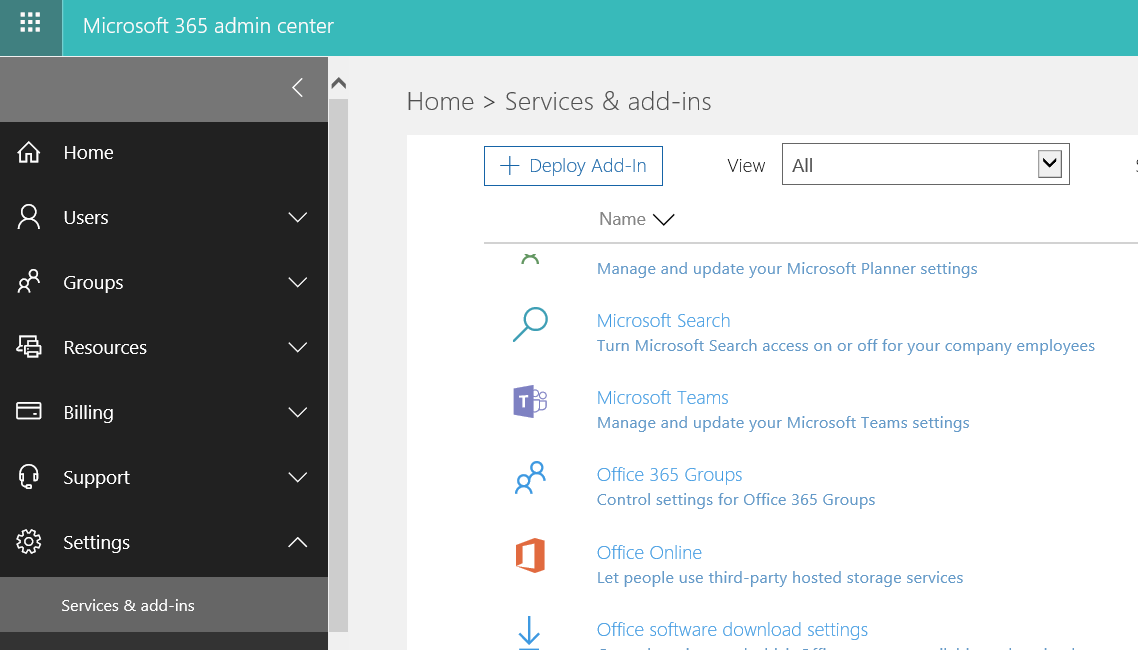
Head over to Microsoft 365 Admin center and select Microsoft Teams option from Services & Add-ins .
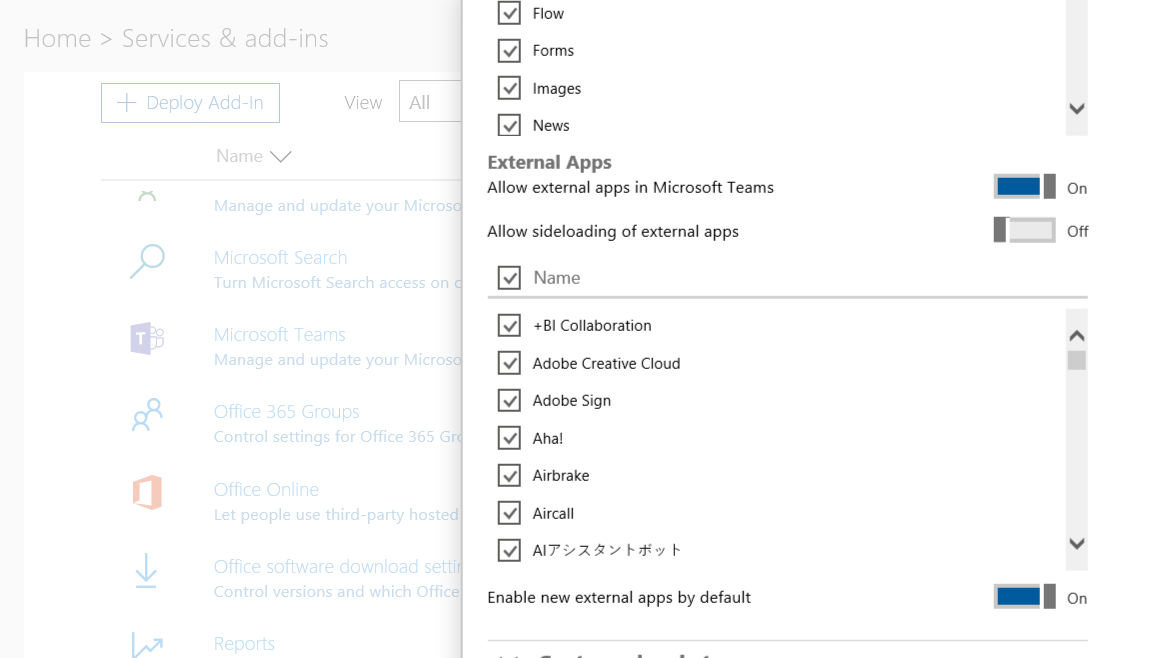
Switch On “Allow Sideloading of External Apps” to enable Bot messaging.
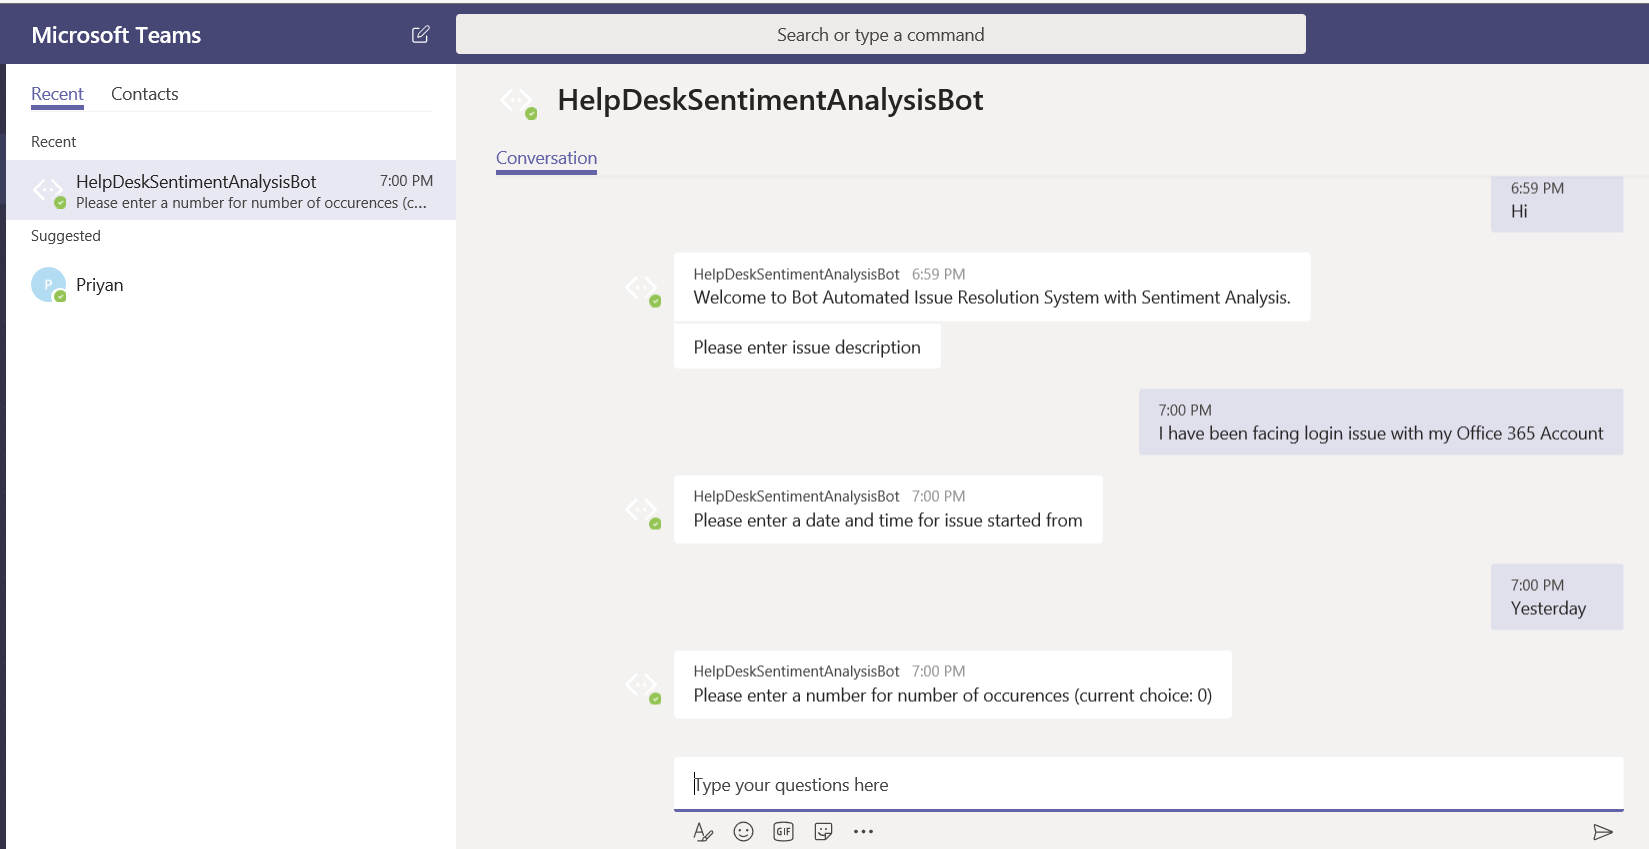
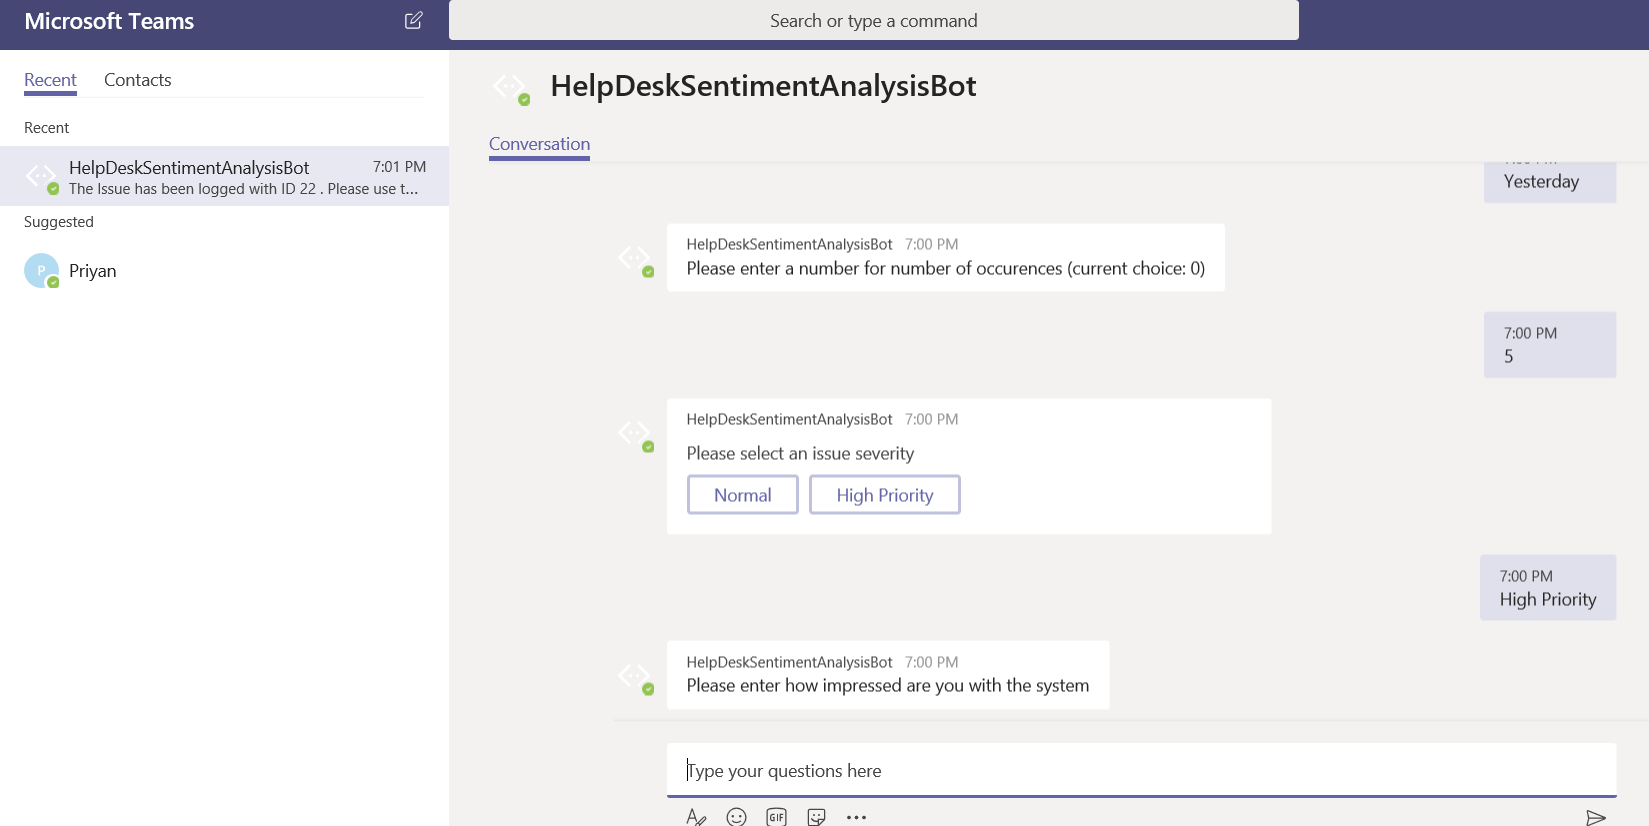
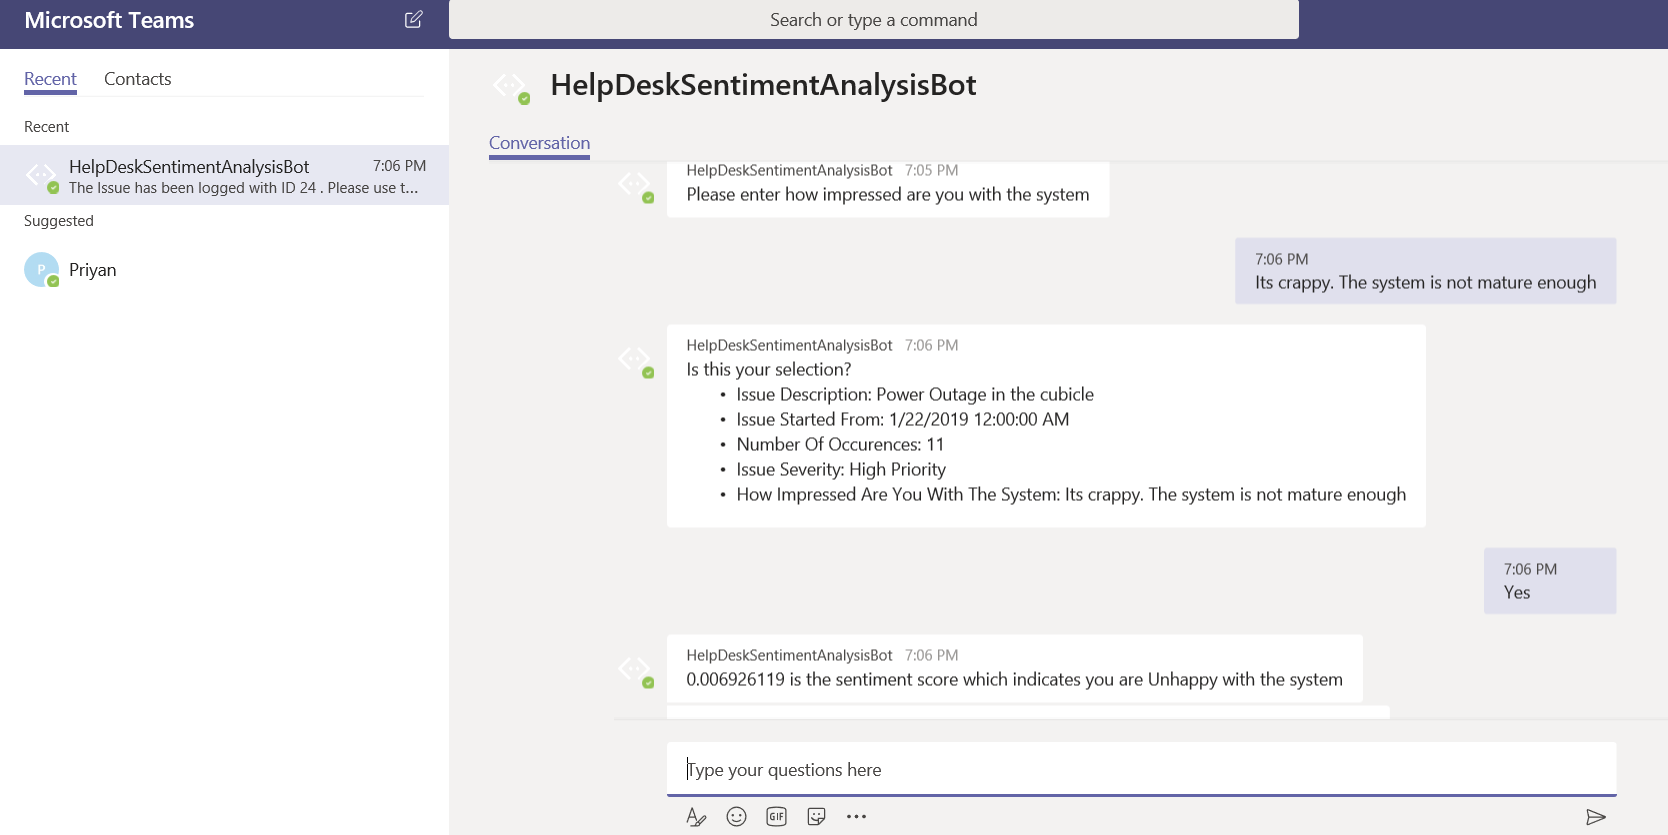
Now if we head over to the Help Desk Bot, we can see that the Messaging text box has been enabled. Let’s try to initiate a chat with the Help Desk Assistant and create an issue ticket.
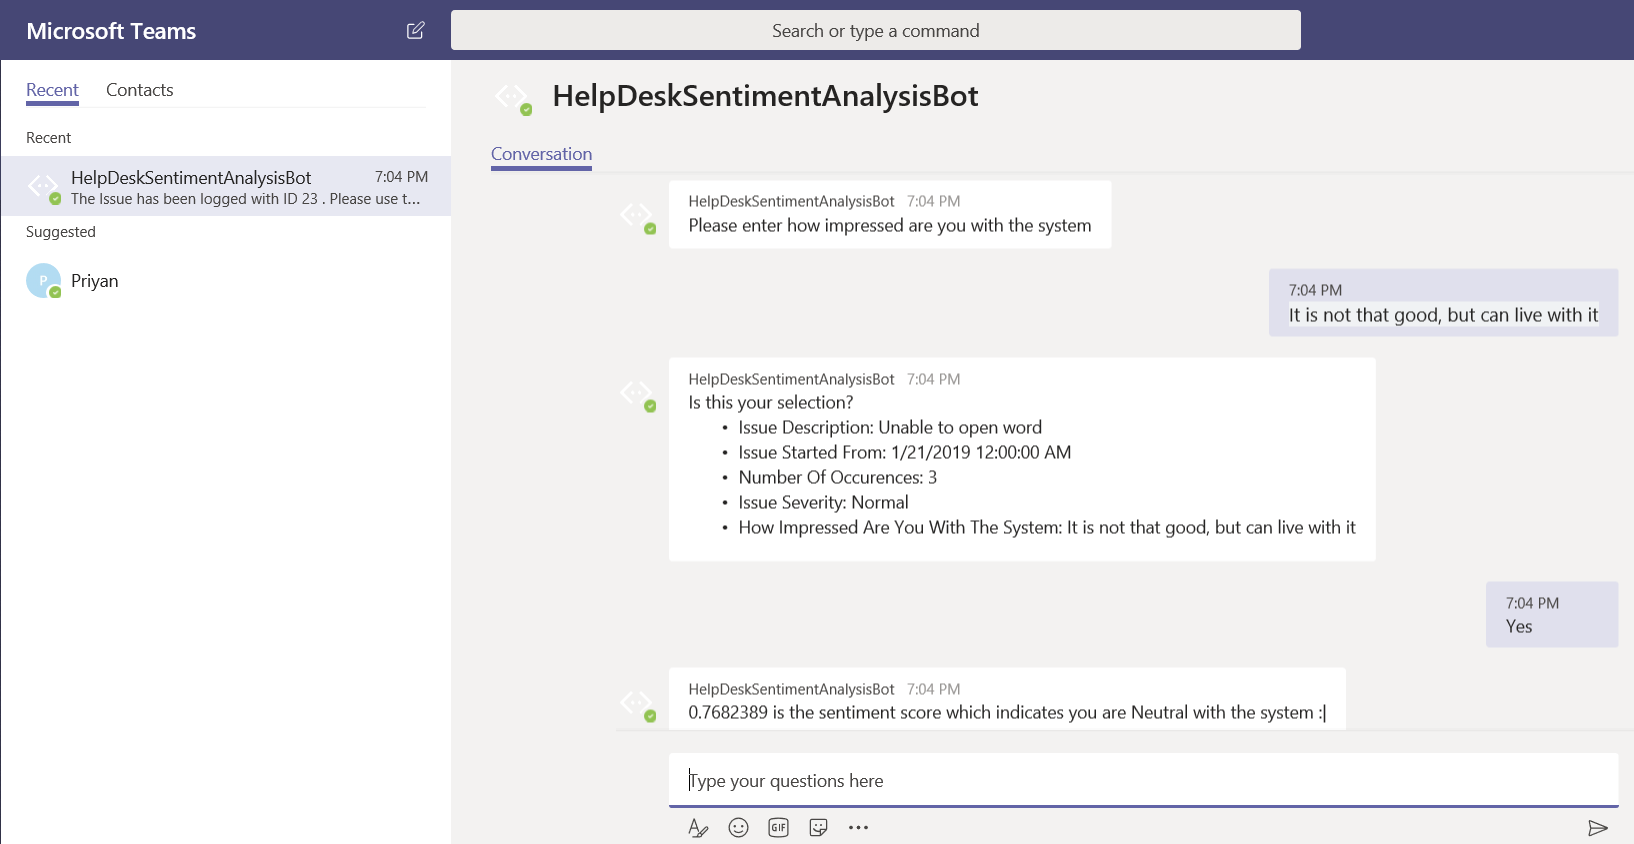
The form flow guided conversation will ask the questions as defined by the public properties.
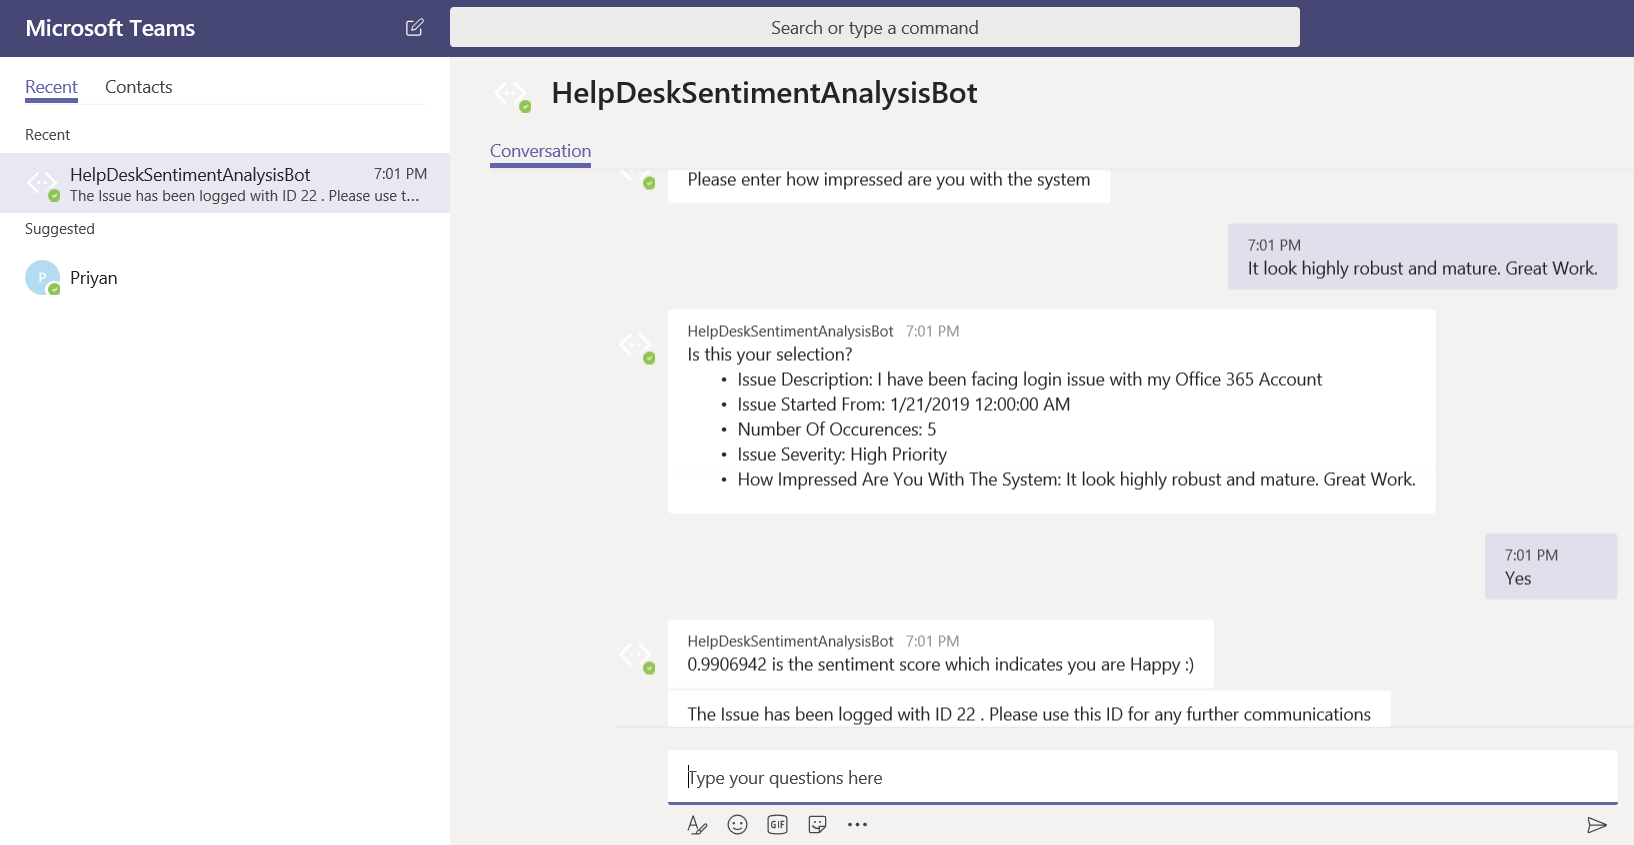
It will also ask feedback about the system which will be fed into the Cognitive Sentiment Analysis to retrieve the score.
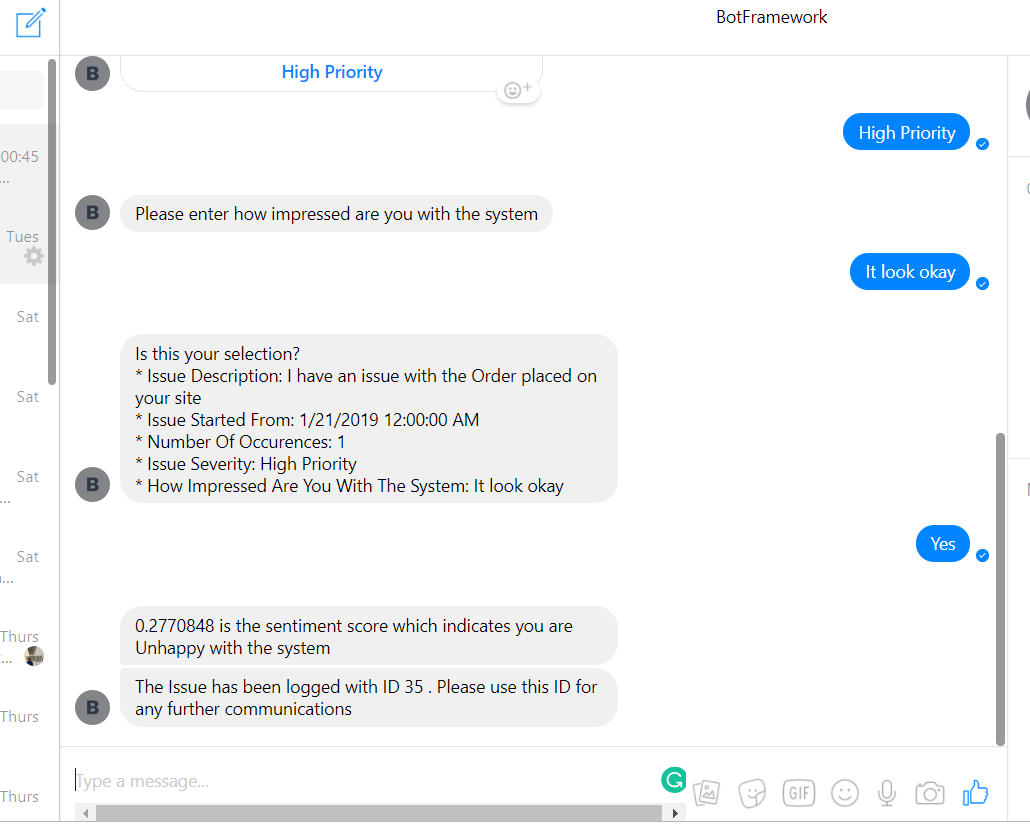
As you can see, based on the user input, it has calculated the score and has output to the console (for production scenarios you can skip outputting the score on to the window). This would create the Issue as an item in SharePoint List. A unique id will be assigned to each Issue and it would be output to the user for future reference.
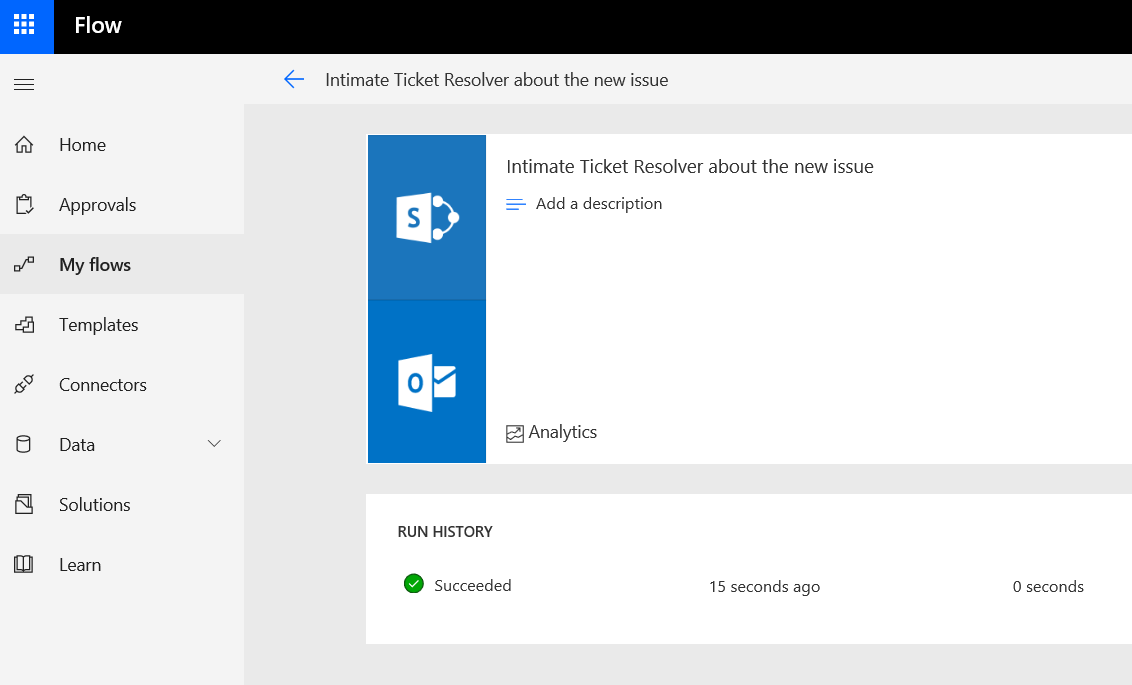
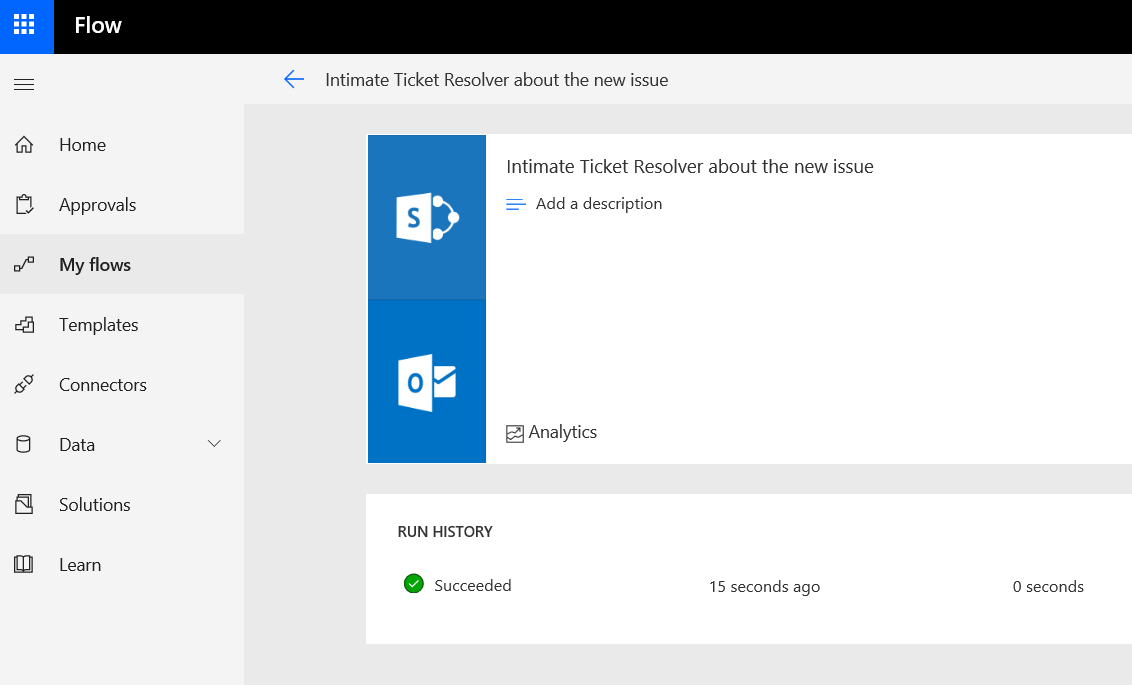
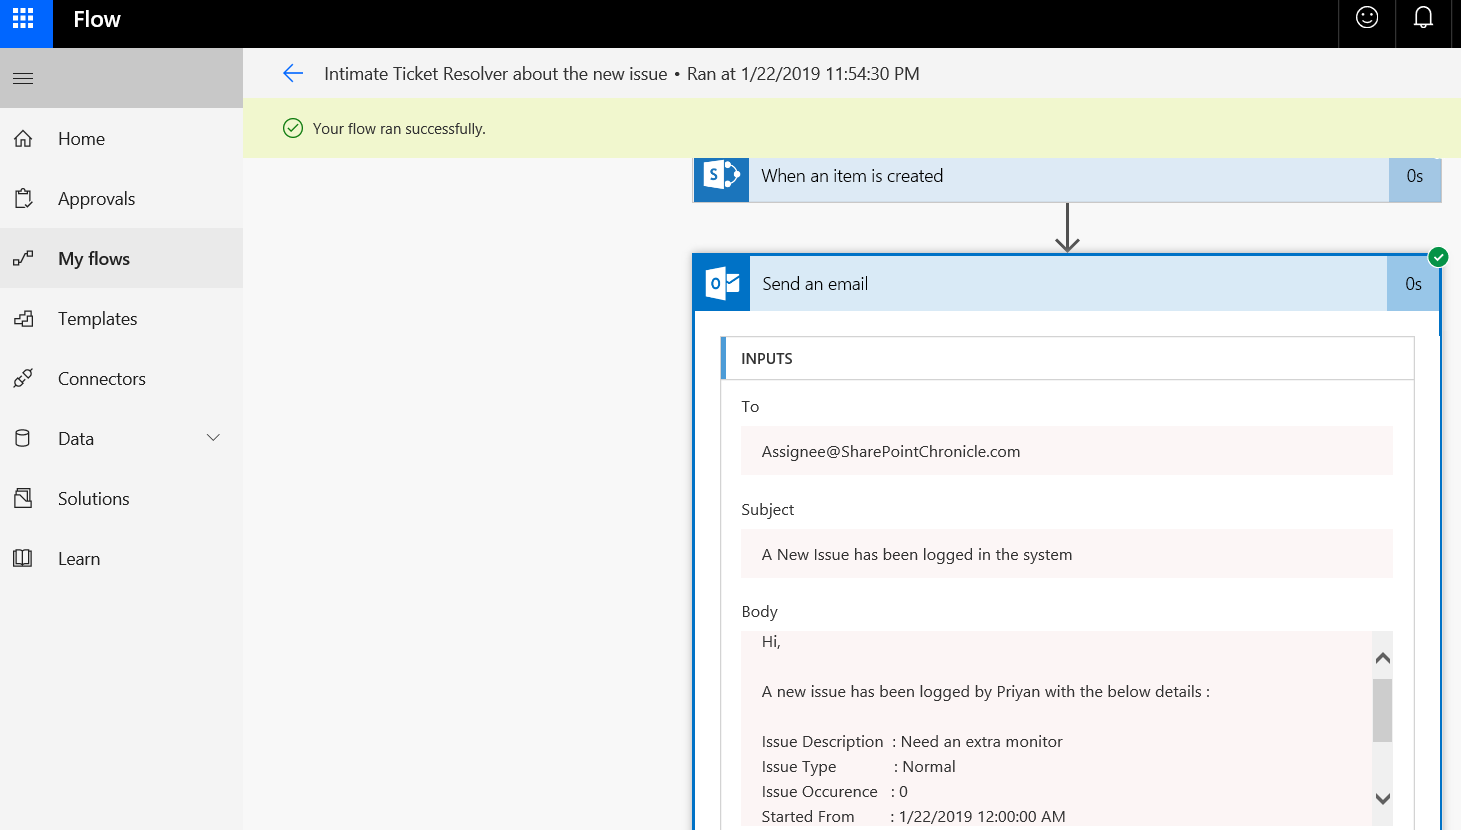
When the item is created, Microsoft Flow would be kick-started and would send the intimation mail to the Issue resolver. We can check the status of the triggered flow from the Flow Portal.
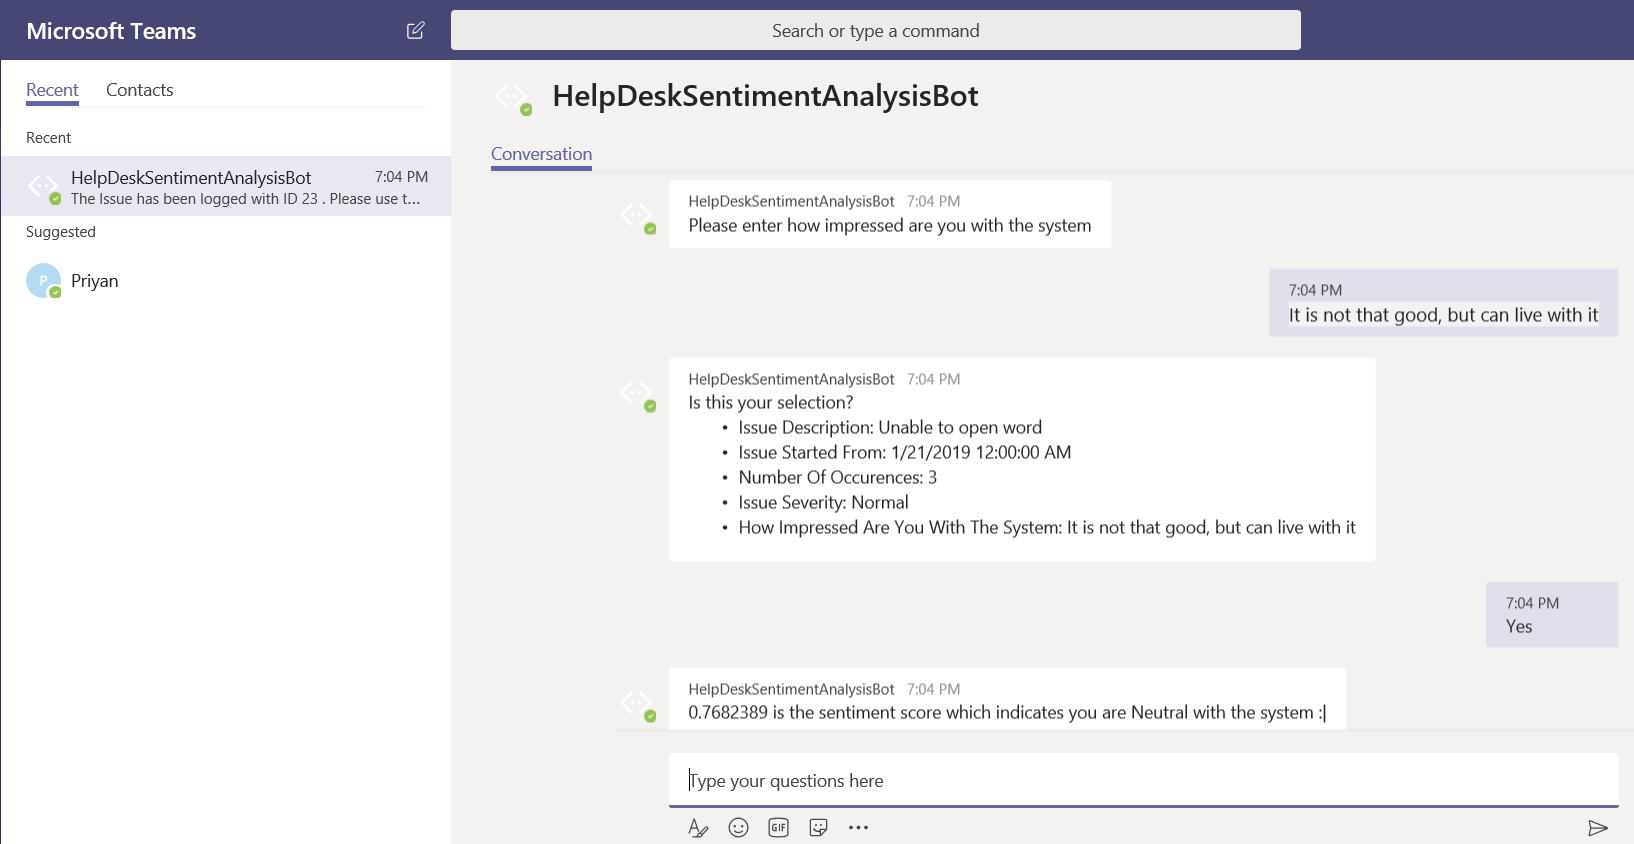
We can also see that with different texts we get a different score from the sentiment analysis API.
The score changes with user inputs and you can test it with different sentiment texts.
Integration with Skype
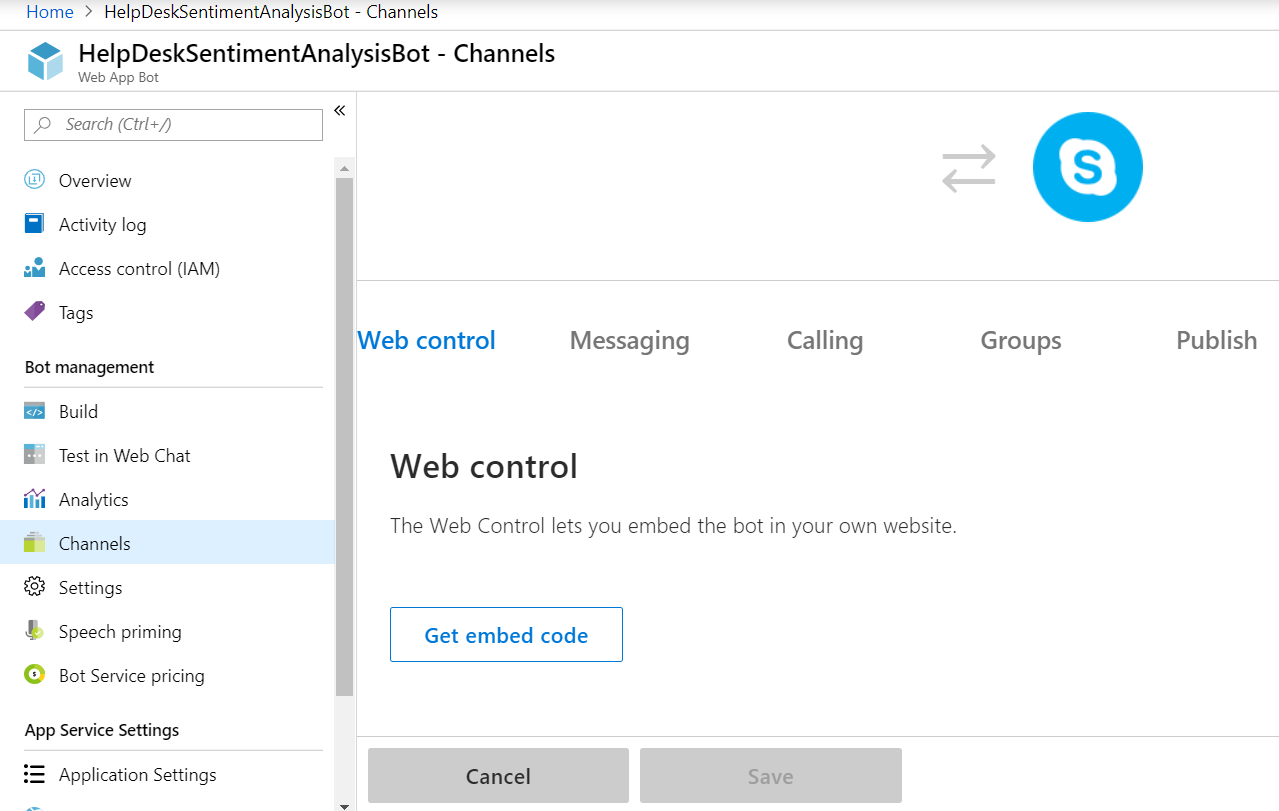
We will see how to integrate the bot with Skype. We can do it by going to the Channels section and select the Skype icon.
Make the required settings change like you can choose to enable adding the bot to a group.
Once you click on Save, it should be available in the Channels section.
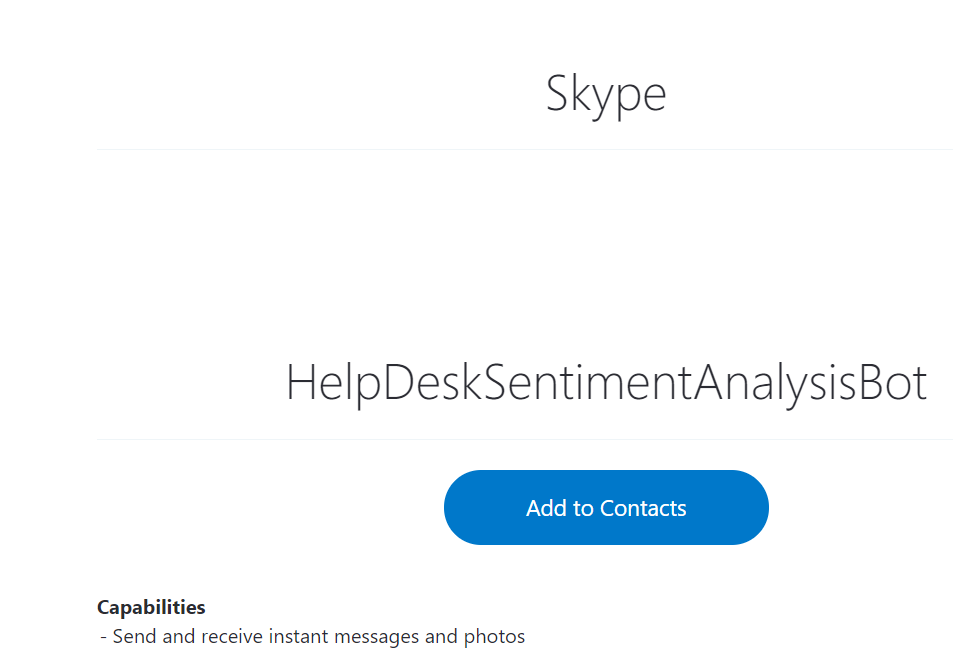
Click on Skype which will add the bot to the contacts list.
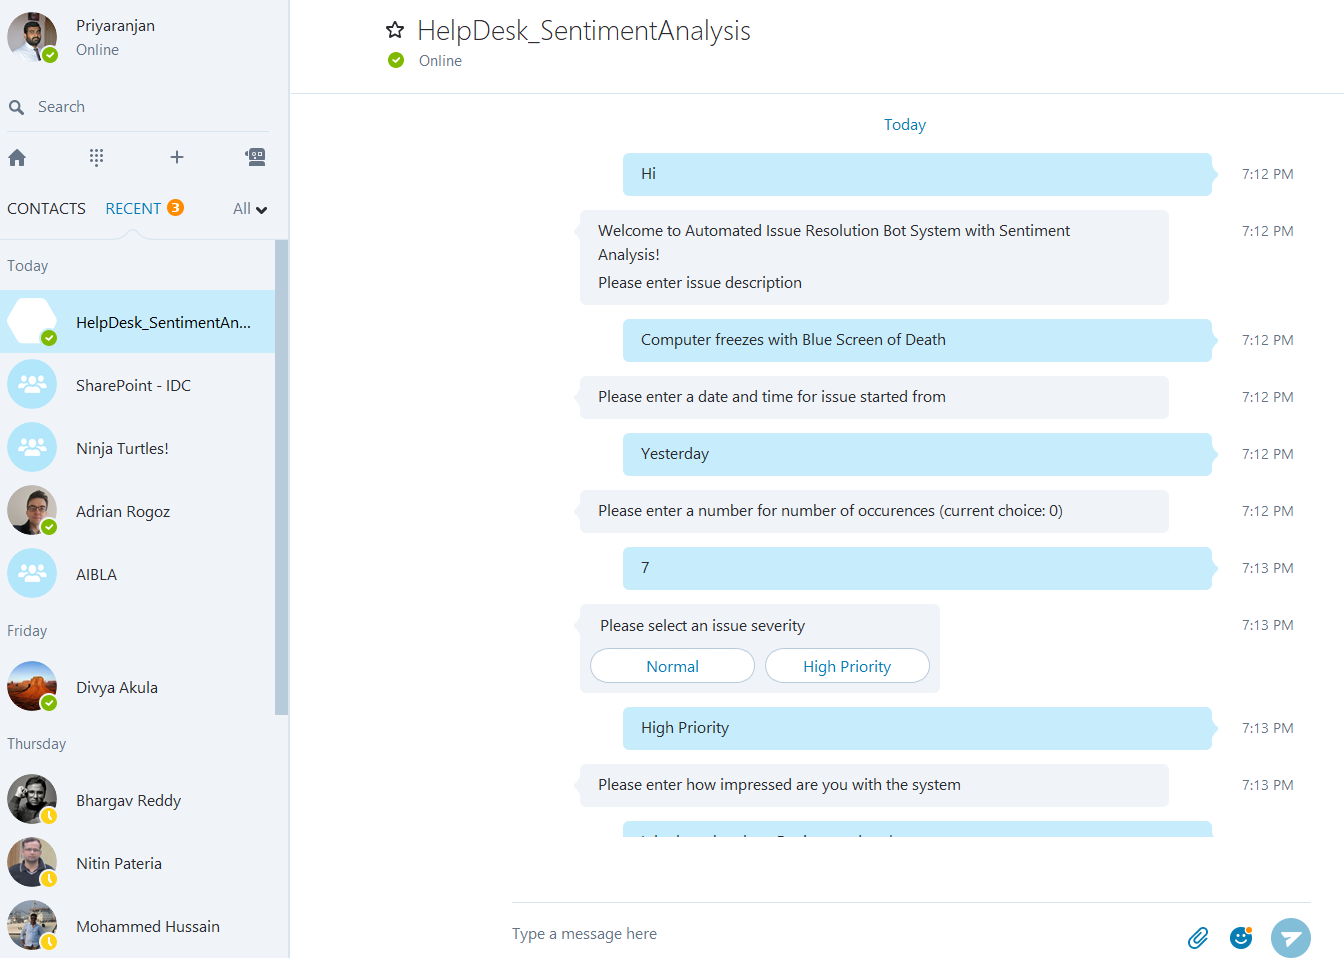
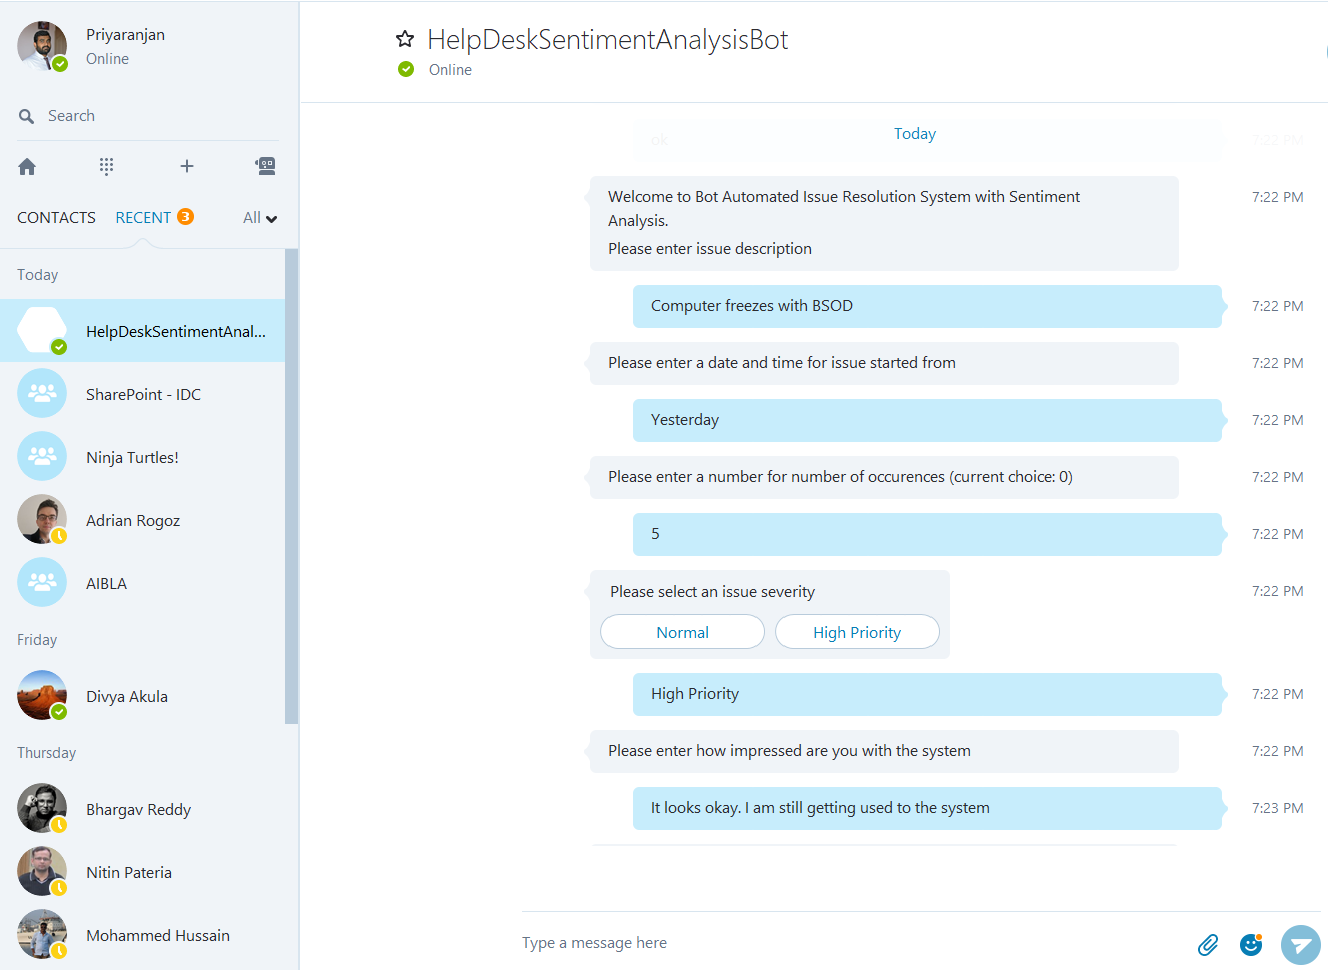
Now we can initiate a chat with the bot and create an issue ticket by following the guided flow.
Once the Issue details are entered, it will create the Issue as a SharePoint list item and return the Issue ID for user reference.
Remaining Business Flow would be taken care by Microsoft flow just like how we saw in the demo with Microsoft Teams.
Integrate with Slack
We can configure the help desk bot to communicate with users using the Slack messaging app. In order to do that head over to the Channels tab and select Slack option.
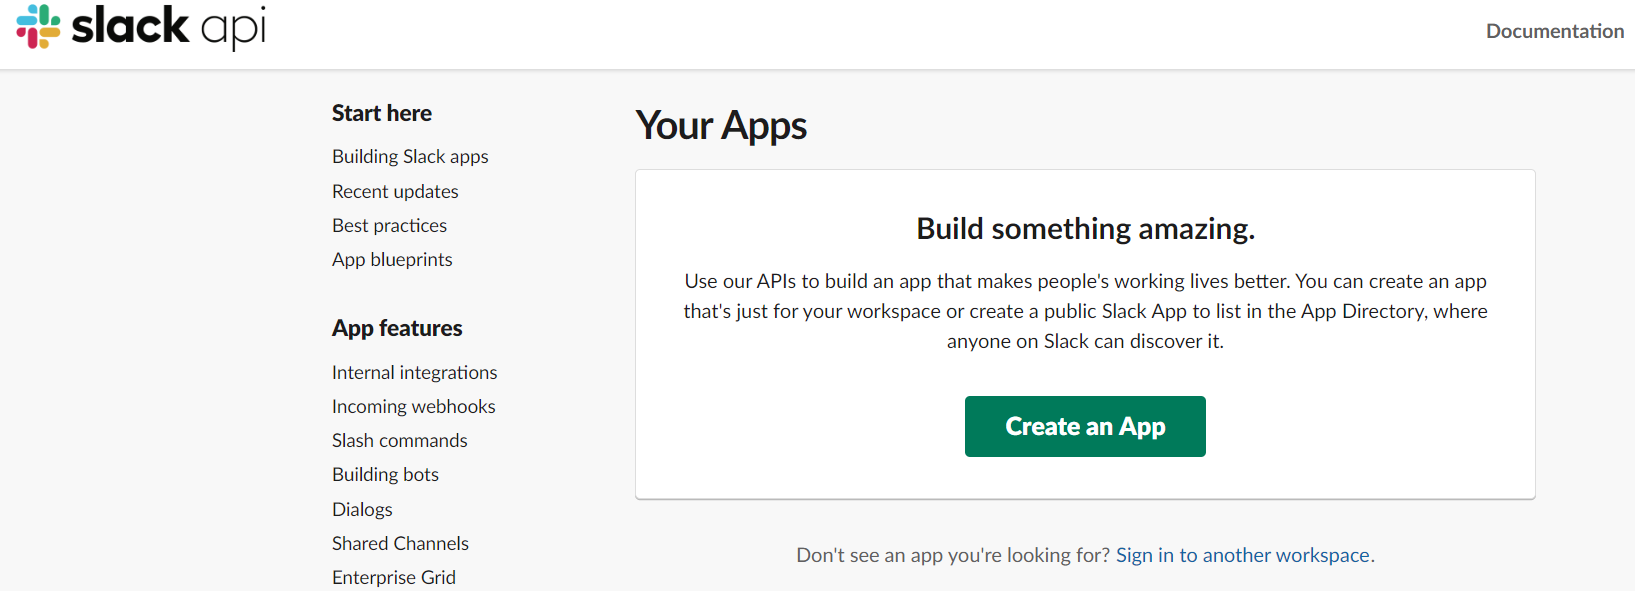
Let’s get started with creating a slack channel from here
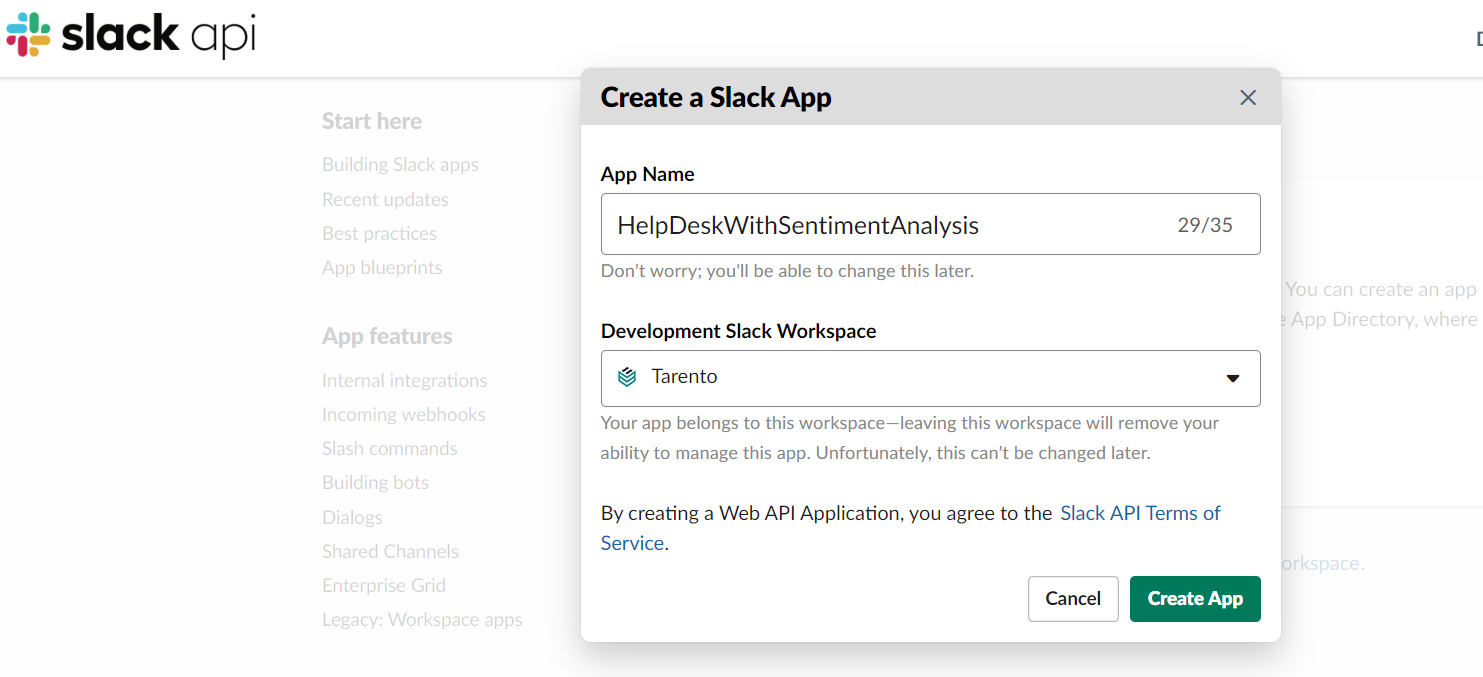
Specify the name and assign a development workspace where the App would be created.
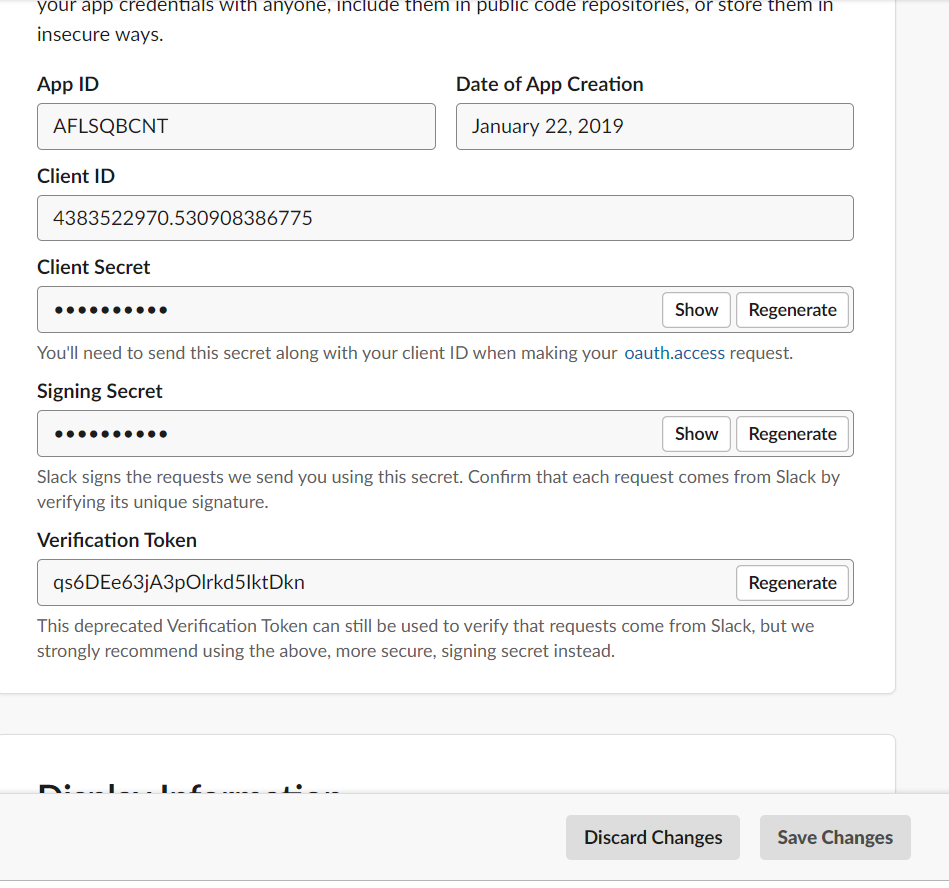
It will create the App and lead to the page where we can find the App ID, Client ID, Client Secret, and verification token. Note them down, so that we can use it while registering the channel in the bot service.
Add Redirect URL
So as to distribute the app we need to configure the redirect URL from the oAuth & Permissions tab.Add https://slack.botframework.com to the redirect URL section and save it.
Create a Bot User
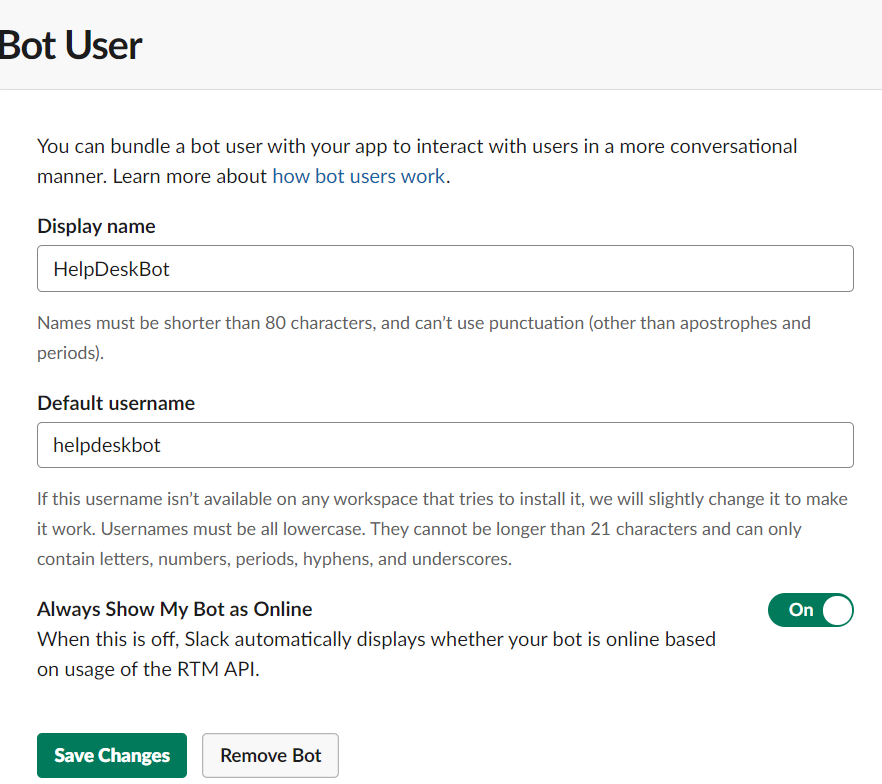
Adding the Bot User gives us the flexibility to assign a username for the bot. It also helps us to choose whether it is always shown as online.Head over to the Bot Users section to create a new Bot.
Specify the Display name and user name that will identify the Bot User. Save changes to provision the user.
Subscribe to activities
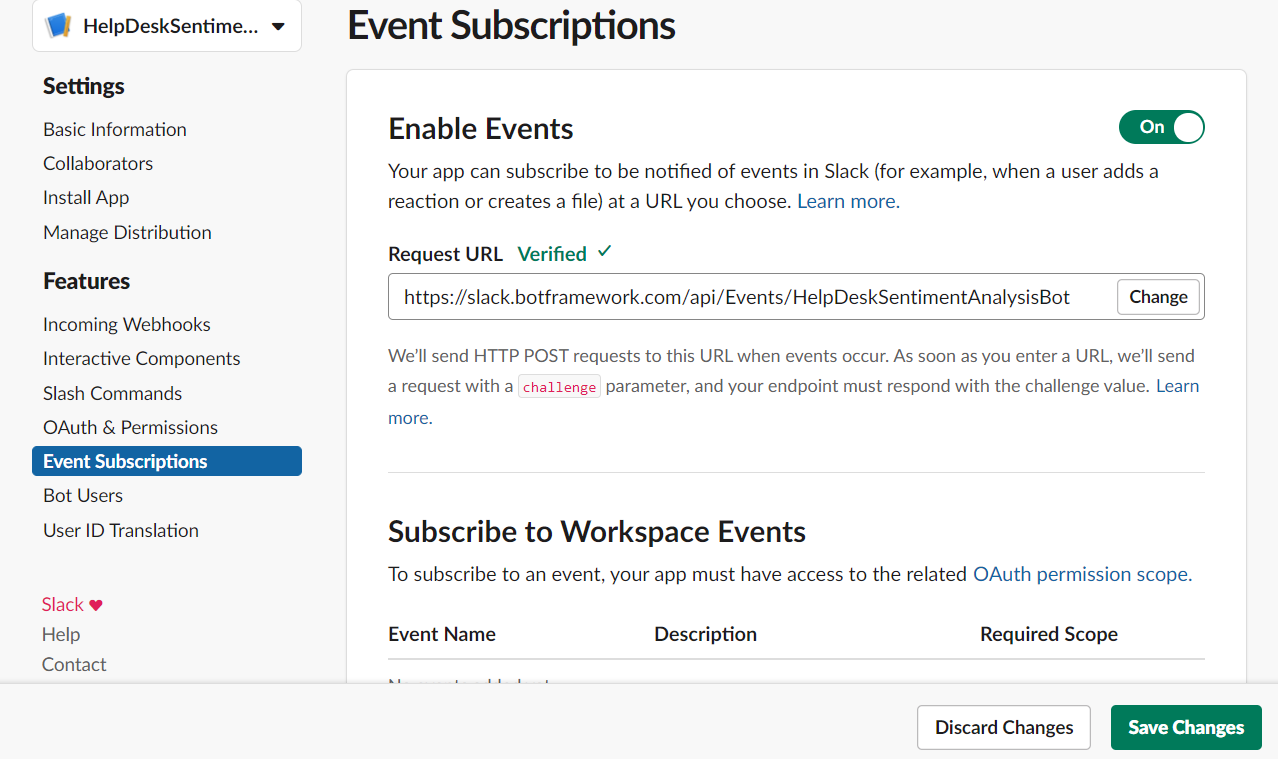
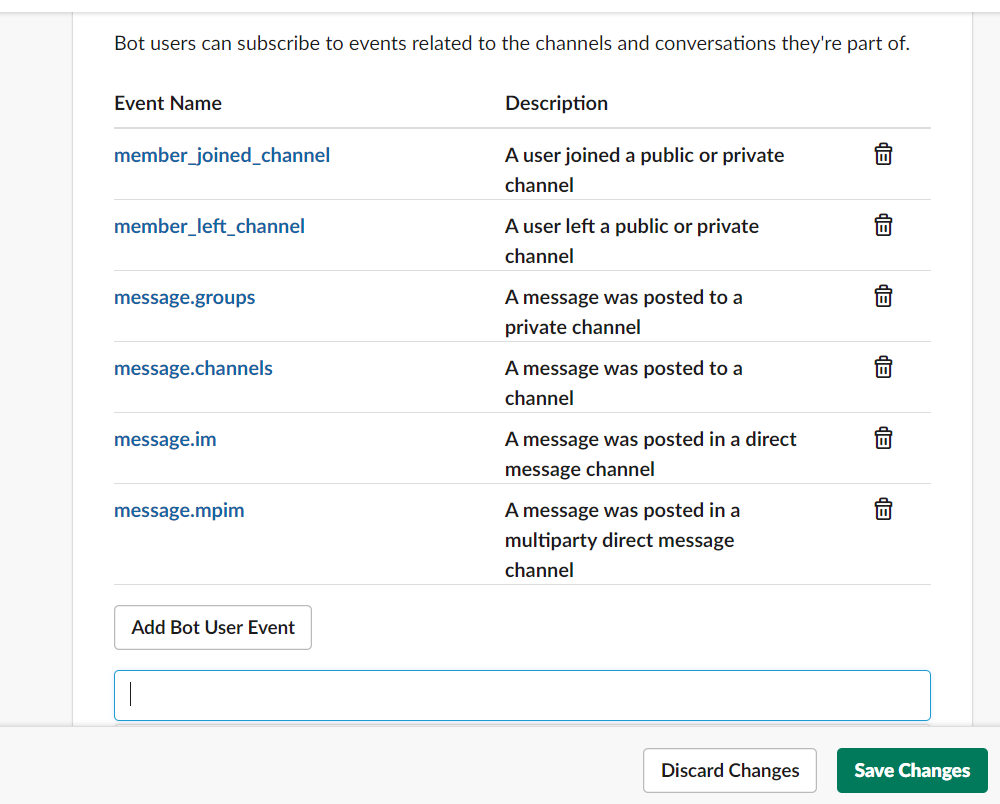
We need to subscribe to the events so that the app will be notified of it. We will subscribe to six particular bot events. In the Event Subscriptions tab, append the Bot Handle to the URL: https://slack.botframework.com/api/Events/ as shown in below. Ensure that you have the Enable Events switched On.
From the list of events, select the below events and click on Save Changes.
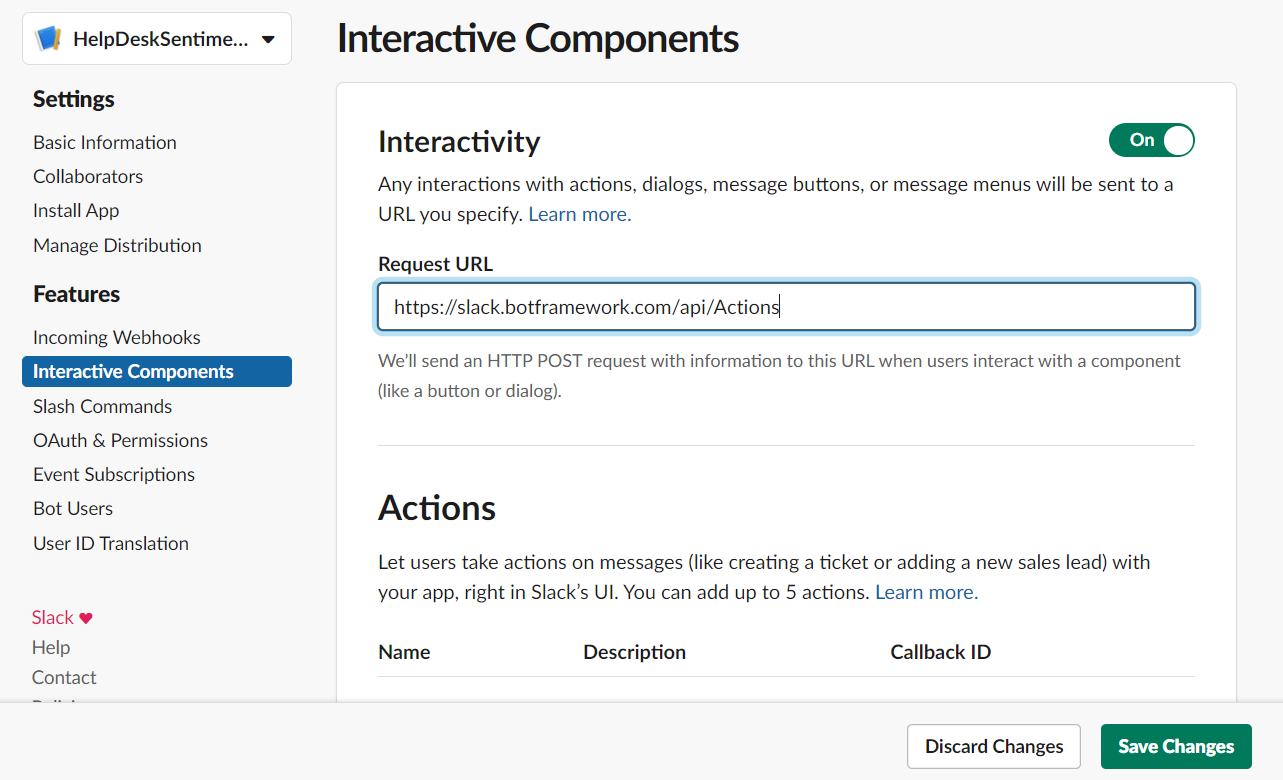
Finally, if we want to accept user inputs via a button click, we have to enable interactive components. We can do that by adding https://slack.botframework.com/api/Actions as the request URL in the Interactive Components section.
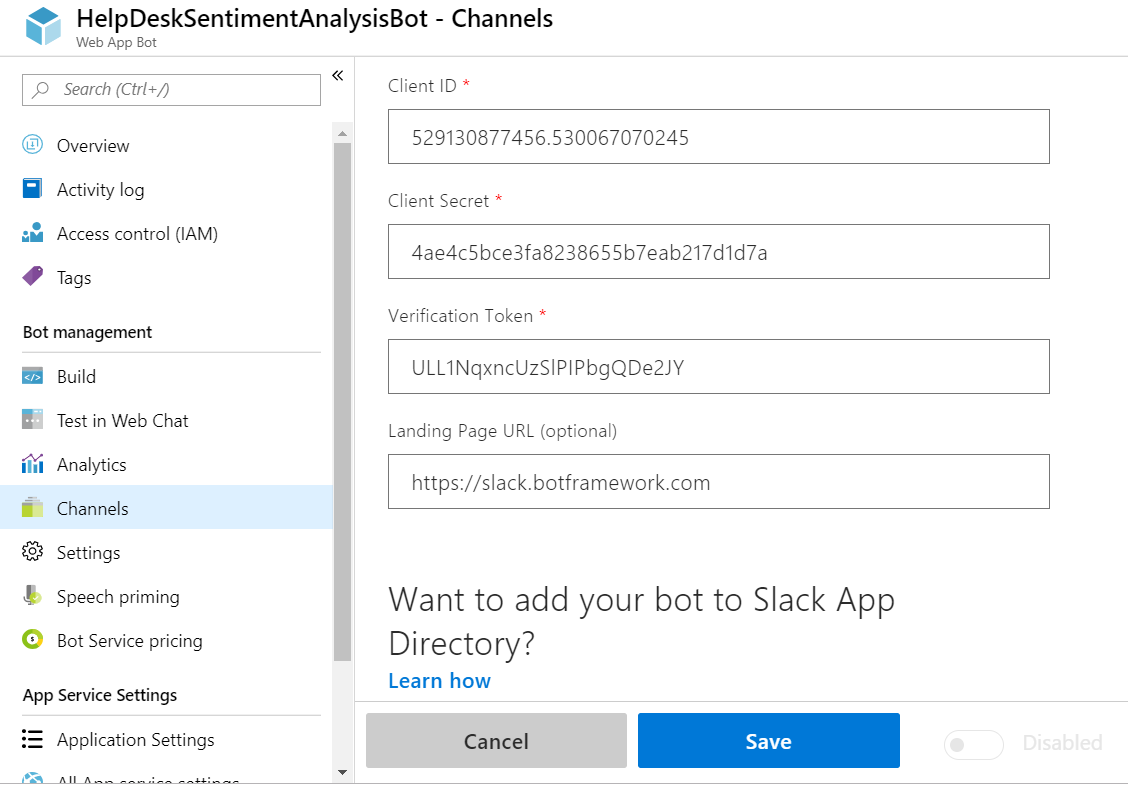
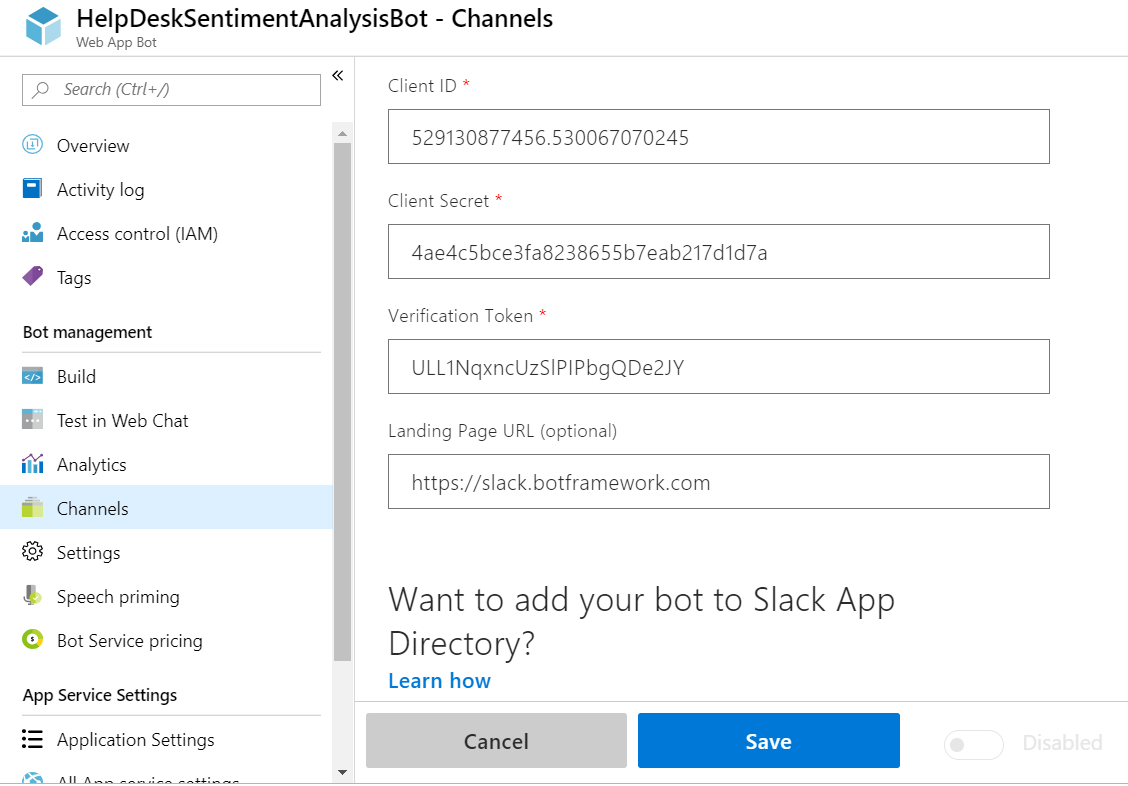
Thus we are done with the configuration changes in Slack, now we can head over to the Channels section in the Azure Portal and update the Client ID, Client Secret, and Verification Token which we obtained while creating the slack channel.
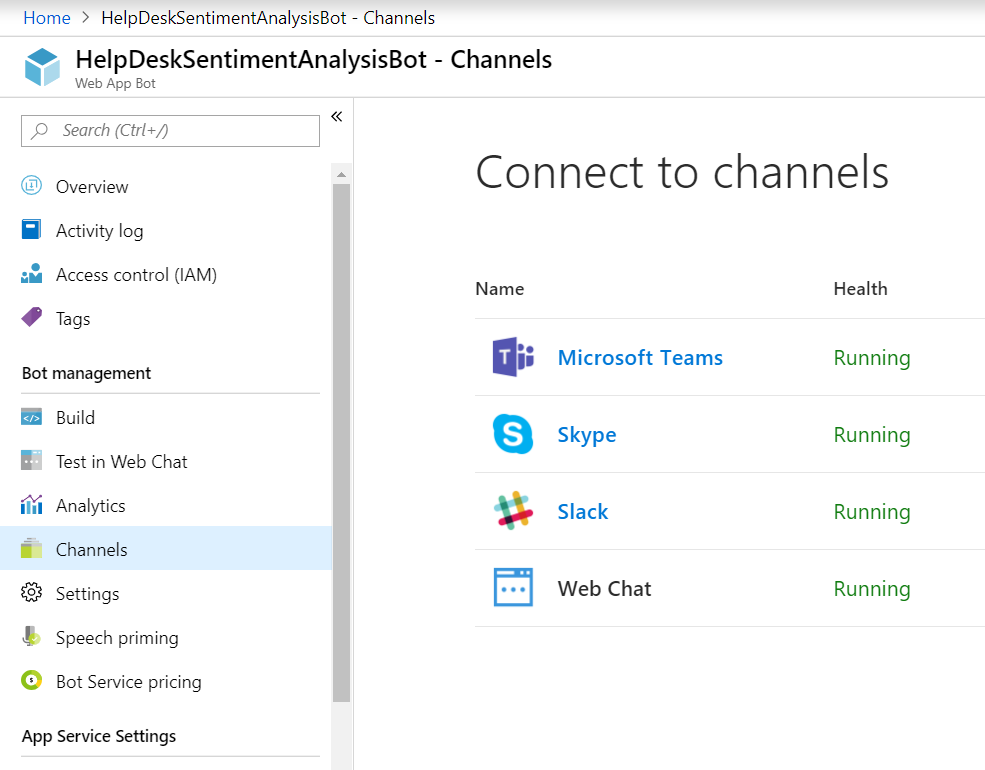
Save the changes and we can see slack listed as the new channel.
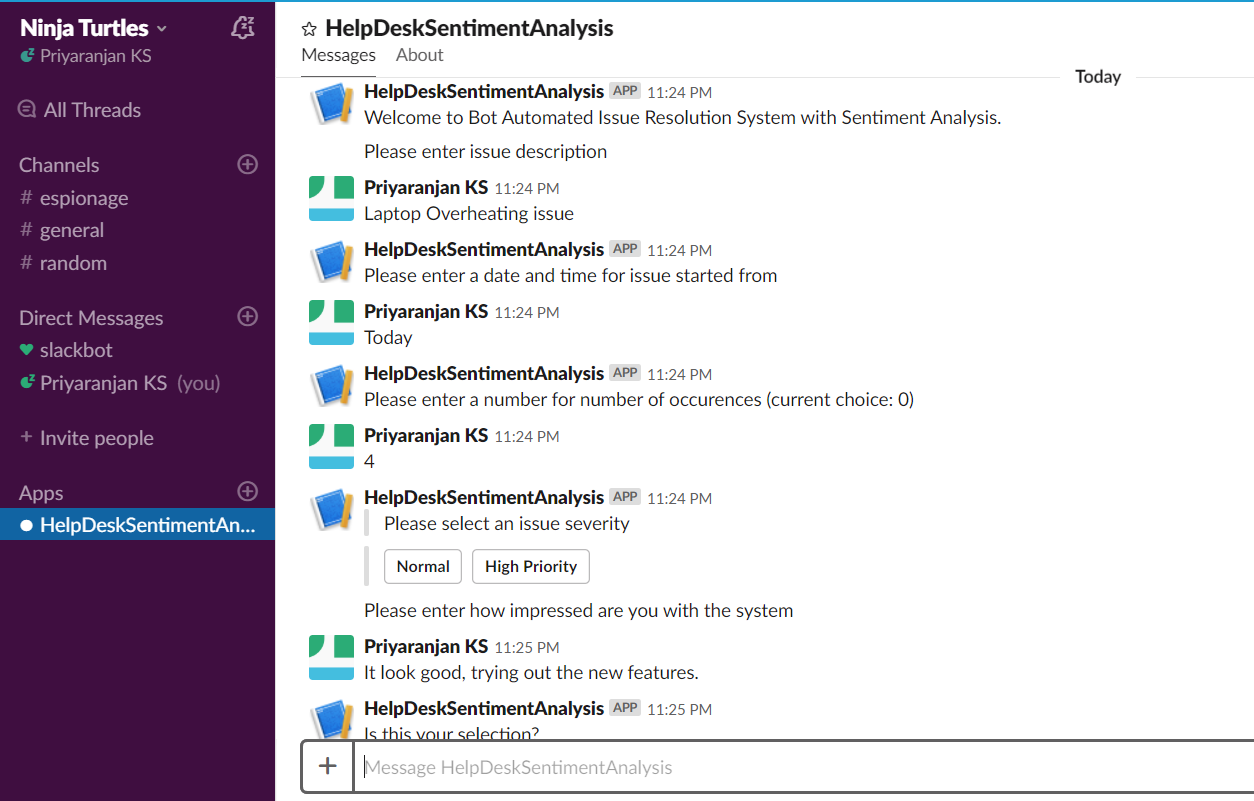
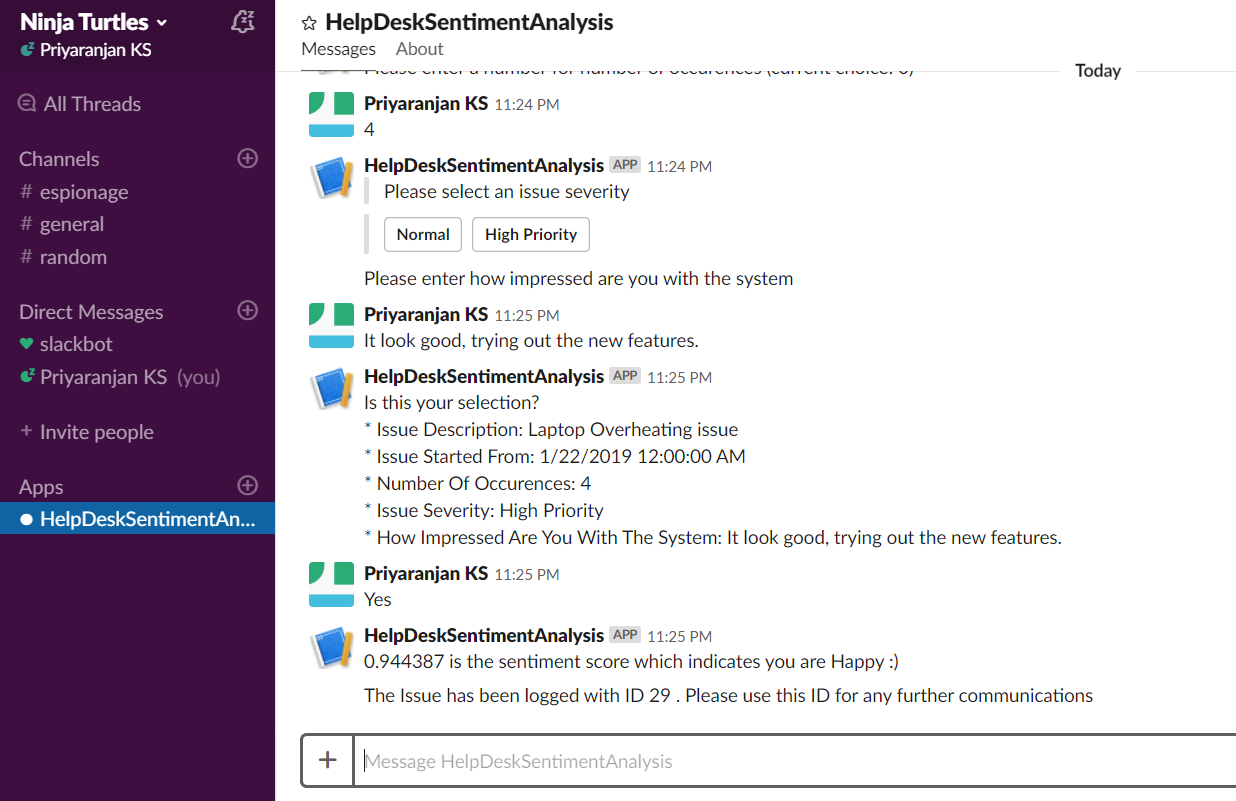
Lets head over to the slack bot and initiate the conversation for reporting and raising an issue ticket
The conversation flow and business process is same as what we saw in the previous channels.
Integration with Facebook
In order to Get started with Facebook Channel Integration, select the Facebook icon from the Channels section
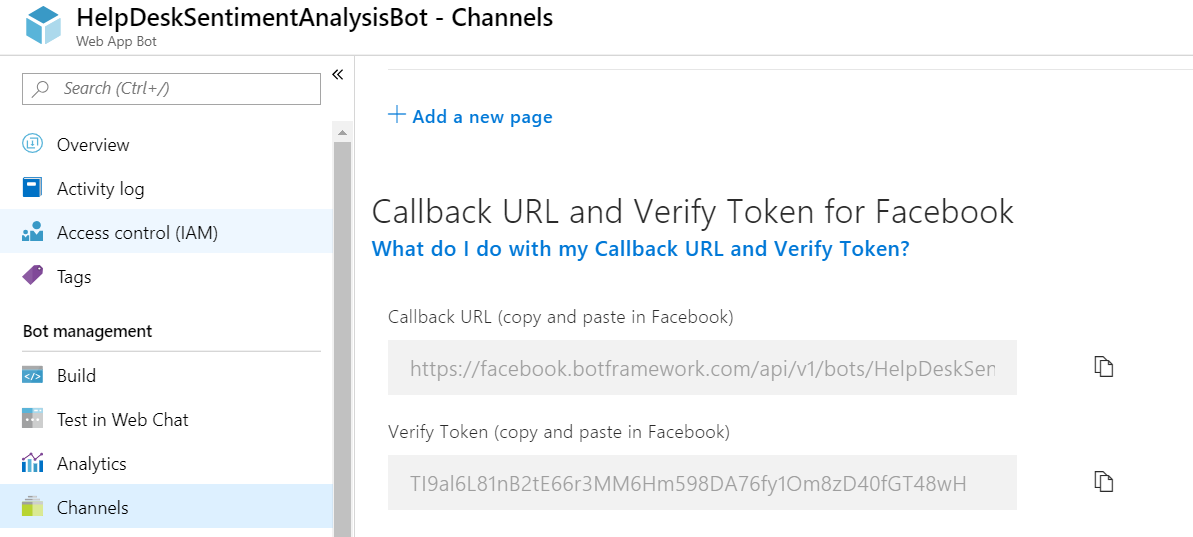
This will take us to the page where we will have to enter the App secret and App id obtained while creating the Facebook page. We can also see a section containing callback URL which we will have to paste in a box while creating the Facebook page.
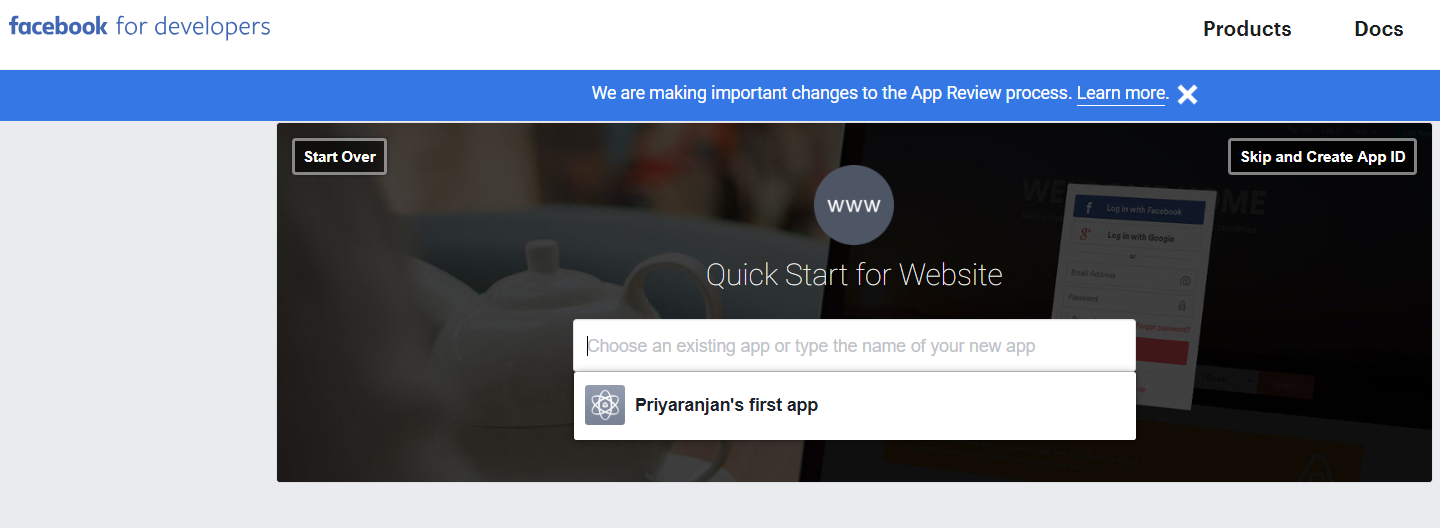
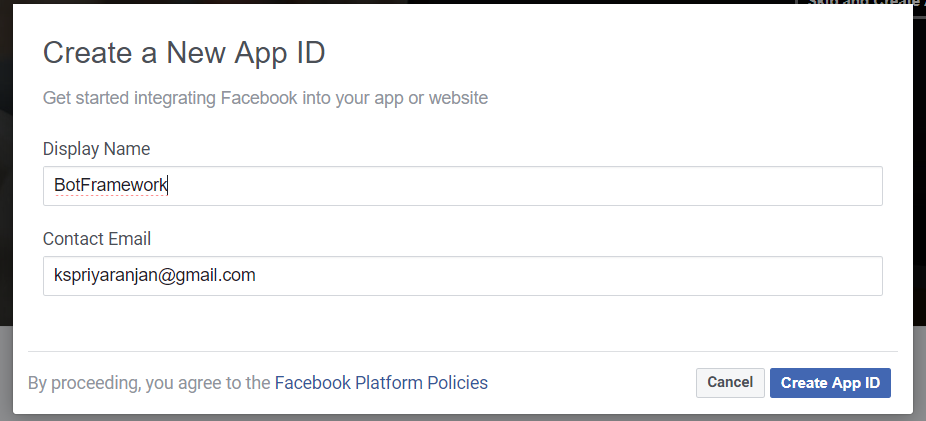
Just like we did slack integration, we can implement Facebook integration after creating a Facebook page. Create a new Facebook page from here. Specify the Display Name and the contact email.
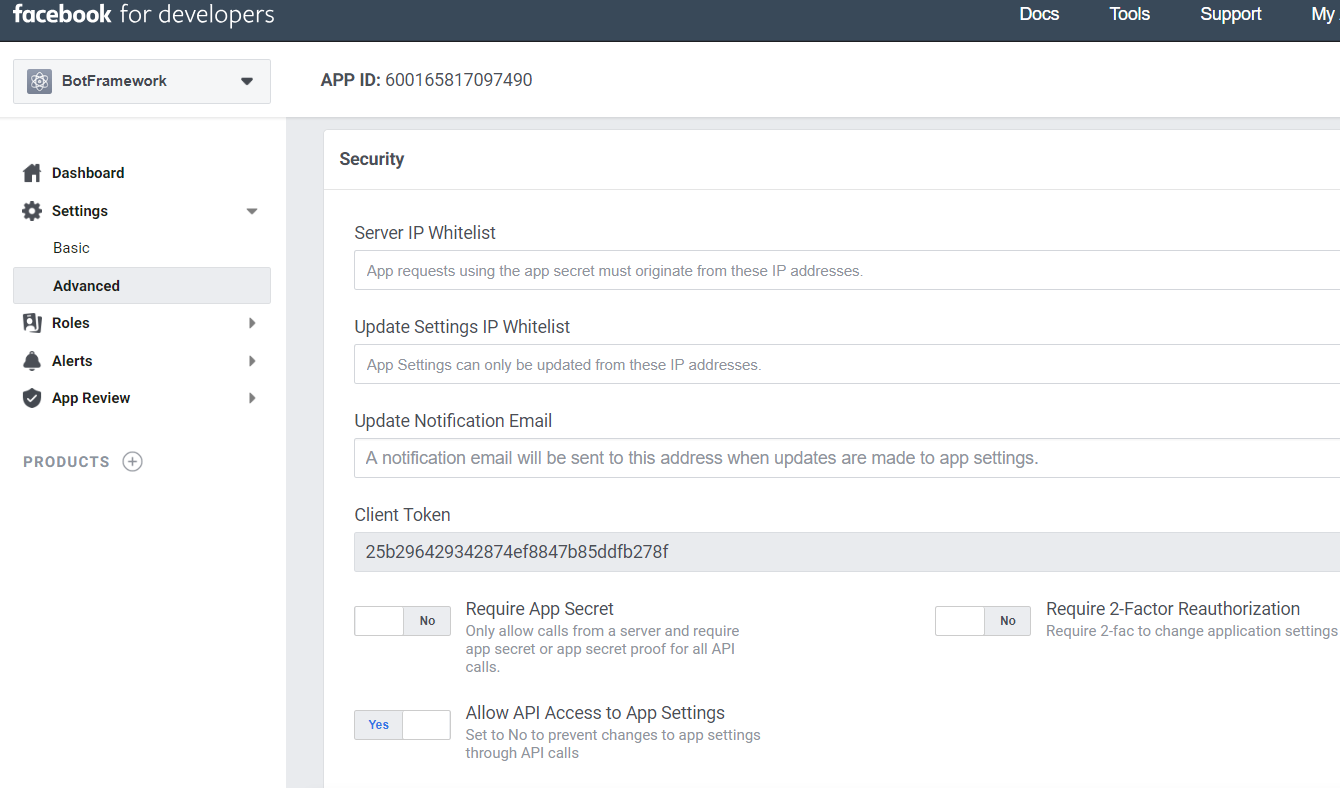
Click on create App ID to generate the Unique ID which you can see from the basic section of the page. Note down the App Secret as it will be used while integrating the channel in the Bot Services page.
Switch on the "Allow API Access to App Settings" slider to "Yes".
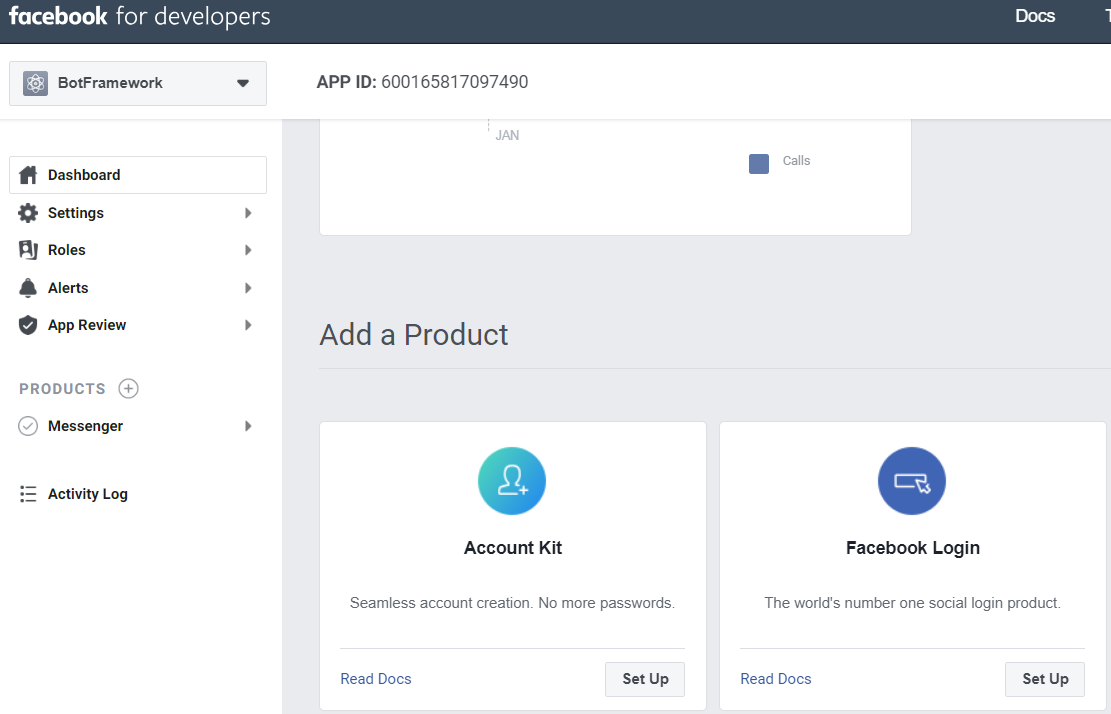
Enable the Facebook Messenger app so that the Bot would work in the messenger window.
Create Page Access Token
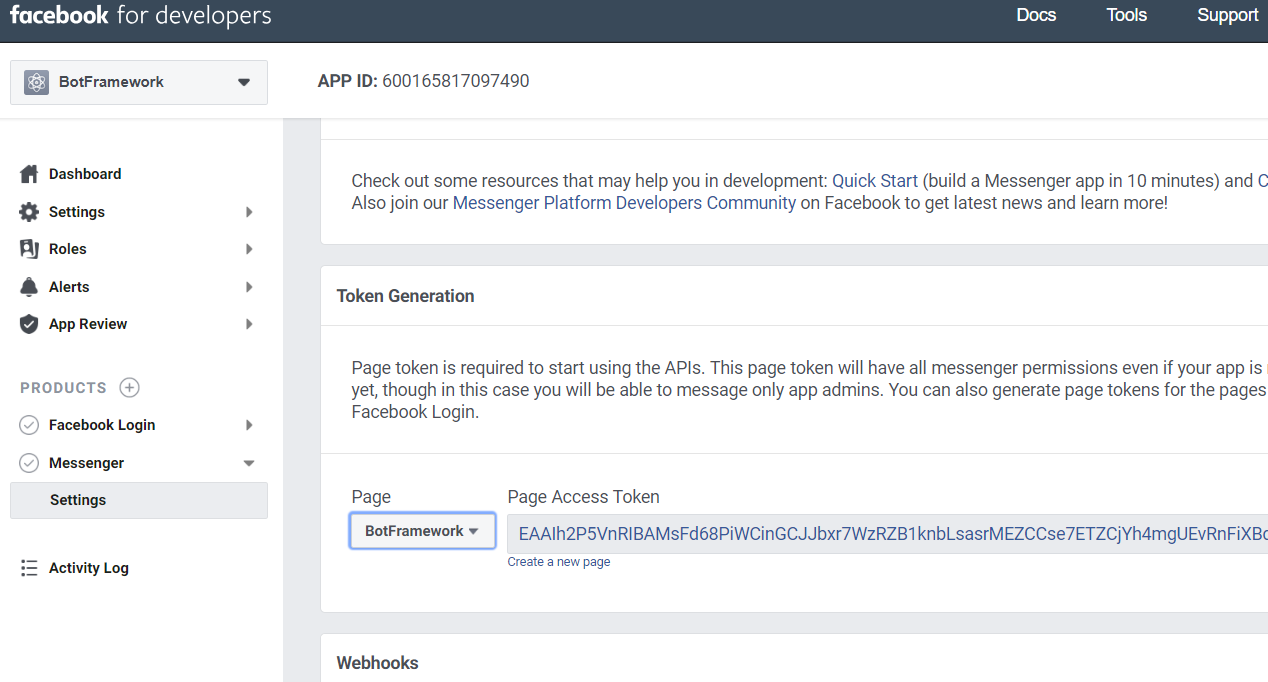
We will have to generate the page access token to start using the APIs. We will be adding this in the Azure Bot Service Channel registration page. From Messenger->Settings, note down the Page Access Token
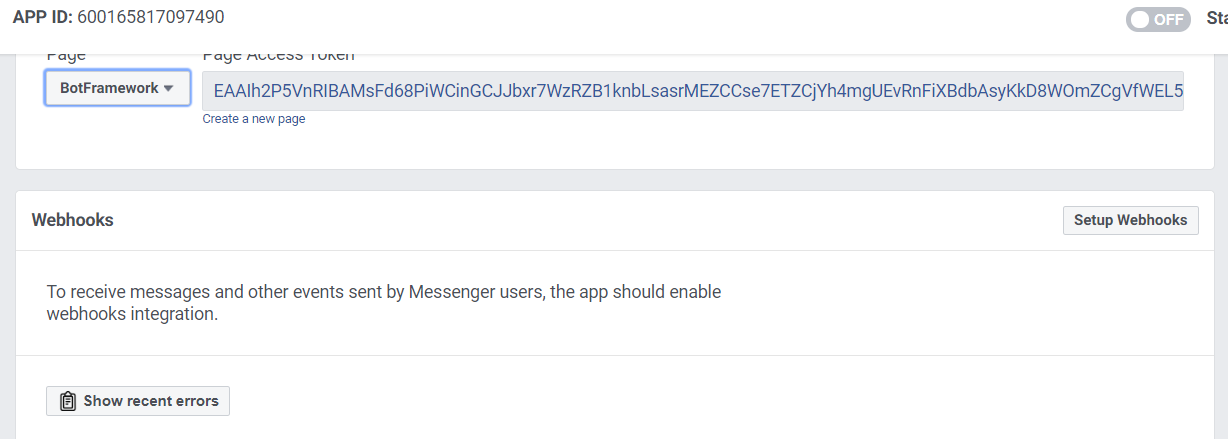
Setup Webooks
Now let’s set up webhooks so that app can respond to the events happening within the messenger.
We can get the Callback URL and Verification token from the Bot Service Channel Page which we have created recently.
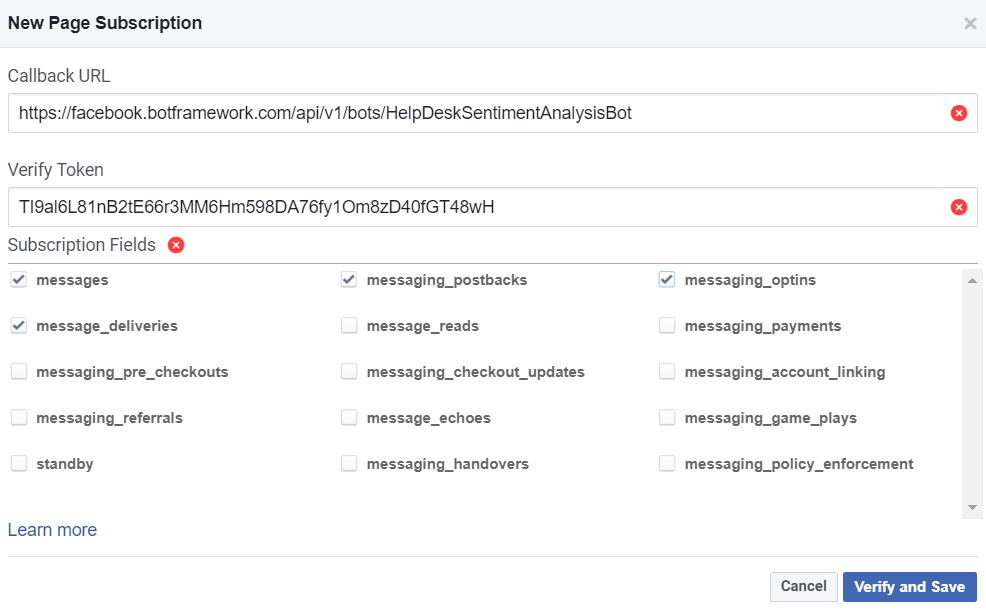
Paste them in the webhook settings page and select the events to which subscription should be enabled.
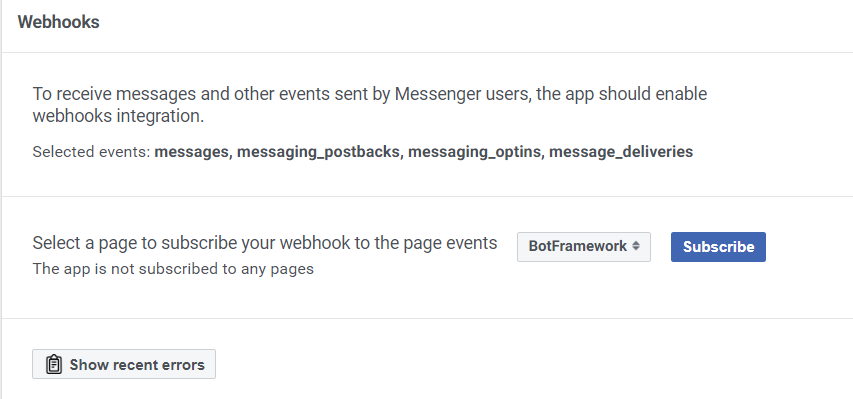
From the drop-down select the recently created page and select the subscribe button.
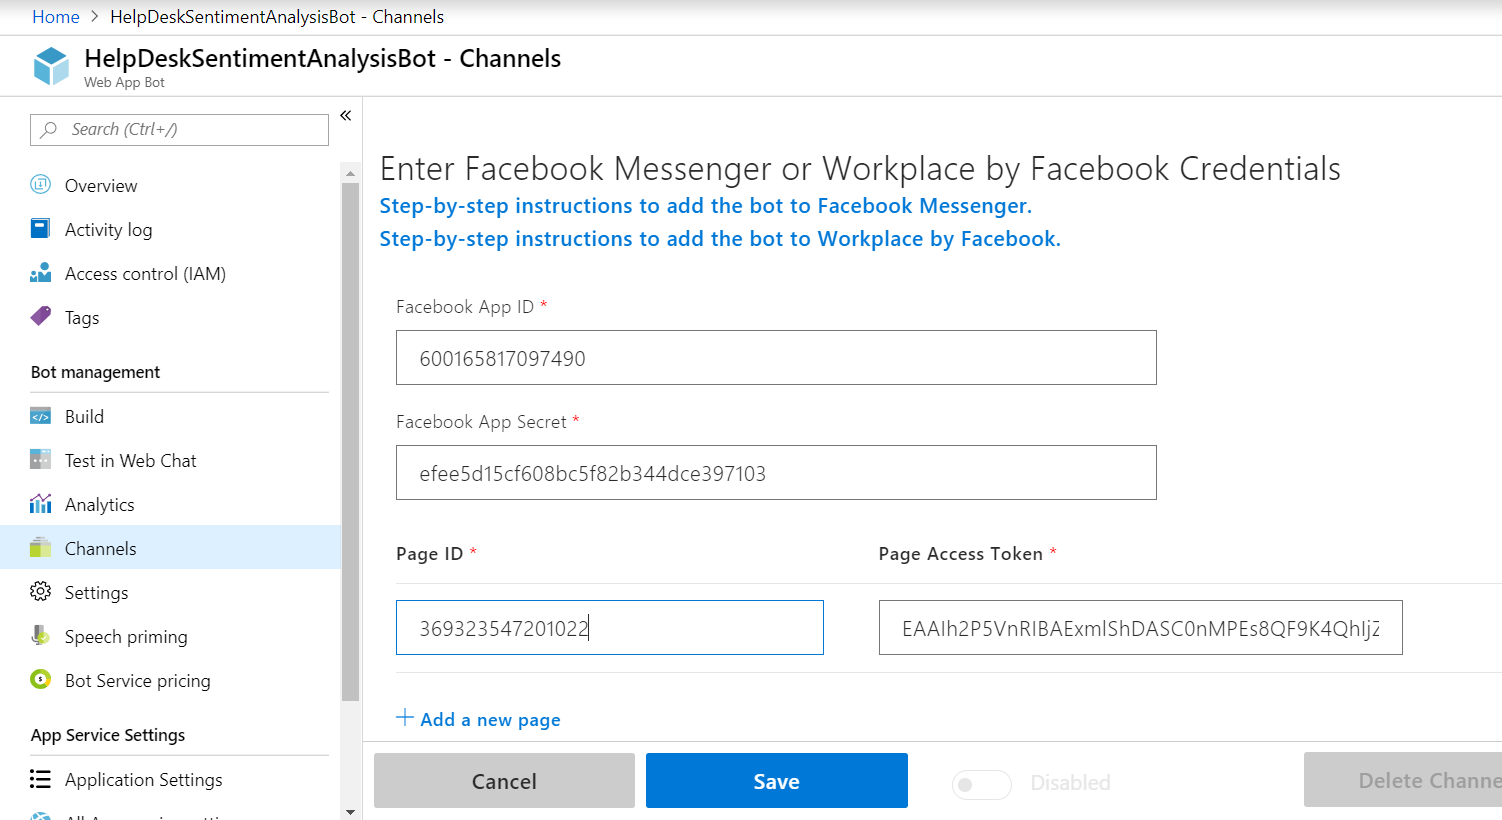
Thus we are done with the Facebook page configuration. Now let’s head over to the Channel registration page and input the App ID, App Secret, Page ID, and Page Access Token .
Clicking on Save will enlist the channel in the available channel section.
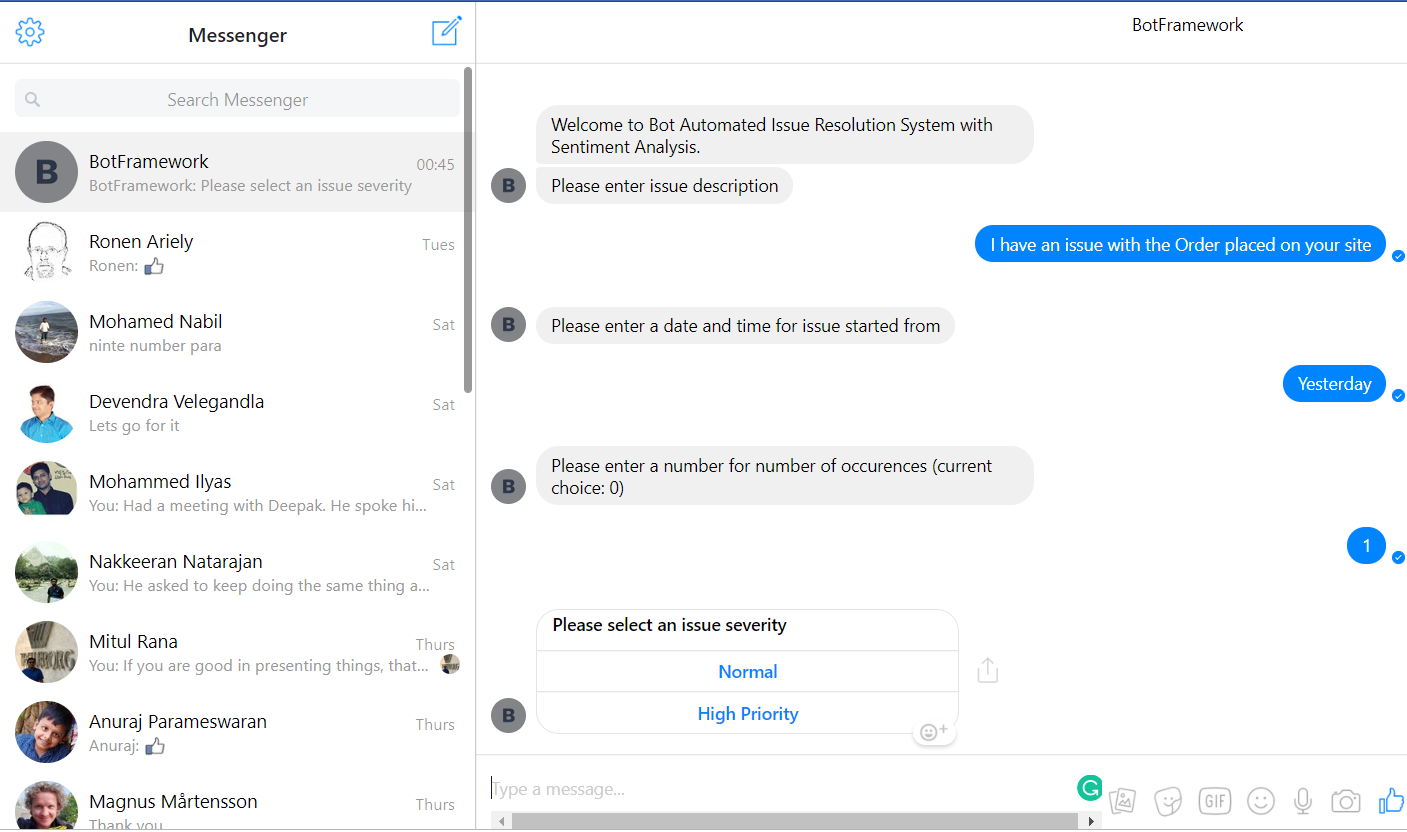
Now if we head over to the Facebook Messenger, we should be able to initiate a chat with the Help Desk Bot.
Just like how we interacted with previous channels, we can proceed with the guided conversation and register the issue in SharePoint.
Looking back at SharePoint we can see the newly created Item with the corresponding Emoji and Cell Highlight. Microsoft Flow would be triggered in the backend and would proceed with the remaining business logic processing.
Summary
Thus we saw how we can set up a minimal Helpdesk system using Bot Framework, SharePoint Online, and Microsoft Flow. We also dealt with integrating Cognitive Text Analysis API for getting the sentiment score of the user feedback. Moreover, we also saw how we could convert the score into emojis/KPI Cell highlighting in the SharePoint List using Column formatting. Finally, we also saw how we could integrate the bot with multiple channels like Microsoft Team, Skype, Slack, and Facebook.

