Note
Access to this page requires authorization. You can try signing in or changing directories.
Access to this page requires authorization. You can try changing directories.
Credits
Bob Cornelissen (SCOM Bob) has written a beautiful article on this, Below is the link:
https://www.bictt.com/blogs/scom-monitoring-multiple-services-running/
Introduction
The purpose of this article is to share few additional steps which needs to be performed if you want to Author a MP in Calling the basic service monitor from "Service Library MP" to monitor multiple services using 1 service monitor with similar names.
Steps
Follow the exact same steps which Bob has mentioned and it worked! But it might only work once. When you try to do it for the 2nd and 3rd 4th time with same MP / different MP's it might not work.
Then you need to make some changes to the MP and we want to summarize the changes here so anyone facing issues following Bob's article can refer the below steps to make this work.
Preparation
Before we go further, please read Bob's article so you are familiar with what he is doing so it will be easy to understand and then read our post further.
What do we need to do to make what is in Bob's article work ?
In our Example we have used Skype for Business service here so our query contains "Skype".
There are 4 main things you need to replace in the exported copy of the MP after the Monitor has been create using the "Management Pack Template" for Service monitor.
1. Replace reference
Find the below:
<Reference Alias="Windows">
        <ID>Microsoft.Windows.Library</ID>
        <Version>7.5.8501.0</Version>
        <PublicKeyToken>31bf3856ad364e35</PublicKeyToken>
</Reference>
Replace it with:
<Reference Alias="MicrosoftWindowsLibrary7585010">
        <ID>Microsoft.Windows.Library</ID>
        <Version>7.5.8501.0</Version>
        <PublicKeyToken>31bf3856ad364e35</PublicKeyToken>
</Reference>
2. Criteria
Find the below:
<DataSource ID="DS" TypeID="WindowsMicrosoft.Windows.Win32ServiceInformationProviderWithClassSnapshotDataMapper">
          <ComputerName>$Target/Property[Type="WindowsMicrosoft.Windows.Computer"]/NetworkName$</ComputerName>
          <ServiceName>wmiApSrv</ServiceName>
<Frequency>60</Frequency>
Replace it with:
<DataSource ID="DS" TypeID="MicrosoftWindowsLibrary7585010Microsoft.Windows.WmiProviderWithClassSnapshotDataMapper">
<NameSpace>root\cimv2</NameSpace>
<Query>Select * from win32_service where Displayname like "%Skype%"</Query>
<Frequency>60</Frequency>
3. Replace the below alias (Windows!Microsoft.Windows.Computer)
Do a find all and replace all with the text tool):
Find the below:
Replace Windows!Microsoft.Windows.Computer
Replace it with:
MicrosoftWindowsLibrary7585010!Microsoft.Windows.Computer
4. Replace the below alias (Windows!Microsoft.Windows.CheckNTServiceStateMonitorType)
(Do a find all and replace all with the text tool):
Find the below:
Windows!Microsoft.Windows.CheckNTServiceStateMonitorType
Replace it with:
MicrosoftWindowsLibrary7585010!Microsoft.Windows.CheckNTServiceStateMonitorType
5. Change the Alert name to reflect in the Alert.
Find the below:
Windows Service Stopped
Replace it with:
"What ever name you want the alert to Alert on"
6. Change the Alert Description Name:
Find the below:
"Service Running State" without quotes
Replace it with:
"What ever name you want the alert to Alert on"
7. Now increment the MP version
Save it and then import it and you should be good.
After the above changes and once you import the MP.
Import the MP
Below is what you would see:
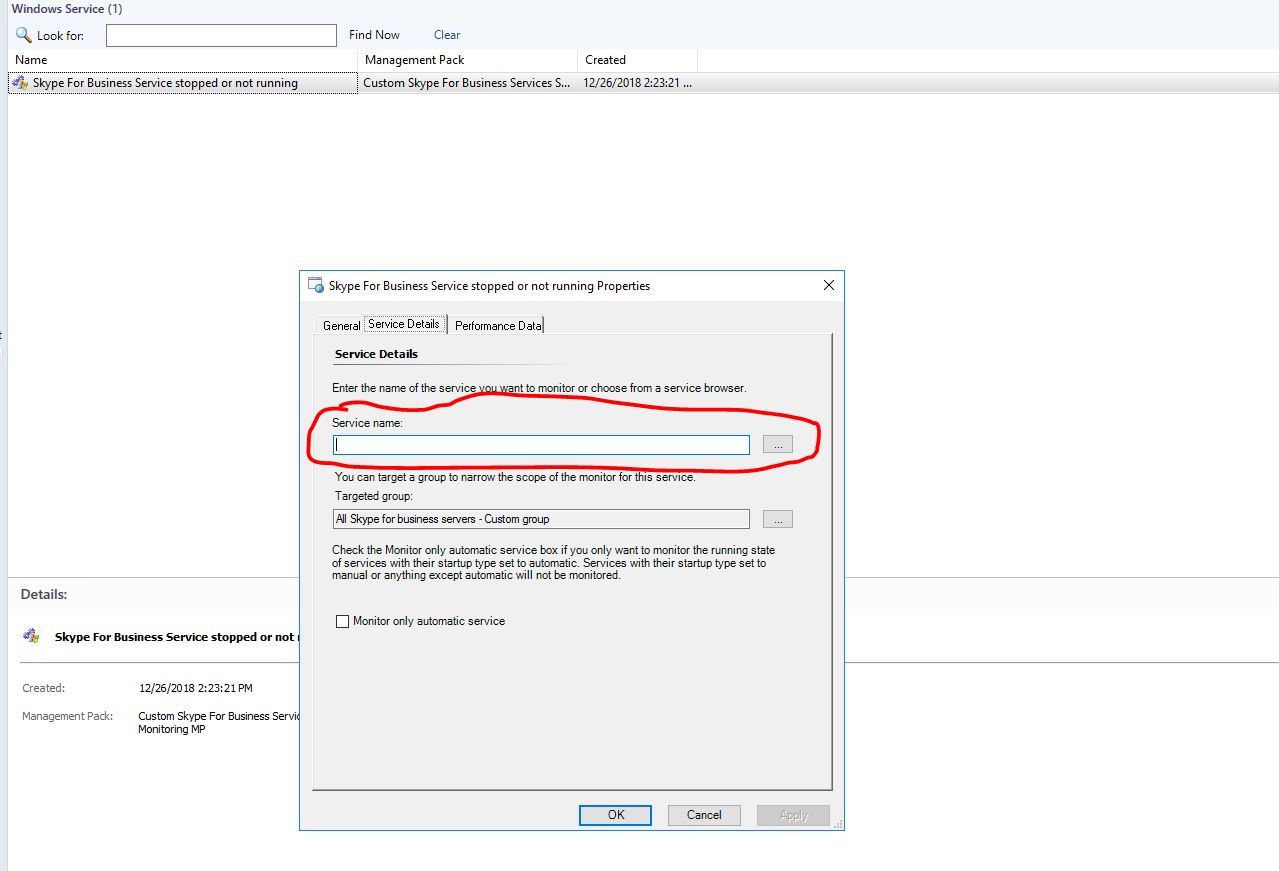
The service name will not be present as we have got it removed and added a WMI Query, This is normal, Do not add a service back as we have added a WMI query instead:
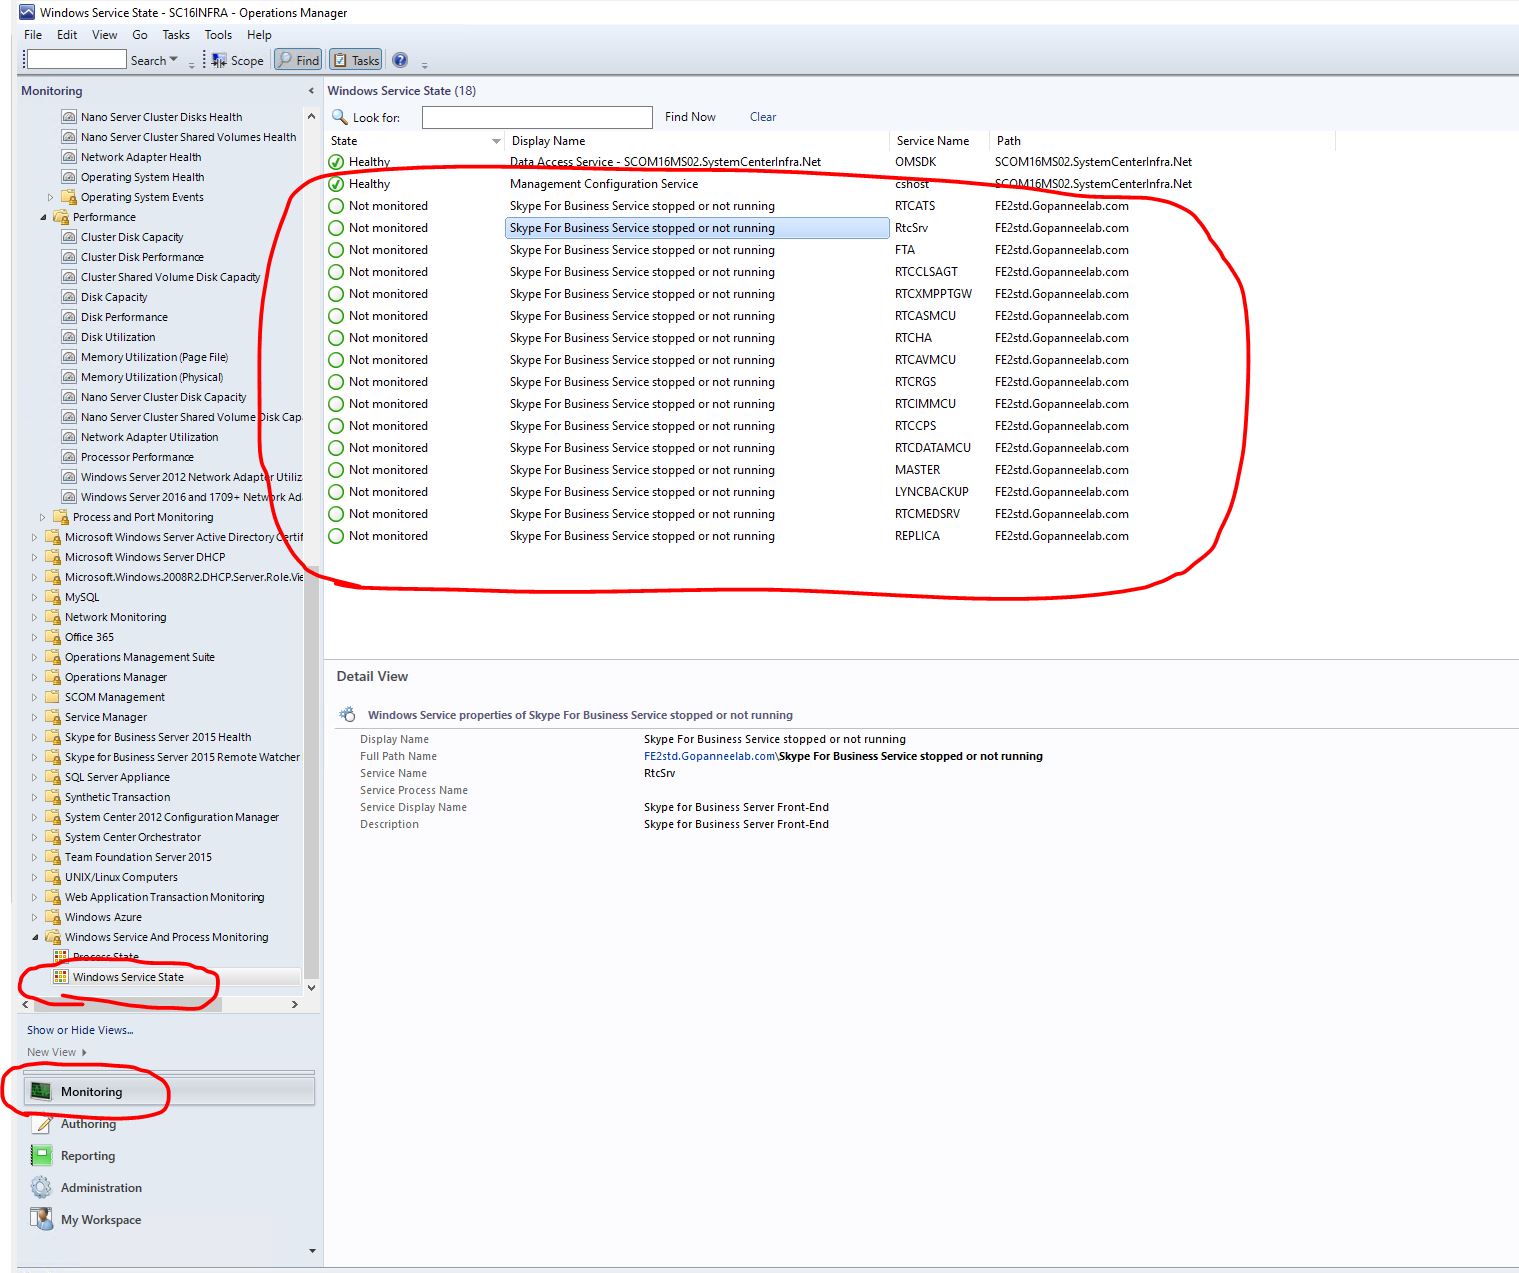
Monitor will discover and will stay in "Not Monitored" state:
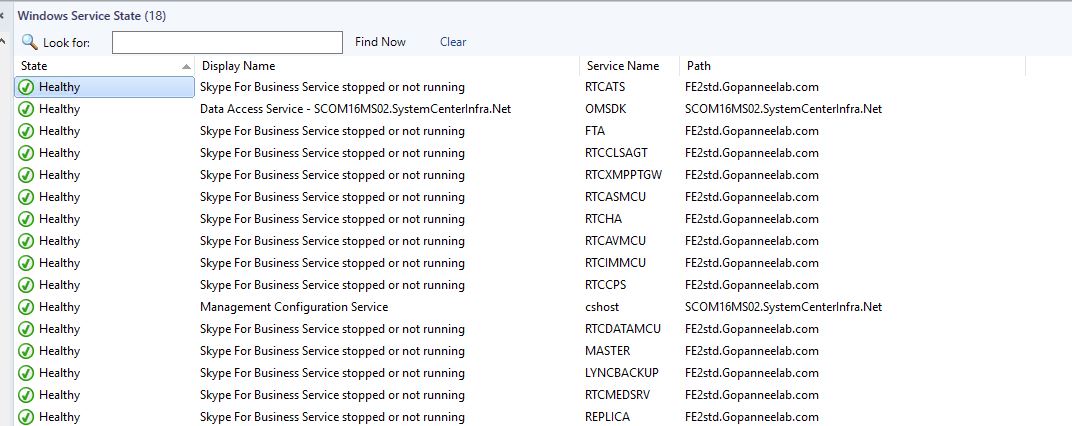
C. Monitor will change Healthy after Initialization:
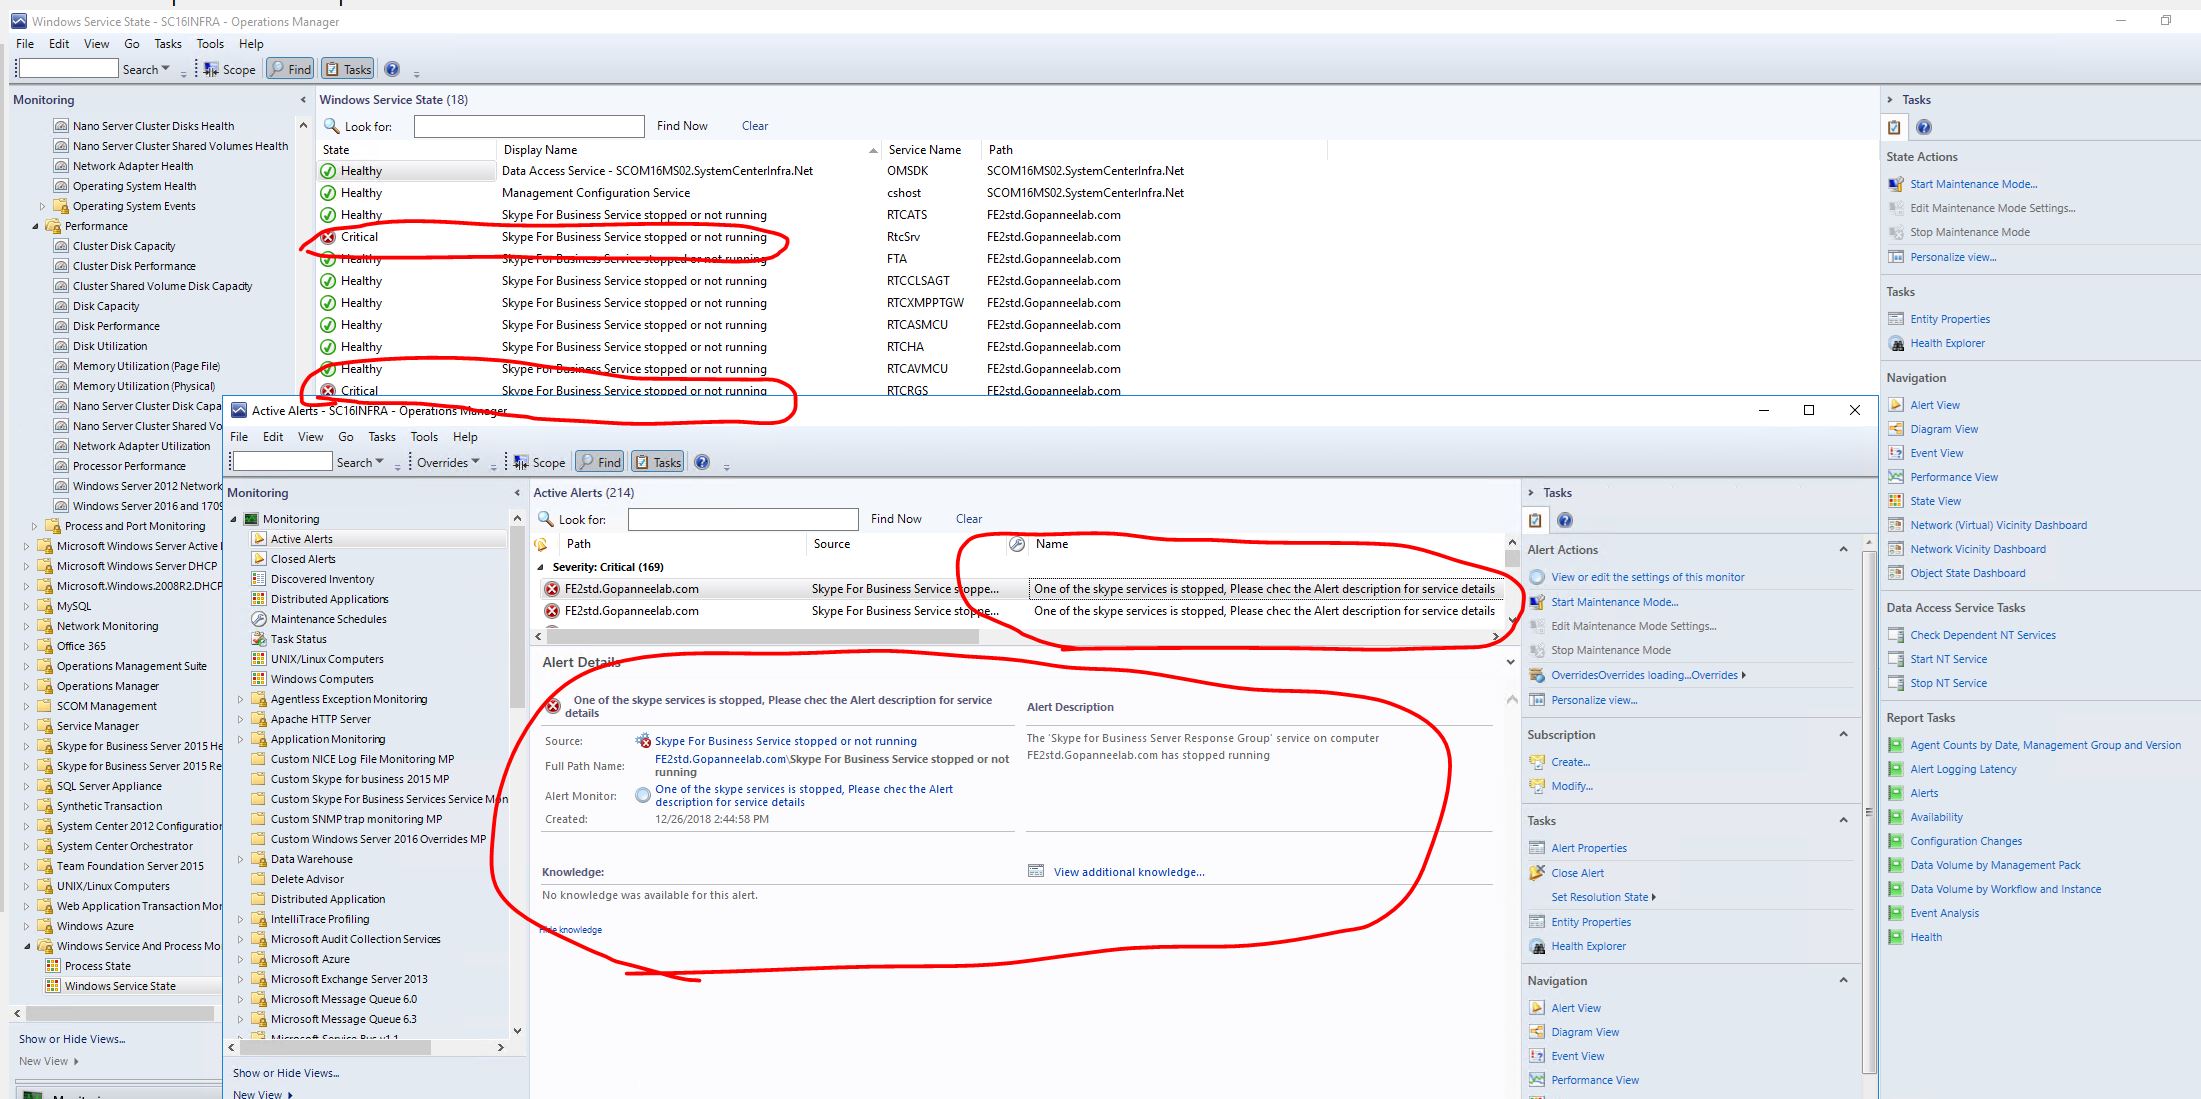
D. Monitor will go Critical and will alert if the any service discovered is stopped:
NOTE - Just don't forget to get the required servers added to the group the "Service Monitor is Targeted To".
Link to the MP
Below you find a download link to a sample MP we made with the above changes as a reference.


