DPM 2016: Step-by-step How to install an Update Rollup and how to update the DPM consoles
*This guide applies to System Center Data Protection Manager 2016, 1801, 1807
*
Introduction
In this Wiki article, we will go through on how to install an Update Rollup for System Center Data Protection Manager (DPM), as well as updating the different DPM consoles.
An Update Rollup for System Center Data Protection Manager consists of four (4) executable files:
System Center Data Protection Manager 2016:
- dataprotectionmanager2016-kbXXXXXXX_GUID.exe
- dpmcentralconsoleserver-kbXXXXXXX_GUID.exe
- dpmmanagementshell2016-kbXXXXXXX_GUID.exe
- dpmmanagementshell2016-kbXXXXXXX_GUID.exe
System Center Data Protection Manager Semi-Annual Channel (SAC):
- dataprotectionmanager-kbXXXXXXX_GUID.exe
- dpmcentralconsoleserver-kbXXXXXXX_GUID.exe
- dpmmanagementshell-kbXXXXXXX_GUID.exe
- dpmmanagementshell-kbXXXXXXX_GUID.exe
System Center Data Protection Manager consoles:
- System Center DPM Administrator Console.
The default console on the DPM server.
- DPM Central Console.
Installed on the SCOM server, manage and monitor multiple DPM servers from a single location.
- DPM Remote Administration Console.
Installed on a remote computer, cannot be installed on the DPM server.
Note: If a DPM Central Console or DPM Remote Administration Console is installed somewhere, these consoles will also need to be updated after that an Update Rollup has been installed on the DPM server.
Installing an Update Rollup for DPM 2016
When downloading the Update Rollup 6 for System Center Data Protection Manager 2016, there are four (4) executable files within the update.
The downloadable files:
High-Level Installation Steps
Updating the DPM Server
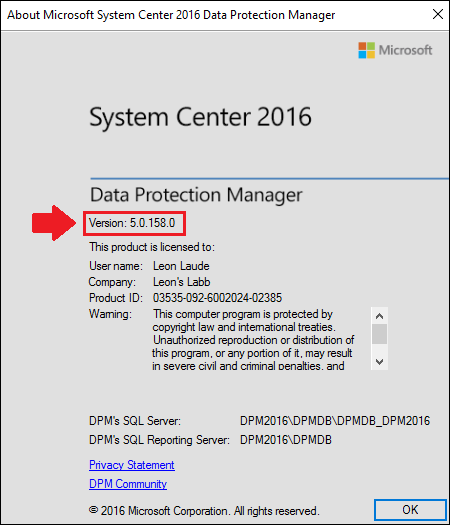
Before starting we will verify the current version of our DPM server, we can do this by opening the System Center 2016 DPM Administrator Console and then click on About DPM.
The DPM version will be marked under the text Data Protection Manager.
Download the latest Update Rollup for System Center Data Protection Manager 2016 to a location on the DPM server, in our case Update Rollup 6 is the current newest Update Rollup.
The Update Rollup consists of four (4) files, once downloaded we should have the following files:
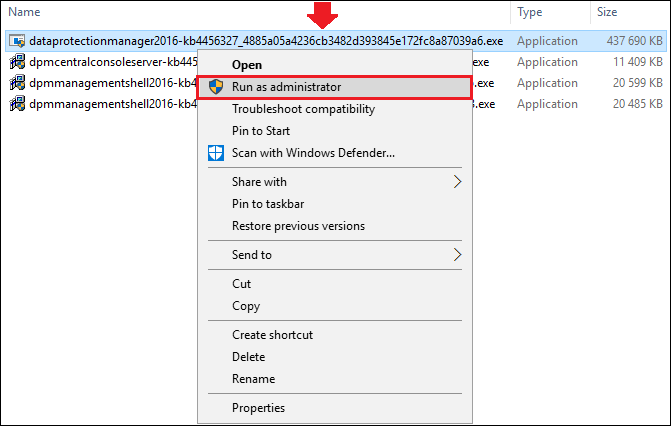
To update the DPM server we will run the dataprotectionmanager2016-kb4456327_4885a05a4236cb3482d393845e172fc8a87039a6.exe file, which is the largest file.
[

](resources/8867.dpm_5F00_rollup11.png)Note: The largest file is always installed on the DPM server.
Right-click the file and choose Run as administrator.
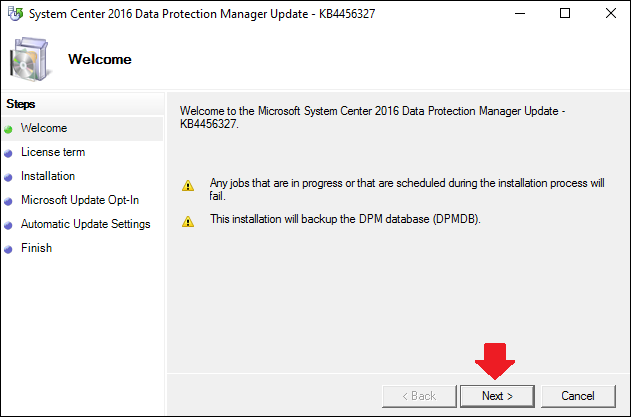
The installation wizard will open up in a new window and will give a warn that all DPM jobs that are in progress or that are scheduled will fail, also note that the installation will backup the DPM database, click Next to continue.
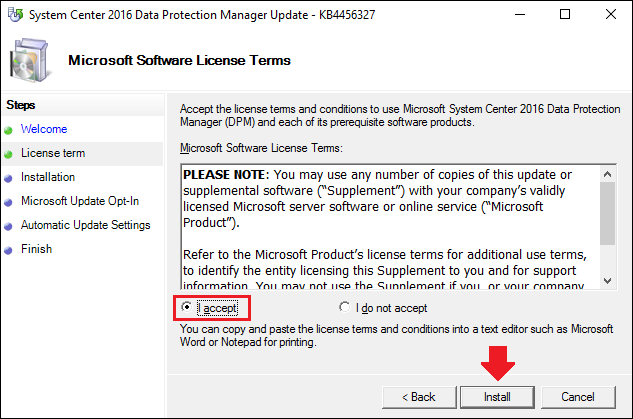
On the license term step, check the box for I accept and then press Next to continue.
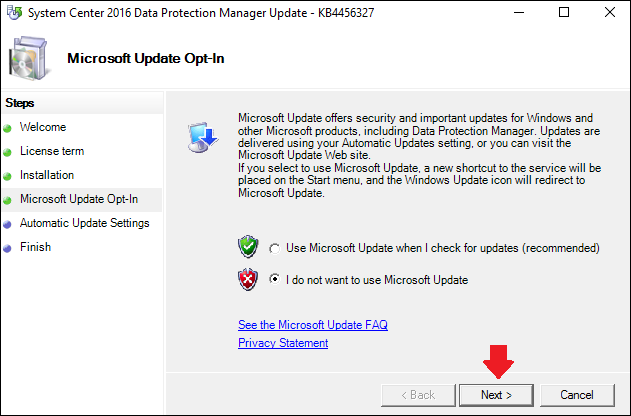
Next up choose whether to opt-in or not for Microsoft updates, in this guide we won’t be opting in, click Next to continue.
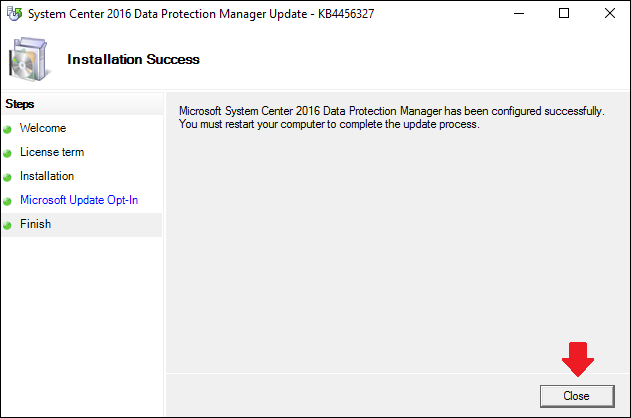
The installation should now be complete, click Close to finish.
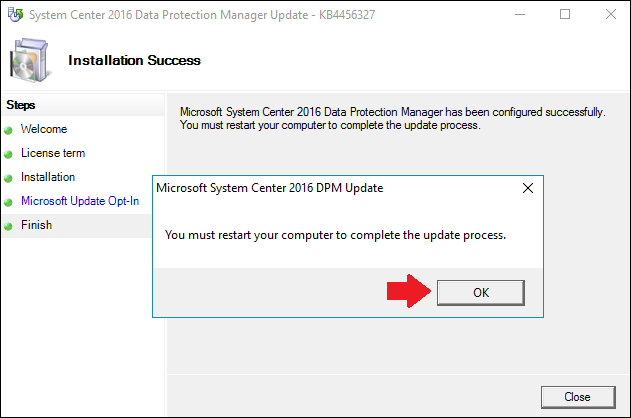
We will now be told to restart the computer in order to finish the update process, click OK.
Restart the DPM server whenever possible.
After the restart of the DPM server, we will verify that the latest Update Rollup has been applied by opening the System Center 2016 DPM Administrator Console and then head to About DPM.
The DPM server and the console on the DPM server have now been updated.
Updating the DPM Remote Administration console
Some organizations use a management server or maybe even their own computer to manage various software and tools, such as DPM.
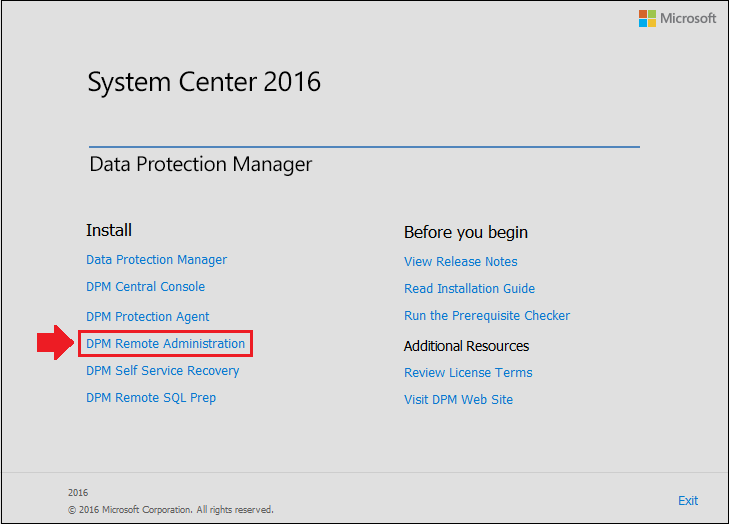
DPM can be managed remotely by installing the DPM Remote Administration console from the DPM installation disk/image.
If an Update Rollup has been installed, the DPM Remote Administration consoles will also need to be updated, if they are not updated the following error will appear when opening the DPM console remotely:
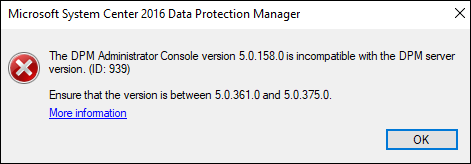
(Version 5.0.158 = RTM, see here for all the other build versions).
Download the corresponding Update Rollup that is currently installed on the DPM server.
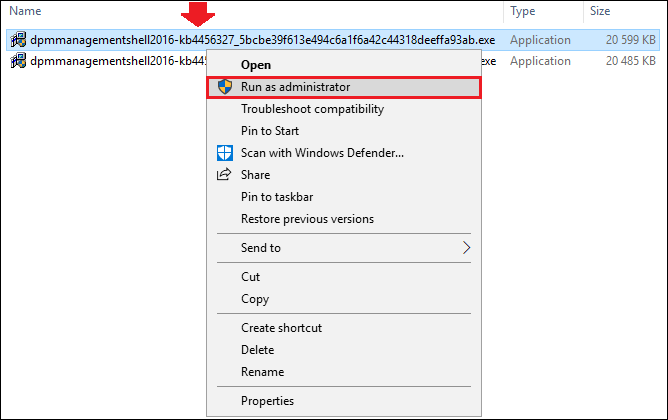
On the remote computer where the DPM Remote Administration is installed, right click the dpmmanagementshell2016-kbXXXXXXX…. file and Run as administrator, select the file according to the architecture the remote computer has, either 64-bit / 32-bit.
The installation will start immediately and finish quite quickly, there will be a small window showing files being extracted.
Once this window disappears the installation is complete, we can then try opening the DPM console on the remote computer to see if it works.
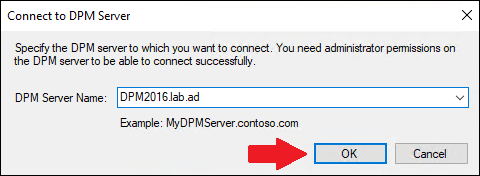
Enter the DPM server name and then click OK to connect.
The DPM console should now load up, let’s have a look at the version by going to About DPM.
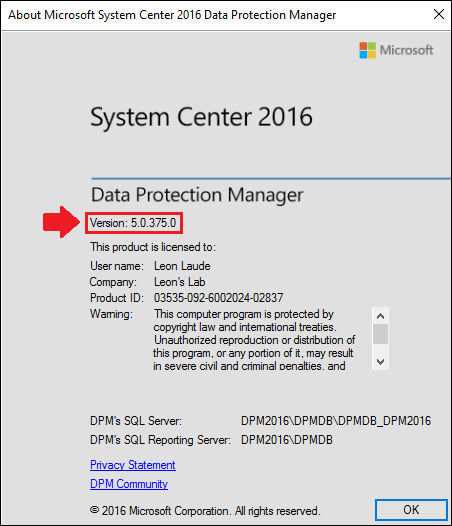
The About DPM window should now look the same as on the DPM server.
We have now successfully updated the DPM Remote Administration console.
Updating the DPM Central console
Some organizations might use multiple DPM servers or even different versions of DPM, with the DPM central console we can both manage and monitor multiple DPM servers from a single location. The DPM central can’t be installed on a DPM server, it is installed on the Operations Manager (SCOM) server. If the DPM central console is installed, it should look similar to below:
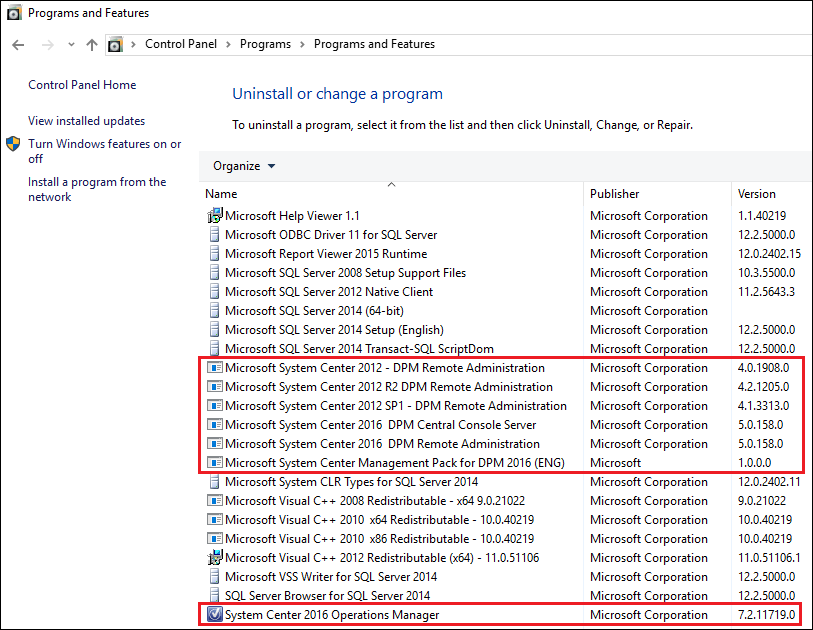
(DPM Central console RTM version installed)
If an Update Rollup has been installed on the DPM server, two (2) executables from the Update Rollup will have to be installed on the Operations Manager (SCOM) server where the DPM Central console is installed.
Download the corresponding Update Rollup that is currently installed on the DPM server.
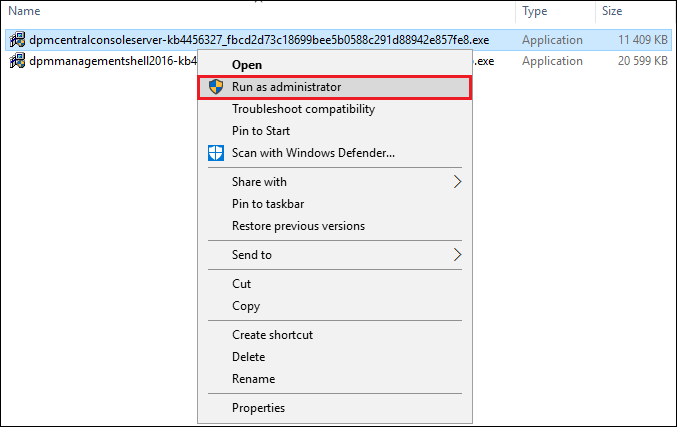
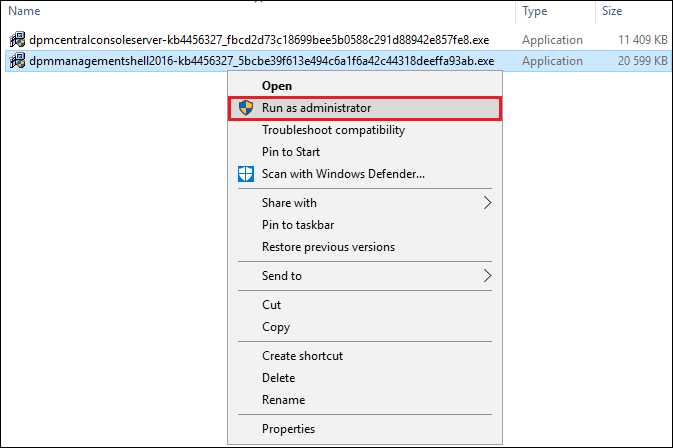
The executable files from the Update Rollup that will be needed are the: dpmcentralconsoleserver & dpmmanagementshell2016 files.
Copy the files to the Operations Manager (SCOM) server, where the DPM Central console is installed.
Install the updates by right clicking on them and then Run as administrator.
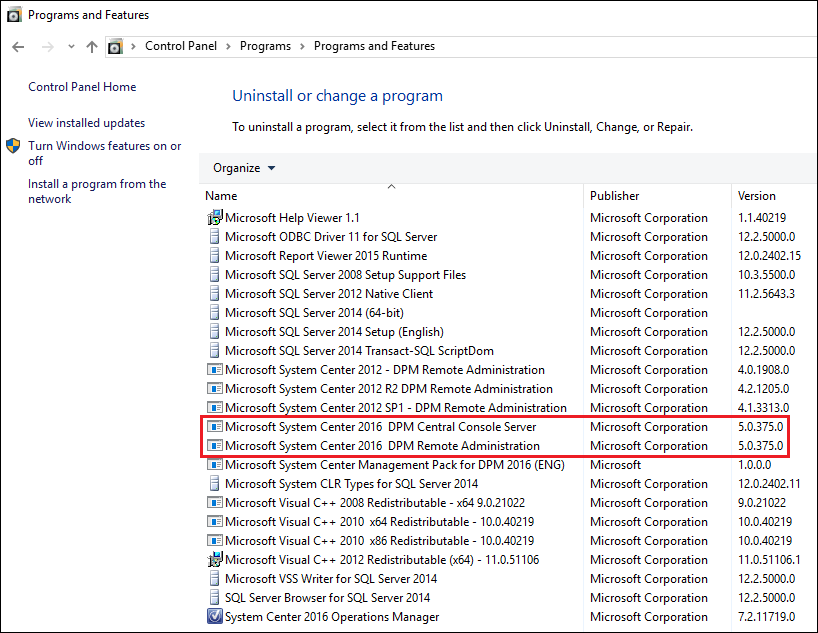
Both updates will install quite quickly, once both have been installed we can confirm that they have been updated by going to the Programs and Features in the Control Panel.
We can now see that the version has been updated from 5.0.158.0 (RTM) to 5.0.375.0 (Update Rollup 6).


