Azure: Create Your First Azure Service Bus App
Azure Service Bus is a cloud delivery messaging service.
Azure Service Bus Models
Service bus has two primary ways of enabling messaging, these are : Queue model [one to one]: Many Front End applications send messages to the queue and one application on the back end serves those requests in order of priority, Topic model [one to many]: This is a publish-subscribe model, push the message into a topic and that message sent to all subscribers one to many, e.g Twitter or Facebook feeds.
Deploy your first Service Bus
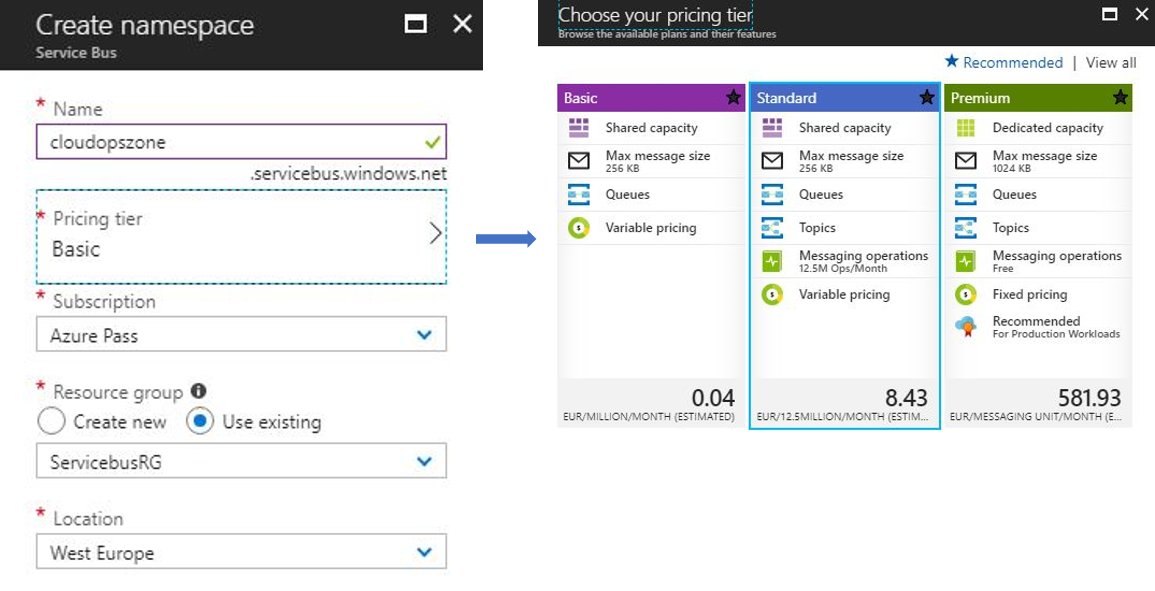
Create Namespace
To deploy a Service Bus first it is needed to create a Namespace. Type at field Name the FQDN for the namespace, e.g cloudopszone.servicebus.windows.net.
| Useful Notice: Fully Qualified Domain Name (FQDN), must be unique |
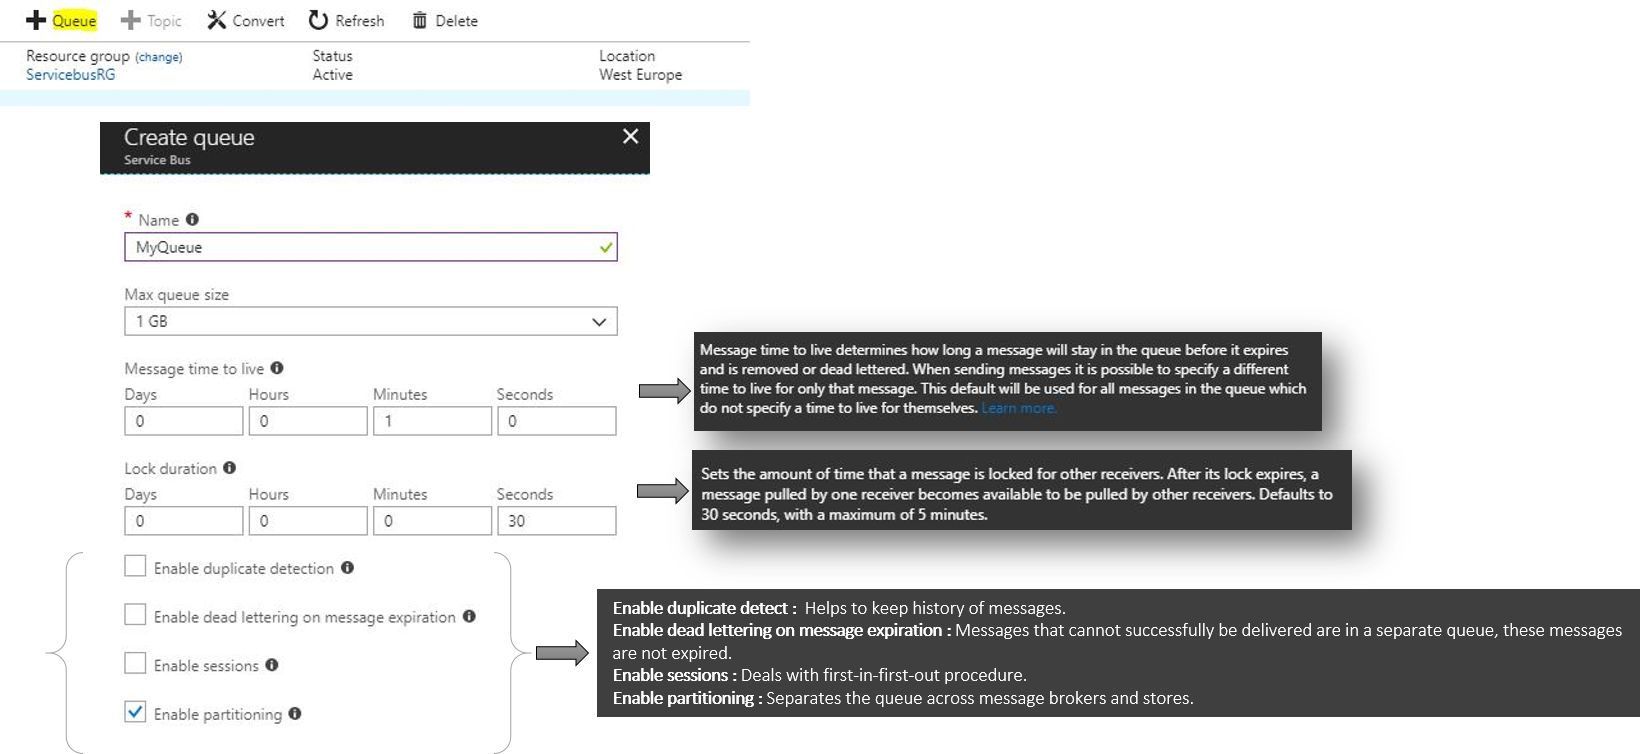
Create Queue
Now, to create a Queue, click +Queue and fill the Create queue blade.
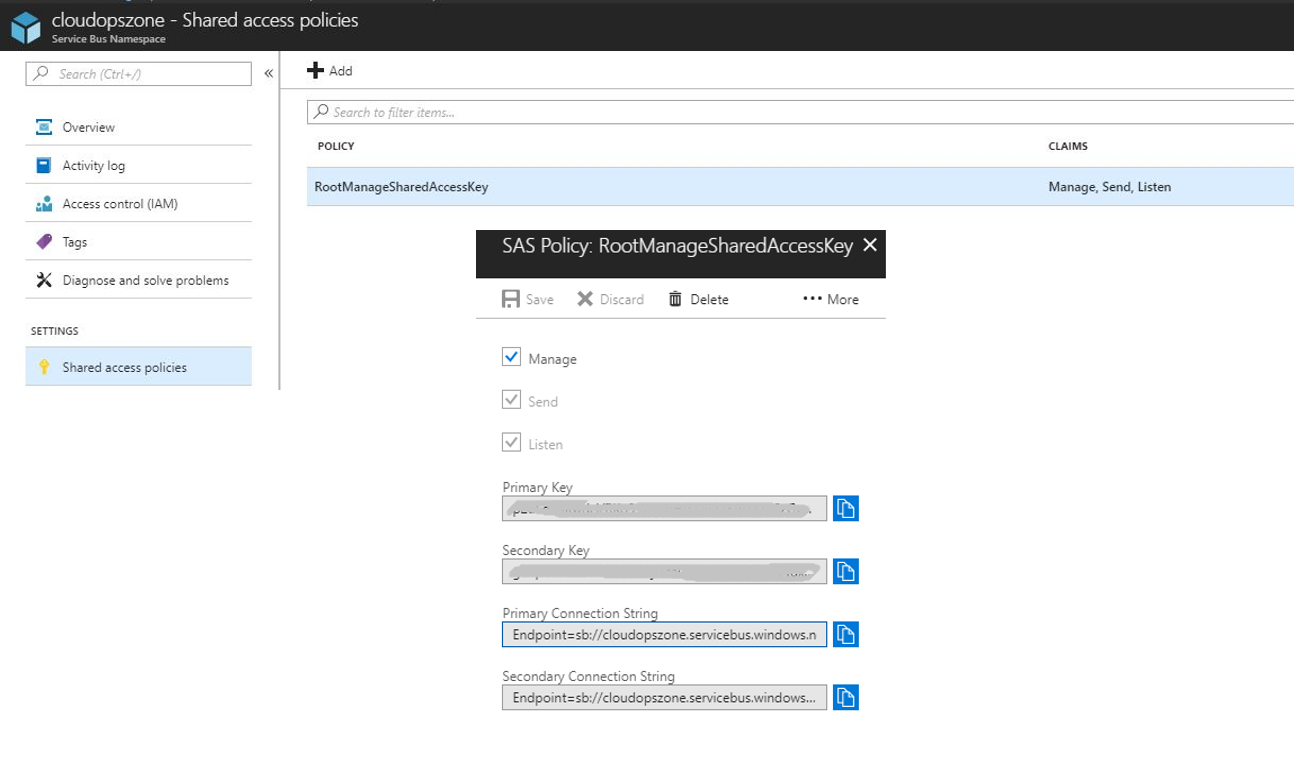
Shared Access Policies
Note the Shared Access Policies, because by default there is one single key the RootManageSharedAccessKey, this key allows Admin access to the queue. Also here are the keys and the connection strings.
Service Bus queue App
The following instructions describe how a C# application can use Azure Service Bus Queue.
Create a console app
Open Visual Studio - File - New - Project..., select Visual C# - Windows Classic Desktop - Console App (.Net Framework).
Azure Service Bus NuGet Package
Install the WindowsAzure.ServiceBus NuGet package. From Tools - NuGet Package Manager - Manage NuGet Packages for Solution...
Add the Service Bus Messaging Namespace
Type the code using Microsoft.ServiceBus.Messagingat the Program.cs, like the next image.
using System;
    using System.Collections.Generic;
    using System.Linq;
    using System.Text;
    using System.Threading.Tasks;
    using Microsoft.ServiceBus.Messaging;
Create Connection, Send and Read a Test Message
In the following code create a connection (using the Azure Service Bus connection string), Queue (type the name of the queue), Client (type the parameters for connection string and queue), a message (type your test message) and send the message.
<pre class="lang:c# decode:true">using System;
    using System.Collections.Generic;
    using System.Linq;
    using System.Text;
    using System.Threading.Tasks;
    using Microsoft.ServiceBus.Messaging;

    namespace cloudopszoneSBQ
    {
     class Program
     {
     static void  Main(string[] args)
     {

     var myconn = "Endpoint=sb://cloudopszone.servicebus.windows.net/;SharedAccessKeyName=RootManageSharedAccessKey;SharedAccessKey=p2uEdJDXwdcl/RKo95B4hnHfKQv528/67KpiCzGyv2w=";
     var myqueue = "myqueue";

     var myclient = QueueClient.CreateFromConnectionString(myconn,myqueue);
     var mymessage = new  BrokeredMessage("This is a cloudopszone test message");
     myclient.Send(mymessage);

     Console.ReadKey();
     }
     }
    }</pre>
Bellow the code that does the work for the message read.
myclient.OnMessage(message =>
    {
     Console.WriteLine("The message is :" + mymessage.GetBody<string>());
    });
Build the App and Run The Code To Send The Message
First build the code, from Build - Build Solutionand after the build succeeded run the app by click Start.
Now, go back to the Azure Portal Service Bus Queue and there are 2 Active Messages.
..... and here is the result of the message read.
References
Please find additional service bus resources: TechNet Service Bus Resources


