PowerShell: Getting Started with Binary Module for PowerShell Core
1. Introduction
In this article, I will provide a simple walkthrough on how to get started with PowerShell binary module development in C# using Visual Studio Code and .Net Core SDK for PowerShell Core on macOS.
2. Requirements
- PowerShell Core
- .Net Core SDK for Windows / macOS / Linux
- Visual Studio Code
- C# Extension for Visual Studio Code
3. Getting Started with PowerShell Binary Module development
3.1. Preparing pre-requisite requirements
In this article, some pre-requisite requirements are not mandatory in order to develop a PowerShell binary module in C# to run in .Net Core 2.0 for PowerShell Core.
3.1.1. Download and Install PowerShell Core on macOS
Firstly, we will have to download and install PowerShell Core for macOS in order to use PowerShell but if you already have using PowerShell on macOS / Linux, we can skip this step.
# Download and Install PowerShell on macOS
curl -LJo ~/Downloads/powershell-6.0.0-rc.2-osx.10.12-x64.pkg
https://github.com/PowerShell/PowerShell/releases/download/v6.0.0-rc.2/powershell-6.0.0-rc.2-osx.10.12-x64.pkg
&& sudo installer -pkg ~/Downloads/powershell-6.0.0-rc.2-osx.10.12-x64.pkg -target /

3.1.2. Download and Install .Net Core SDK on macOS
Next, we will have to download and install .Net Core SDK for macOS to be able to generate a new project and compile or build the project for use.
# Download and Install .Net SDK on macOS
curl -LJo ~/Downloads/dotnet-sdk-2.1.3-osx-gs-x64.pkg
https://download.microsoft.com/download/2/9/3/293BC432-348C-4D1C-B628-5AC8AB7FA162/dotnet-sdk-2.1.3-osx-gs-x64.pkg
&& sudo installer -pkg ~/Downloads/dotnet-sdk-2.1.3-osx-gs-x64.pkg -target /
Once the .Net Core SDK has been installed, you can validate the .Net Core SDK using the following command below.
# Reset terminal and Show .Net SDK Information
reset && dotnet --info

3.1.3. Download and Install Visual Studio Code on macOS
Next, we will have to download and install Visual Studio Code as your Integrated Development Environment (IDE) application to develop the PowerShell module in C#. If you have other preferred IDE of your choice for C# development, you can skip this step.
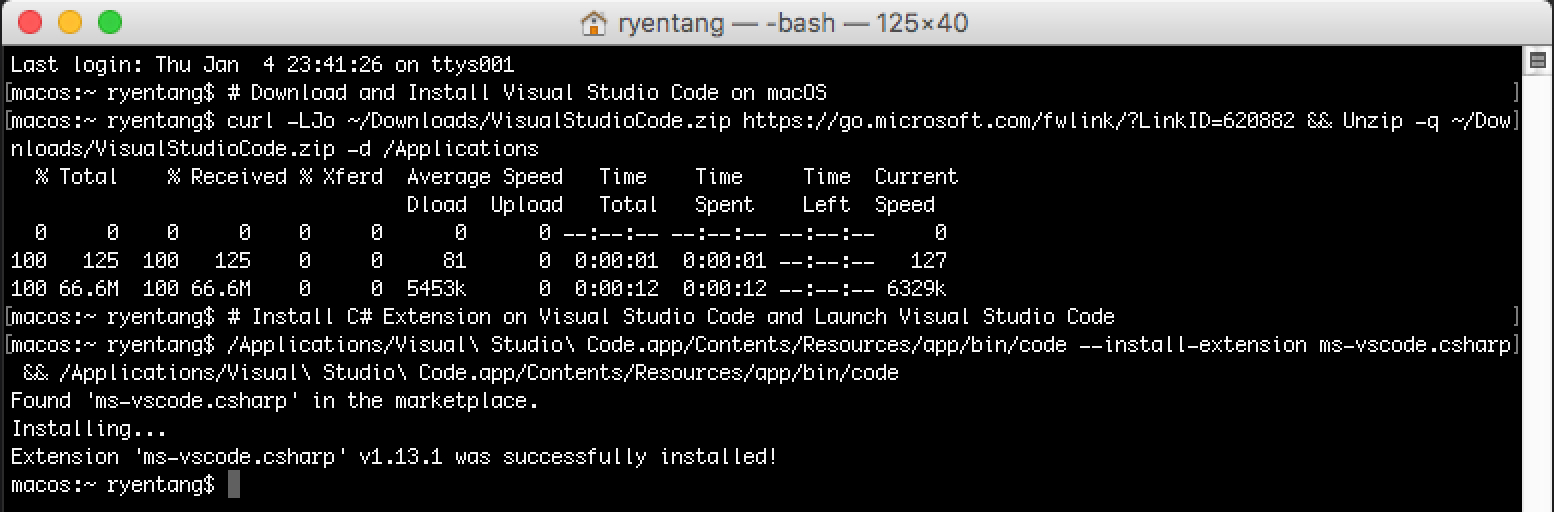
# Download and Install Visual Studio Code on macOS
curl -LJo ~/Downloads/VisualStudioCode.zip https://go.microsoft.com/fwlink/?LinkID=620882
&& Unzip -q ~/Downloads/VisualStudioCode.zip -d /Applications
3.1.4. Install C# Extension on Visual Studio Code
If you preferred to use Visual Studio Code as your preferred IDE application, you will need to install the C# extension on Visual Studio Code.
# Install C# Extension on Visual Studio Code and Launch Visual Studio Code
/Applications/Visual\ Studio\ Code.app/Contents/Resources/app/bin/code --install-extension ms-vscode.csharp
&& /Applications/Visual\ Studio\ Code.app/Contents/Resources/app/bin/code
3.2. Begin PowerShell Binary Module development
Now that we have all the pre-requisite requirements installed on the macOS, let us begin developing a simple powershell cmdlet using Visual Studio Code and .Net Core SDK in macOS for PowerShell Core.
3.2.1. Creating working folder directory
Let us make a Projects folder directory containing a PowerShell folder directory for all PowerShell developments with our working HelloWorld example directory.
# Create our folder directory structure
mkdir Projects && cd Projects && mkdir PowerShell && cd PowerShell && mkdir HelloWorld && cd HelloWorld
3.2.2. Generate a new Class Library with PowerShell Standard Library package
Once we are in the working folder directory, we will use .Net Core SDK to generate a new Class Library project and add the PowerShell Standard Library to the project.
# Generate a new Class Library with PowerShell Standard Library package
dotnet new classlib && dotnet add package PowerShellStandard.Library --version 3.0.0-preview-01

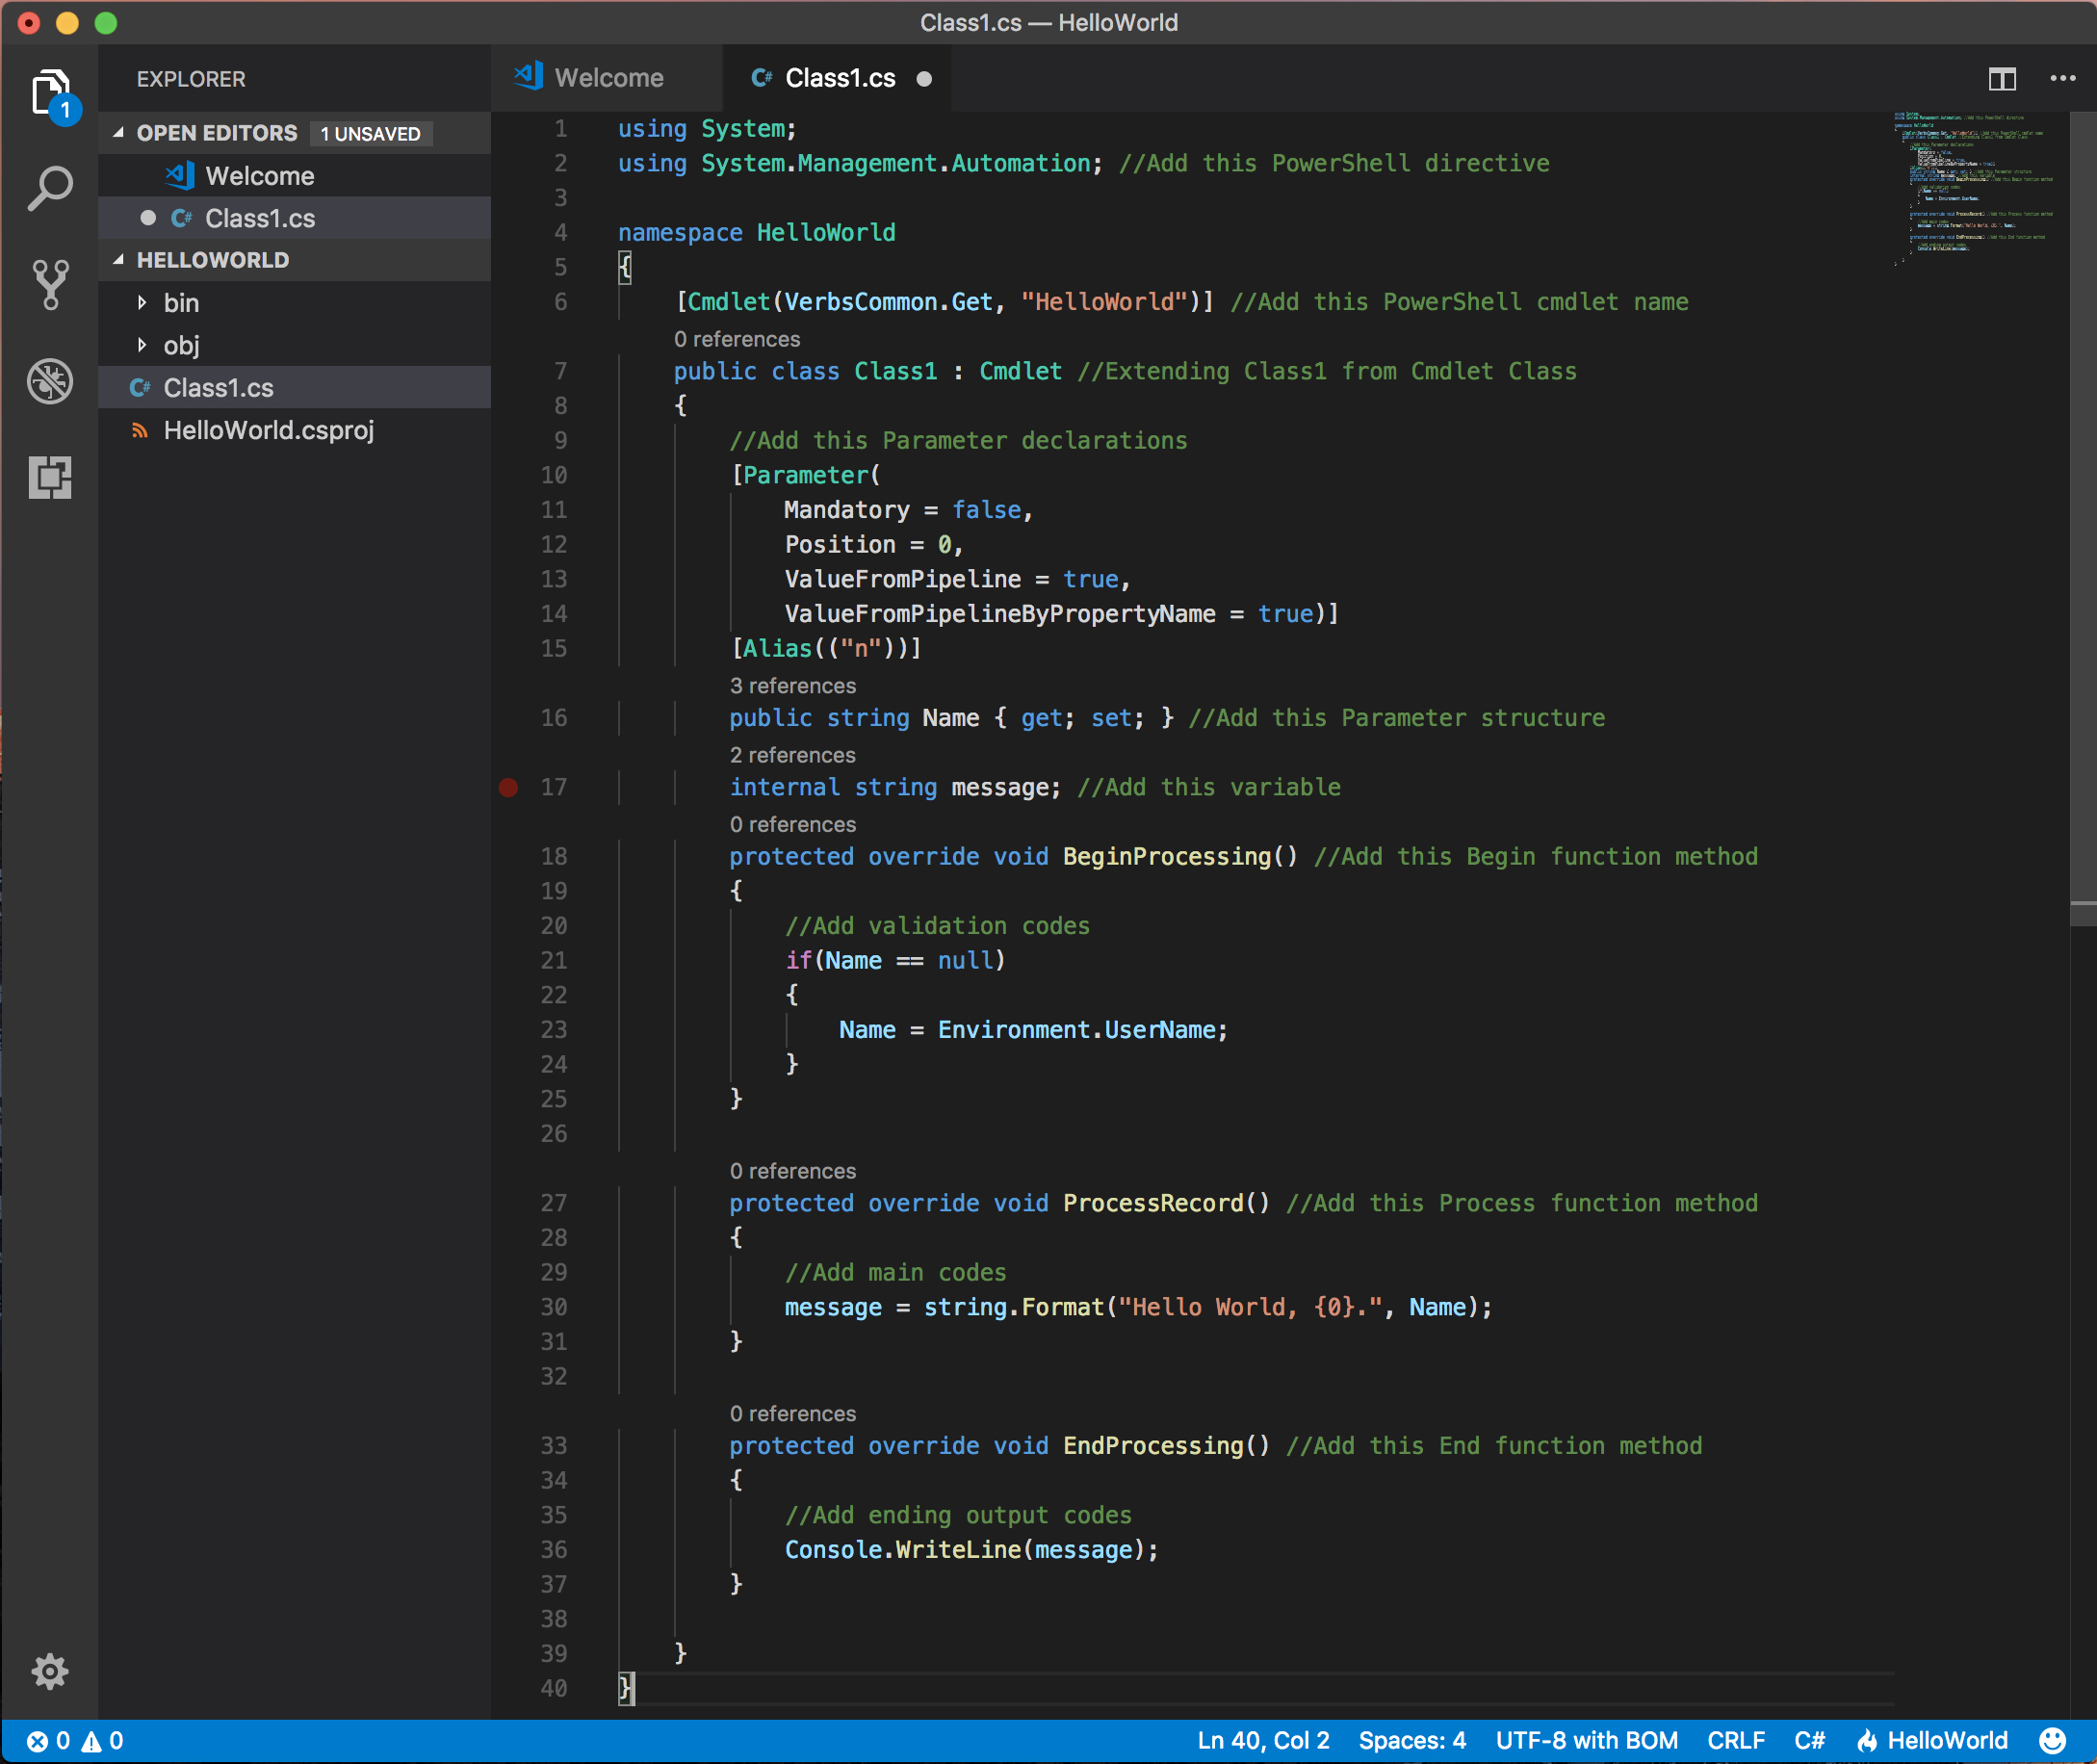
3.2.3. Develop a simple PowerShell HelloWorld binary module in C#
Next, launch Visual Studio Code to edit the Class1.cs with the following basic C# HelloWorld example code that create a HelloWorld module with a Get-HelloWorld cmdlet for walkthrough demonstration purposes.
using System;
using System.Management.Automation; //Add this PowerShell directive

namespace HelloWorld
{
    [Cmdlet(VerbsCommon.Get, "HelloWorld")] //Add this PowerShell cmdlet name

    public class Class1 : Cmdlet //Extending Class1 from Cmdlet Class
    {
        //Add this Parameter declarations
        [Parameter(
            Mandatory = false,
            Position = 0,
            ValueFromPipeline = true,
            ValueFromPipelineByPropertyName = true)]
        [Alias(("n"))]
        public string Name { get; set; } //Add this Parameter structure

        internal string message; //Add this variable

        protected override void BeginProcessing() //Add this Begin function method
        {
            //Add validation codes
            if(Name == null)
            {
                Name = Environment.UserName;
            }
        }

        protected override void ProcessRecord() //Add this Process function method
        {
            //Add main codes
            message = string.Format("Hello World, {0}.", Name);
        }

        protected override void EndProcessing() //Add this End function method
        {
            //Add ending output codes
            Console.WriteLine(message);
        }
    }
}
3.2.4. Compile the PowerShell Binary Module
Using .Net Core SDK, we will compile or build the PowerShell binary module into a HelloWorld.dll in the working folder directory.
# Compile or Build the PowerShell Cmdlet Module DLL in that working folder directory
dotnet publish -c release
4. Conclusion
After the compilation of the PowerShell binary module using the .Net Core SDK, it is the moment of truth to import the module into PowerShell and test the Get-HelloWorld cmdlet that we have created for PowerShell Core in macOS terminal.
# Switch from BaSH to PwSH
pwsh
# Import the PowerShell Cmdlet Module DLL
Import-Module ~/Projects/PowerShell/HelloWorld/bin/release/netstandard2.0/HelloWorld.dll

5. Reference
- Get started with .NET in 10 minute
- Microsoft Docs - .NET Core Guide
- GitHub - .NET Core Release Notes
- Microsoft MSDN - How to Write a PowerShell Binary Module
6. See Also
- Visual Studio Code: Getting Started with PowerShell by Ryen Kia Zhi Tang
- Create Your Own PowerShell Commands using C# Class Library by Chen V