SharePoint Webhooks As Event Receivers For SharePoint Online
Introduction
SharePoint Webhooks were made generally available in January 2017. It provides the mechanism of catching the Asynchronous Events like item added, item deleted etc., that happen in the SharePoint Objects. At present, SharePoint Webhooks cannot be used with Synchronous events like Adding Items, for which we will still have to rely on Remote Event Receiver solution using Provider Hosted Add-in. As of now, SharePoint webhooks are only enabled for SharePoint list items.
Working of SharePoint Webhooks
So as to implement a new SharePoint webhook, we will first have to create a service endpoint using Azure Function and then add it as a subscription to the SharePoint List. While creating the subscription, we will have to specify the below information so that the subscription can be registered with the list.
- Resource - This would be the SharePoint List REST API URL
- Server notification URL – This is the service endpoint URL which we will get after creating the Azure Function App. It is to this URL , SharePoint will send the notification and data payload when ever an event happens in the list.
- Expiration date – It is the expiration date of our subscription which is by default 6 months. It cannot be more than that.
- Client State(Optional) – It is a string passed back to the client on all notifications. We can use this for validating notifications send from SharePoint.
Create Service Endpoint in Azure
We will make use of Azure Functions to create the Service Endpoint that will store the code logic which will be triggered in response to the event notification coming from SharePoint. We will be using the URL received after creating the Azure Function App to add as a new subscription to the List.
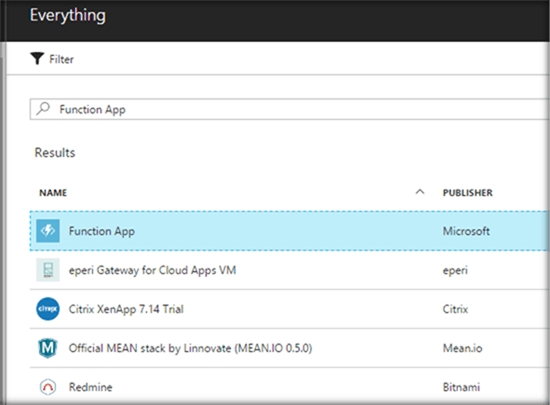
To create the Azure Function App, search for ‘Function App’ in the Azure Portal and select it.
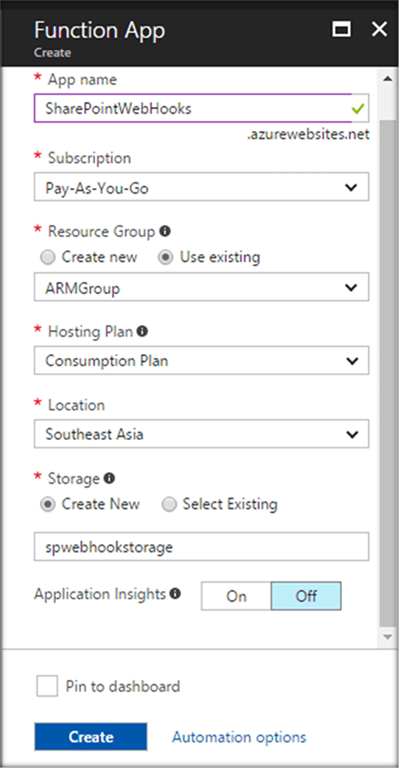
Specify the App name and other details required for creating the Azure Function App.
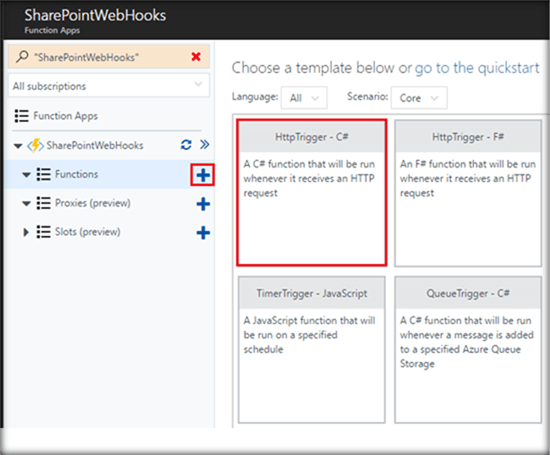
Once created, we can add a HTTP Trigger function as shown below.
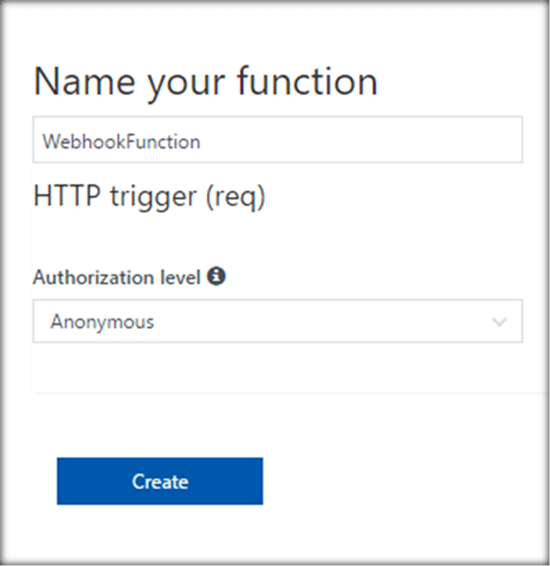
We will specify the Trigger Function Name and set the Authorization level to Anonymous.
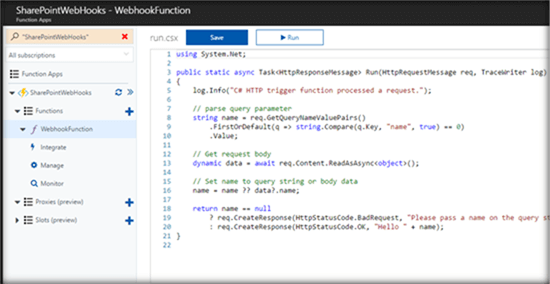
Upon creation, it will have a default code fragment which we will replace with our code.
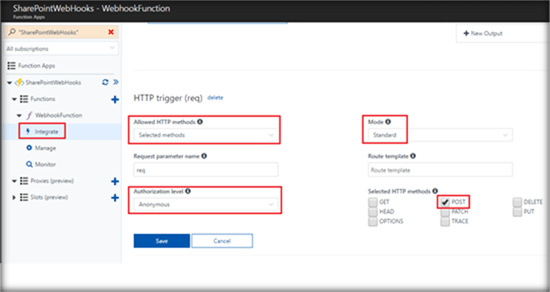
We will add the code at a later point. First, we need to make sure that the trigger will respond to some notification it receives. So, let’s go to the "Integrate" section and change the settings as shown below.
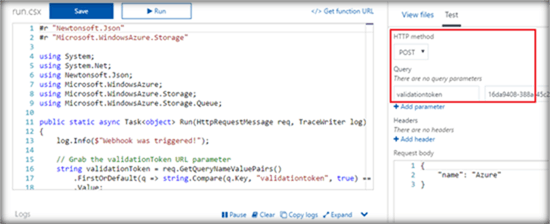
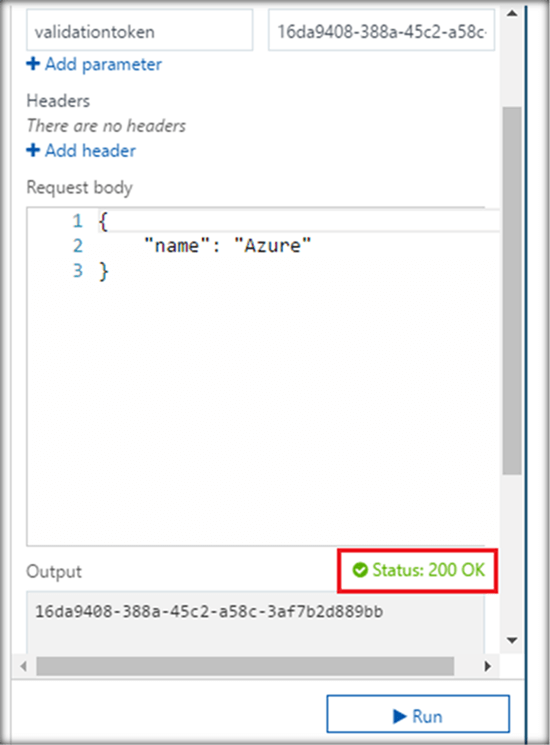
In the run.csx file, from the test section add a new query parameter ‘validationtoken’ and set an arbitrary value.
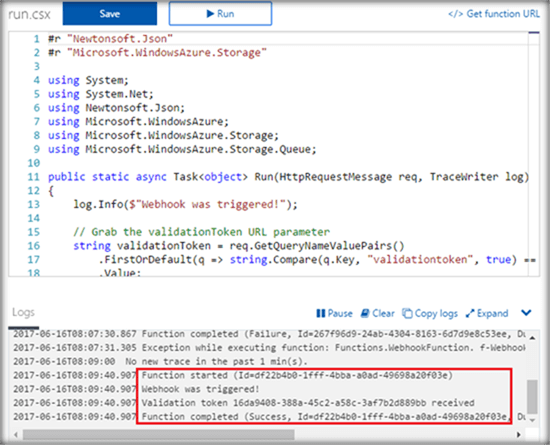
Upon running it if we get the below status in the logs we can make sure that the trigger function is setup for basic use.
It will also give us a 200 OK status in the output window.
After the testing get the Function URL from the run window.
Copy the URL as shown below,
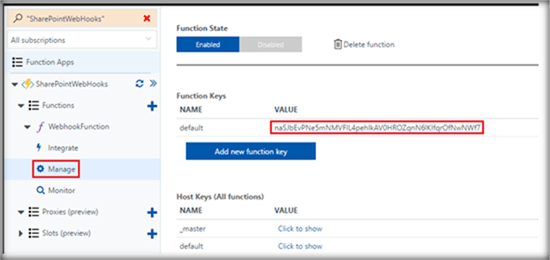
To avoid unauthorized usage of our Azure Function we can specify a secret code which we can get from the Manage section to the end of the SharePoint webhook URL. In our case the SharePoint Webhook URL which we will use to attach to the SharePoint List will look like below:
Add SPWebhook Subscription
Once we have got the web hook URL let's register it with the SharePoint List. In this demo we will be registering it with the list named SLA so that whenever a new item is added, we will have to inform the Service User about the new change in the List for him to process the action item before the SLA Date.
So as to add the subscription we will be making use of the below parameters
- Resource - /_api/web/lists(‘SLA List GUID')/subscriptions
- Server notification URL
- Expiration date – "2017-09-19T16:17:57+00:00"
We will be issuing a POST request with the above body. We can either use an Azure AD Application or a SharePoint Hosted Add-in to add the subscription. As per the Microsoft Documentation, ensure that the below permission are assigned so the subscription can be added successfully,
**If your application is a Microsoft Azure Active Directory (AD) application
**
| Application | Permission |
| Office 365 SharePoint Online | Read and write items and lists in all site collections. |
If your application is a SharePoint add-in
You must grant the SharePoint add-in the following permission(s) or higher,
| Scope | Permission Rights |
| List | Manage |
Add SharePoint Webhook Subscription using SPWebhookAdmin
We can either create a new application to register the subscription from scratch as shown in this example. However, for this demo let’s not reinvent the wheel, we will make use of an awesome tool created by Josh that registers the SharePoint WebHook Subscription using SharePoint Framework. He has done an awesome work with SPWebHookAdmin.
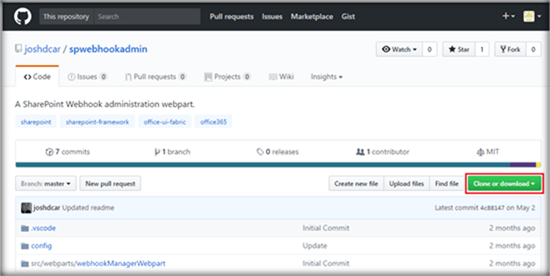
You can download the entire source code from GitHub. Lets download it to the desktop and run the SPFx solution to register SharePoint Webhook.
We can download the repository from GitHub
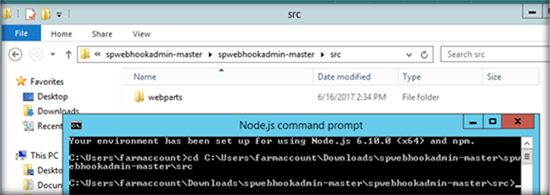
Since this is a SharePoint Framework solution we will need to have the prerequisites required for SPFx setup,which is detailed here. Once the solution is downloaded , open Node JS command prompt and head over to the src folder location of the solution.
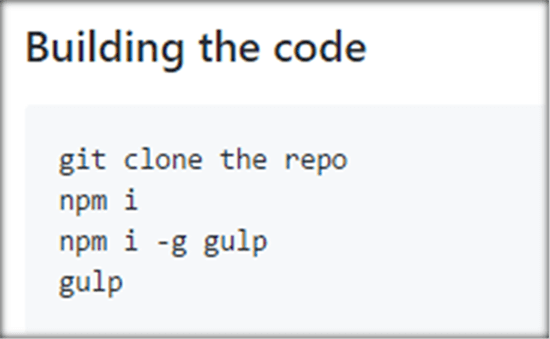
Build the code for the first time using the below commands as mentioned in Github.
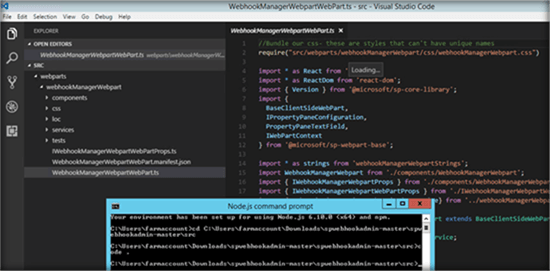
If we want to view the solution implementation we can use enter Code . to gulp so that the solution opens up in Visual Studio Code.
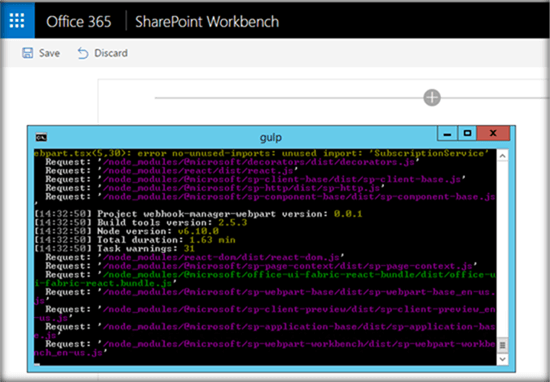
Lets head over and run gulp serve so that the solution will be added to the local workbench.
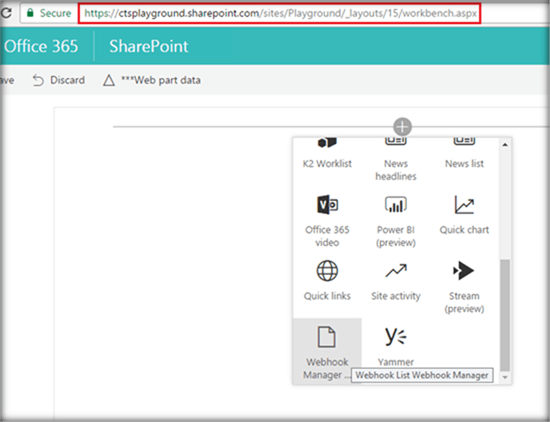
In our case we have to add the solution to SharePoint Online. We will do this by appending the below URL to our SharePoint Site Collection URL. *_layouts/15/workbench.aspx
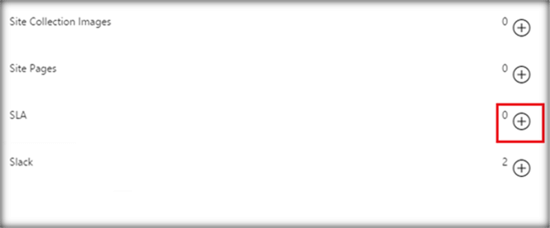
*From the + Sign add the Webhook manager to the page.This will list out all the list in the site and the number of subscriptions associated with it.
As we can see SLA list does not have any subscription. Add a new one clicking on the + Sign.
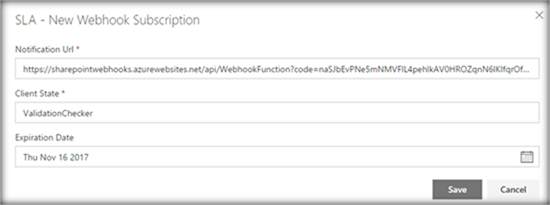
Specify the Notification URL which is our Azure Function URL. Client State is optional as per the documentation, but this solution uses it for additional validations. You can add an arbitrary string here say: ValidationChecker. Set the Expiration date which should not exceed 6 months from the date of creation.
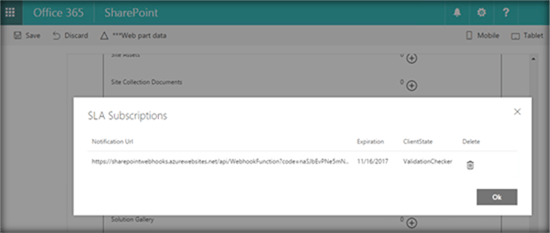
Thus the new subscription has been added and we can see the count updated as below.
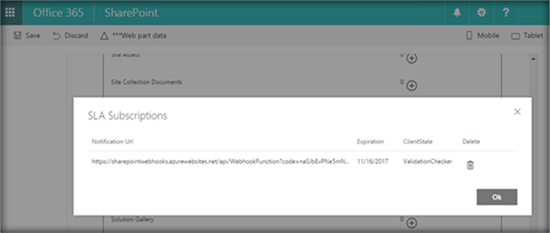
On Clicking the list name we can see the newly added subscription.
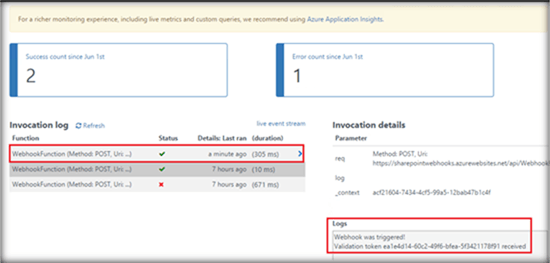
When the subscription was added to the SharePoint List, in the azure portal the recently created Azure Function was triggered and the we can see the validation token that was received from SharePoint in the Logs section.
Add Client DLLs to Azure Function
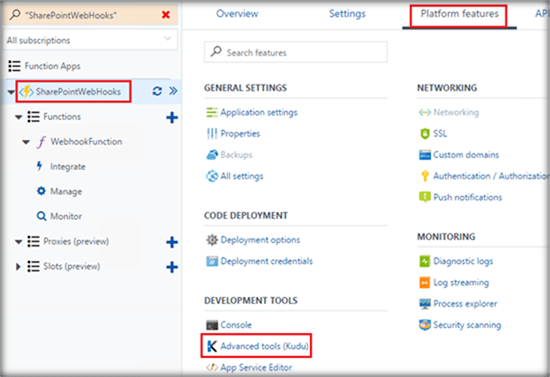
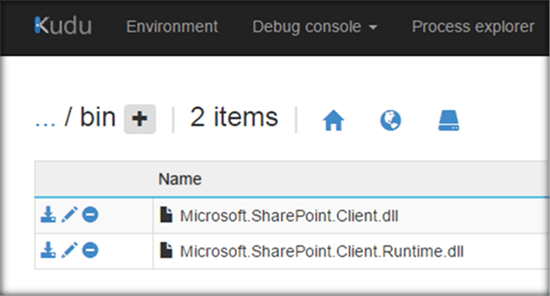
In order to start working with the code implementation we will be using the SharePoint Client DLLs which has to be uploaded to the Azure Function App directory. Select the Azure Function App and from Platform Features, Select Advanced Tools (Kudu)
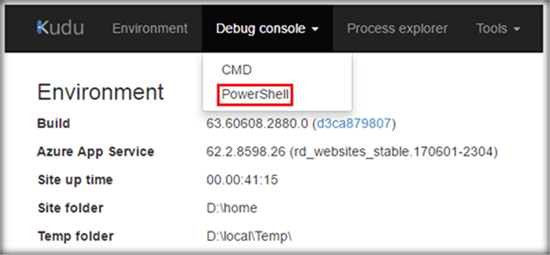
Select PowerShell from Debug Console.
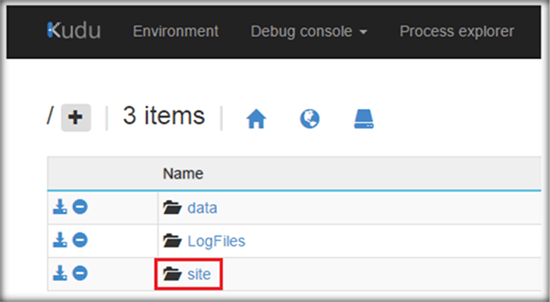
Navigate through the folders Site -> WWWRoot->(Function Name)
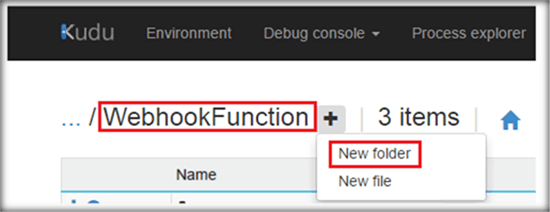
Create a new folder within the <Function Name> folder.
Drag and drop the below client DLLs from the desktop.
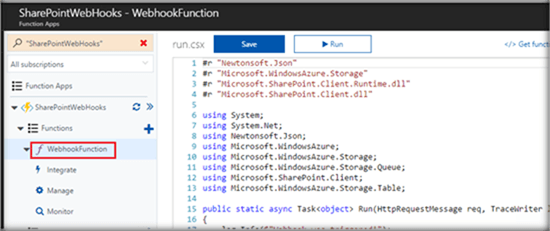
Add the Webhook Functionality code
Once we have added the client Dlls , we can start working on the code logic that has to be triggered in response to the SharePoint Event notification.
The webhook code does the below steps,
- Reads the validation token and the payload content send from SharePoint
- foreach(var notification in notifications)
- {
- log.Info($"{notification.Resource}");
- CloudStorageAccount storageAccount = CloudStorageAccount.Parse("DefaultEndpointsProtocol=https;AccountName=spwebhookstorage;AccountKey=SVM4igqbl9/GotmaC4PGLI5nM7QCXzcJCgY+8zB1fG2D1aKgYOr+lnMv6QkDAoY1Kw6KSe/iCxM97vDu52leDw==");
- // Get queue... create if does not exist.
- CloudQueueClient queueClient = storageAccount.CreateCloudQueueClient();
- CloudQueue queue = queueClient.GetQueueReference("sharepointlistwebhookeventazuread");
- queue.CreateIfNotExists();
- // add message to the queue
- string message = JsonConvert.SerializeObject(notification);
- log.Info($"Before adding a message to the queue. Message content: {message}");
- queue.AddMessage(new CloudQueueMessage(message));
- log.Info($"Message added :-)");
- listID = notification.Resource;
- subscriptionID=notification.SubscriptionId;
- }
- Connect to SharePoint Online and create an object of the List where the Event occurred. The List ID is sent along with the SharePoint Payload. So we can make use of CSOM to create the list from this ID.
- SPClientContext.Credentials = spOnlineCredentials;
- Web spWeb = SPClientContext.Site.RootWeb;
- Guid listId = new Guid(listID);
- List changedList = spWeb.Lists.GetById(listId);
- SPClientContext.Load(changedList);
- SPClientContext.ExecuteQuery();
- Get the Changes that happened in the List – We can make use of the *ChangeQuery *CSOM Object to get the entire changes in the list. But in our case we need to get only the recent change. We can specify the time from which the changes has to be retrieved using the ChangeTokenStart. For this demo,to make things simpler, we are setting it to last one minute so that changes that happened in last one minute is retrieved.
- lastChangeToken = new ChangeToken();
- lastChangeToken.StringValue = string.Format("1;3;{0};{1};-1", listID, DateTime.Now.AddMinutes(-1).ToUniversalTime().Ticks.ToString());
- changeQuery.ChangeTokenStart = lastChangeToken;
Note
However to get the very latest change we will have to set the lastChangeToken() to the time at which the webhook was last triggered which is explained in this example. It reads the last webhook run time which is stored in the database. This way we can get the list change that happened between the current webhook trigger and the previous trigger which will get us the latest list event that caused the webhook to be invoked.
- ChangeToken lastChangeToken = null;
- lastChangeToken = new ChangeToken();
- lastChangeToken.StringValue = string.Format("1;3;{0};{1};-1", listID, DateTime.Now.AddMinutes(-1).ToUniversalTime().Ticks.ToString());
- ChangeQuery changeQuery = new ChangeQuery(false, true);
- changeQuery.Item = true;
- changeQuery.ChangeTokenStart = lastChangeToken;
- var changes = changedList.GetChanges(changeQuery);
- SPClientContext.Load(changes);
- SPClientContext.ExecuteQuery();
- Once the Changes are retrieved, it will contain the list item ID.We will create the list item based on the ID and send the mail to the Service User about the change in the SLA list so that he can work on the action item.
- foreach (Change change in changes)
- {
- if (change is ChangeItem)
- {
- ListItem changedListItem = changedList.GetItemById((change as ChangeItem).ItemId);
- SPClientContext.Load(changedListItem);
- SPClientContext.ExecuteQuery();
- string emailBody = "<b>New Change in the SLA List</b> </br><table style='border: 1px solid black;'>";
- emailBody += "<table style='border: 1px solid black;'><tr style='color:green;'><td>ID :"+ (change as ChangeItem).ItemId +" -- </td><td><b> Action Item : "+ changedListItem["Title"]+"</b></td><td> -- SLA : "+ changedListItem["SLADate"]+"</td></tr>";
- emailBody += "</table>";
- Microsoft.SharePoint.Client.Utilities.EmailProperties emailProperties = newMicrosoft.SharePoint.Client.Utilities.EmailProperties();
- emailProperties.To = new string[] { "Priyaranjan@SharePointChronicle.com" };
- emailProperties.Subject = "Attention : A new modification has occured in the SLA List";
- emailProperties.Body = emailBody;
- Microsoft.SharePoint.Client.Utilities.Utility.SendEmail(SPClientContext, emailProperties);
- SPClientContext.ExecuteQuery();
- log.Info($"A list item with ID : { (change as ChangeItem).ItemId} is {change.ChangeType.ToString() }" );
- }
- }
We can add additional logging to the code so that we can debug the code when it is run. For instance we are outputting the payload sent from SharePoint List on Event Notification as well as the list name and List ID that was added.
Demo of SharePoint Webhooks
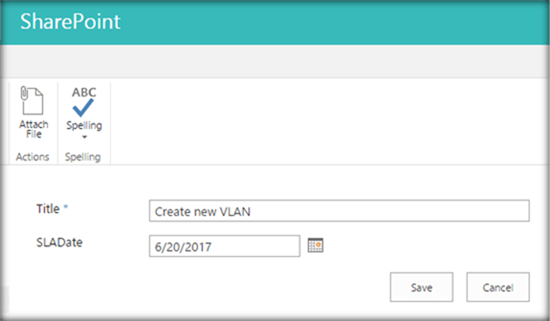
Lets see how the SharePoint Webhooks work. We will add a new item in SharePoint List which should ideally trigger the SharePoint Webhook as part of the Event Notification to Azure Function.
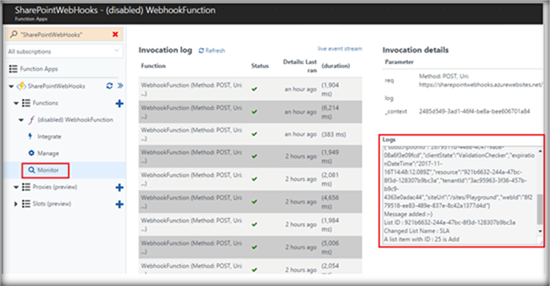
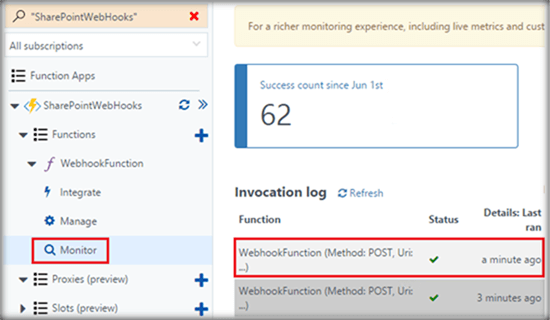
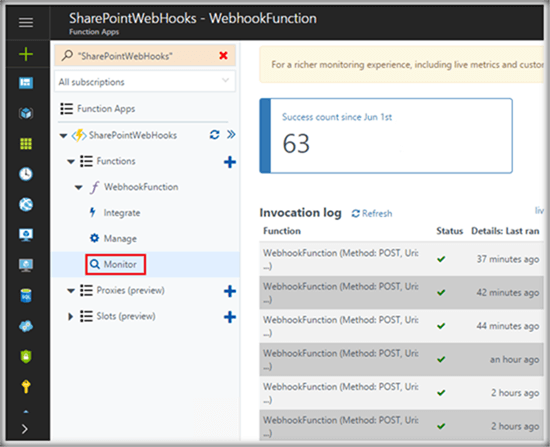
If we head over to the Azure Function App in the Azure Portal, we can see that the webhook function was triggered from the Monitor Section.
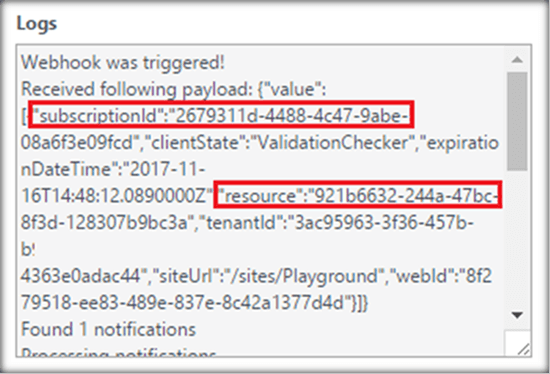
We can also see the logs indicating a successful run of the Azure Function which has correctly outputted the payload sent from SharePoint List as well as code outputs.
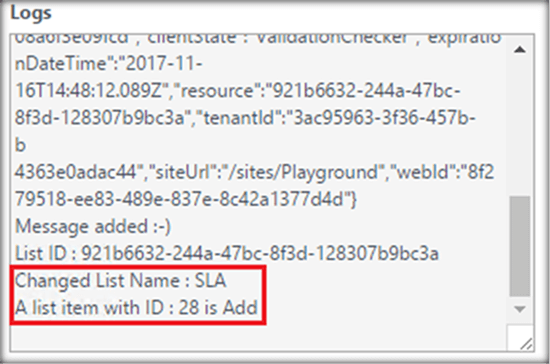
It has also given us the list where the event occurred, list id and the type of Event that happened in the list.
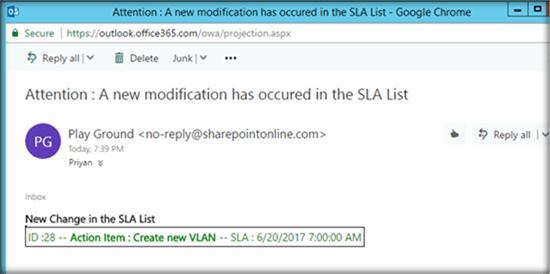
As part of the code implementation, we have used SPUtility to send mail to the Service user with the details of the newly created list item so that he can work on the action item before its SLA.
SharePoint Webhooks in Action
The video recording of the demo is shared.
Monitor and Manage SharePoint Webhook
Once we have created and tested the SharePoint webhook, we can monitor the events from the Monitor section of the Azure Function App.
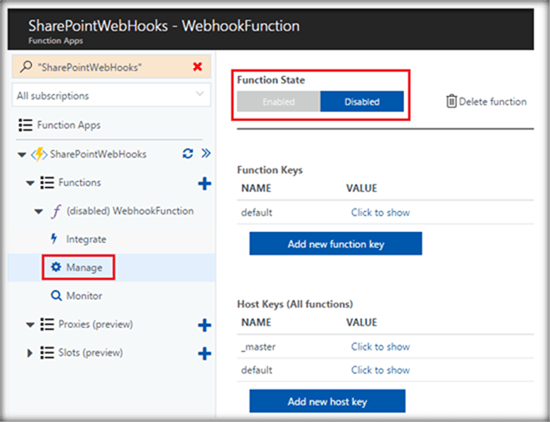
Similarly, if we don’t want the webhook function to be triggered, we can Disable the function from the Manage section.
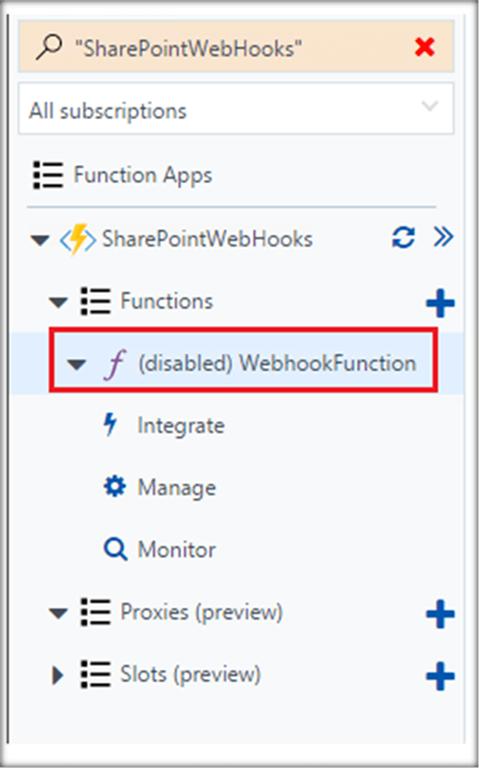
Once disabled, it will no longer respond to the SharePoint Webhook notification.
If we want to completely remove the subscription association with the list as well, we can use the same SharePoint Framework solution. We can delete it using the delete button.
Summary
Thus, we have seen the implementation of SharePoint webhooks and Azure Functions to simulate Event Receivers for SharePoint Online.
