Configure User Profile Service In SharePoint Server 2016
SharePoint has a user profile Service, which is responsible for the administration of the user profiles within SharePoint. The User Profile Service Application is the Service Application, which forms the basis of the user profile Service. All the social features of SharePoint are directly dependent on the User Profile Service, as it uses it to retrieve the user information. The social features like My Sites, Self-Service Site Creation, news feeds etc. requires the user profile Service to be pre-configured. Moreover, user profile Service Application is responsible for synchronizing the user profiles with the information which is stored in the active directory services.
In this article, we will see how to configure the user profile Service Application. While creating user profile Service, we can configure My Site URL. This is not mandatory, as we can configure My Site URL even later after the user profile Service creation. However, if we intend to configure My Site URL at the same time, make sure that you have a site collection created for My Site. If it is not created beforehand, we will get the error, given below.
Thus, make sure that a site collection can be assigned as My Site is in place. Here, we have created a site collection named ‘My Site’, using the ‘My Site Host’ template.
Now, let’s start with the user profile Service Application creation. Select ‘Manage Service Applications’ from Service Applications tab.
Select the ‘User Profile Service Application’ option.
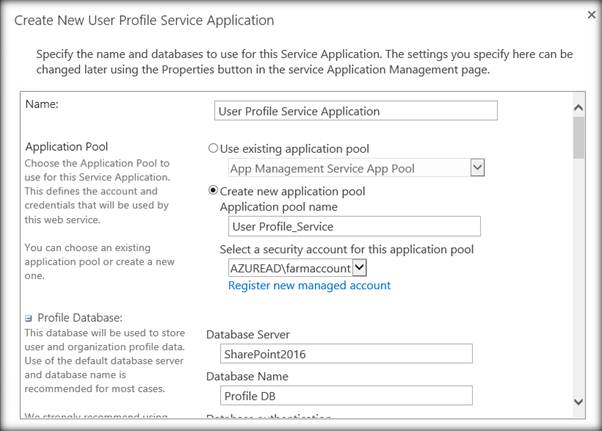
We can assign the name for the Service Application and specify the app pool, which will be used by the Service Application. We can also use an existing Application pool.
Specify the database Server and the database name, which will be used to store the social tag and notes.
As we move down, we have the option to enter My Site Host URL. Enter the site URL, which was earlier created to act as My Site. We also have to specify the managed path under which My Sites will be created. Here, I have added the managed path “sites/MySite/Personal”.
Click OK to start the provisioning of the Service Application.
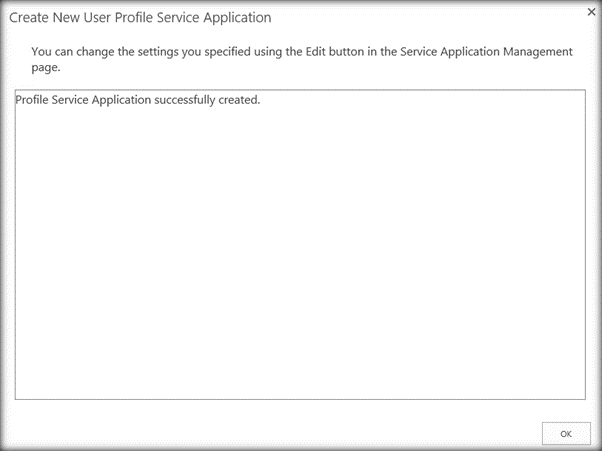
The user profile Service Application has been created.
Now, we have to create My Site managed path, which we had mentioned during the user profile Service Application creation. Select 'Managed Paths' from the managed Web Applications page.
Specify the managed path name as “sites/MySite/Personal” and click OK.
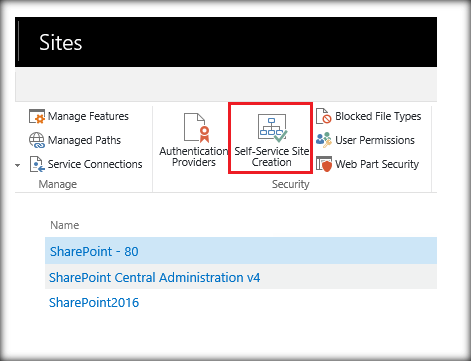
Now, we have to configure the Self-Service site creation option. Click Self-Service Site creation.
Set ‘On’ option to enable the creation of the Self-Service site creation feature. This will enable the users to create the sites on their own without the help of the site administrator. Now, we have to specify the path under which the site collections will be created. Here, we have mentioned the managed path ‘sites/SelfService’.
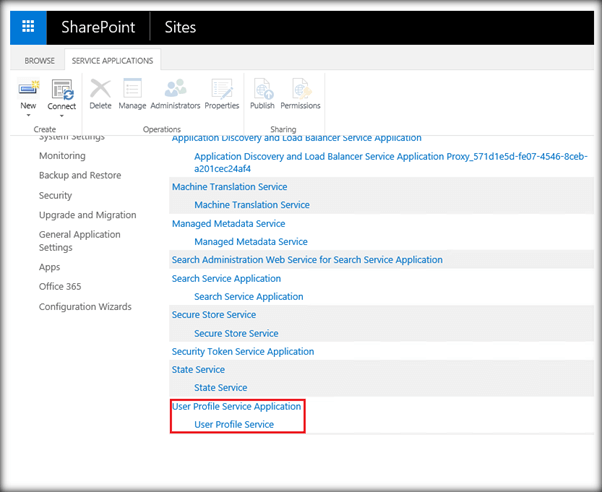
Subsequently, we can see the newly created user profile Service Application.
Clicking on it will take us to the page, where we can create and edit the user profile information of the user. We can also configure or edit My Site options.
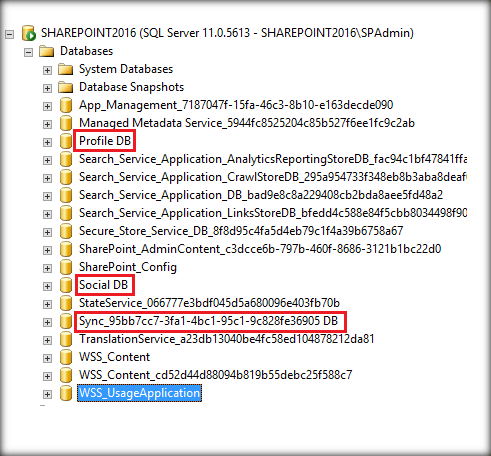
If we check SQL Server, we can see the newly created databases, which were created along with the user profile Service Application.
The social features and the user profile Service runs the numerous timer jobs in the background periodically to synchronize the data as well as to update the user profile information. If we go to Central Administration -> Monitoring -> Review job definitions we can see the timer jobs associated with User Profile Service.
Summary
Thus, we saw how to configure the user profile Service in SharePoint Server 2016.


