Getting started with the SharePoint Migration Tool from Microsoft
Microsoft has released a free SharePoint migration program called the SharePoint Migration Tool. Here is how to get started with this SharePoint Migration Tool for moving content from on-premises to Office 365.
SharePoint Migration Tool announcement
The SharePoint Migration Tool was launched during Microsoft Ignite 2017 in this blog on the Microsoft Tech Community - Introducing the SharePoint Migration Tool from Microsoft.
"At Microsoft Ignite we announced a new free, simple, and fast migration solution to help you migrate content from on-premises SharePoint sites and file shares to SharePoint or OneDrive in Office 365.”
The SharePoint Migration Tool has these features:
- Easy to use intuitive interface
- Migrate from file shares on-premises to SharePoint Online or OneDrive for Business
- Migrate from on-premises versions of SharePoint to SharePoint Online
- Supports CSV file for bulk migrations
- Detailed information and reports to track and troubleshoot migrations
- Support for MFA accounts (currently via a hidden registry key)
There aren't options for custom metadata mapping or SharePoint Online to SharePoint Online migrations. There is a product feedback suggestion to add support to migrate from one area of SharePoint Online to another. Vote here to express interest in this proposed feature.
As well as the SharePoint Migration Tool, for more complex migrations, customers may be able to take advantage of FastTrack data migration service. This depends on how many licences the customer has, for the full benefits they must have purchased 500 or more seats. Further details are available here - Data Migration.
General Availability
The SharePoint Migration Tool reached General Availability on January 10th, 2018 with build 0.2.75.0.
"Taking advantage of cloud services doesn’t have to be difficult or a long-phased migration project. Today we're excited to announce General Availability of the SharePoint Migration Tool, a simple, and fast migration solution to help you migrate content from on-premises SharePoint sites and file shares to SharePoint or OneDrive in Office 365."
General Availability of the SharePoint Migration Tool & SharePoint Migration Assessment Tool Updates
Download and Install the SharePoint Migration Tool
Download the tool from this address:
http://spmtreleasescus.blob.core.windows.net/install/default.htm
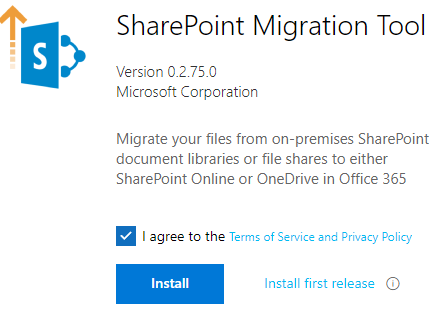
Accept the terms, click Install and when prompted again when the Application Install box appears, click Install to proceed. There is currently no offline installer for this app. The SharePoint Migration tool will automatically be launched after installation
The following browsers are supported: Internet Explorer, Edge or Chrome browser. Microsoft says for Chrome users, install the ClickOnce for Google Chrome plug-in before installing the SharePoint Migration Tool.
Requirements for the SharePoint Migration Tool
Here are the recommended requirements for best performance as well as the minimum requirements
| Specs | Recommended requirements for best performance | Minimum requirements (expect slow performance) |
| CPU | 64-bit Quad core processor or better | 64-bit 1.4 GHz 2-core processor or better |
| RAM | 16 GB | 8 GB |
| Local Storage | Solid state disk: 150 GB free space | Hard disk: 150 GB free space |
| Network card | 1 Gbps | High speed internet connection |
| Operating System | Windows Server 2012 R2 or Windows 10 client .NET Framework 4.6.2 |
Windows Server 2008 R2, Windows 7 updated or better .NET Framework 4.6.2 |
Sign-in to the SharePoint Migration Tool
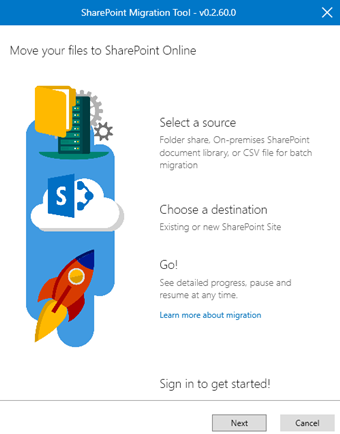
The first thing to do after the welcome screen is to click next to sign-in and specify a username and password. This is the tenant where files are being migrated to. Specifying this username and password associates the submitted migrations jobs to this account.
It is possible to resume a migration from another computer if that’s needed by logging in with the same username and password. This account must be a site collection administrator on the destination where content is being migrated to.
Using the SharePoint Migration Tool
Then next step is choose a source and destination. In the "Where is your data?" prompt, select either SharePoint on-premises, File Share or CSV file for bulk migration as the source. If selecting File Share, choose the file share to be migrated and SharePoint Online site or OneDrive destination URL.
In the above example, a local folder has been chosen as the source with the destination being Documents area in the OneDrive URL. After clicking Add a summary screen is shown.
From this screen, further migrations can be added by clicking on 'Add a task', which prompts again for a source to migrate and the destination. Also, the is a Settings screen accessed from the cog icon on the top right of the screen. There is also an option to save tasks to a CSV file. When ready to start the migration click on the Migrate button (not shown in the above screenshot).
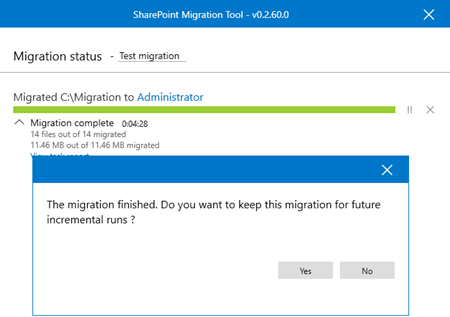
A progress screen will be shown as the data is being migrated. This displays how many of the files have been migrated, with how many to go and the same for data (in MB/GB). There is also an option to view a task report if needed and to give the migration a name.
With the migrated completed a "The migration finished. Do you want to keep the migration for future incremental runs?" message is shown.
Migrate from SharePoint Server to Office 365
Similar to the process of migrating file shares, the SharePoint Migration Tool supports migrating from SharePoint on-premises document libraries to Office 365. Start a migration picking the “SharePoint on-premises” option when prompted for “Where is your data?”. After this supply a SharePoint 2013 site URL when prompted. Currently SharePoint 2010 is not supported, the tool only support SharePoint 2013.
An authentication prompt may appear if it does enter the username and password to the SharePoint Server site. For the source, select the document library where the files to be migrated are located, a drop-down list should contain all the possible choices. Following this, for the destination, enter the URL of the SharePoint Online site where the files are to be migrated to, then selecting the document library to where the files will be migrated. Click Add, where further tasks can be added, then click the Migrate button to continue.
SharePoint Migration Assessment Tool
There is a related tool that Microsoft has released in parallel called the SharePoint Migration Assessment Tool. This allows to scan SharePoint 2010 or 2013 for any potentials issues before migration to Office 365:
"The SharePoint Migration assessment tool (SMAT) is a simple command line executable that scans the contents of your SharePoint farm to help identify the impact of migrating your server to SharePoint Online with Office 365."
Further details available here - Overview of the SharePoint Migration Assessment Tool.
Resources
Here are a set of resources for the SharePoint Migration Tool:
- Introducing the SharePoint Migration Tool
- How the SharePoint Migration Tool works
- How to use the SharePoint Migration Tool
- How to format your CSV file for data content migration
- Create a user mapping file for data content migration
- SharePoint Online and OneDrive Migration Speed
There is also a dedicated forum available to ask questions and provide feedback - SharePoint Migration Tool Feedback and Support Forum.


