Microsoft Azure – How to attach data disk to existing virtual machine using PowerShell
In this article, we will learn how to attach a data disk to our existing virtual machine using PowerShell cmdlets.
In one of the blogs, we have already discussed how to attach a data disk to an Azure virtual machine using management portal. Here is the link for that:
https://kapilsqlgeek.com/2017/01/05/how-to-attach-a-new-data-disk-to-azure-vm-using-azure-portal/
We can attach the data disk at the time of creation of virtual machine or after the creation of virtual machine.
To attach the data disk, we need to write the below cmdlet:
Get-AzureVM “kkazurevm02” –Name “kkazurevm02” | Add-AzureDataDisk –CreateNew –DiskSizeInGB 10 –DiskLabel “kkdata” –LUN 0 | Update-AzureVM
In this cmdlet, we have specified the parameters as:
Add-AzureDataDisk - Command to add new azure data disk
DiskSizeInGB - Size of data disk to add
DiskLabel - Label of the data disk
LUN - To specify the number of disk adding to VM
Update-AzureVM - To update the VM after making changes to it
After the command gets executed we can see the status as Succeeded.
We can also check the new data disk value added to our storage account where all the VHDs already stored.
We can also check the information about new data disk using cmdlet as:
Get-AzureVM –ServiceName “kkazurevm02” –Name “kkazurevm02” | Get-AzureDataDisk
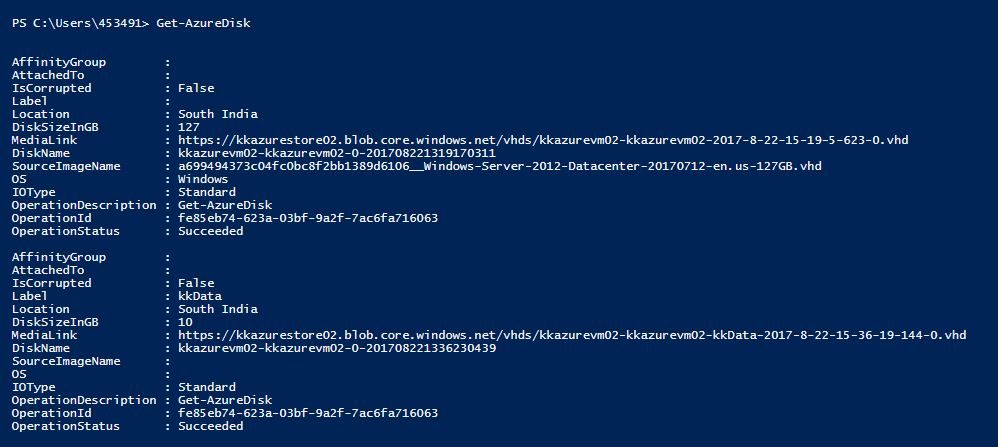
So finally we can see the new data disk has listed with existing Azure disks:
To identify new data disk, we can see from the information that OS label is Blank means this is not an OS disk, Label name is ‘kkdata’ that we specified at the time of creation of data disk.
So, friends, this is how we can add the data disk to the existing Azure virtual machine.


