Nano Server: Getting Started in Container with Docker
This TechNet Wiki article provides an overview on how to pull a Windows Server 2016 Nano Server container image using Docker and run a Nano Server container using Windows Containers feature on Windows 10. This page focuses on Windows Server 2016 NanoServer deployment preparation in Windows Containers environment with Docker.
1. Introduction
With the latest release of NanoServer, NanoServer is the leanest and meanest Windows operating system for containerization for developers and this walkthrough will get you started working on NanoServer container in your Windows 10 quickly.
2. Requirements
In order to work on NanoServer container, you will need to meeting the following requirements below.
- Hyper-V Feature in Windows 10
- Containers Feature in Windows 10
- Docker (Download here)
3. Preparation on Windows 10
Let us begin in preparing your Windows 10 to run Nano Server container.
3.1. Install Hyper-V and Containers Windows 10 Features
Firstly, we will need to enable the following Windows 10 Features to start off.
# Enable Hyper-V and Containers Windows 10 Features Enable-WindowsOptionalFeature ` -FeatureName "Microsoft-Hyper-V", "Containers" ` -Online ` -All ;
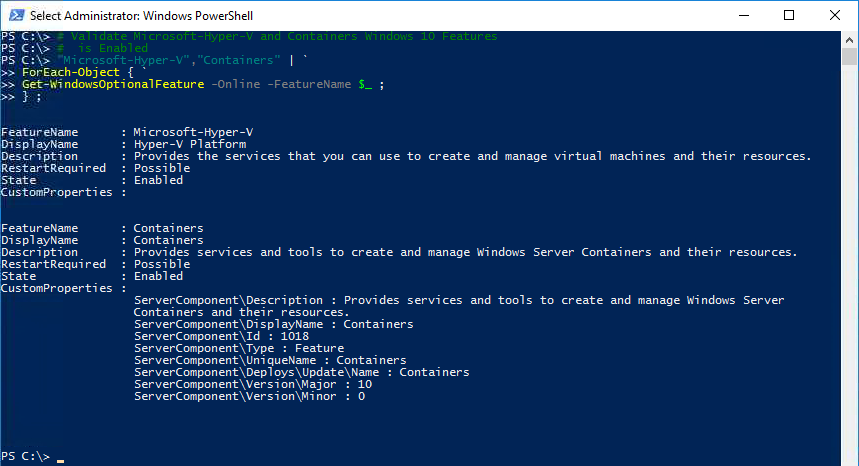
3.2. Validate Hyper-V and Containers Windows 10 Features are Enabled
Next, validate that Microsoft-Hyper-V and Containers are enabled.
# Validate Microsoft-Hyper-V and Containers Windows 10 Features # is Enabled "Microsoft-Hyper-V","Containers" | ` ForEach-Object { ` Get-WindowsOptionalFeature ` -FeatureName $_ ` -Online ; } ;
3.3. Download Docker using PowerShell
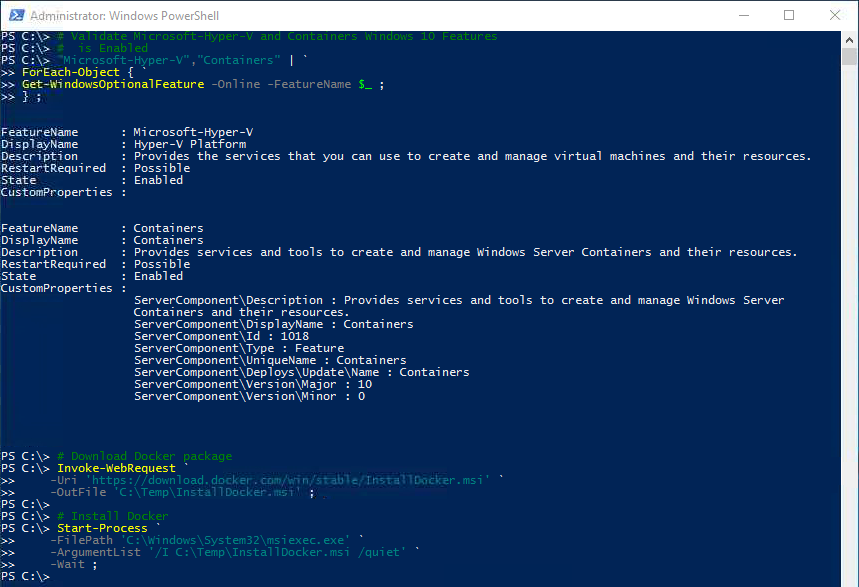
Once we have validated Windows 10 requirements are met, let us download the Docker for Windows package using PowerShell
# Download Docker package Invoke-WebRequest ` -Uri 'https://download.docker.com/win/stable/InstallDocker.msi' ` -OutFile 'C:\Temp\InstallDocker.msi' ;
3.4. Install Docker using PowerShell
Once the download has completed, let us install the Docker for Windows using PowerShell.
# Install Docker Start-Process ` -FilePath 'C:\Windows\System32\msiexec.exe' ` -ArgumentList '/I C:\Temp\InstallDocker.msi /quiet' ` -Wait ;
Once the installation has completed, restart your Windows 10.
3.5. Switch Docker Linux Containers to Windows Containers engine using PowerShell
After a reboot and you have logged into Windows, switch the Docker's default Linux Containers to Windows Containers engine using PowerShell.
# Switch Docker to Windows Containers Start-Process ` -FilePath 'C:\Program Files\Docker\Docker\DockerCli.exe' ` -ArgumentList '-SwitchDaemon' ` -Wait ;
3.6. Validate Docker is on Windows Containers engine using DockerCLI
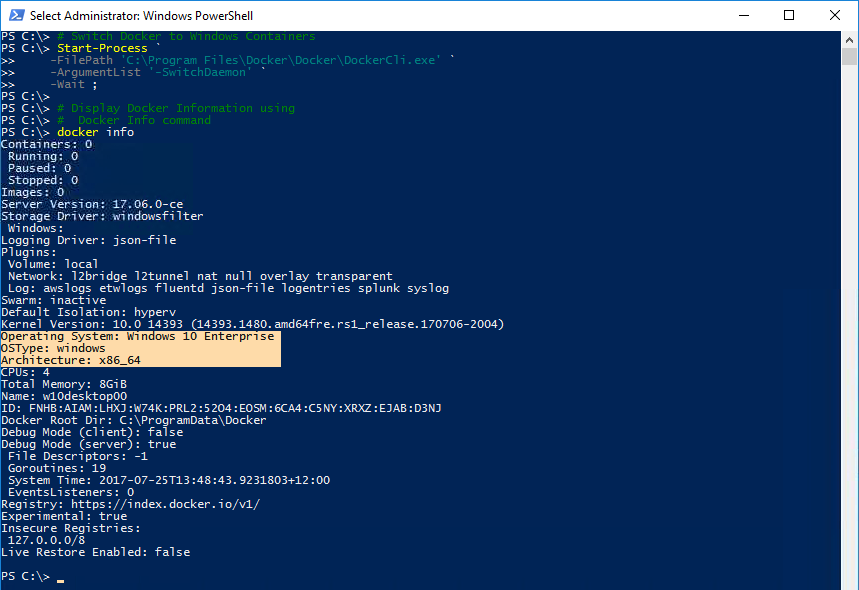
Use the DockerCLI with Info parameter to generate a general information of the system and confirm that it is on Windows 10 operating system instead of Linux.
# Display Docker Information using # Docker Info command docker info
4. Getting Started with NanoServer Container
With the system prepared, let get some fun in containerisation by get an image online and create your very first container.
4.1. Pull a NanoServer Container image using DockerCLI
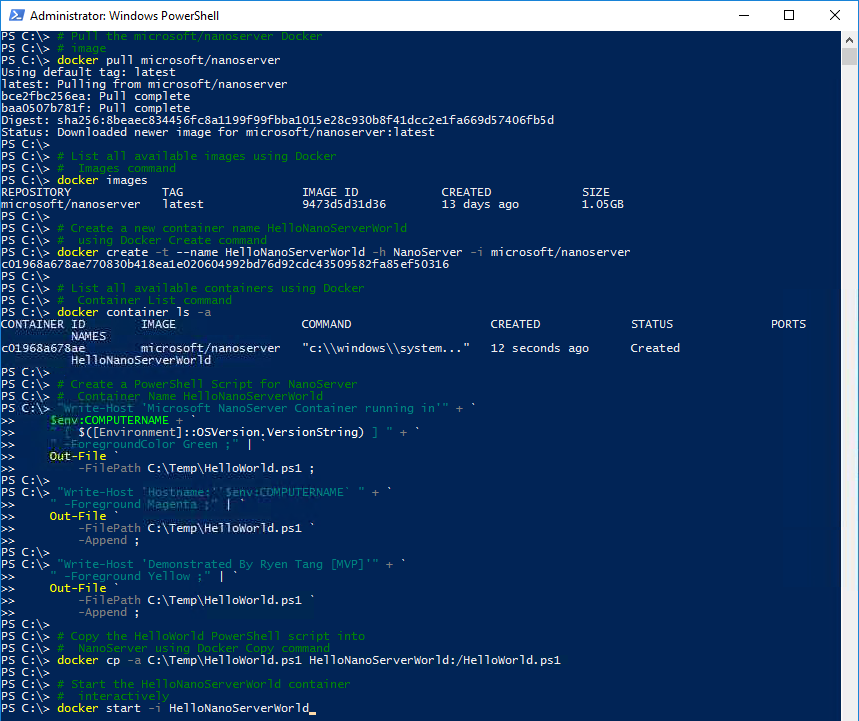
Perform a Pull Request for latest NanoServer Container image using Docker
# Pull the microsoft/nanoserver Docker # image docker pull microsoft/nanoserver
4.2. List all available images using DockerCLI
Validate NanoServer image available after the DockerCLI Pull Request
# List all available images using Docker # Images command docker images
4.3. Create a new NanoServer container from the image using DockerCLI
# Create a new container name HelloNanoServerWorld # using Docker Create command docker create -t --name HelloNanoServerWorld -h NanoServer -i microsoft/nanoserver
4.4. List all available containers using DockerCLI
Validate the new NanoServer container is created.
# List all available containers using Docker # Container List command docker container ls -a
4.5. Create a PowerShell script file for demo
For demo purposes, create a PowerShell script that we will copy to the NanoServer container for execution and demonstrate PowerShell execution within the container.
# Create a PowerShell Script for NanoServer # Container Name HelloNanoServerWorld "Write-Host 'Microsoft NanoServer Container running in'" + `$env:COMPUTERNAME + `" [ $([Environment]::OSVersion.VersionString) ] " + `" -ForegroundColor Green ;" | `    Out-File `        -FilePath C:\Temp\HelloWorld.ps1 ;
"Write-Host 'Hostname:'`$env:COMPUTERNAME` " + `" -Foreground Magenta ;" | `    Out-File `        -FilePath C:\Temp\HelloWorld.ps1 `        -Append ;
"Write-Host 'Demonstrated By Ryen Tang [MVP]'" + `" -Foreground Yellow ;" | `    Out-File `        -FilePath C:\Temp\HelloWorld.ps1 `        -Append ;
4.6. Copy a file from host to container using DockerCLI
This is how we will copy the PowerShell script create previously into the NanoServer container.
# Copy the HelloWorld PowerShell script into # NanoServer using Docker Copy command docker cp -a C:\Temp\HelloWorld.ps1 HelloNanoServerWorld:/HelloWorld.ps1
4.7. Start the container using DockerCLI
Now that we have prepare the container, we can start the container and enter into the NanoServer container session interactively.
# Start the HelloNanoServerWorld container # interactively docker start -i HelloNanoServerWorld
5. Working within the NanoServer Container
Once we managed to pull an image and create a container, let us try working inside the NanoServer container interactively.
5.1. List the files and directories using DOS Command
Validate the PowerShell script has been copied into the NanoServer container.
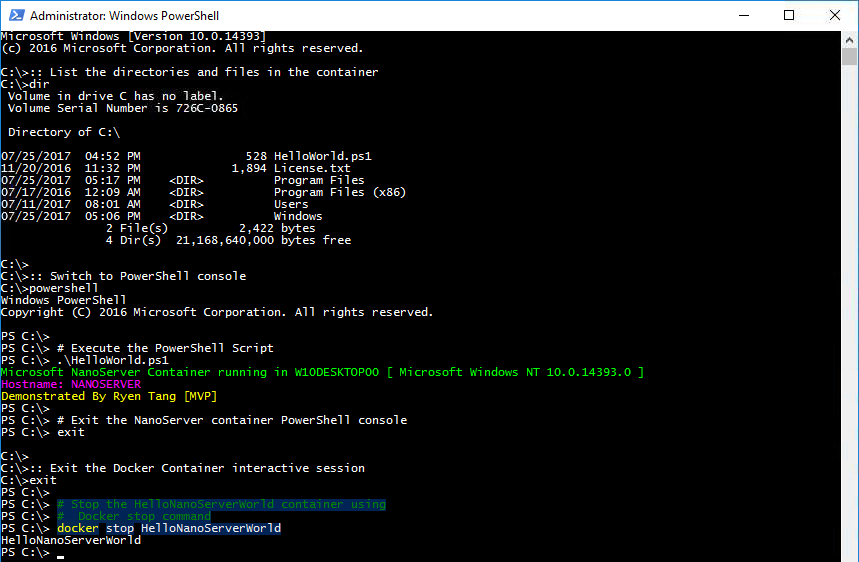
:: List the directories and files in the container dir
5.2. Switch from DOS to PowerShell
No explanations needed because we will be executing PowerShell for demonstration.
:: Switch to PowerShell console powershell
5.3. Execute the PowerShell Script within the NanoServer container
For demo purposes, we will run this PowerShell script within the Nano Server container interactive session.
# Execute the PowerShell Script .\HelloWorld.ps1 ;
5.4. Stop the container gracefully using DockerCLI
Firstly, we will need to exit from PowerShell console within the NanoServer container session.
# Exit the NanoServer container PowerShell console exit
Secondly, we will need to exit the NanoServer container interactive session back to the host.
:: Exit the Docker Container interactive session exit
Once you have exited the container interactive session, you can use the DockerCLI to stop the container.
# Stop the HelloNanoServerWorld container using # Docker Stop command docker stop HelloNanoServerWorld
6. Maintaining the images and containers
Because disk space is never free, you may want to delete the container or image on your local disk after use and we will walk you through on how.
6.1. Display available images or containers
Depending on whether you want to remove an image or container, we will demonstrate on how to list the images and containers that are available on your host machine.
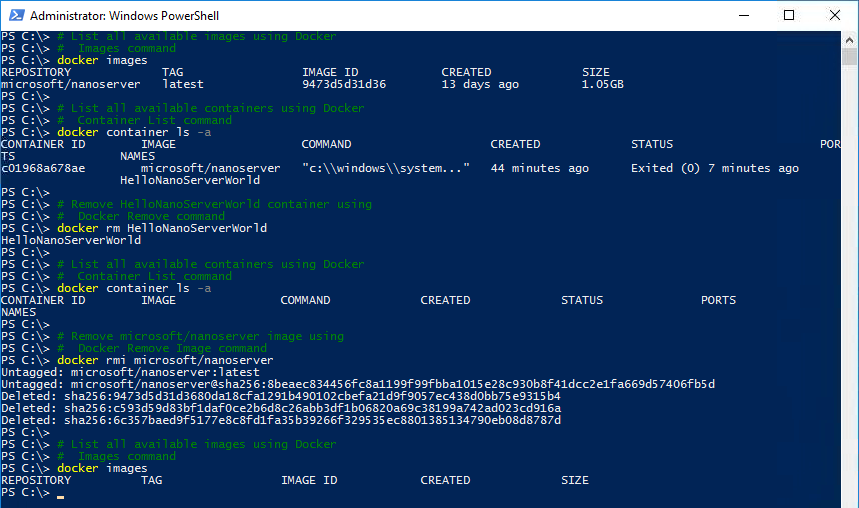
# List all available images using Docker # Images command docker images
# List all available containers using Docker # Container List command docker container ls -a
6.2. Remove the container using DockerCLI
To delete a container, use the DockerCLI with the remove parameter and the container name.
# Remove HelloNanoServerWorld container using # Docker Remove command docker rm HelloNanoServerWorld
Validate the container has been deleted by listing all available containers again.
# List all available containers using Docker # Container List command docker container ls -a
6.3. Remove the image using DockerCLI
To delete an image, use the DockerCLI with the remove parameter and the repository name.
# Remove microsoft/nanoserver image using # Docker Remove Image command docker rmi microsoft/nanoserver
Validate the image has been deleted by listing all available images again.
# List all available images using Docker # Images command docker images
7. Conclusion
That’s all folks. Happy docking around with containers in Windows 10 with Hyper-V and Containers optional features working with Docker. This containerization concept definitely allows rapid development of application locally in a containerized environment that is portable to another host with ease for production.
8. Reference
- Microsoft Docs - Windows Containers on Windows 10
- Microsoft Docs - About Windows Containers
- Microsoft Docs - Windows container requirements
- Microsoft Docs - Changes to Nano Server in the next release of Windows Server
- GitHub Microsoft/Docker-PowerShell - Manage Docker with PowerShell
- Microsoft Docker Hub Repository
- Docker Docs - Install Docker
- Docker Docs - Install Docker for Windows
- Docker Docs - Get started with Docker for Windows
- Docker Docs - Docker Engine user guide
- Docker Docs - Use the Docker command line
9. See Also
- Nano Server Survival Guide by Ryen Tang
- Microsoft Azure: Managing Nano Server with Server Management Tools by Ryen Tang
- Microsoft Azure: Deploying Windows Server 2016 Nano Server by Ryen Tang
- Windows Nano Server: Virtualization with VMware vSphere by Ryen Tang
- Nano Server: Getting Started with Image Builder by Ryen Tang
- Nano Server: Using New-NanoServerImage with Show-Command to deploy Nano Server by Ryen Tang
- Nano Server: Viewing Application, Security and System Event Logs using WMI by Ryen Tang
- Nano Server: Deploying an Internet Information Services (IIS) Web Server by Ryen Tang
- Nano Server: Deploying ASP.NET 5 site on Internet Information Services (IIS) Web Server by Ryen Tang
- Nano Server: Deploying PHP 7.0.6 on Internet Information Services (IIS) Web Server by Ryen Tang
- Nano Server: Deploying MySQL Database Server by Ryen Tang
- Nano Server: Deploying Python 3.x interpreter by Ryen Tang
- Windows Server Insider: Getting Started in Container with Docker by Ryen Tang

