Configure On-Premise IIS Deployment in VSTS
Configure On-Premise IIS Deployment in VSTS
You have successfully built your first application in VSTS, now what’s next? You can either deploy it to Azure or On-Premise. It is very handy to automate the entire deployment job because your code just moves from one environment to another hassle- free and obviously with controller checks. Keep in mind that if you want to deploy to on premise, your build must be done using a private agent.
In this tutorial, let's walk you through step-by-step how to deploy to your On-Premise IIS servers.
1. Create deployment group
First step is to create a deployment group:
- Connect to your VSTS project
- Navigate to Build & Release àDeployment Groups.
- Click on Create New deployment group à Provide a Name and click on Create
- Select ‘Use a Personal access Token’ and copy the script

- Now login to your On-Premise IIS server and launch PowerShell with Admin privilege
- Paste the script you copied and execute
- Note that this will connect to https://gitbub.com and download the agent
- When prompted for PAT, provide the PAT you created for installing the build agent
- When prompted for configuring tags press Y and give a name for your tag (eg:- web)
- When prompted for user account for the service, either accept the default (Network Service) or provide your own Service account and credentials
- Script will execute and you will see a successfully configured message
- Wait for 5 min, go back to your VSTS account Build and Release Deployment groups
- Select the deployment group you created and on top select Machines
- You will see the machine name under this and its associated with the Tag you have created

2. Create release definition
Next step is to create release definition. This will ensure your deployment kicks-in as soon as you finish a successful build. Release definition will pick up the artifacts and start deployment to IIS servers with conditions you define.
- Connect to your VSTS project
- Navigate to Build & Release Releases
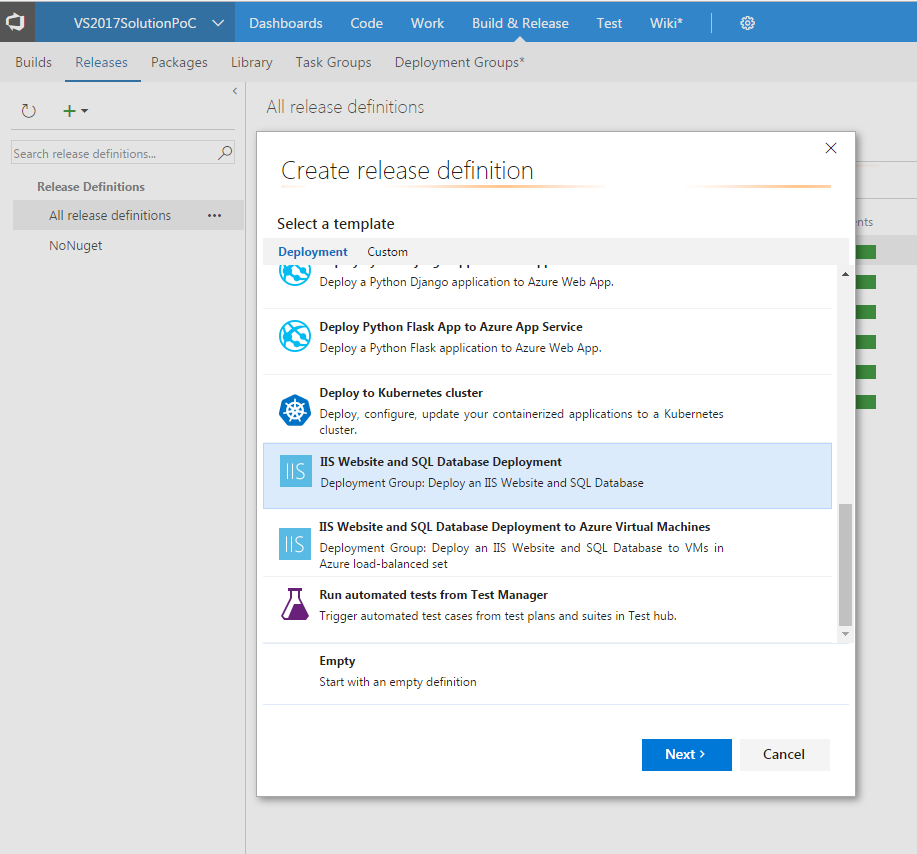
- Click on Create release definition and select ‘IIS Website and SQL Database Deployment’ Next
- Now define the artifacts. Select your Project and the Build definition you want the release to pick the artifacts from
- Select continuous deployment and click Create

- If you don’t use Database for your project, select SQL DB Deploy (Preview) and remove it
- Click Add task à Add a deployment Group Phase àclick close
(A)
(A) (A) Run on Deployment Group
- Select ‘Run on Deployment Group’. Select the Deployment group and Machine Tag you created

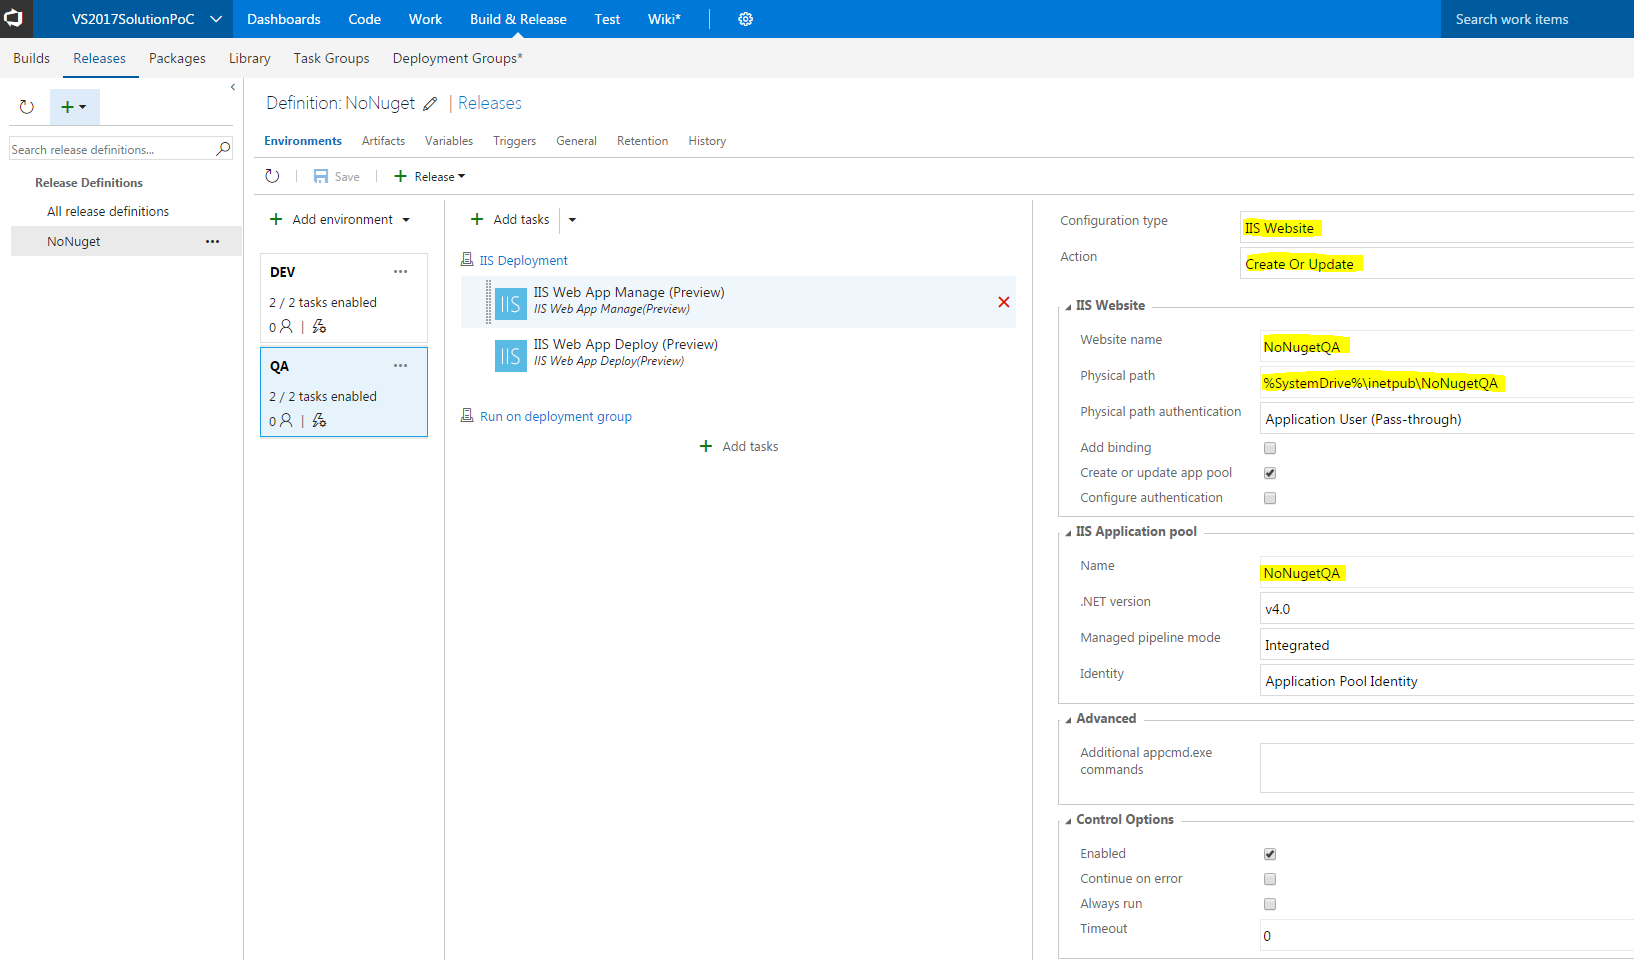
(A) (B) IIS Web App Manage
- Configuration Type: IIS Website
- Action: Create or Update
- Website Name: Provide the website Name
- Physical Path: Provide the path of website
- IIS Application pool: Provide the pool name
(A) (C) IIS Web App Deploy:
- Website Name: Provide Website name
- Package or folder: Provide (System.DefaultWorkingDirectory) so that it picks artifacts from default location.

(A) (D) Editing Environment definitions
- Place your mouse over Environment1 and edit the name
- Click beside your Environment and click on ‘Assign Approvers’
- Select the options per your requirements
- Move to Deployment conditions on top and select options

- Save your changes
(A) (E) Create Second Environment
The whole point of creating release definition is to achieve automation. You do not want to move the code across environments manually. In my case I have two Environments DEV & QA. Remember to select different deployment group if your second environment is in another machine.
When selecting Deployment conditions, you can specify ‘After successful deployment to another environment’ and select your first environment (DEV). Save changes, now you are ready to rock!
Now go to the build and Queue a new build for the definition you created release. When build completes, move to release. Sit back and enjoy watching your code being deployed across environments.
