How to: Enable Item Templates to be used in Universal Windows App C# project
Introduction
In Visual Studio 2015 and Visual Studio 2017 you can create Item Templates for **Universal Windows App **by using the Export Templates wizard from:
· The File menu in the Export Template item on Visual Studio 2015
· The Project menu in the Export Template item on Visual Studio 2017
Unfortunately, the basic Item Template created by the wizard will not appear in the Add New Item dialog box on a Universal Windows C# project.
In the MSDN article: Create Item Templates you will find how to enable item templates to be used in a Windows Store 8.1 C# project, not for a Universal Windows C# project
This wiki explains how to enable an Item Template to be used in a Universal Windows C# project on Visual Studio 2015 and Visual Studio 2017.
Requirements
Follow the steps about the section "To add a custom project item template to the Add New Item dialog box" in the MSDN article "How to : Create Item Templates" to export an item template.
- If you are using Visual Studio 2015, you will find the link here
- If you are using Visual Studio 2017, you will find the link here
Create the Item Template step by step
Follow the steps below :
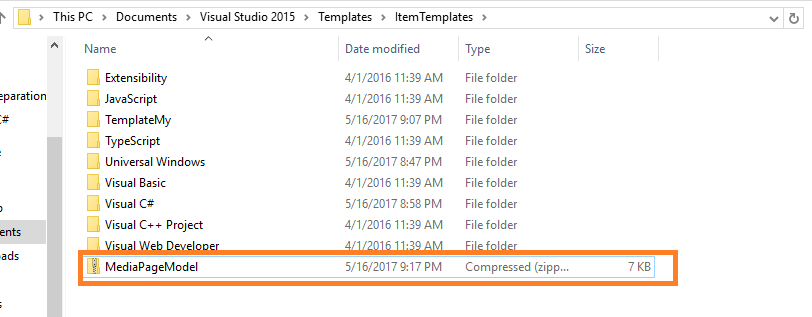
1. Extract the .vstemplate file from the .zip file that was copied to the ..\Users\username\Documents\Visual Studio Version\Templates\ItemTemplates\ (or My Exported Templates) folder.
2. Open the .vstemplate (MyTemplate) file in Visual Studio.
3. Add the following XML within the opening <TemplateData> tag: <TemplateID>Microsoft.CSharp.Class</TemplateID>. The Microsoft.CSharp.Class allows your Item Template to be used in Windows App C# project.
4. The following example shows the entire contents of a .vstemplate file after the line of XML :
<VSTemplate Version="3.0.0" xmlns="http://schemas.microsoft.com/developer/vstemplate/2005" Type="Item">
  <TemplateData>
    <TemplateID>Microsoft.CSharp.Class</TemplateID>
    <DefaultName>MediaPageModel.xaml</DefaultName>
    <Name>MediaPageModel</Name>
    <Description>This page represents a model of all Media pages</Description>
    <ProjectType>CSharp</ProjectType>
    <SortOrder>10</SortOrder>
    <Icon>__TemplateIcon.ico</Icon>
  </TemplateData>
  <TemplateContent>
    <References />
    <ProjectItem SubType="Designer" TargetFileName="$fileinputname$.xaml" ReplaceParameters="true">MainPage.xaml</ProjectItem>
    <ProjectItem SubType="" TargetFileName="$fileinputname$.xaml.cs" ReplaceParameters="true">MainPage.xaml.cs</ProjectItem>
  </TemplateContent>
</VSTemplate>
5. Save the .vstemplate file in Visual Studio and close it.
6. Copy and paste the .vstemplate file back to the .zip file located in the ..\Users\username\Documents\Visual Studio Version\Templates\ItemTemplates\ folder.
If the Copy File dialog box appears, choose the Copy and Replace option.
Close and restart your Visual Studio
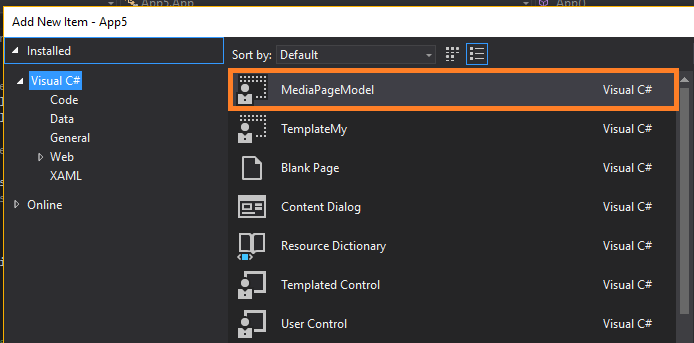
You can now add an item based on this template to a Universal Windows C# project by using the Add New Item dialog box.
Conclusion
Now you can easily create any Item Template for your Universal Windows application.


