Note
Access to this page requires authorization. You can try signing in or changing directories.
Access to this page requires authorization. You can try changing directories.
Introduction
R has become the leading choice for the data science professionals and statisticians. The popularity of R has increased substantially over the years when it comes to data analysis. R is a GNU project, which was initially developed by Ross Ihaka and Robert Gentleman at the University of Auckland, New Zealand and the source code for R software environment is written primarily in C and Fortran. The founders decided to name the programming language R, based on the first letter of their names. The language is both similar and different in many ways when compared to the language S, developed by Bell Labs. R is considered to be a different implementation of S. Most of the code written for S runs in R as well.
https://upload.wikimedia.org/wikipedia/commons/thumb/1/1b/R_logo.svg/724px-R_logo.svg.png
Some of the features of R are:
Just like any other programming language, the programming constructs that make up R are well defined which includes variables, condition making statements, loops, functions, data types and so on.
R provides the data structures like vectors, matrices, arrays and data frames that users can use for performing statistical analysis and creating graphs.
R supports object oriented programming.
R has mature, effective data handling and a storage facility. We can import data from csv, MS Excel and other data sources, which will be stored and can be used to analyze the data. We do not require an external DB.
There are a lot of tools available to perform the data analysis within the R environment.
R can be used to generate statistical graphs, which will help in deriving business intelligence. It has advanced graphics and plotting abilities. R Plot is an interface available in R Tools for Visual Studio, which provides an advanced graphic display.
http://csharpcorner.mindcrackerinc.netdna-cdn.com/article/a-deep-dive-into-r-programming/Images/graphic%20display.jpg
Image Source- r-bloggers.com
Defining R and its features might look pretty vague. Let’s start and get our hands dirty.
This article is divided into two main sections,
- Setting up R Environment and R Tools in Visual Studio IDE
- Understanding the power of R - Analyze and derive the conclusion from data, using R
Once this is completed, you will get an idea on setting up R environment locally and it will help you get started with R programming. Let’s head to the first section of the article.
Setting Up R Environment and R Tools in Visual Studio
R tools for Visual Studio were released in March as a public preview release. This will help you to work with R programming in VS. However, in order to set up R Tools in Visual Studio, there is a prerequisite – R language engine should be installed in the local machine, or else we will get the error, shown below:
In order to set up the environment, first we will:
- Install Microsoft R Open. It is a R language Engine and
- Install R tools in Visual Studio, which will help us to work with the data, using R programming.
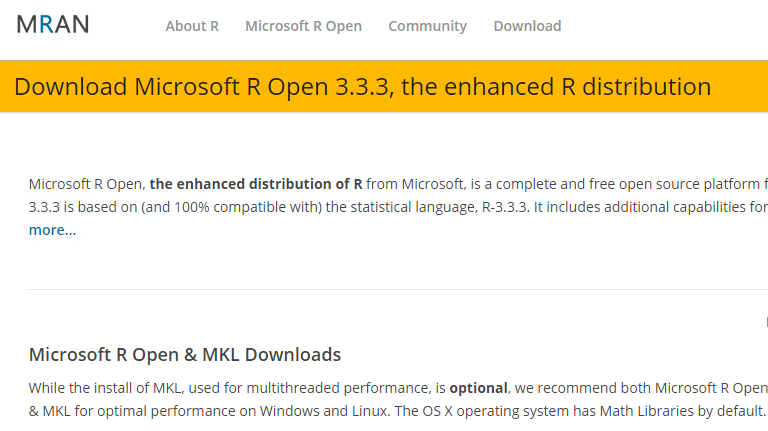
Hence, let’s install Microsoft R Open, which will install the R language engine in the local machine. You can download Microsoft R Open from here.
Depending on the platform, you can chose to download the appropriate R Open executable. I have downloaded Windows 7 Platform executable.
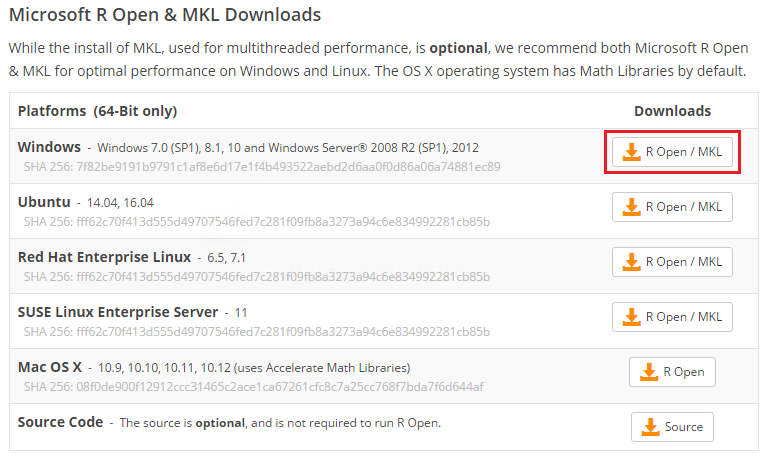
Once we have downloaded the file, run the executable.
Click on Continue to proceed with the installation.
Click Continue and Select the Agreement.
This will start installing Microsoft R Open.
Click finish. This would complete the R language Engine installation in the local machine.
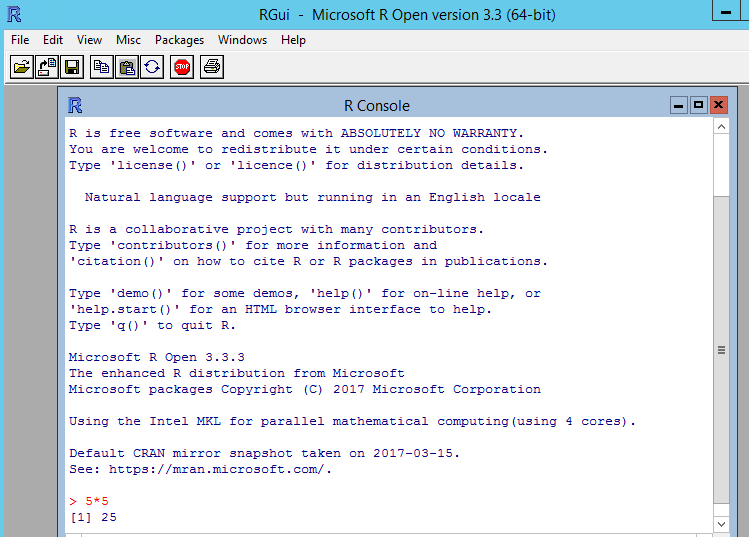
Once completed, it will provide us the R console, where we can implement R Programming.
Double click the icon and it opens up R console.
We can test its functionality by using normal arithmetic operations. However, the console is less interactive.
Setup R Tools for Visual Studio
Hence, let’s spin up Visual Studio IDE and install R Tools for Visual Studio (RTVS), which is a highly flexible and a mature environment to implement R Programming. You can get the executable from here.
Click the executable and run it.
Close any Visual Studio session, that is active for a smooth installation.Click install.
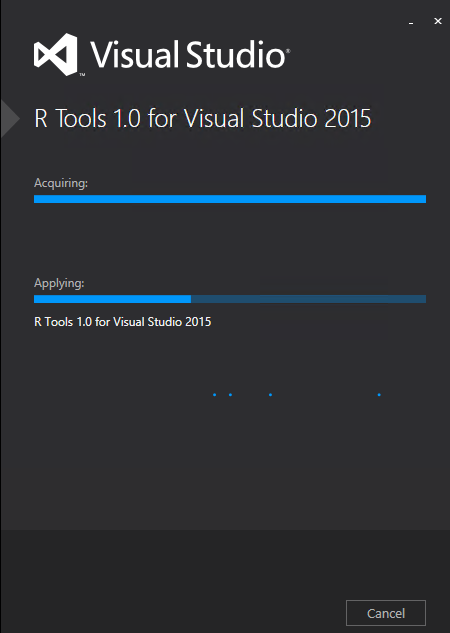
This will start the installation of R Tools in Visual Studio.
Finally the setup is completed. Let’s head to Visual Studio to check out the new addition.
In the tab next to test, we have the new tab for R Tools. Click data science settings so that the session opens in the data scientist profile.
Click yes. This will reset the Visual Studio layout to the snapshot, shown below:
We have the R Interactive Window in the left side, where we will be doing the programming part. The variable Explorer on the top right end is where we can analyze the loaded variables and import the data from an external data source. R Plot at the bottom right corner is used to display the graphical representations. We can switch back to the default Visual Studio Layout once, we are done with R Programming.
Understand the Power of R - Analyze and derive conclusion from data using R
Let’s use R programming to dig into bulk data and derive the results for our specific queries. Here, I am using dummy student details, which are in CSV format as the input and I will try to derive the answers for the data-related questions. We will be entering the commands in R Interactive Window in the left side of the Window.
First, we have to set the working directory, which can be done using setwd method.
Now, let’s load the data into R Tools environment in Visual Studio. We can use read CSV command to import the data from CSV. I have placed the R CSV file, which contains the student details, in the working directory. This file looks as shown below:
Now, let’s load the csv file into Visual Studio. We can read from other data sources like MS Excel as well.
StudentDetails<- read.csv("R.csv")
print(StudentDetails)
Once the command is executed, it will print out the tabular data, as shown below:
The first row is the sequential serial number. The rest of the columns are loaded as it is from the csv. We have a global variables window in the right side. Once the load is completed, it will be loaded with the data, which we can browse and explore.
Just below the Variable Explorer, R Plot is there, which is used for the graphical representation of the charts.
We have student details of 100 students. Now, let’s quickly do some analysis of the student details data and derive the answers to the questions, using R Programming.
What is the maximum mark in Java?
Java is one of the subjects. Let’s try to derive the maximum score among 100 students.
MaxJava<- max(StudentDetails$Java)
print(paste("The highest score in Java is",MaxJava,sep=":"))
Max is the method which is used to get the maximum value from the collection.
StudentDetails$Java means we are querying the Java Column present within the StudentDetails variable structure. MaxJava is the variable that will hold the value. In order to concatenate two strings, we can use the paste function, which has the syntax as shown below:
Paste(“First String”,”Second String”,sep=”JoiningCharater”);
Count of all those who got the max mark in Java
JavaToppers<- subset(StudentDetails, Java == max(StudentDetails$Java));
ToppersCount<- nrow(JavaToppers)
print(paste("Total number of top scorers in Java", ToppersCount, sep = ":"))
Subset is used to derive a subset of the rows from the main data set, based on a matching condition(Max mark in Java). Subsequently, we have now used it to get the number of rows present in the subset. Toppers Count is the variable, that will hold the final value.
Details of all those who got the max mark in Java
JavaToppers<- subset(StudentDetails, Java == max(StudentDetails$Java))
print(JavaToppers)
Here, we are using subset function to get the subset of the rows from the main data set that matches the condition and display it as it is. Java Toppers is the variable that will hold the final value.
Average score of a subject
MeanPython<- mean(StudentDetails$Python)
print(paste("The Average score in Python is", MeanPython, sep = ":"))
Here, we have used mean as the method to calculate average of StudentDetails$Python (ie: Python column present within StudentDetails dataset).MeanPython is the variable that will hold the final value.
Male Female Classification
MaleRows<- subset(StudentDetails, Sex == "Male");
MaleCount<- nrow(MaleRows)
print(paste("Number of Male Students", MaleCount, sep = " - "))
FemaleRows<- subset(StudentDetails, Sex == "Female");
FemaleCount<- nrow(FemaleRows)
print(paste("Number of Female Students", FemaleCount, sep = " - "))
Here, we have used subset function to get the subset of the rows that matches a condition. Afterwards, we have used nrow to get the count of the rows within the subset.
Student from the city of Darlington
DarlingtonStudents<- subset(StudentDetails, City == "Darlington")
print(DarlingtonStudents)
Just like the queries shown above, we have used a subset here as well, except that the condition is different.
Find the sum of subjects and list 3 overall toppers
StudentDetails$Sum<- StudentDetails$Java + StudentDetails$C + StudentDetails$Ruby + StudentDetails$Python
head(StudentDetails[order(StudentDetails$Sum, decreasing = T),], n = 3)
Here, we are summing up the scores in Java, C , Ruby and Python and assigning it to a new column SUM, which is not really present in the import table. StudentDetails$Sum<- Some Value will create a new column in the table and assign the value to the column. Finally, we are ordering the table in the descending order and use the Head method to get the top rows.NowN=3 will fetch only the first three rows.
Group By Subject Toppers
JavaToppers<- head(StudentDetails[order(StudentDetails$Java, decreasing = T),], n = 4)
RubyToppers<- head(StudentDetails[order(StudentDetails$Ruby, decreasing = T),], n = 4)
PythonToppers<- head(StudentDetails[order(StudentDetails$Python, decreasing = T),], n = 4)
print("The details of Java Toppers:")
print(JavaToppers);
print("The details of Ruby Toppers:")
print(RubyToppers);
print("The details of Python Toppers:")

print(PythonToppers);
Here, we are sorting Java Score in the descending order and get the first 4 rows, using Head function, and assigning it to JavaToppers variable. Similarly, we are doing it for the other subjects as well.
Create Charts using R Plot
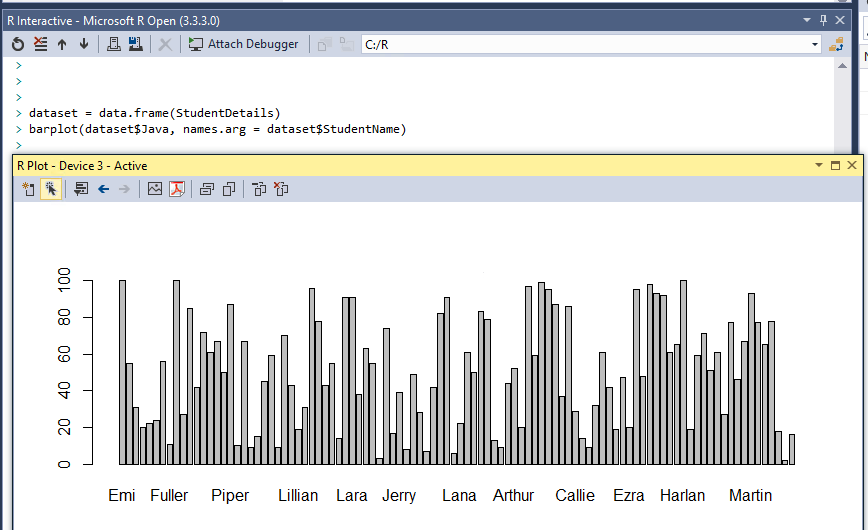
We can create charts from the data set using R Plot as well. This helps to derive meaningful information from the data visualization. In order to create the data plot we can create a dataset and use the barplot function to plot the chart in R Plot as shown below. This will plot the Marks in Java against the Y axis for each student.
dataset = data.frame(StudentDetails)
barplot(dataset$Java, names.arg = dataset$StudentName)
If we want to leverage the graph plotting functionality we can make use of the ggplot package that has much better functions. We can install it by running
install.packages("ggplot2")
We can then plot it using the ggplot method as shown below :
library(ggplot2)
ggplot(dataset, aes(x=dataset$StudentName, y=dataset$Java)) + geom_bar(stat="identity",colour="black", size=2) +
labs(x="StudentName", y="Java")+theme(axis.text.x=element_text(angle=90, colour="grey20", face="bold", size=25))
Summary
Thus, we have seen how we can use R programming for the data analysis. This is just a kick start. R is powerful and can work with the complex data.
