Note
Access to this page requires authorization. You can try signing in or changing directories.
Access to this page requires authorization. You can try changing directories.
Introduction
I recently came in touch with an Extension for Microsoft's Configuration Manager, called "Parallels Mac Management". As the name implies, the extension allows you to manage Mac Clients using Microsoft's System Center Configuration Manager, but without the need of a Public Key Infrastructure (PKI). In this Guide there is already a Parallels Proxy installed on the Site-Server where Configuration Manager is installed.
Getting the Mac Client Installer
https://msitproblog.com/wp-content/uploads/2017/03/pmm_agent_install_part1.png
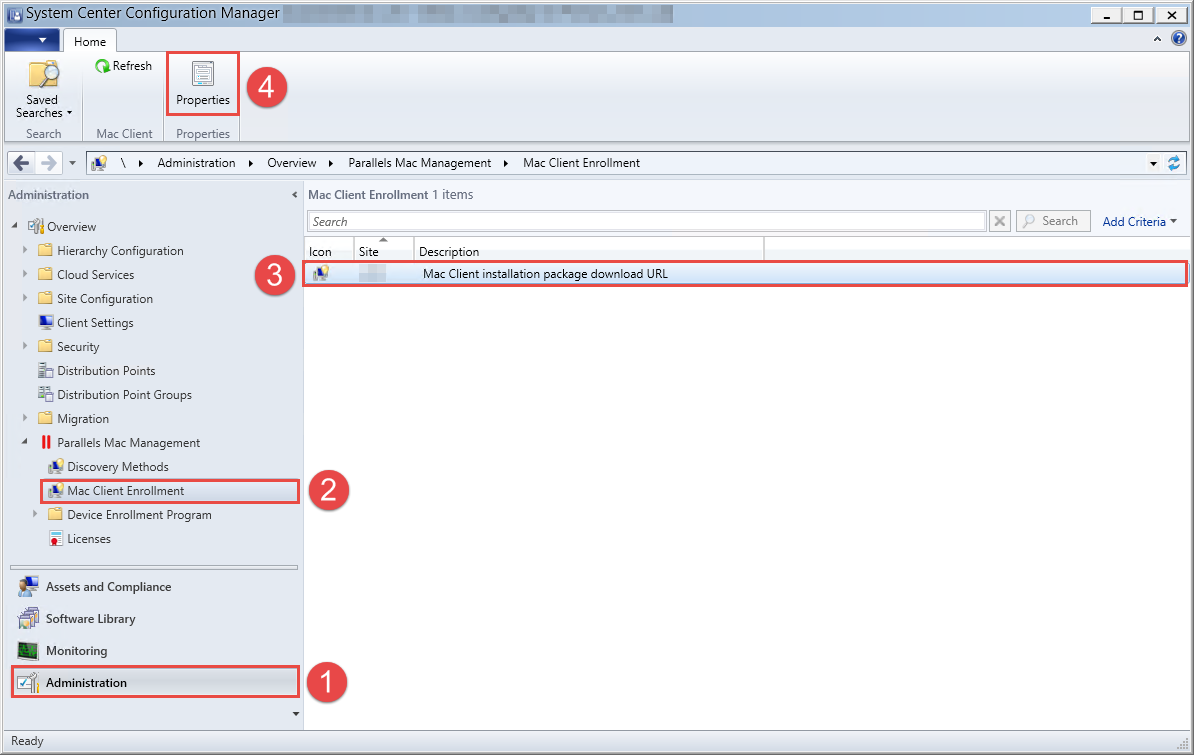
Open the ConfigMgr Console -> Administration --> Parallels Mac Management --> Mac Client Enrollment and open the Properties
https://msitproblog.com/wp-content/uploads/2017/03/pmm_agent_install_part2.png
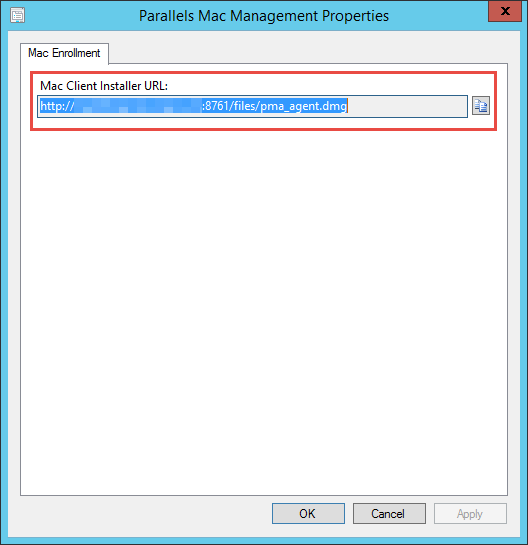
Copy the displayed URL and head over to your Mac Device.
Installing the Mac Management Client
https://msitproblog.com/wp-content/uploads/2017/03/pmm_agent_install_part3.png
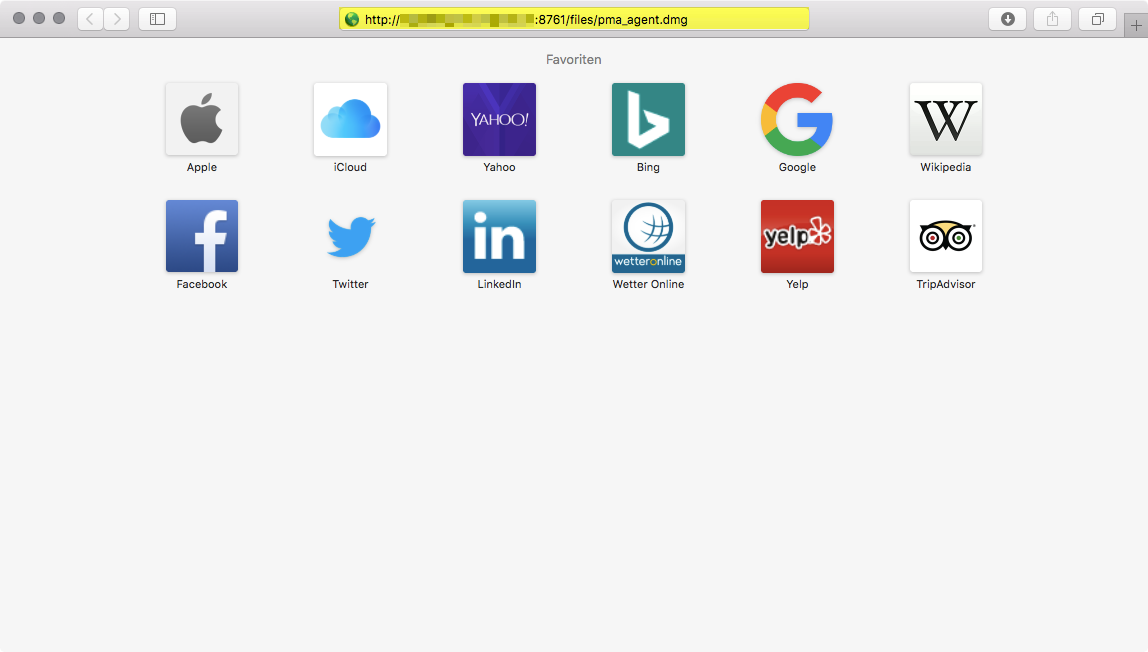
Open the copied URL in Safari, which should download the 'pma_agent.dmg' file on your Mac.
https://msitproblog.com/wp-content/uploads/2017/03/pmm_agent_install_part4.png
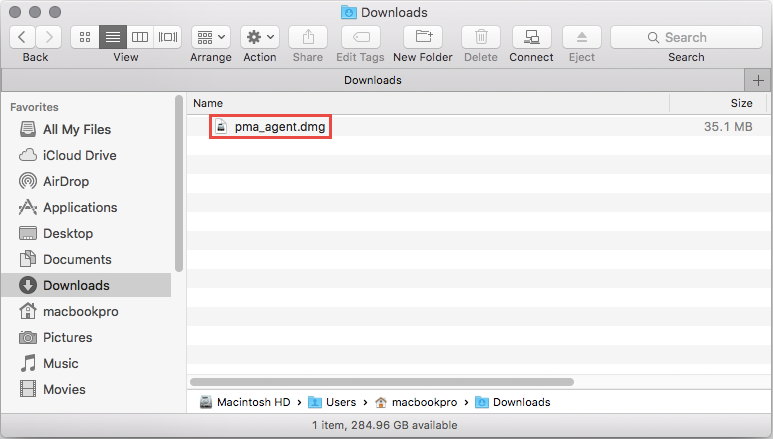
Open the downloaded file by double clicking it.
https://msitproblog.com/wp-content/uploads/2017/03/pmm_agent_install_part5.png
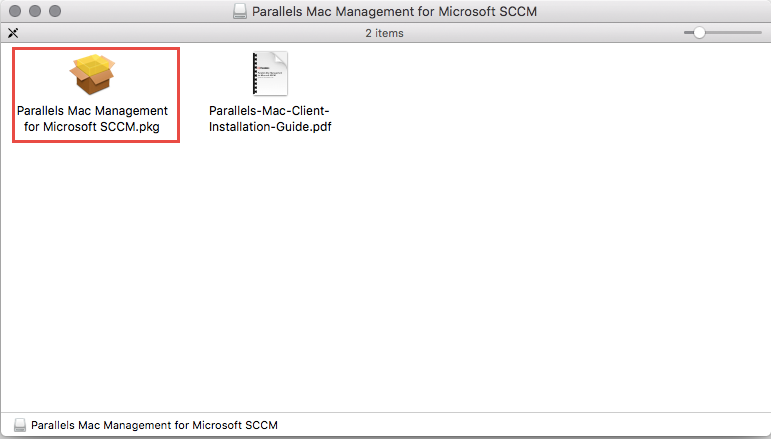
Execute the "Parallels Mac Management for Microsoft SCCM.pkg" inside the dmg file, which should launch the Setup Wizard.
https://msitproblog.com/wp-content/uploads/2017/03/pmm_agent_install_part6.png
Continue
https://msitproblog.com/wp-content/uploads/2017/03/pmm_agent_install_part7.png
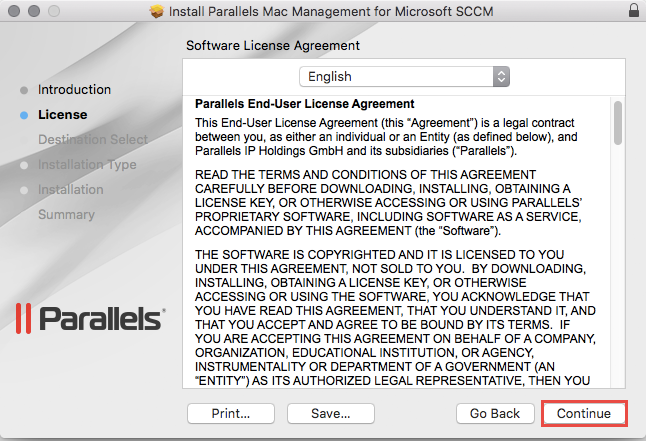
Read the End-User License Agreement and Click Continue.
https://msitproblog.com/wp-content/uploads/2017/03/pmm_agent_install_part8.png
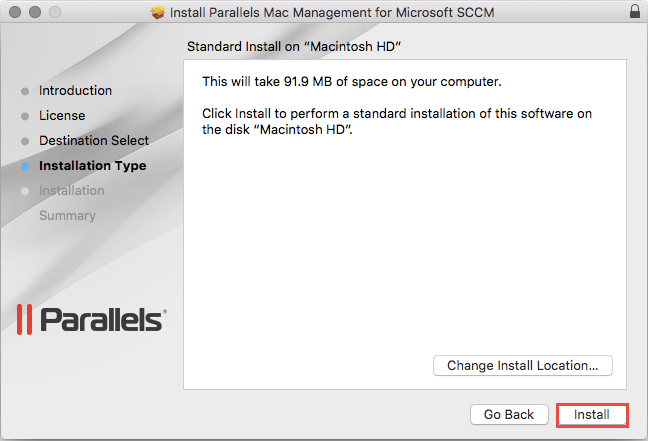
Install
https://msitproblog.com/wp-content/uploads/2017/03/pmm_agent_install_part9.png
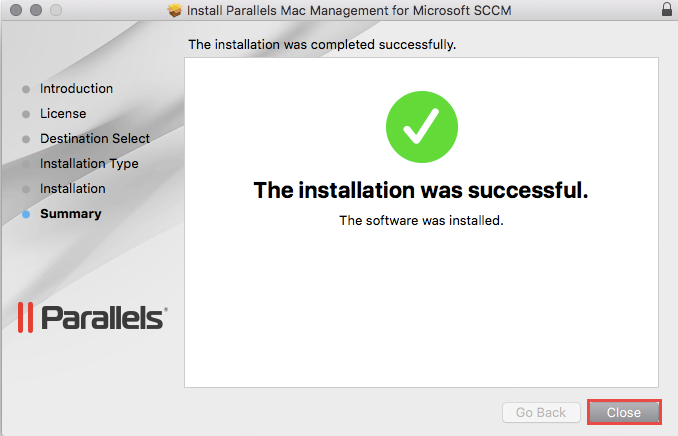
Close
Registering the Mac Management Client
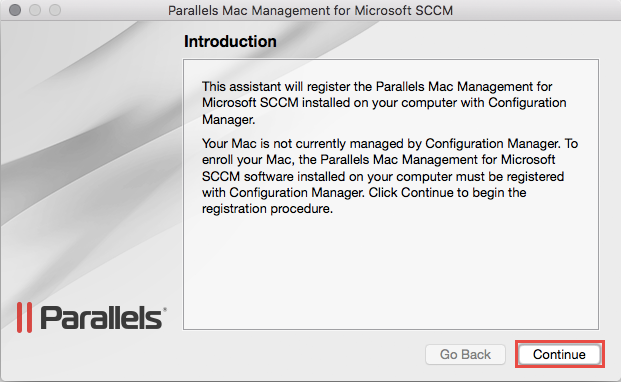
After you Close the Installation Dialog, the below displayed Registration Dialog should appear. If you close this Dialog by mistake, it should automatically re-open every 5-10 minutes or after any Restart of the Mac.
https://msitproblog.com/wp-content/uploads/2017/03/pmm_agent_install_part10.png
Continue
https://msitproblog.com/wp-content/uploads/2017/03/pmm_agent_install_part11.png
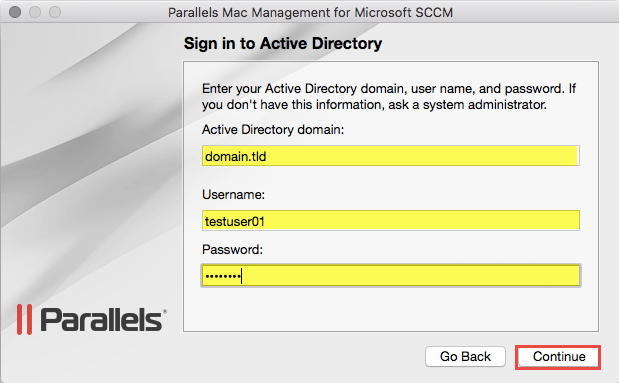
Specify the Credentials of a User, which has the Permission to enroll new Macs.
https://msitproblog.com/wp-content/uploads/2017/03/pmm_agent_install_part12.png
If the specified User does not have permission to enroll new Mac's, the above Message should appear.
https://msitproblog.com/wp-content/uploads/2017/03/pmm_agent_install_part13.png
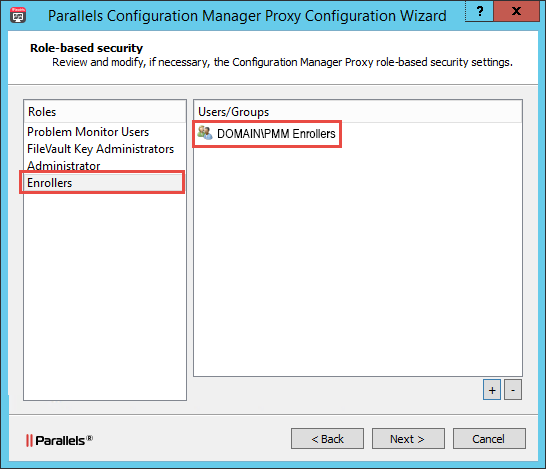
If this should happen, make sure that the User is member of the Group, which you specified as "Enrollers" in the Parallels Proxy Configuration Wizard during the Proxy Setup.
https://msitproblog.com/wp-content/uploads/2017/03/pmm_agent_install_part14.png
If everything went well, the above Screen should appear. Click Done.
Verify the Client Registration
https://msitproblog.com/wp-content/uploads/2017/03/pmm_agent_install_part15.png
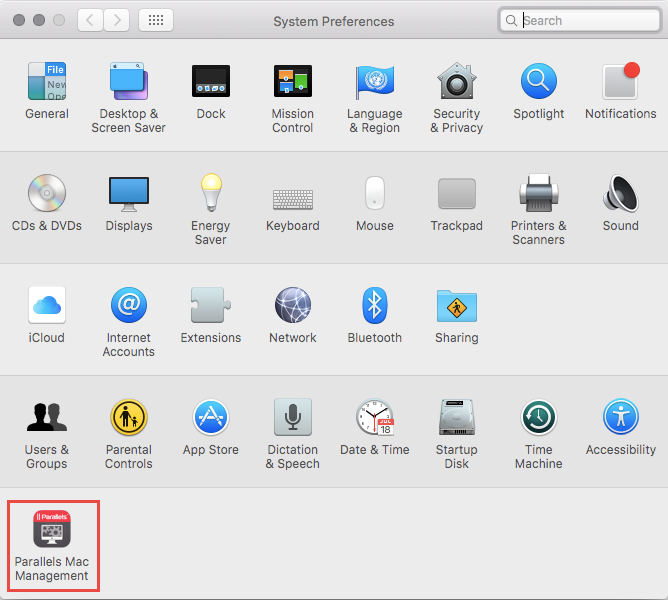
Open the Settings App and click on Parallels Mac Management at the bottom.
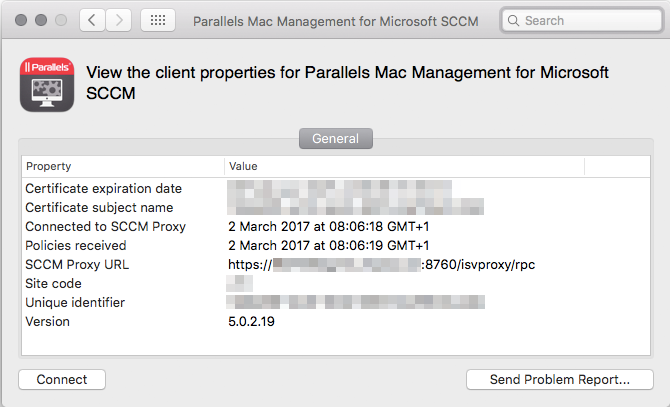
https://msitproblog.com/wp-content/uploads/2017/03/pmm_agent_install_part16.png
Verify the Properties SCCM Proxy URL, Site code, and Policies received.
https://msitproblog.com/wp-content/uploads/2017/03/pmm_agent_install_part17.png
Head over to the ConfigMgr Console, and search for the Mac in the Devices Node. It should be displayed as above, with the Client Version matching the one in the Settings App.
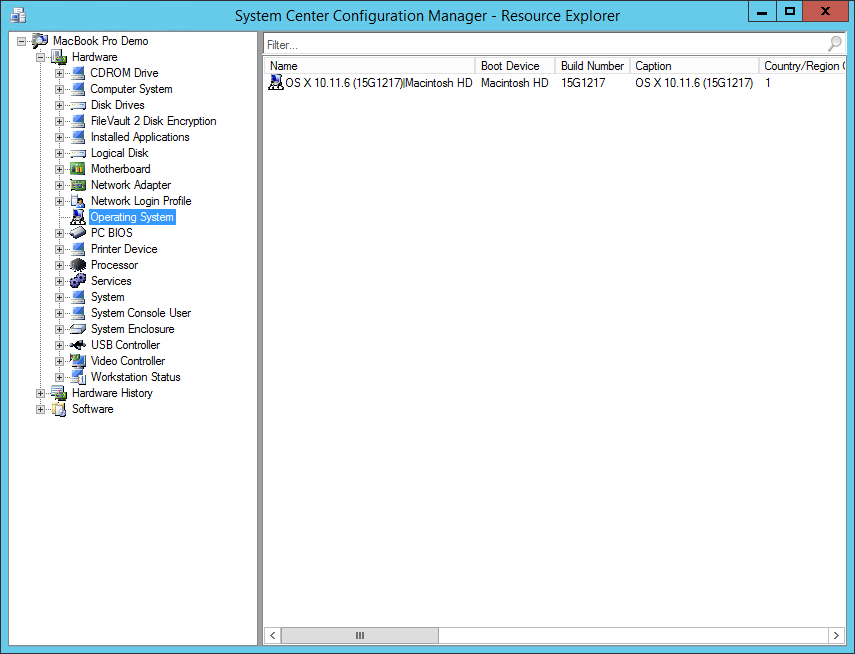
https://msitproblog.com/wp-content/uploads/2017/03/pmm_agent_install_part18.png
The Client should also have sent some Hardware Inventory by now, which can be viewed in the Resource Explorer as on a normal Windows Device. Pretty cool stuff :)
Uninstalling the Parallels Mac Management Client
Run the following command in a Terminal Window to fully uninstall the Mac Management Client:
sudo /Library/Parallels/pma_agent.app/Contents/MacOS/pma_agent_uninstaller.app/Contents/Resources/UninstallAgentScript.sh