Office 365: Adding a custom domain
Introduction
Office 365 provides the ability to add your own domain. When setting up Office 365 Microsoft gives you a onmicrosoft.com domain out-of-the-box. If you want to use your own domain, and for most companies this is preferred, you can add your own domain using the setup wizard in the Office 365 admin center. This will provide you with the ability to use your own email in Office 365 or log in using to Office 365 and Skype for Business, using your own domain.
Adding the custom domain
Open the Office 365 portal and go to the admin center. From the admin center, click ‘Go to Setup’ to open the setup wizard.
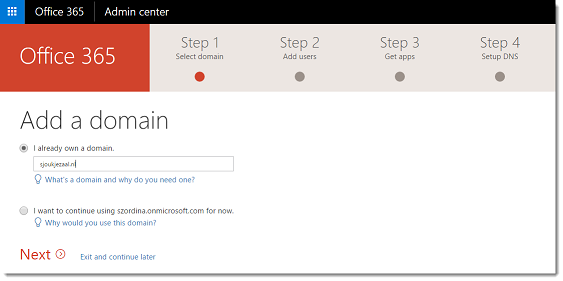
 In the next screen, check the ‘I already own a domain, and click Next.
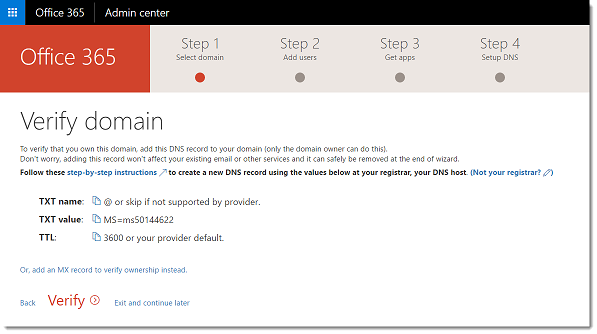
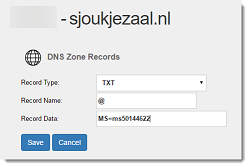
Now you have to prove that you own the domain. In order to do that, log in to your domain register and add the record which is generated by Office 365 in the next screen.
*If you not already own a domain but need to buy one, return to the admin center, choose Domains, choose buy the new domain and follow the steps.
If you have your own DNS services, add the TXT record and once the propagation completes,
*
After that, click Verify.
Office 365 will connect to the domain register and validate if the text record is there. If all went well, you go to the next step, which is adding users.

For now, click Next. You can add users from the admin center later.
In the next screen, you can install apps. Skip this step, you can do this later as well. Click Next.

The last step gives you the ability to migrate your email messages. For now, click Don’t migrate email messages and again, click Next.

For setting up DNS, there are two possibilities. First is Setup my online services for me, which Microsoft recommends. If you already have an existing website and you only want to migrate email to Office 365, don’t choose this setting. If you do (and we accidentally did…), your website becomes inaccessible. So, if you have already had an existing website, choose the second one, I’ll manage my own DNS records and click Next.

In the next section, Office 365 will provide you with the records which need to be added to your DNS. Login to your domain registered and add the records. You can click verify after you’ve added them all or after adding a few of them and Office 365 will check if they are valid.

This completes the steps for adding a custom domain to Office 365.
More information
You can refer to the following articles for more information: