Nano Server: Getting Started with Image Builder
1. Introduction
Not everyone is a New-NanoServerImageGenerator PowerShell cmdlet guru to create a Nano Server image for deployment. With that in mind, Microsoft has developed a Nano Server Image Builder tool that allows everybody to use graphical user interface to customize and create a Nano Server image at ease or package an existing Nano Server image to a bootable USB media with WinPE for deployment.
This article will focus on how to obtain Nano Server Image Builder tool into your environment and get started with Nano Server image creation.
2. Requirement
To begin, you will need the following installed on the management server:
- Windows Assessment and Deployment Kit (Windows ADK)
- Nano Server Image Builder
3. Getting Started with Nano Server Image Builder
In this section, you will learn how to download and install the requirements to get started with Nano Server Image Builder on a Windows Server 2016 Management Server.
3.1. Download Windows Assessment and Deployment Kit (Windows ADK)
In this section, you will use Invoke-WebRequest cmdlet to download the ADKSetup.exe from the internet.
# Download Windows Assessment and Deployment Kit (Windows ADK)
# Windows ADK for Windows 10, version 1607
Invoke-WebRequest `
-Uri 'https://go.microsoft.com/fwlink/p/?LinkId=526740' `
-OutFile 'C:\Temp\ADKSetup.exe' ;
3.2. Install Windows ADK
In this section, you will use Start-Process cmdlet to execute the ADKSetup.exe installation silently.
# Install Windows Assessment and Deployment Kit (Windows ADK)
# on Management Server
Start-Process `
-FilePath 'C:\Temp\ADKSetup.exe' `
-ArgumentList '/features + /quiet /log C:\Temp\ADKSetup.log' `
-Wait `
-PassThru ;
3.3. Download Nano Server Image Builder
In this section, you will use Invoke-WebRequest cmdlet to download the NanoServerImageBuilder.msi from the internet.
# Download Nano Server Image Builder (1.0.78)
Invoke-WebRequest `
-Uri 'https://download.microsoft.com/download/0/6/F/06F4BA5D-6A43-4230-B5FE-6E24AD4E5BF4/NanoServerImageBuilder.msi' `
-OutFile 'C:\Temp\NanoServerImageBuilder.msi' ;
3.4. Install Nano Server Image Builder
In this section, you will use Start-Process cmdlet to execute the NanoServerImageBuilder.msi installation silently.
# Install Nano Server Image Builder on Management Server
Start-Process `
-FilePath 'C:\Temp\NanoServerImageBuilder.msi' `
-ArgumentList '/qn /l*v C:\Temp\NanoServerImageBuilder.log' `
-Wait `
-PassThru ;
3.5. Launch Nano Server Image Builder tool
In this section, you will use Start-Process cmdlet to launch the NanoServerImageBuilder.exe executable.
# Launch Nano Server Image Builder on Management Server
Start-Process `
-FilePath 'C:\Program Files\Nano Server Image Builder\NanoServerImageBuilder.exe' ;
4. Working with Nano Server Image Builder
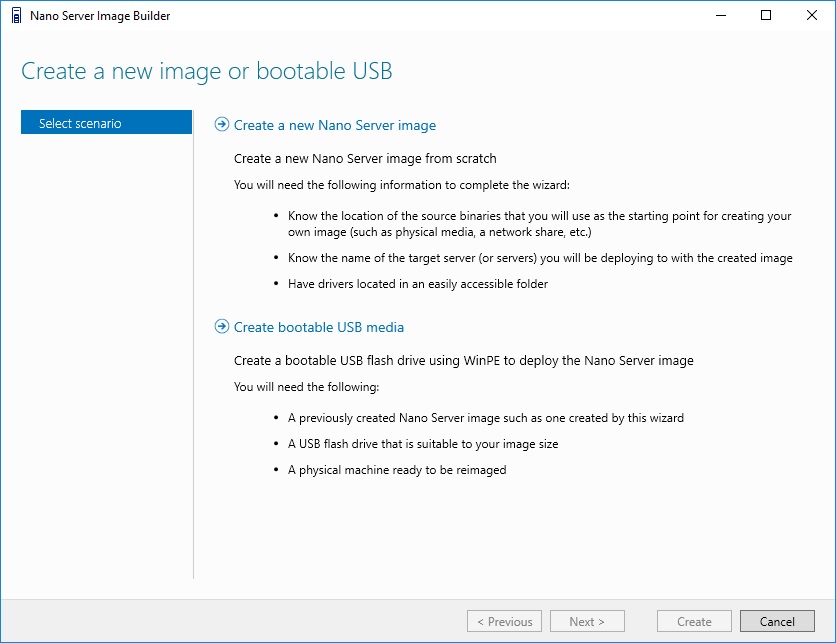
After launching the Nano Server Image Builder, there will be 2 scenarios available for you:
- Create a new Nano Server image
- This is for creating the Nano Server VHD/VHDX image
- Create bootable USB media
- This is for adding Nano Server VHD/VHDX image to a bootable USB flash drive for physical hardware deployment
In this example, you will choose the create a new Nano Server image scenario to start off a Nano Server image creation for deployment.
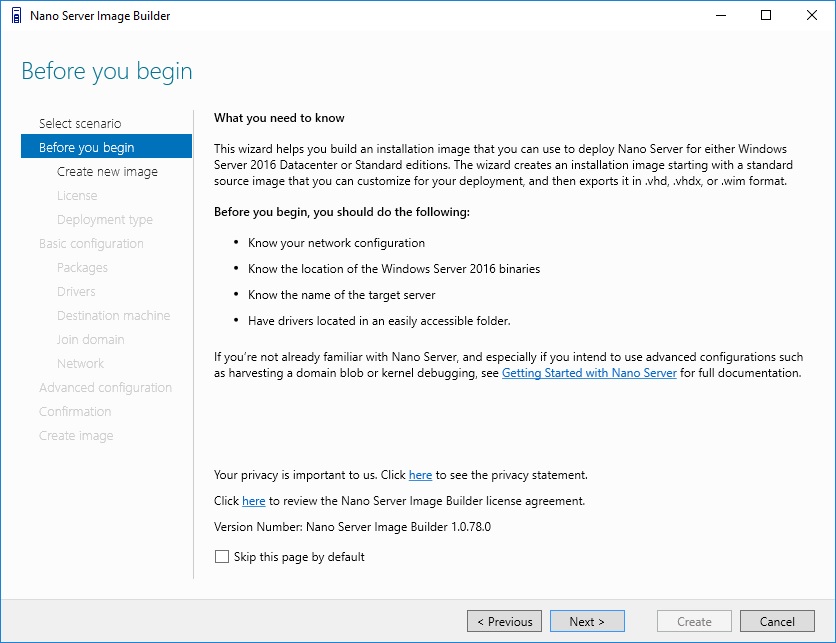
4.1. Before you begin
In this section, it will provide you with information that you will require to know prior to begin with the configuration.
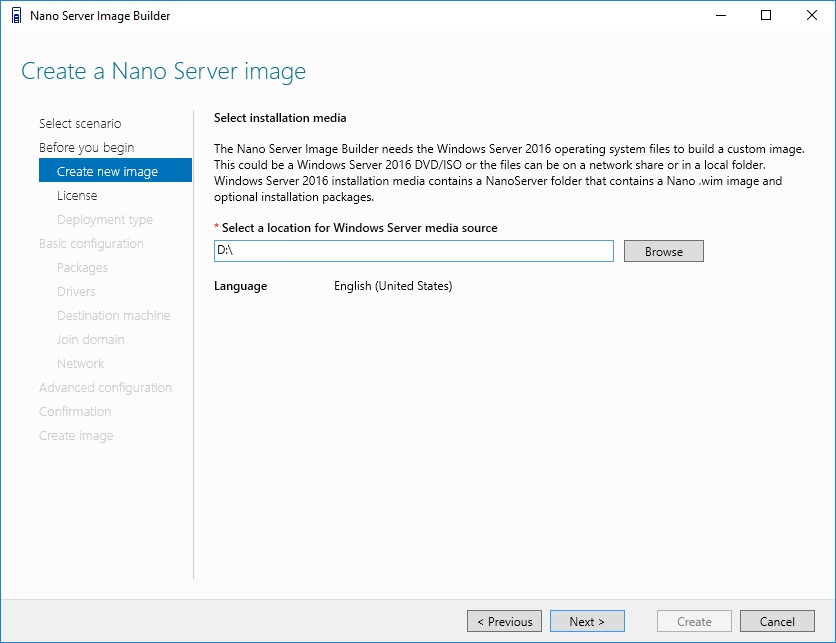
4.2. Create a Nano Server image
In this section, you will have to specify the Windows Server media source location where it will detect for Nano Server folder that contains the NanoServer.wim image file.
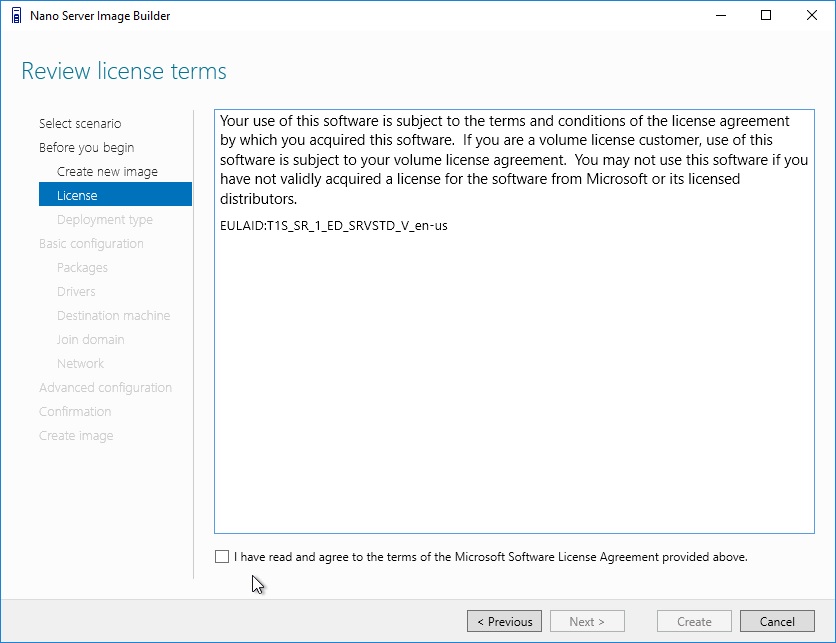
4.3. Review and accept the license terms
In this section, you will have to read and agree to the terms of the Microsoft Software License Agreement provided that is stored in the NanoServer.wim WIM image file (C:\Windows\System32\Licenses\neutral\Volume\ServerStandard\license.rtf).
4.4. Choose your deployment type
In this section, you will need to specify whether it is a virtual or physical machine deployment, define the image name, set the disk size and specify a directory to copy the image creation log files. It is recommended to use VHDX file type unless your environment is still having Windows Server 2008 R2 Hypervisor.
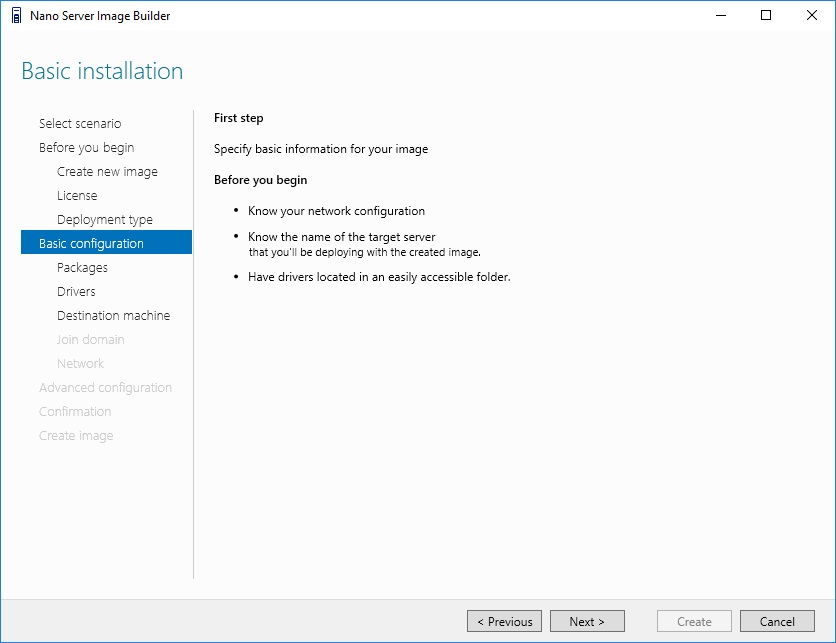
4.5. Preparing your basic configuration
In this section, it will provide you some basic information that you will require to prepare for the next few sections.
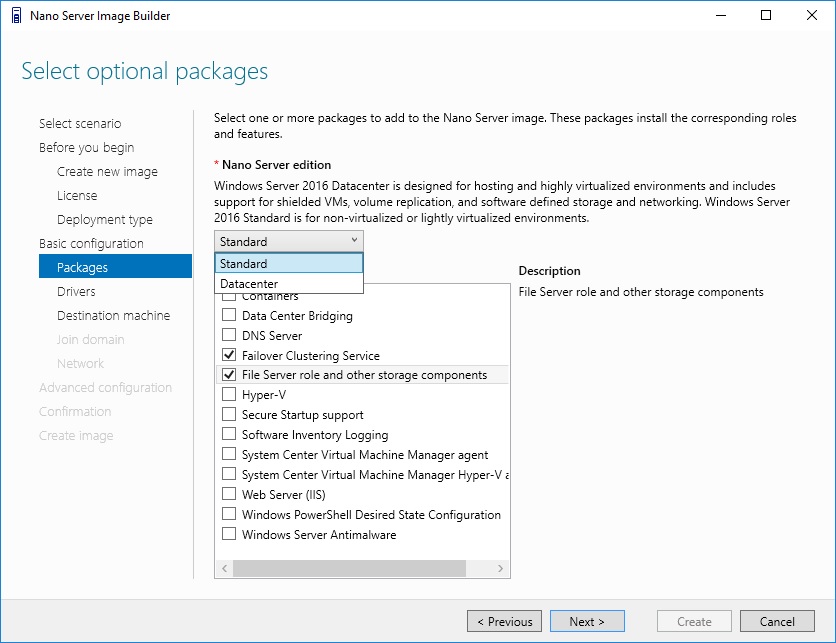
4.6. Choosing Nano Server Edition and Roles
In this section, you will require to select between Standard or Datacenter edition and specify your Nano Server roles.
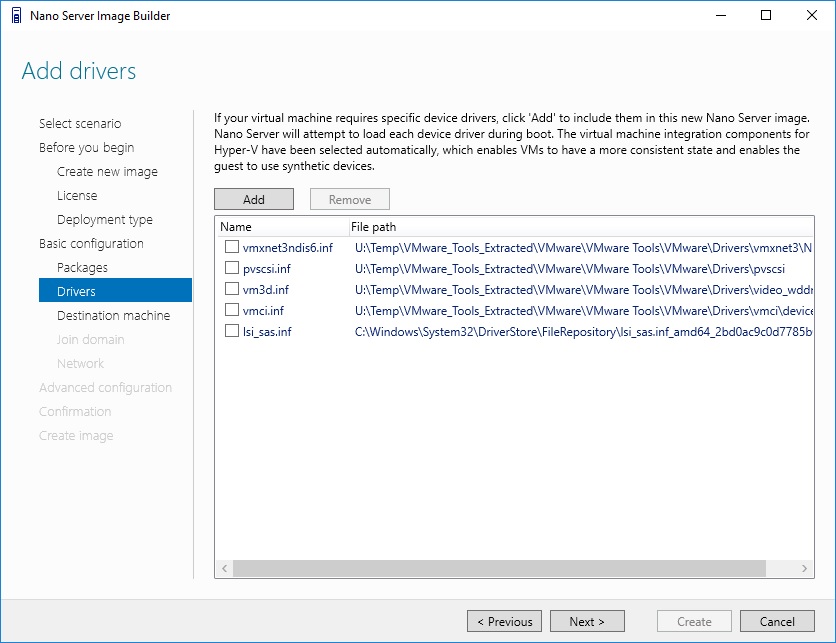
4.7. Adding additional drivers
In this section, you will have the capability to add your hardware required drivers.
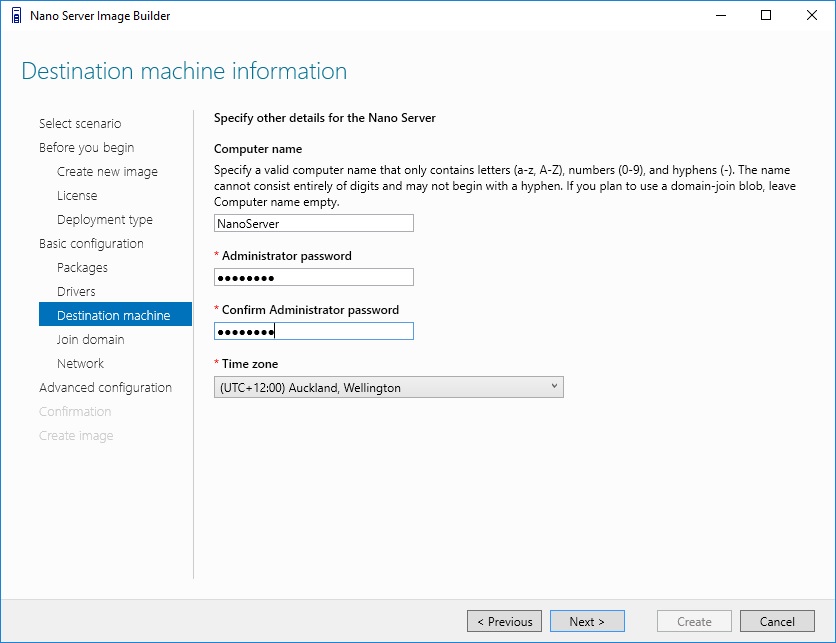
4.8. Inputting your machine information
In this section, you will specify a computer name if you have not harvest a domain-joined blob file from the domain controller or leave it blank if you do have a domain-joined blob ready. You will have to specify a local administrator password to login to the recovery console and define your time zone.
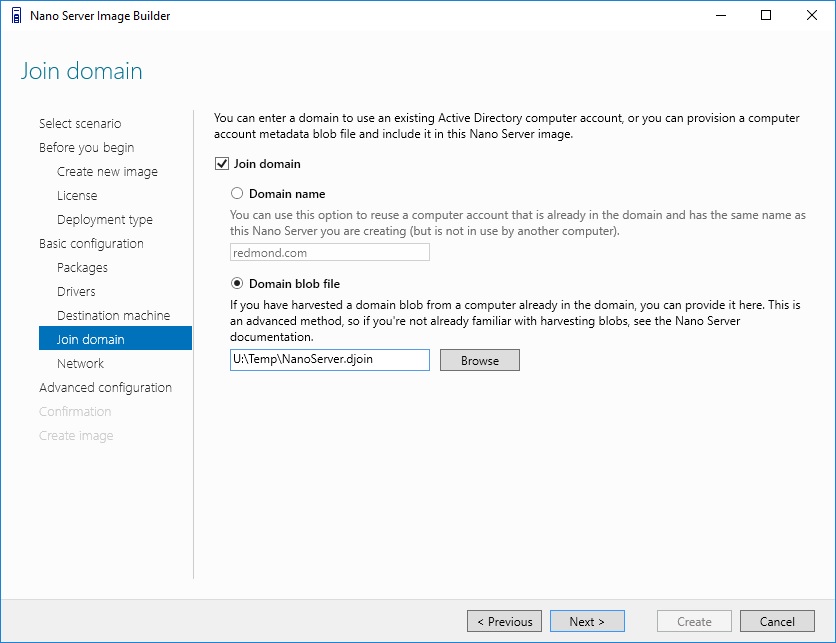
4.9. Choosing to join domain
In this section, you can specify to join your nano server to a domain with domain joined blob file provided you have left the computer name blank on the previous section.
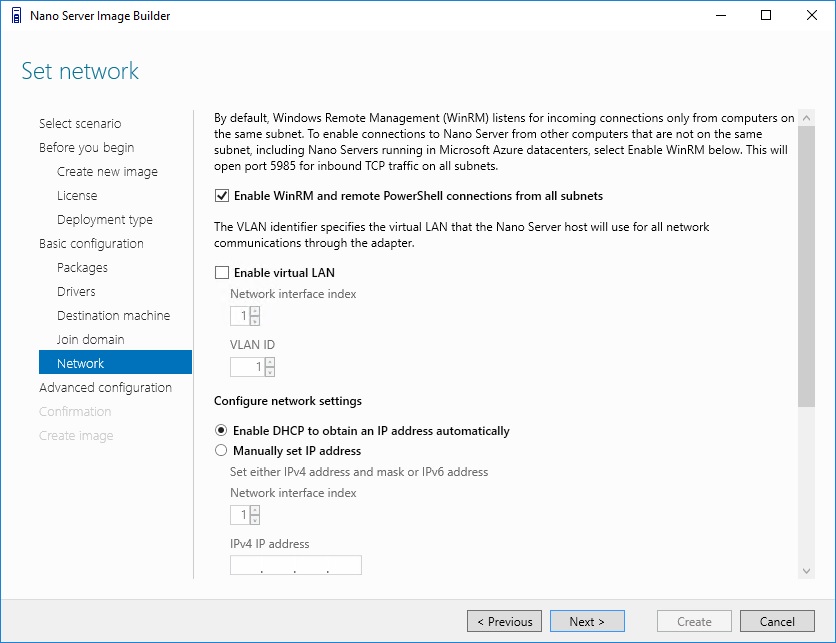
4.10. Configuring your network configuration
In this section, you can enable Windows Remote Management (WinRM) on port 5985, enable a virtual LAN with VLAN ID and define it to use DHCP or manual static IP Address configuration.
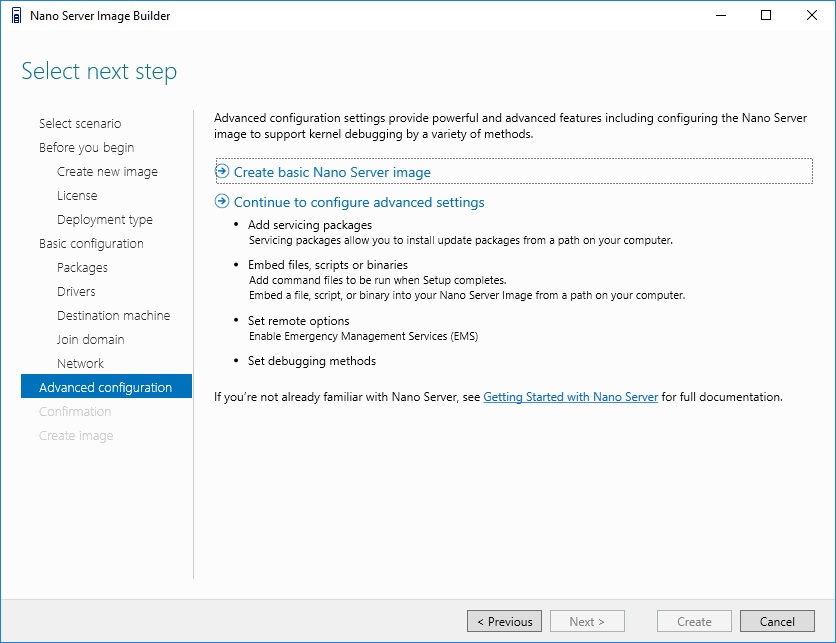
4.11. Selecting the next step
In this step, you can choose to create a basic Nano Server image now or continue to configure advanced settings.
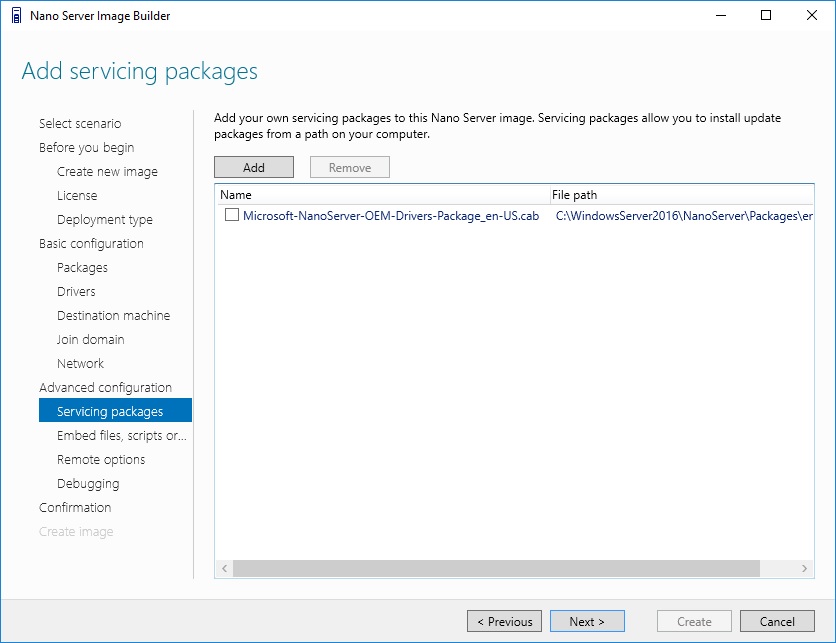
4.12. Adding servicing packages
In this section in advanced configuration, you will have the capability to add your own or updated servicing packages.
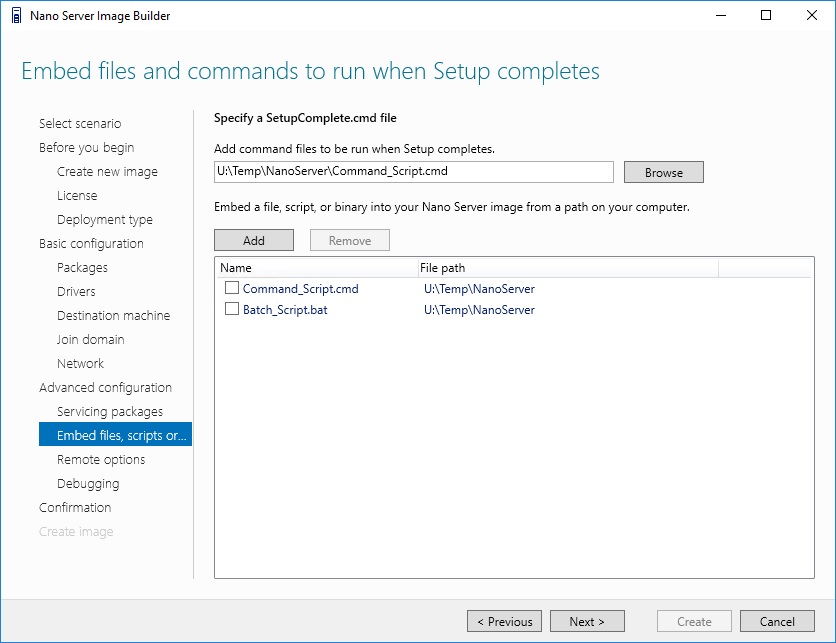
4.13. Embedding files or commands
In this section in advanced configuration, you will have the capability of adding custom scripts that will execute when the setup completed.
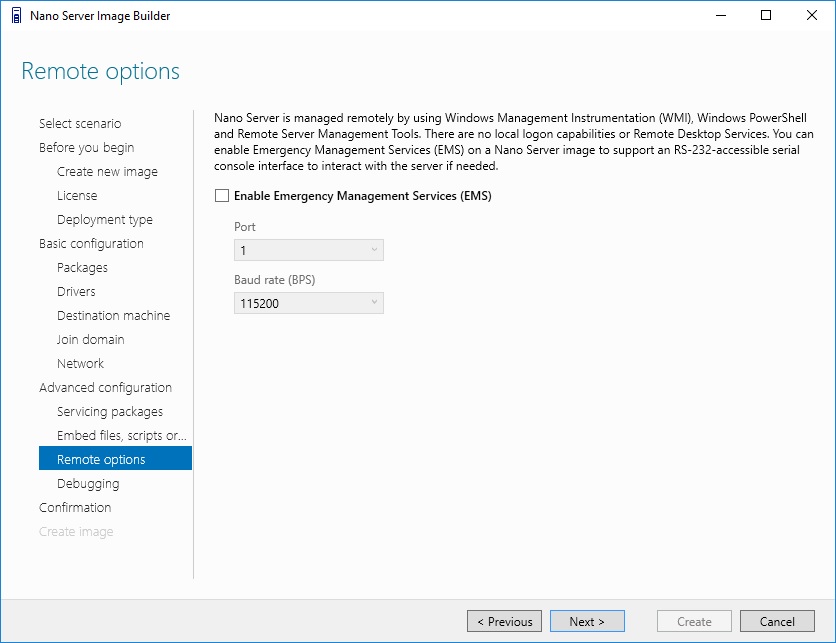
4.14. Enabling Emergency Management Services
In this section, you will be able to enable Emergency Management Services (EMS) to support RS232 serial console interface to interact with the physical nano server.
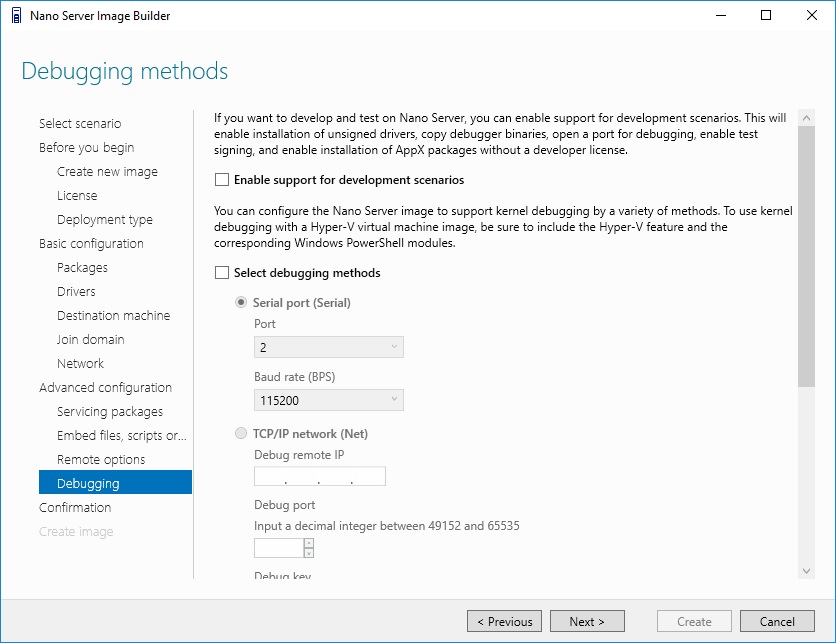
4.15. Enabling debugging methods
In this section, you can enable kernel debugging using serial port or TCP/IP network.
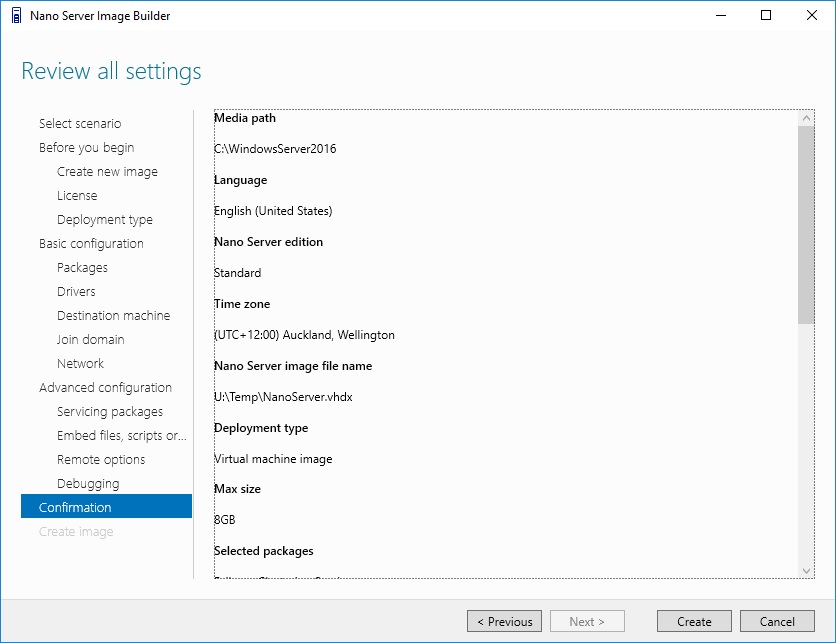
4.16. Review all settings
At the end of all the configuration, you will reach this confirmation section where you can review all your settings before you create the Nano image.
4.17. Creating the Nano image
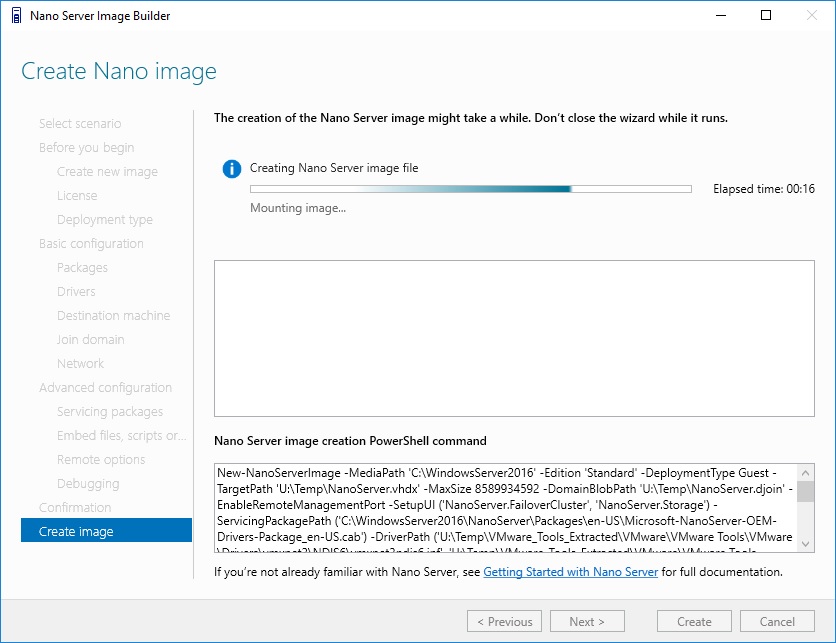
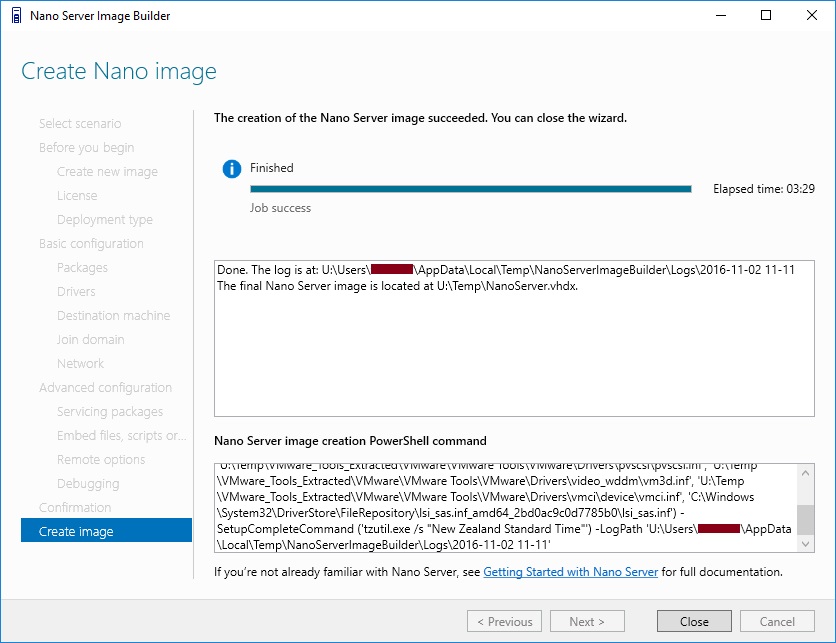
After reviewing the settings, you can select the Create button and initiate the Nano image creation and you can copy the PowerShell command that was generated and used by the Image Builder to create this Nano Image for other builds.
5. Conclusion
With Nano Server Image Builder, it actually streamlines the deployment settings and automatically assist anyone with their configuration options without the need to understand the New-NanoServerImageGenerator PowerShell cmdlet parameters to generate a Nano Server VHD/VHDX image:
- Accepting license agreement terms.
- Choosing VHD, VHDX or WIM formats with an option to create bootable ISO.
- Adding device drivers for Nano Server.
- Specifying hostname, administrator password, logfile path, and time zone.
- Joining a domain by using an existing Active Directory account or a harvested domain-join blob.
- Selecting Nano Server roles for deployment.
- Injecting new servicing packages.
- Enabling WinRM for communication outside the local subnet.
- Enabling Virtual LAN IDs and configure static IP addresses.
- Adding Command, Batch or other custom scripts to execute after the unattend.xml is processed.
- Enabling Emergency Management Services (EMS) for serial port console access.
- Enabling development services to enable test signed drivers and unsigned applications, PowerShell default shell.
- Enabling debugging over serial, USB, TCP/IP, or IEEE 1394 protocols.
- Creating USB media using WinPE that will partition the server and deploy the Nano Server image.
5. References
- Nano Server Image Builder
- Windows Assessment and Deployment Kit (Windows ADK)
- Microsoft TechNet - Getting Started with Nano Server
- Microsoft TechNet Blog - Introducing the Nano Server Image Builder by Scott M. Johnson
6. See Also
- Nano Server Survival Guide by Ryen Tang
- Microsoft Azure: Managing Nano Server with Server Management Tools by Ryen Tang
- Microsoft Azure: Deploying Windows Server 2016 Nano Server by Ryen Tang
- Windows Nano Server: Virtualization with VMware vSphere by Ryen Tang
- Nano Server: Using New-NanoServerImage with Show-Command to deploy Nano Server by Ryen Tang
- Nano Server: Viewing Application, Security and System Event Logs using WMI by Ryen Tang
- Nano Server: Deploying an Internet Information Services (IIS) Web Server by Ryen Tang
- Nano Server: Deploying ASP.NET 5 site on Internet Information Services (IIS) Web Server by Ryen Tang
- Nano Server: Deploying PHP 7.0.6 on Internet Information Services (IIS) Web Server by Ryen Tang
- Nano Server: Deploying MySQL Database Server by Ryen Tang
- Nano Server: Deploying Python 3.x interpreter by Ryen Tang
- Nano Server: Getting Started in Container with Docker by Ryen Tang


