Configure Email Coexistence between Office 365 & Google Apps
Introduction
Many organizations these days want to coexist due to different reasons. The major reason is that user demands more and organizations want to cater to this ever demanding user base. Some users might be familiar with Office 365 while some might be familiar with Google Apps. Also, the organization might want to move their future email workloads from a different platform like Google Apps to Office 365 while still keeping their existing email domain intact. This article explains how to configure Mail Flow Coexistence between Office 365 and Google Apps.
Assumptions
During the writing of this article, it has been assumed that an organization's primary email workload is running on Google Apps and that the organization is considering to deploy new or future users to Office 365 while keeping their existing email domain. This article will not explain how to setup a domain in Office 365 and assumes that the domain setup is already configured in Office 365 including the provisioning of DNS records such as MX, CNAME etc.
Solution
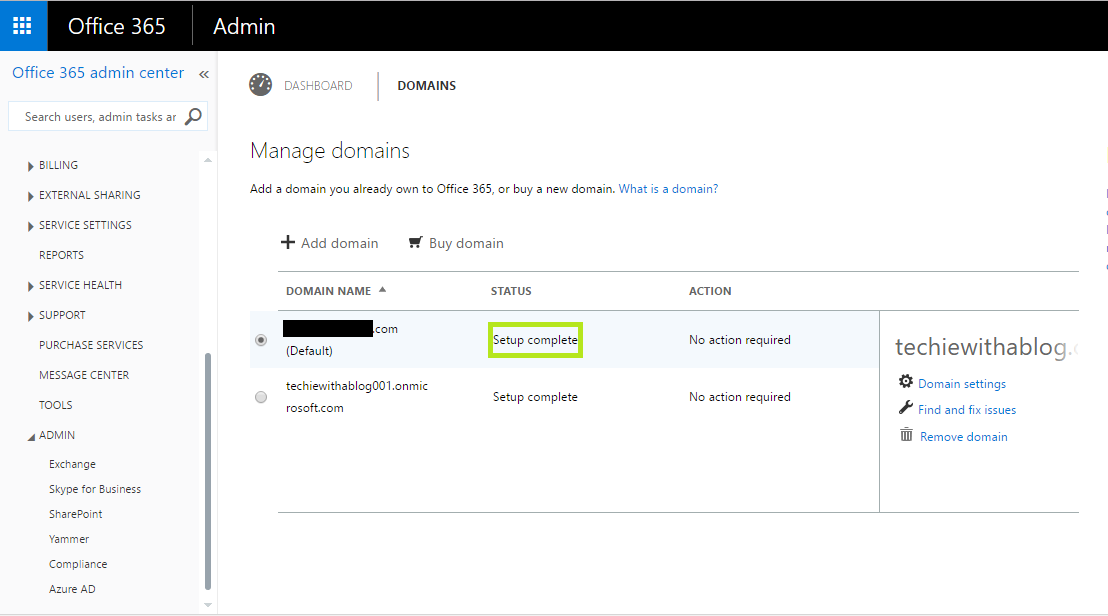
Once the domain setup is complete in Office 365, it should appear like below as shown in the below diagram in Fig 1. This is after adding all the text records, srv records and mx records in the office 365 portal.
Fig 1
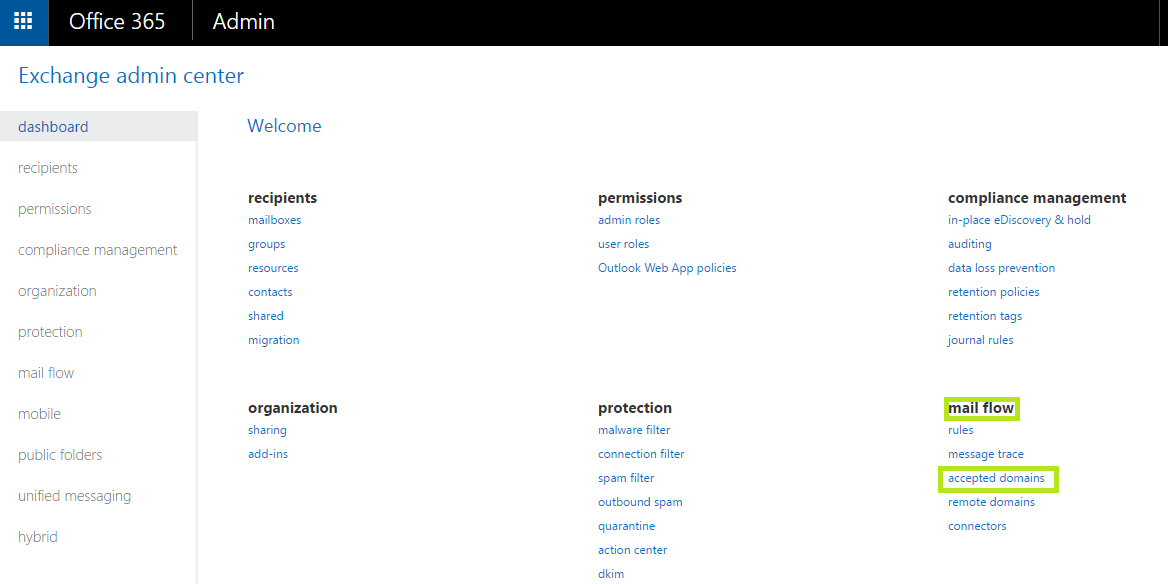
Once that’s done, navigate to “Exchange Admin Center” by navigating to “Admin > Exchange”. This will open up a new tab. Once in the “Exchange Admin Center” under “Mail Flow” select “Accepted Domains” as shown in Fig2.
Fig 2
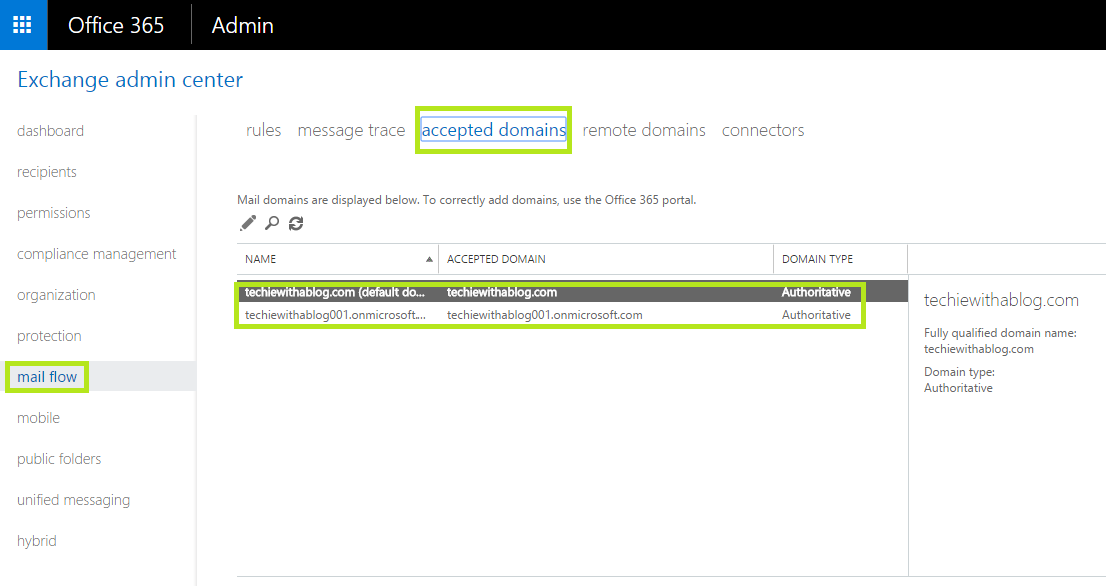
Once done, it will open up the “Accepted Domain” section as shown below in Fig 3.
Fig 3
In the above figure, the domain that you own and the service domain Microsoft Provides are both visible. Make sure the domain that is used in the production is set to the default domain in the Office 365 portal. Currently, the domain type is set to “Authoritative”. This must be changed to “Internal Relay” as mail will be relayed to the Gmail Mail users from Office 365 mail users.
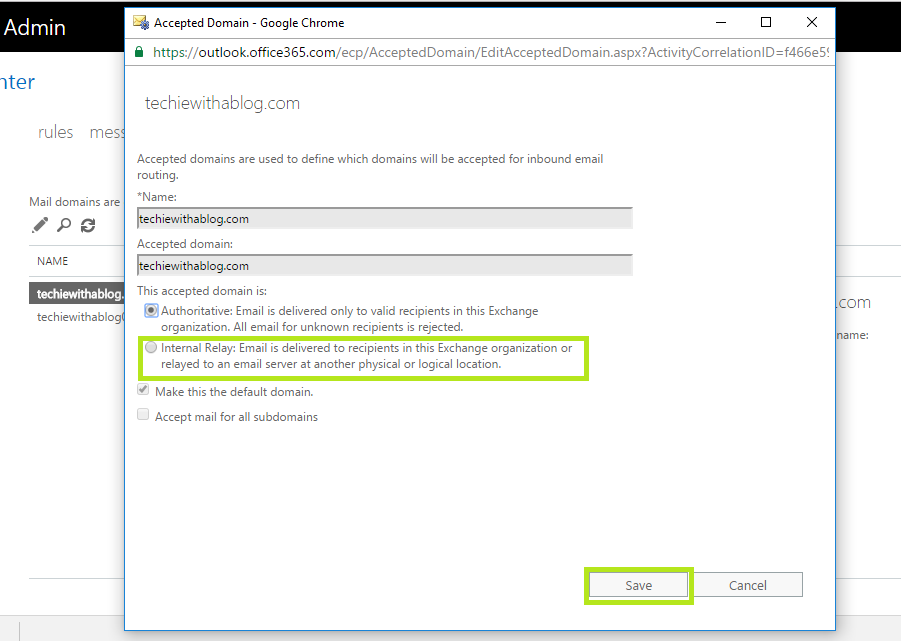
To set the domain type to an internal relay, simply double-click the “Techiewithablog.com”(The production domain) domain to bring up the settings box to change the domain type to a relay as shown in Fig 4.
Fig 4
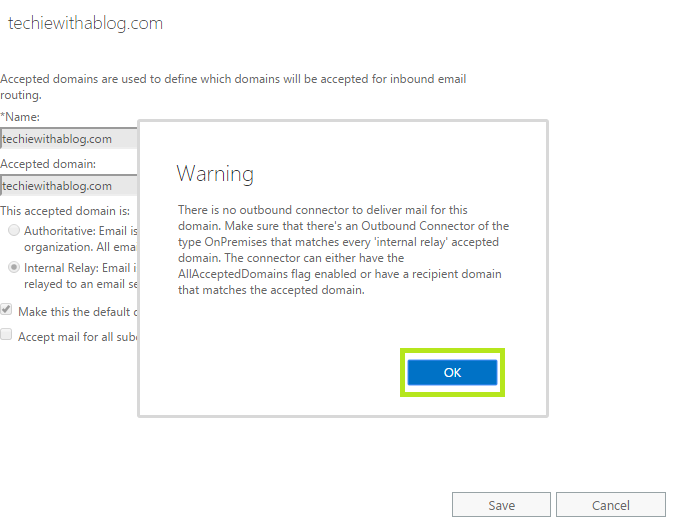
From the above box, select “Internal Relay” option and click “Save”. This will bring up a popup message informing that “There is no outbound connector to deliver email for this domain” as shown below in Fig 5. Simply click “OK” to the message so that an outbound connector can be created in the next steps.
Fig 5
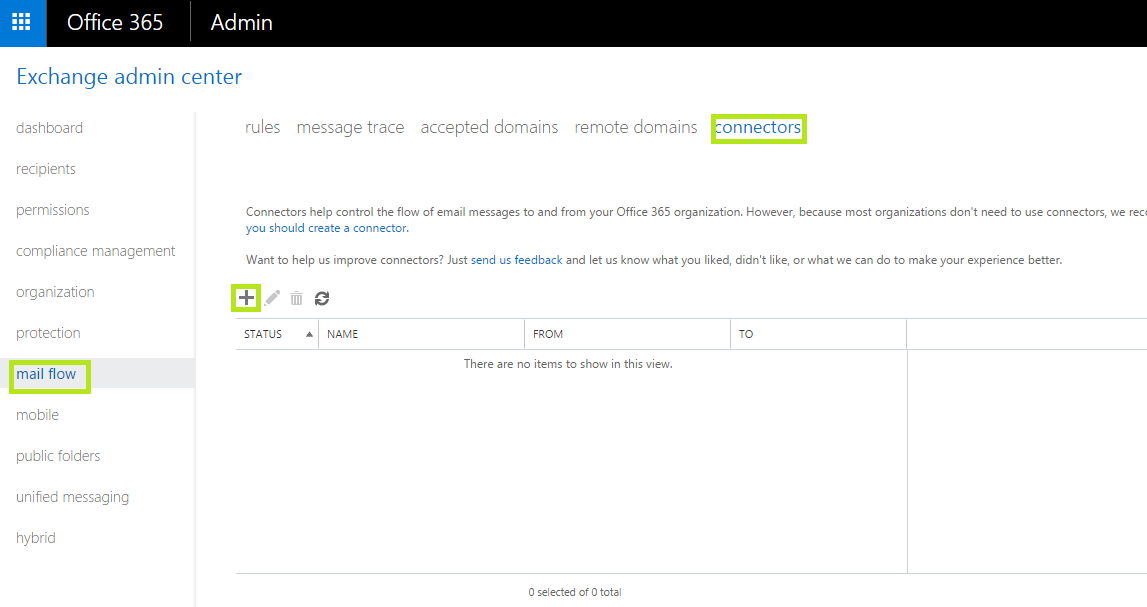
To create the Outbound email connector, within the “Mail Flow” section select “Connectors” and click “+” sign to create a new connector as shown in below Fig 6.
Fig 6
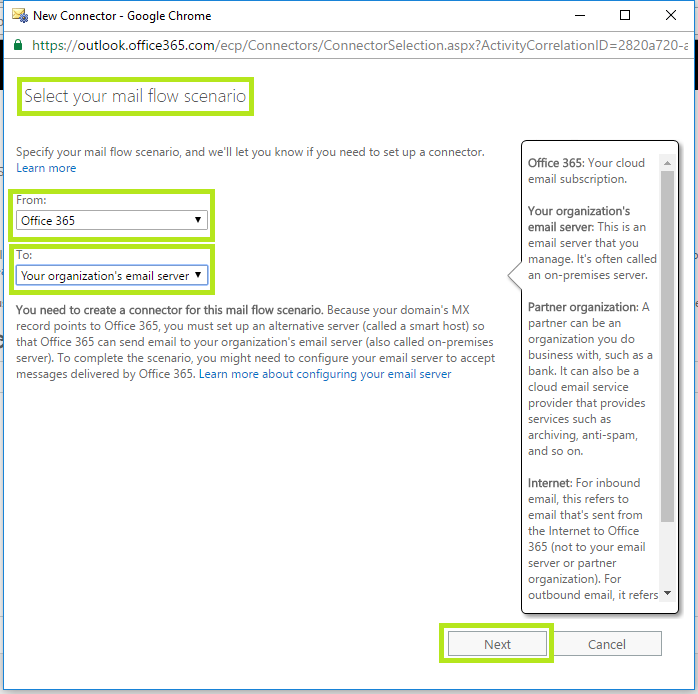
Once clicked, it will bring up the new connector dialog box to create the new mail flow connector. Here, select “Office 365” from the drop-down menu for the “From” field and select “Your organization’s email server” for “To” field as this is what needs to be done between the platforms, i.e. to send email from Office 365 to Google App users. Once that’s done, click “Next” as shown in Fig 7.
Fig 7
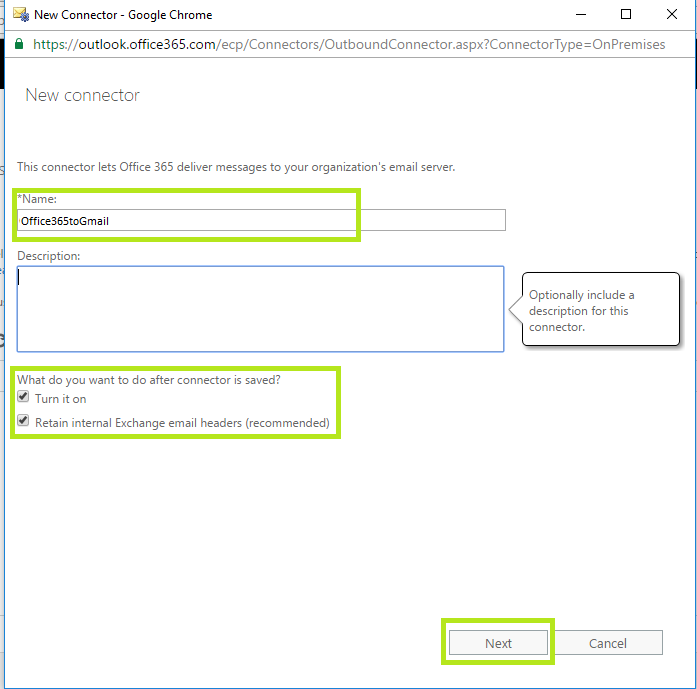
In the next section, name the connector with a meaning full name and select the default settings for ”What do you want to do after the connector is saved” option as is and click Nnext as shown in below Fig 8.
Fig 8
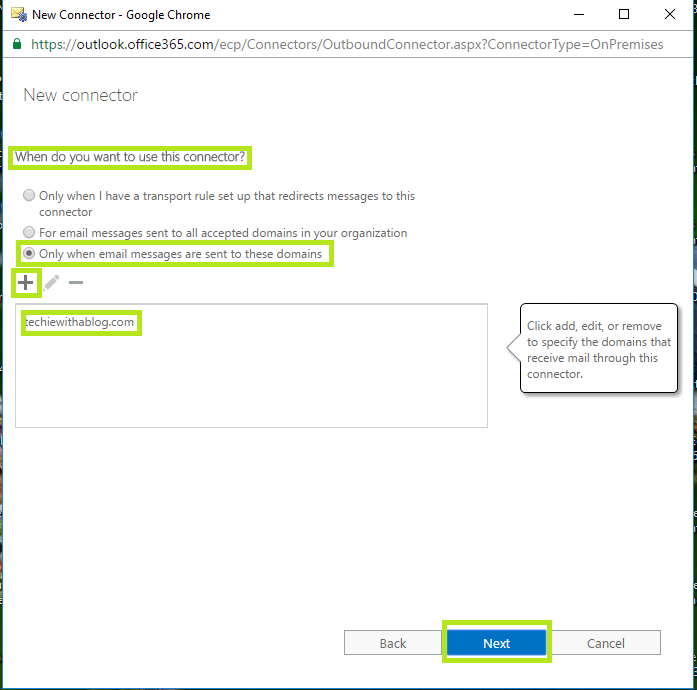
In the next section, specify when to use the connector which is created. In this scenario, this connector is needed to relay emails only when emails are sent to someone@techiewithablog.com SMTP domain (In this scenario. In your scenario the domain name will be different). Therefore, under “When do you want to use this connector?” select, “Only when email messages are sent to these domains” and click “+” to add the respective domain that is used in the respective scenario. In this case, the domain “techiewithablog.com” is added as shown in the below Fig 9. Once done click “Next”.
Fig 9
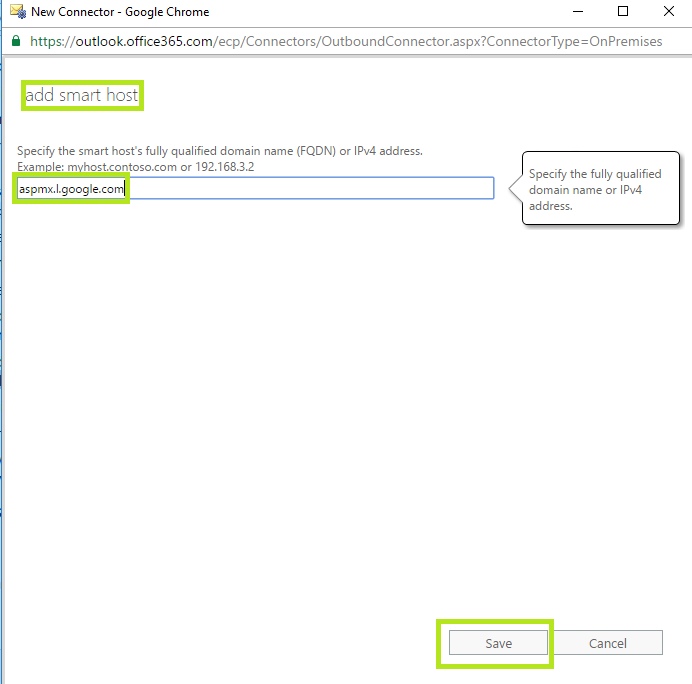
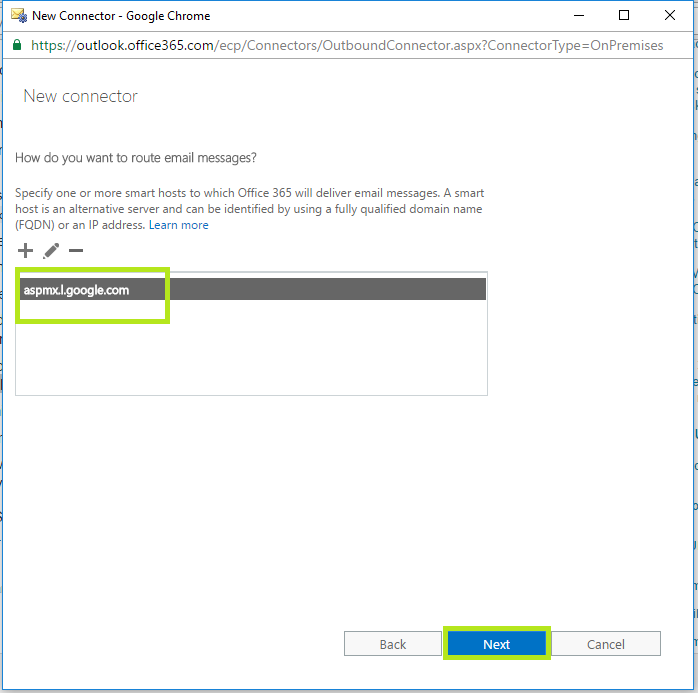
In the next section, a smart host needs to be provided to configure Office 365 to route the relayed emails. This is going to be the Google smart host that should be specified. Therefore, include “aspmx.l.google.com” as the Google smart host as shown below in Fig 10 and Fig 11 and click “Save” and “Next”.
Since the MX records are currently pointed to Google, doing an NS lookup to the SMTP domain will get you the Smart Host.
**
**
Fig 10
Fig 11
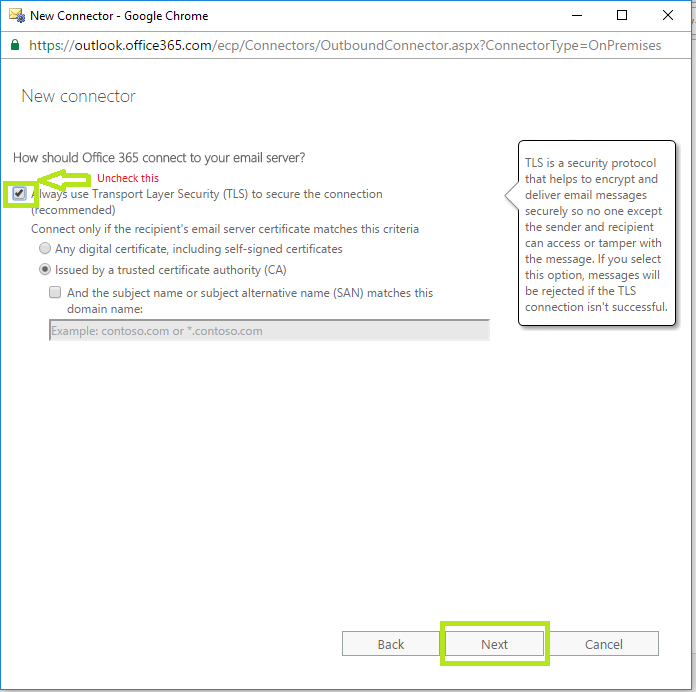
Once in the next section, for “How should the Office 365 connect to your email server?” section, deselect “Always use transport layer security option” and click Next as shown in Fig 12.
Fig 12
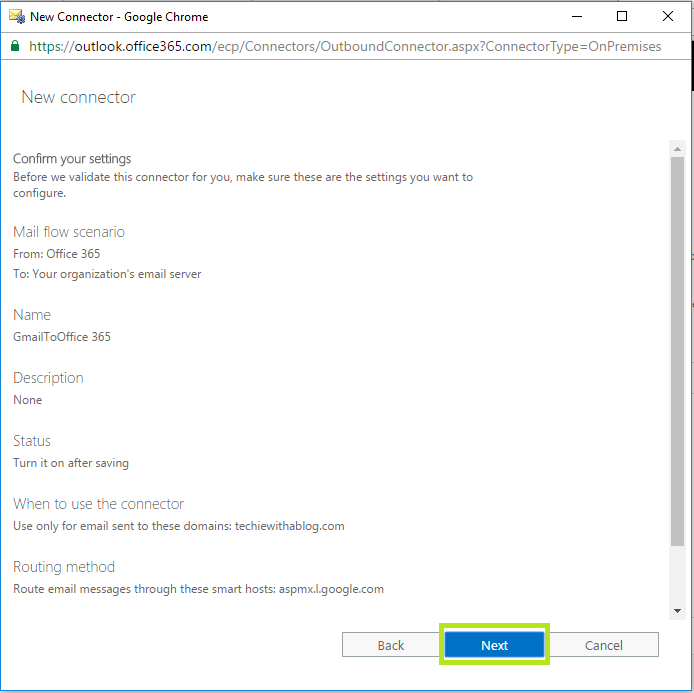
Once everything is configured on the connector, it will give a summary of it as shown below in Fig 13. Click “Next”
Fig 13
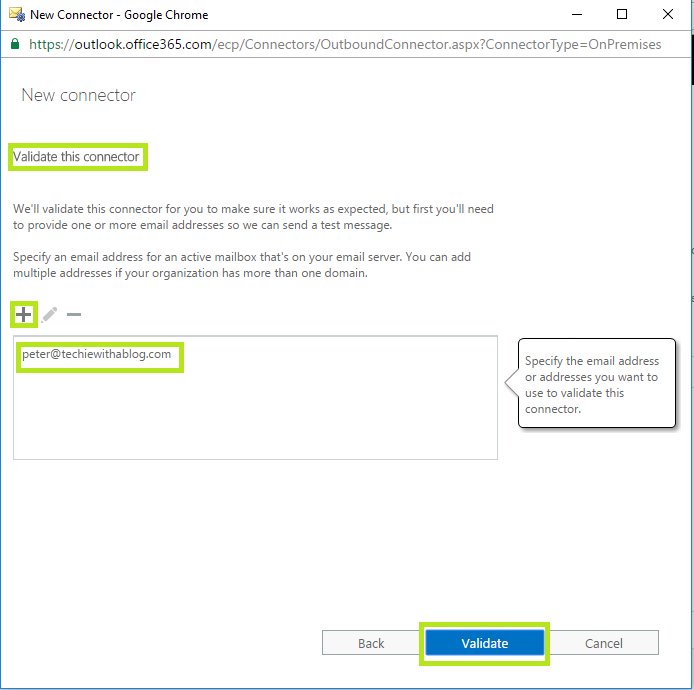
Once that is done, it is required to validate the connector which is created. Therefore, click “Next” as shown above in Fig 13, it will take to a setting where an email address needs to be specified for a user who is in Google Apps. In this demo case, a user named Peter@techiewithablog.com in Google Apps is used to try to validate the connector. Once in the Validate the connector page, click “+” to add the user and click on “Validate” as shown below in Fig 14.
Fig 14
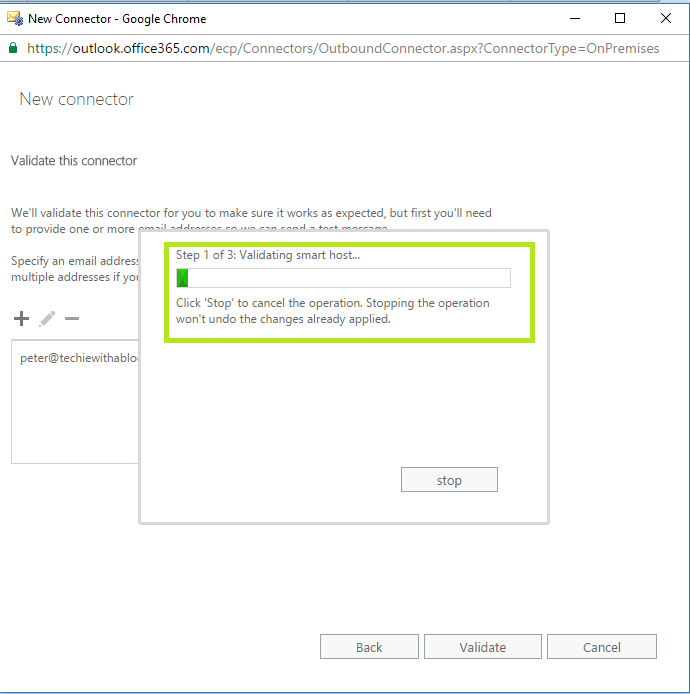
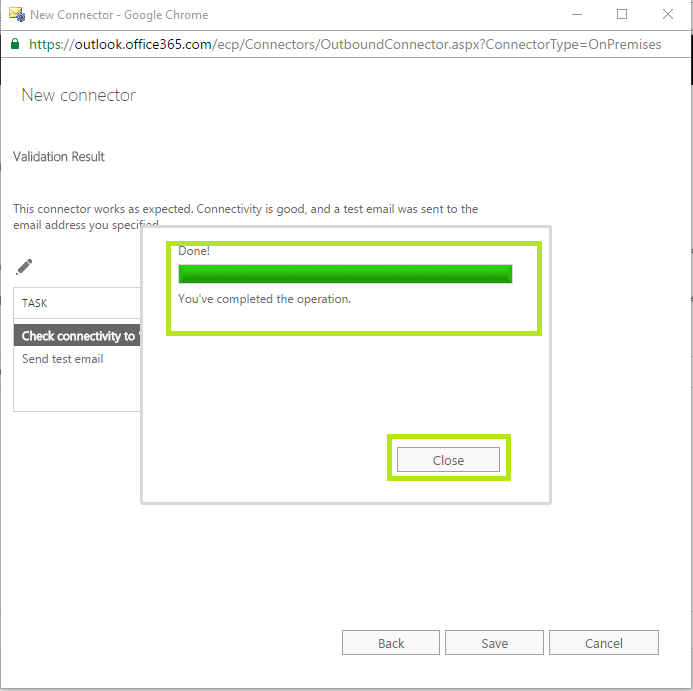
This will now run a series of validation checks against the connector by sending an email to verify the connector is working properly. If everything goes smooth, the validations progressing should be successful and the final result as shown in Figures 15 and 16 can be seen. Once the validation is done, click “Close” as shown in Fig 16.
Fig 15
Fig 16
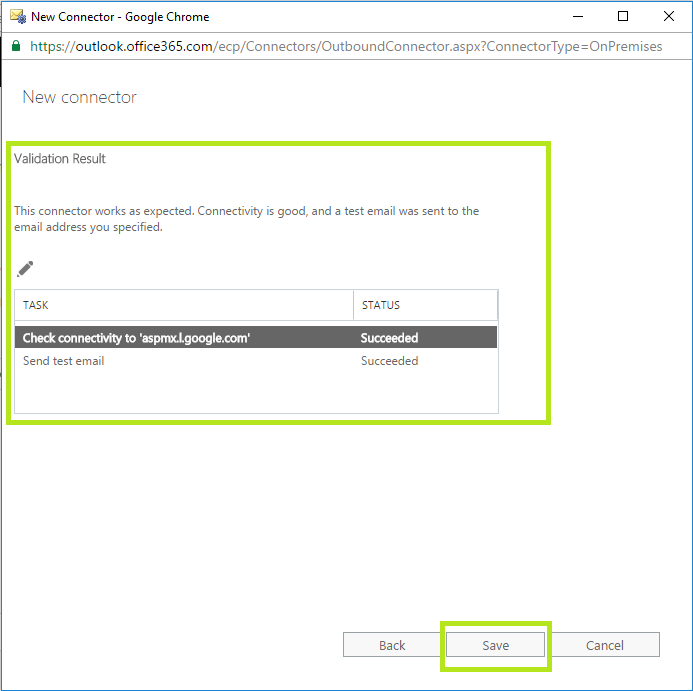
If the validation is successful, the validation results will be shown as successful as shown in the below Fig 17. Once done, click “Save” so that the connector is now ready to relay emails to Office 365 and Google Apps.
Fig 17
This should now enable email co-existence between the two platforms.
