Office 365: What is Customer Lockbox and How to Enable it
What is Office 365 Customer LockBox?
Office 365 Customer Lockbox feature which will help a customer to control how a Microsoft support engineer is going to access customer data during a scenario where customers have raised a support request to investigate some service issues related to customers Office 365 tenant.
Office 365 Customer Lockbox allows the customer to Approve or Reject access request made by the Microsoft Support engineers to access customer data. If customers give access by Approving the request, Microsoft Support Engineers will be able to access the data to help customers resolve issues if they deem necessary.
How to Enable Customer LockBox in Office 365?
To enable the Office 365 Customer Lockbox feature on the tenant, log in with the admin credentials and navigate to the “Office 365 Admin Center”.
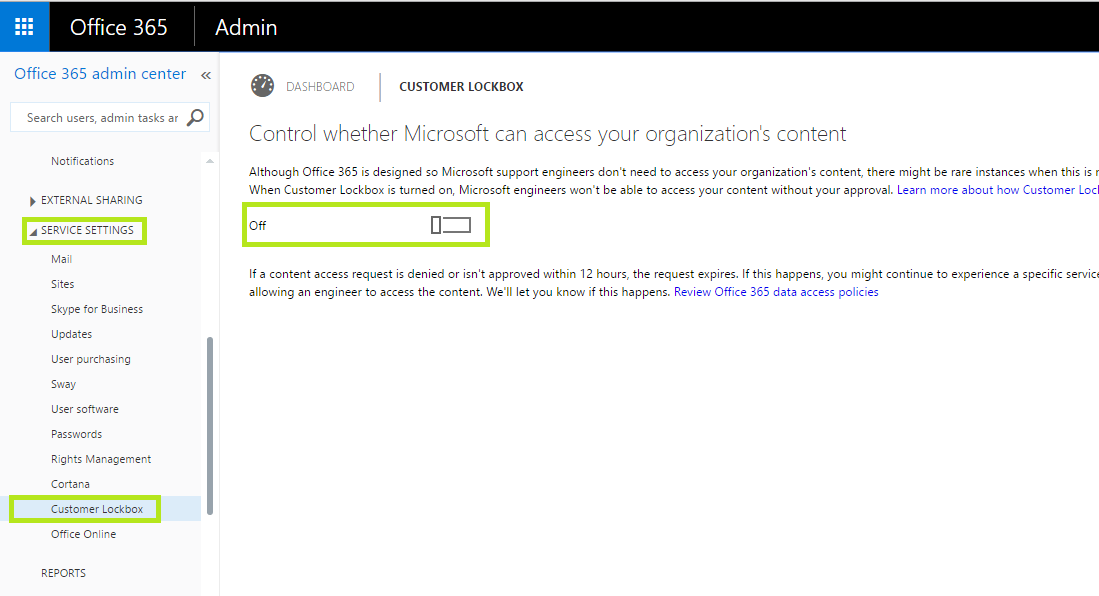
Once done, select “Service Settings” and expand to select “Customer Lockbox”. Once done, toggle the button from “Off” (By default) to “On” state to enable the lockbox feature as shown in the below diagram Fig 1.
Fig.1
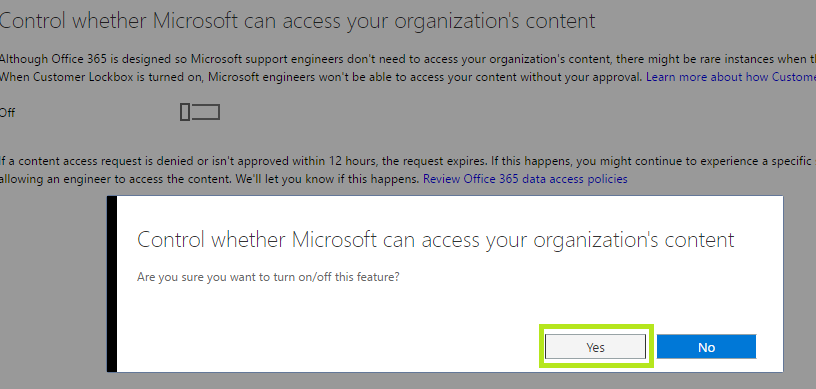
When the feature is turned on, it will prompt for the confirmation. Select “Yes” and wait for a while for Office 365 to enable the services as shown below in Fig 2.
Fig 2
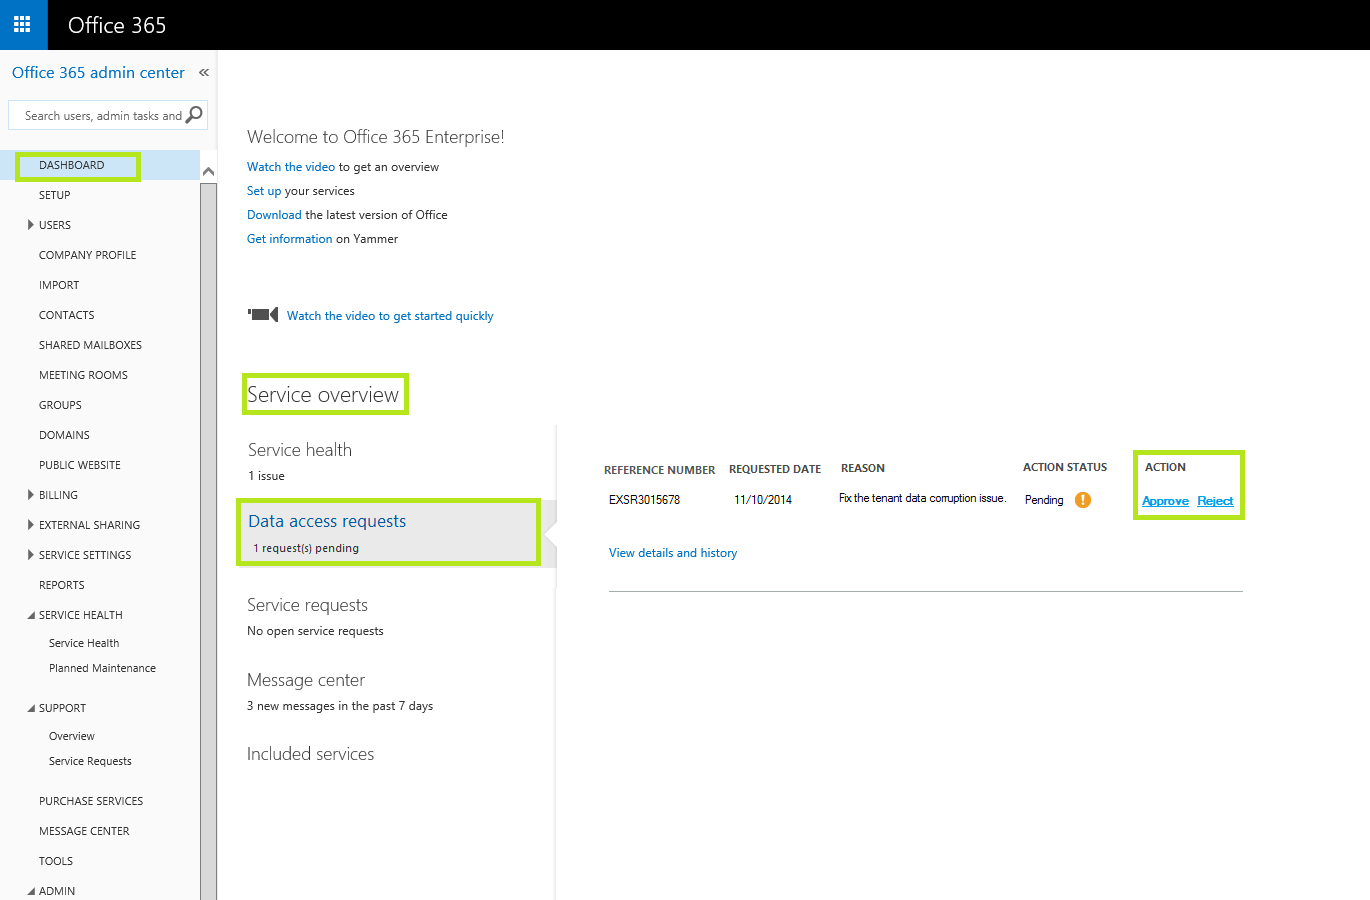
Once done, “Customer Lockbox” can be accessed by navigating to the “Dashboard” of the Admin portal and under the “Service Overview” sections “Data Access Requests”. If a Lockbox request is made, it will be visible under this section and customer should be able to“Approve” or “Deny” it under the “Actions” as shown below in Fig 3.
Fig 3
References:
This article was originally published at the Authors Blog. This link is external to TechNet Wiki. It will open in a new window. TechNet community is free to add anything to this article that is deemed necessary to update more content.


