Creating a Chocolatey package using PowerShell
In the first article, we saw how to install Chocolatey and used an already available package named "visualstudiocode".
In this article, we will see how to create a custom Chocolatey package using PowerShell.
Run the below command to create a new Chocolatey package:
The folder structure is as follows:
Update bob.nuspec file as shown below:
<?xml version="1.0" encoding="utf-8"?>

<package xmlns="http://schemas.microsoft.com/packaging/2015/06/nuspec.xsd">
  <metadata>
    <id>bob</id>
    <version>6.9.2</version>
    <title>bob (Install)</title>
    <authors>Me</authors>
    <description>TestPack</description>
  </metadata>
  <files>
    <!-- this section controls what actually gets packaged into the Chocolatey package -->
    <file src="tools\**" target="tools" />
    <!--Building from Linux? You may need this instead: <file src="tools/**" target="tools" />-->
  </files>
</package>
Update **chocolateyinstall.ps1 **as shown below. Download the notepad.exe and copy the exe inside the tools folder.
$ErrorActionPreference = 'Stop'; # stop on all errors


$packageName= 'bob'
$toolsDir   = "$(Split-Path -parent $MyInvocation.MyCommand.Definition)"
$url        = ''
$url64      = ''
$fileLocation = Join-Path $toolsDir 'npp.6.9.2.Installer.exe'


$packageArgs = @{
  packageName   = $packageName
  unzipLocation = $toolsDir
  fileType      = 'exe' #only one of these: exe, msi, msu
  url           = $url
  url64bit      = $url64
  file         = $fileLocation

  softwareName  = 'bob*'

  checksum      = ''
  checksumType  = 'md5'
  checksum64    = ''
  checksumType64= 'md5'

  #MSI
  silentArgs    = "/qn /norestart /l*v `"$($env:TEMP)\$($packageName).$($env:chocolateyPackageVersion).MsiInstall.log`""
  validExitCodes= @(0, 3010, 1641)
}

Install-ChocolateyInstallPackage @packageArgs # https://chocolatey.org/docs/helpers-install-chocolatey-install-package
Run the command choco pack to create a chocolatey package as shown:

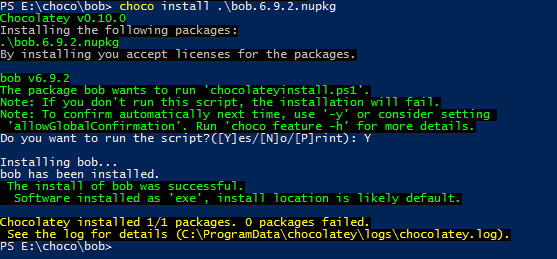
Run the command choco install "nameofthepackage" to install the package.


